
Framing Needlework!! I need help!!
 10-19-2013, 01:59 PM
#1
Junior Member
Thread Starter
Join Date: Dec 2012
Location: Midwest
Posts: 241
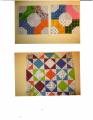
I just completed four designs on 14 ct aida cloth. Plan to give one to each of my children as a gift. Each design is to be framed in a round frame approx. 8" across. Frames were actually designed to hold plates and have a depth for the insert of close to 3/4". I would like to frame the designs so that they protrude from the frame in concave fashion. How can I best accomplish this? I thought of buying a piece of sponge approx. 3/4" thick and cutting it to fit the frame. Would then drape the design over the sponge and insert in the frame. Hopefully when I added a solid backing the sponge would protrude from the frame in a rounding fashion like I want. I inserted the back of a corelle luncheon plate into the frame and it gives me the effect I want. What do you think of this idea? Would it work or is there something better that I can do? Any help would be appreciated. Am attaching a picture to help explain what I am attempting to do.

 10-19-2013, 02:08 PM
#3
Junior Member
Join Date: Feb 2011
Location: Wheat Ridge, Colorado
Posts: 136
I would cut two pieces of acid free foam board the size of the inner ring and use a piece of batting between the stitchery and the foam core.This would bring your stitchery out from the ring but the batting would make it look smooth. I dont think you could get the sponge to look right.
10-19-2013, 02:32 PM
#4
Junior Member
Thread Starter
Join Date: Dec 2012
Location: Midwest
Posts: 241
Originally Posted by hybearn8er

I would cut two pieces of acid free foam board the size of the inner ring and use a piece of batting between the stitchery and the foam core.This would bring your stitchery out from the ring but the batting would make it look smooth. I dont think you could get the sponge to look right.
10-20-2013, 03:52 PM
#6
Senior Member

Join Date: Jan 2008
Location: Illinois
Posts: 909
If you like the look with the plate, why not go to a thrift store and buy 4 plates to use. Cover with batting and they would be padded. You could put something solid and flat over the back to cover the plate.
I've never done this, but just a thought.
I've never done this, but just a thought.
 10-21-2013, 07:04 AM
#8
Member
Join Date: Jun 2008
Location: Wolcottville, In 46795
Posts: 77
Your best bet is to get some acid free foam core cut into circles. Don't use the sticky board, that's only good for catching critters and bugs. I would try thinner batting and layer it, using a few dress pins in the sides of the foamcore to test the poofiness to see how you like it. Once you get the right thickness, lace the xstitch around the foam/batting package with a cotton crochet thread to pull the art tight. Even though it's a circle, you want to treat it like a square while stretching (like there is a horizonal and a verticle). Once it's laced (don't sew it to the foamcore, just to itself) then you can adjust it until it is centered to your liking.
(I am a picture framer, been doing this for 20 years, this is my mom's account )
)
(I am a picture framer, been doing this for 20 years, this is my mom's account
)
10-21-2013, 08:10 AM
#9
Junior Member
Thread Starter
Join Date: Dec 2012
Location: Midwest
Posts: 241
Originally Posted by Betty Boop
Your best bet is to get some acid free foam core cut into circles. Don't use the sticky board, that's only good for catching critters and bugs. I would try thinner batting and layer it, using a few dress pins in the sides of the foamcore to test the poofiness to see how you like it. Once you get the right thickness, lace the xstitch around the foam/batting package with a cotton crochet thread to pull the art tight. Even though it's a circle, you want to treat it like a square while stretching (like there is a horizonal and a verticle). Once it's laced (don't sew it to the foamcore, just to itself) then you can adjust it until it is centered to your liking.
(I am a picture framer, been doing this for 20 years, this is my mom's account )
(I am a picture framer, been doing this for 20 years, this is my mom's account
)
10-21-2013, 08:26 AM
#10
Member
Join Date: Jun 2008
Location: Wolcottville, In 46795
Posts: 77
Normally I use a box stitch, but with an oval or circle it's best just to go one stitch at the "top" down to one stitch at the "bottom". Don't tie it off. Go all the way "acrosss", then do the other two sides. Anchor one point and tighten that side. Then do the other set of sides. Only tie off the final sides when you are happy with the front.
You're quite welcome. This method is a lot easier than you'd think, and isn't damaging to the art.
You're quite welcome. This method is a lot easier than you'd think, and isn't damaging to the art.

Thread
Thread Starter
Forum
Replies
Last Post
