
My Disappearing Hourglass


 08-28-2014, 12:39 PM
#15
Senior Member
Thread Starter

Join Date: Apr 2010
Location: Pahrump, NV
Posts: 597
TIPS: Starch the block before you cut. Keeps those bias edges in check.
Make sure all the seams are 1/4" - it matters!
Make sure all the blocks are the same size before cutting the nine smaller blocks.
Measure from the CENTER SEAM when making the cuts of the block. In the tutorial by MSQC Jenny did not stress this but I found that measuring from the center seam was more reliable.
Use the center 4-patch to measure the other portions of your block - if you need to adjust the size down, use the center 4-patch as a template.
If you have to re-size your blocks make sure you cut from the edges that do not have triangles.
Avoid using the lighter colors in a layer cake - or make them all light colors and avoid the darker colors. Mixing the two just didn't look right to me.
I marked all my blocks before I made the cuts - and then when I was cutting, if it didn't look right - I checked it again. Most of the time I had messed up the original marks!
Anyone else have some tips?
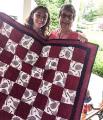
I made a table runner with the unused blocks - it loses something with only one row of the blocks. It is 62 inches long and 17 inches wide. Aside from the light colored block - it went together well.
Make sure all the seams are 1/4" - it matters!
Make sure all the blocks are the same size before cutting the nine smaller blocks.
Measure from the CENTER SEAM when making the cuts of the block. In the tutorial by MSQC Jenny did not stress this but I found that measuring from the center seam was more reliable.
Use the center 4-patch to measure the other portions of your block - if you need to adjust the size down, use the center 4-patch as a template.
If you have to re-size your blocks make sure you cut from the edges that do not have triangles.
Avoid using the lighter colors in a layer cake - or make them all light colors and avoid the darker colors. Mixing the two just didn't look right to me.
I marked all my blocks before I made the cuts - and then when I was cutting, if it didn't look right - I checked it again. Most of the time I had messed up the original marks!
Anyone else have some tips?
I made a table runner with the unused blocks - it loses something with only one row of the blocks. It is 62 inches long and 17 inches wide. Aside from the light colored block - it went together well.

 08-28-2014, 03:34 PM
#19
Super Member
Join Date: Aug 2013
Location: Florida
Posts: 5,966
You did a great job! I know what you mean about the fabric choices in precuts. Sometimes there are fabrics that have light backgrounds with prints that coordinate but can't function as solids. The contrast is off. I almost always "add" coordinates and have others left over.
08-28-2014, 04:21 PM
#20
Member
Join Date: Nov 2011
Location: Central Coast of California
Posts: 3
My friendship group did the same block. But a member changed the technique. We started with two each light and dark 6" squares, drew diagonal on light square, sewed 1/4" on either side of drawn line, cut between the sewn lines and trimmed to 5 1/2" and then sewed into hourglass format. Using this method we did not have bias edges on the outsides. We also pressed all the seams open.

Thread
Thread Starter
Forum
Replies
Last Post
