
Some things I learned "the hard way" -
 06-04-2017, 05:37 PM
#61
Super Member
Join Date: Aug 2011
Location: New York
Posts: 1,572
Good tips! Here are a few from me.
Use good thread! Old thread can be fragile and bleed.
Clean the bobbin area often.
Don't forget to oil/grease your machine regularly- esp the vintage/antique ones.
Use the right bobbin for each machine- again good quality will save a lot of headaches.
Mist the fabric and use a dry non-teflon iron- esp if you have birds or asthma. Teflon fumes can kill birds.
Be sure to check your scant 1/4 inch seam allowance, and spot check units as you sew. It will save a lot of frogging and frustration!
Do an internet search to check for corrections, updates, and suggestions for patterns Before cutting!
 06-05-2017, 06:19 AM
#63
Super Member
Join Date: Dec 2009
Location: KANSAS
Posts: 1,059
06-05-2017, 07:29 AM
#64
Power Poster
Thread Starter
Join Date: May 2008
Location: MN
Posts: 24,474
30-60-90 and 60-60-60 degree triangles do not work for making triangle in a square units.
I bought these triangles thinking they would work - another learning lesson! It took me a while to figure out WHY they weren't working.
See attached.
I bought these triangles thinking they would work - another learning lesson! It took me a while to figure out WHY they weren't working.
See attached.
Last edited by bearisgray; 06-05-2017 at 07:33 AM.
 06-05-2017, 08:53 AM
#65
Super Member
Join Date: Dec 2015
Location: Ontario, Canada
Posts: 4,357
Pick up a small plastic container with a tight fitting lid to put all your old needles, bent pins and dull rotary cutter blades in. Keep it up high, away from little fingers.
Take pictures of your designs up on your design wall and look at them on your computer screen to get a better feel for the finished product.
Use free photo editing software like "Ribbet" to turn your quilt photos into black and white to check your quilts for colour value placement.
Watson
Take pictures of your designs up on your design wall and look at them on your computer screen to get a better feel for the finished product.
Use free photo editing software like "Ribbet" to turn your quilt photos into black and white to check your quilts for colour value placement.
Watson
06-10-2017, 12:55 PM
#66
Super Member

Join Date: Dec 2010
Location: Twin Cities, Minnesota
Posts: 1,925
So many excellent ideas!
I have learned:
* Precision counts.
- if the fabric is cut correctly
- if the sub-units and blocks are the correct size
- then sewing the blocks together is SO much easier
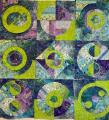
* Using a gray scale helps me determine the value range of my quilt. My current quilt has a value range of about 2 or 3 through 8 or 9 (reading from left to right). Note: not sure how accurate this gray scale is - made it up.
[ATTACH=CONFIG]574375[/ATTACH]
* To use binoculars backwards. Somewhere / somehow I acquired children's toy binoculars (Carmen Sandiego's �). Looking through them backwards reduces the visual size of my quilt and helps me determine is anything is too light or too dark. There was a huge dark splotch in the lower right corner and 11 blocks were pulled and replacements made.
I have learned:
* Precision counts.
- if the fabric is cut correctly
- if the sub-units and blocks are the correct size
- then sewing the blocks together is SO much easier
* Using a gray scale helps me determine the value range of my quilt. My current quilt has a value range of about 2 or 3 through 8 or 9 (reading from left to right). Note: not sure how accurate this gray scale is - made it up.
[ATTACH=CONFIG]574375[/ATTACH]
* To use binoculars backwards. Somewhere / somehow I acquired children's toy binoculars (Carmen Sandiego's �). Looking through them backwards reduces the visual size of my quilt and helps me determine is anything is too light or too dark. There was a huge dark splotch in the lower right corner and 11 blocks were pulled and replacements made.
Last edited by KarenK; 06-10-2017 at 01:03 PM.
06-11-2017, 04:38 AM
#67
Super Member
Join Date: Oct 2015
Location: Va.
Posts: 5,753
Take photos with your smart phone. Then use the built in program to make them black and white. This helps establish value range at all steps of the process from choosing fabrics to piecing blocks, final layout and choosing borders and binding. Also if you print out an enlarged version of your pieced top you can use it under tracing paper to plan your quilting---that's a trick I learned in a Lisa Calle class- lots of fun to use this technique to see all the different ways you can quilt a particular quilt!
Rob
Rob
Last edited by rryder; 06-11-2017 at 04:40 AM.
06-11-2017, 05:25 AM
#68
Banned
Join Date: Oct 2016
Location: here
Posts: 722
daisydawg: I find that sewing with a dull machine needle is "harder" on the fabric because it takes more "effort" for the needle to punch through the fabric. (The words in "" are not the correct words perhaps, but they convey what I am trying to say). Sharper the needle, the easier it sews. Same thing happens with pins when they dull down - it is harder to push them through the fabric.
Hope this is clear????
Hope this is clear????

Thread
Thread Starter
Forum
Replies
Last Post
bearisgray
General Chit-Chat (non-quilting talk)
65
02-01-2024 09:04 AM
miriam
For Vintage & Antique Machine Enthusiasts
30
02-07-2017 02:50 PM
karenm36
General Chit-Chat (non-quilting talk)
63
01-06-2012 06:28 PM
bearisgray
Main
97
06-29-2011 08:29 AM


