
the technique tutorial making the rise and shine blocks


 10-07-2010, 01:49 PM
#73
Power Poster
Join Date: Aug 2008
Location: new york state
Posts: 10,165
Thank You.
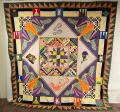
I read the first post but i didnt really pay much attention until I saw your completed blocks. WOW. Went back and re read and paid attention. This looks like something we will all be trying.
I read the first post but i didnt really pay much attention until I saw your completed blocks. WOW. Went back and re read and paid attention. This looks like something we will all be trying.
10-10-2010, 03:32 AM
#74
Member
Join Date: Aug 2010
Location: Schertz, Texas
Posts: 91
Originally Posted by ckcowl
ok, so i promised to show you how this is done. so, i will try to do this correctly so you get pics with the instructions. then a couple more layouts...
first you need:
(1) 61/2" square paper backed fusable (i used heat n bond lite)
(1) 6 1/2" square design fabric (mine/hot pink)
(2) 6 1/2" squares background fabric (mine/black)
next, trace your pattern on the paper side of the paperback fusable.
iron to wrong side of your design fabric
cut out your design on the lines
remove paper and arrange on your black squares...yup, you get (2) 6 1/2" squares for each (1) traced :)
see how simple that was?
this technique can be used for lots of different designs...have fun with it i sure have
Thanks, Jan

Thread
Thread Starter
Forum
Replies
Last Post
FERSID
General Chit-Chat (non-quilting talk)
13
10-26-2011 08:33 AM
