
Comments on rewiring the 15-91 with a potted motor
 11-07-2012, 11:06 AM
#1
Super Member
Thread Starter
Join Date: Feb 2012
Posts: 8,091
Comments on Rewiring a potted motor, part 1.
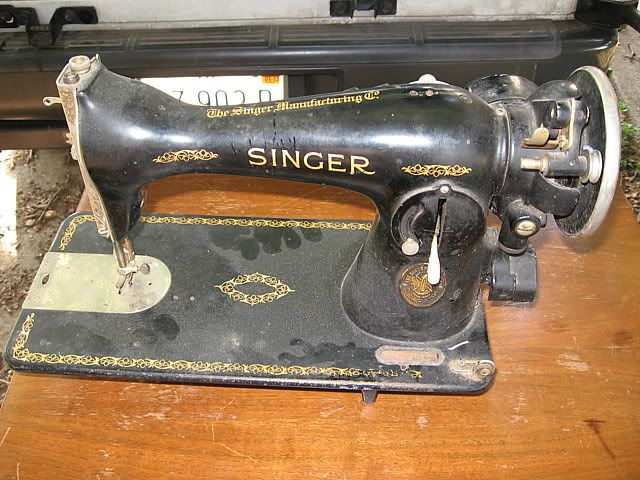
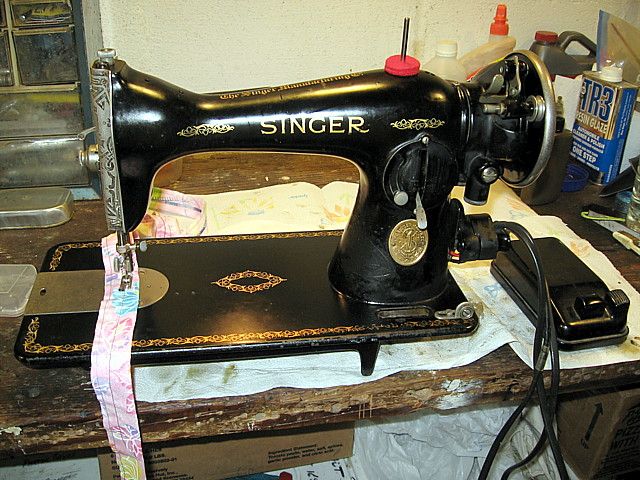
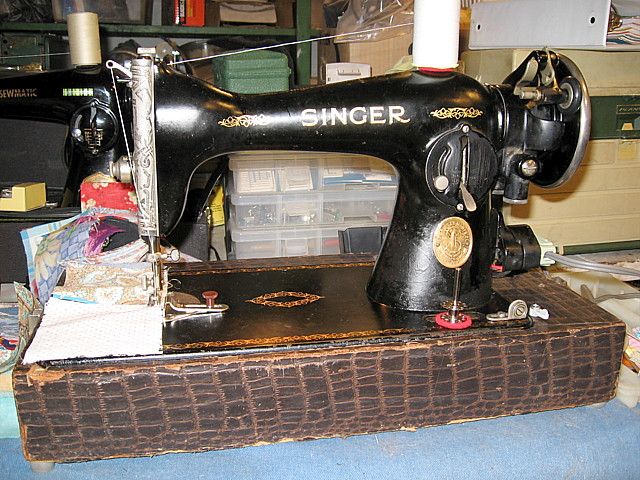
For some time I’ve been looking for a Singer 15-91 that needed rewiring. I found one last month at a thrift store. It is a former cabinet model and had spent many years in its cabinet getting filthy and rusty, while at the same time the wiring was deteriorating.
First, let me say that I am not going to do a tutorial on rewiring a potted motor. To get an excellent set of instructions go to Rains tutorial: http://vssmb.blogspot.com/search/label/rewiring
I’m going to make some comments and mention some details that I think go along with Rain’s tutorial.
Now right off I will say that I am on a dial up connection and the tutorial is very picture heavy. I could not read the entire tute because of how long it took my computer to load the pics. For his many sections it would have taken literally hours for this thing to load.
So I skimmed through to the sections I had questions on, took notes and used my own experience to fill in. So if I repeat something Rain said, or posted pictures about, it’s because I didn’t’ see them.
I put the machine on my bench and tore it apart paying attention to what went where and assuming I was going to see something really scary complex. It must have eluded me as I didn’t see it. The inside of that potted motor is SIMPLE. That’s the only word for it.
There is actually more room to work inside of it than in most hang on motors.
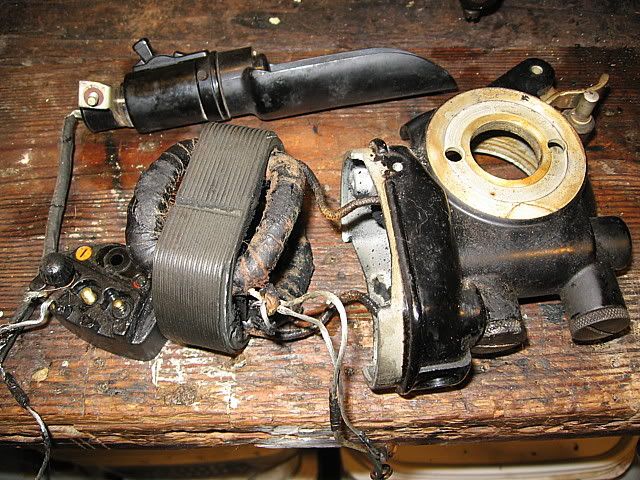
Now, the insides of the potted motor are simple, roomy and easy to clean, but from what I’ve seen in the pics in the tutorial, most or at least many of them were made with the aluminum wiring and the old latex insulation. This is a bad combination as the aluminum wiring tends to corrode and the latex insulation will turn gooey, sticky and eventually melt off, or it will turn crunchy and crumble off. Sometimes it will do both in the same machine. That was the case with my 15-91.
The insulation on the wiring outside of the motor melted, and ran all over the outside of the machine. I’ve worked for quite a while and still can’t get it all off of the machine, you can see it still there in some of the pics. So I concentrated on learning how to rewire the potted motor to make the machine functional. I’ll get to the cosmetics later.
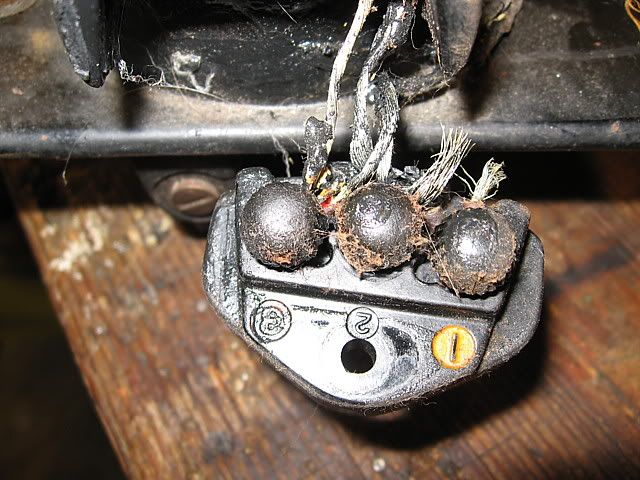
So we’ve followed Rain’s tutorial and we’ve gotten to the point we have the new red and black wires soldered to the field wiring and we’ve got it heat shrinked and tied in the Underwriters knot. And the 3” piece of heat shrink has been applied to the tails of the new wires.
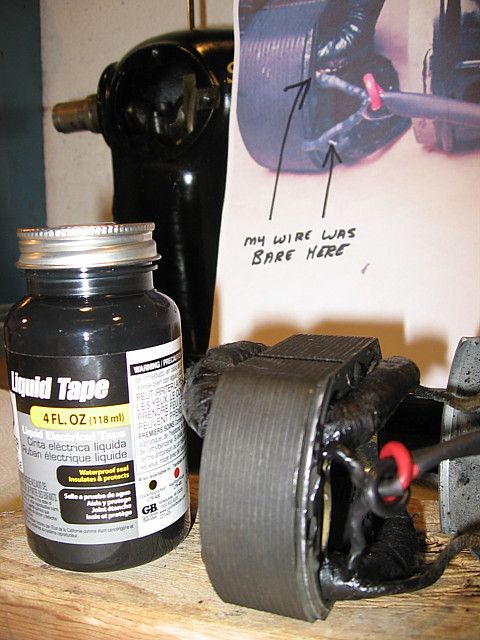
In the pics on Rain’s site I could see what looked like exposed wires right as they came out of the field coils, on my motor every last bit of the insulation had crumbled off the original wiring. And no matter that I had the heat shrink right up to the coils, when it shrunk, there were exposed wires. I can’t leave wires exposed, so I had to figure out a way to fix it. Tape was out of the question. More heat shrink wouldn’t help, so I bought a bottle of Liquid Tape at the True Value Hdwr store nearest me.
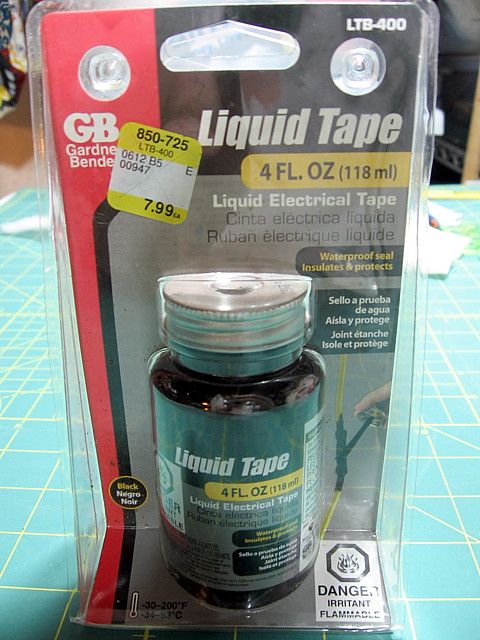
This stuff is like thick uncured rubber. Brush it on or put it on with a pointy stick wait 5 minutes and it’s a cured rubber coating. I covered the exposed wires with it and the problem was solved.
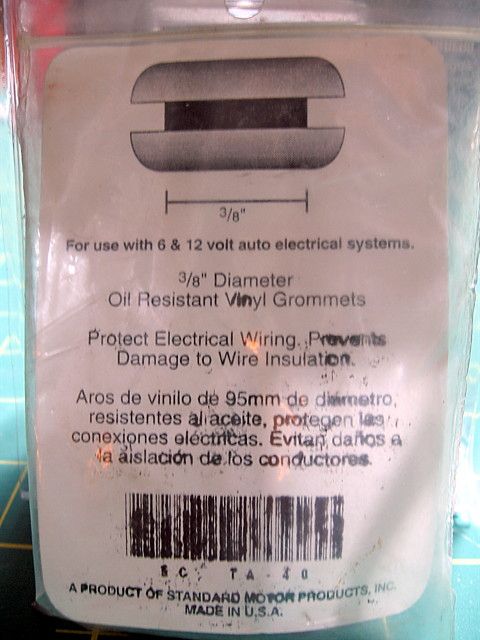
The next thing is the grommet in the housing that the wires pass through. Rain says look for a 7/16” grommet. But the hole in the housing is only 3/8” so the 7/16” grommet will not fit.
I suspect Rain was measuring the OD of the grommet but the measurement you need to match up is the hole ID. That is how grommets are measured.
Next is motor lube. We’ve got the motor back together except for the grease caps. What grease do I use to lube the gears? You use Singer Lube in the tube. The reason for this is that the housing has slots from the grease cap area directly into the gears.
On the one side is a hole for the wick to fit into to lube the shafts, then adjacent to that a slot for the gears. Each grease hole is made like this.
It took an entire tube of Singer Lube to fill the shaft wicks and the gears.
I had several older tubes of Singer lube so I used them up. I’m not sure what I will do next time as one of the newest tubes of Singer Lube has white grease in it. Looks like lithium grease. I do not know if this is the right lube or not, nor do I know if it will mix with the original lube.
I guess I’ll find out when I order some from Sew Classic.
For some time I’ve been looking for a Singer 15-91 that needed rewiring. I found one last month at a thrift store. It is a former cabinet model and had spent many years in its cabinet getting filthy and rusty, while at the same time the wiring was deteriorating.
First, let me say that I am not going to do a tutorial on rewiring a potted motor. To get an excellent set of instructions go to Rains tutorial: http://vssmb.blogspot.com/search/label/rewiring
I’m going to make some comments and mention some details that I think go along with Rain’s tutorial.
Now right off I will say that I am on a dial up connection and the tutorial is very picture heavy. I could not read the entire tute because of how long it took my computer to load the pics. For his many sections it would have taken literally hours for this thing to load.
So I skimmed through to the sections I had questions on, took notes and used my own experience to fill in. So if I repeat something Rain said, or posted pictures about, it’s because I didn’t’ see them.
I put the machine on my bench and tore it apart paying attention to what went where and assuming I was going to see something really scary complex. It must have eluded me as I didn’t see it. The inside of that potted motor is SIMPLE. That’s the only word for it.
There is actually more room to work inside of it than in most hang on motors.
Now, the insides of the potted motor are simple, roomy and easy to clean, but from what I’ve seen in the pics in the tutorial, most or at least many of them were made with the aluminum wiring and the old latex insulation. This is a bad combination as the aluminum wiring tends to corrode and the latex insulation will turn gooey, sticky and eventually melt off, or it will turn crunchy and crumble off. Sometimes it will do both in the same machine. That was the case with my 15-91.
The insulation on the wiring outside of the motor melted, and ran all over the outside of the machine. I’ve worked for quite a while and still can’t get it all off of the machine, you can see it still there in some of the pics. So I concentrated on learning how to rewire the potted motor to make the machine functional. I’ll get to the cosmetics later.
So we’ve followed Rain’s tutorial and we’ve gotten to the point we have the new red and black wires soldered to the field wiring and we’ve got it heat shrinked and tied in the Underwriters knot. And the 3” piece of heat shrink has been applied to the tails of the new wires.
In the pics on Rain’s site I could see what looked like exposed wires right as they came out of the field coils, on my motor every last bit of the insulation had crumbled off the original wiring. And no matter that I had the heat shrink right up to the coils, when it shrunk, there were exposed wires. I can’t leave wires exposed, so I had to figure out a way to fix it. Tape was out of the question. More heat shrink wouldn’t help, so I bought a bottle of Liquid Tape at the True Value Hdwr store nearest me.
This stuff is like thick uncured rubber. Brush it on or put it on with a pointy stick wait 5 minutes and it’s a cured rubber coating. I covered the exposed wires with it and the problem was solved.
The next thing is the grommet in the housing that the wires pass through. Rain says look for a 7/16” grommet. But the hole in the housing is only 3/8” so the 7/16” grommet will not fit.
I suspect Rain was measuring the OD of the grommet but the measurement you need to match up is the hole ID. That is how grommets are measured.
Next is motor lube. We’ve got the motor back together except for the grease caps. What grease do I use to lube the gears? You use Singer Lube in the tube. The reason for this is that the housing has slots from the grease cap area directly into the gears.
On the one side is a hole for the wick to fit into to lube the shafts, then adjacent to that a slot for the gears. Each grease hole is made like this.
It took an entire tube of Singer Lube to fill the shaft wicks and the gears.
I had several older tubes of Singer lube so I used them up. I’m not sure what I will do next time as one of the newest tubes of Singer Lube has white grease in it. Looks like lithium grease. I do not know if this is the right lube or not, nor do I know if it will mix with the original lube.
I guess I’ll find out when I order some from Sew Classic.
 11-07-2012, 11:07 AM
#2
Super Member
Thread Starter
Join Date: Feb 2012
Posts: 8,091
Comments on Rewiring a potted motor, part 2.
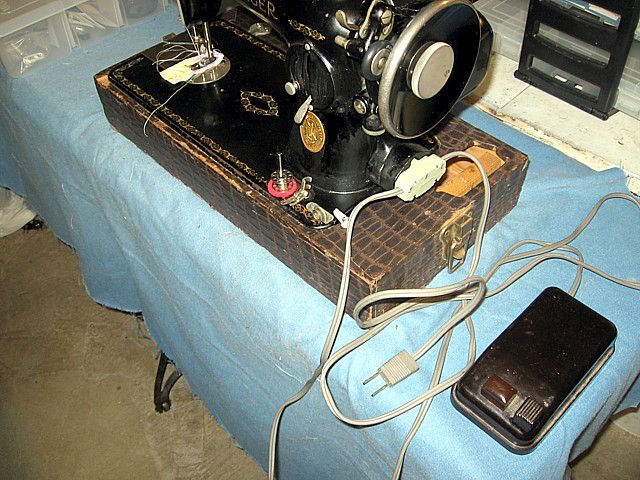
Well the Singer is rewired, I wired it as a portable rather than a cabinet model so I used the wiring from our Featherweight to see if my work was any good. It was, the motor took off without any hesitation. The machine ran fine.
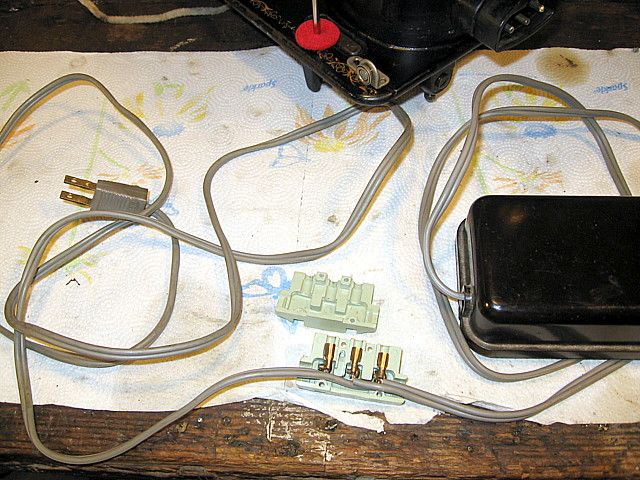
Now to wire a dedicated cord set. I had wiring from my LSMG, he’s got boxes upon boxes of wiring and gave me one so I dug out a complete cord set less the connector plug. The plug was marked SINGER, but I have no idea what it came from.
From our 319K that I bought a new wiring set for I used the connector plug. The foot controller is a Singer unit that came with my Commodore.
I put them all together and made a wiring set for the 15 plugged it together and leaned way back when I plugged it in just in case the sparks flew. They didn’t. The machine light came on, but the motor wouldn’t go zoom zoom. Say WHAT?!
Well in all the handling I had flipped the connector block upside down and wired one of the controller wires in the wrong place. No sparks or shorts, but no power to the motor. Got that all fixed and my Frankin wirings works.
After that to test the machine I made a Whacky quilt sandwich with it. Only 24” x 30” but it will be the test quilt to see how our new SS walking foot works.

Now a question for Candace.
You said in the thread written by pinkCastleDH
{ http://www.quiltingboard.com/vintage...d-t205138.html }
So, my red and black wires that I rewired the motor with came from a Singer machine,
The green connector block came from a Singer machine,
The grey cords came from a Singer machine,
And the brown foot controller came from a Singer machine.
Does this mean my 15-91 is in original condition?
Just teasing, of course it doesn’t.
Joe
Well the Singer is rewired, I wired it as a portable rather than a cabinet model so I used the wiring from our Featherweight to see if my work was any good. It was, the motor took off without any hesitation. The machine ran fine.
Now to wire a dedicated cord set. I had wiring from my LSMG, he’s got boxes upon boxes of wiring and gave me one so I dug out a complete cord set less the connector plug. The plug was marked SINGER, but I have no idea what it came from.
From our 319K that I bought a new wiring set for I used the connector plug. The foot controller is a Singer unit that came with my Commodore.
I put them all together and made a wiring set for the 15 plugged it together and leaned way back when I plugged it in just in case the sparks flew. They didn’t. The machine light came on, but the motor wouldn’t go zoom zoom. Say WHAT?!
Well in all the handling I had flipped the connector block upside down and wired one of the controller wires in the wrong place. No sparks or shorts, but no power to the motor. Got that all fixed and my Frankin wirings works.
After that to test the machine I made a Whacky quilt sandwich with it. Only 24” x 30” but it will be the test quilt to see how our new SS walking foot works.
Now a question for Candace.
You said in the thread written by pinkCastleDH
{ http://www.quiltingboard.com/vintage...d-t205138.html }
Originally Posted by Candace
Machines that have donor parts are still in "original" condition if the parts are original manufactured parts and not repros. <snip>
So, my red and black wires that I rewired the motor with came from a Singer machine,
The green connector block came from a Singer machine,
The grey cords came from a Singer machine,
And the brown foot controller came from a Singer machine.
Does this mean my 15-91 is in original condition?
Just teasing, of course it doesn’t.
Joe
Last edited by J Miller; 11-07-2012 at 11:16 AM.
 11-08-2012, 02:13 PM
#6
Super Member

Join Date: Dec 2010
Location: Atlanta, Ga
Posts: 1,516
Thanks Joe, we've been putting off getting my 2 into shape, maybe this will help inspire me!!! I really only wanted 1 but the guy in Lancaster was holding my 301 hostage unless I bought both the 15-91 and the 301 and I'd already bought the first 15-91 in Vt.
11-08-2012, 02:41 PM
#7
Senior Member
Join Date: Dec 2010
Posts: 443
I have a singer 15-91 and wondered where you purchased a walking foot. Enjoyed seeing the pictures as to how you cleaned and repaired your machine. Mine is in a cabinet and is so heavy but I enjoy using it as it is such a workhorse.
Joanne
Joanne
11-08-2012, 03:46 PM
#8
Super Member
Thread Starter
Join Date: Feb 2012
Posts: 8,091
Joanne,
Sew-Classic { http://www.shop.sew-classic.com/ }, April1930 { http://www.april1930s.com/ }, and others have Walking Foot attachments. I have four right now, one generic ZZ that my wife got from eBay many years ago for her Bernina, it came with an adaptor, two marked SINGER, a slant shank and a vertical shank ZZ and the most recent one from Sew-Classic that doesn't work near as well as the others.
Several previous posters have the same WF as I got from Sew-Classic and they work good, so I'm going to try mine in a couple other machines then if still doesn't work, I'll return it.
But I'm going to be looking for a SINGER straight stitch WF in the future.
These old machines are heavy, but I prefer them to the lighter ones. They don't move around when I'm using them.
Joe
11-08-2012, 03:48 PM
#9
Super Member
Join Date: Sep 2009
Location: Massachusetts, USA
Posts: 1,775
Thanks Joe for sharing this!! I have several potted motor machines that need work. I'm going to study it over again later when I have more time but just wanted to ask....how do you get words between your different sets of pics in your tute? 

Thread
Thread Starter
Forum
Replies
Last Post
Beautiful_Sound
For Vintage & Antique Machine Enthusiasts
10
10-30-2015 08:36 PM
miriam
For Vintage & Antique Machine Enthusiasts
45
04-09-2014 11:52 PM
Sewlovely2
For Vintage & Antique Machine Enthusiasts
3
09-26-2013 09:47 PM
