
Sewing machine case repair
 09-05-2012, 01:53 AM
#1
Super Member
Thread Starter
Join Date: Feb 2012
Posts: 8,091
PROLOG:
Over the years we have acquired several sewing machines with broken and damaged cases. One was found on the curb just discarded, some came from GW auctions already broken and they somehow didn’t receive any additional damage, and some looked good and came to me in lots of pieces.
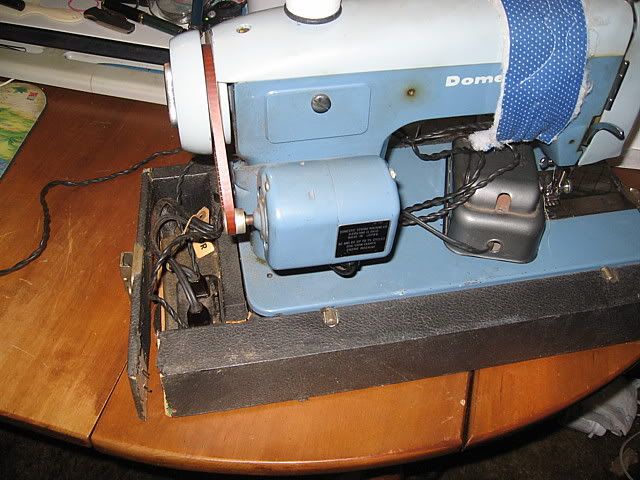
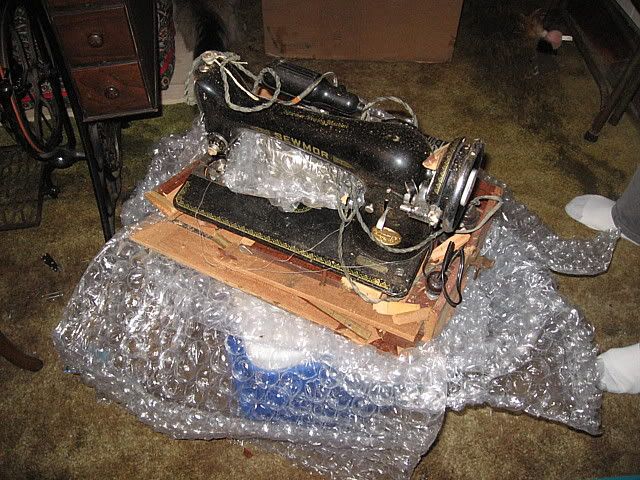
My Domestic and SEWMOR are two of those:

I also have my mothers HOTHER with it’s almost totally ruined water damaged case.
Several weeks ago in a thread about a machine she’d bought Caroline mentioned she had a sewing machine case she was going to throw away. I mentioned that if she was going to do that, throw it in my direction. I honestly didn’t think she would, but she did.
The case bottom was badly water damaged and the bottom panel was missing.
What do you do with cases like these? Most people who have mentioned having bad cases throw them away. I do not.
Here in central IL the cheapest old style wooden sewing machine case is $20.00 and up.
Instead of throwing them away, I repair them. It’s a lot of work, but in the long run, it’s cheaper and more rewarding.
So, read on for an account of how I repaired the case Caroline sent me.
Over the years we have acquired several sewing machines with broken and damaged cases. One was found on the curb just discarded, some came from GW auctions already broken and they somehow didn’t receive any additional damage, and some looked good and came to me in lots of pieces.
My Domestic and SEWMOR are two of those:
I also have my mothers HOTHER with it’s almost totally ruined water damaged case.
Several weeks ago in a thread about a machine she’d bought Caroline mentioned she had a sewing machine case she was going to throw away. I mentioned that if she was going to do that, throw it in my direction. I honestly didn’t think she would, but she did.
The case bottom was badly water damaged and the bottom panel was missing.
What do you do with cases like these? Most people who have mentioned having bad cases throw them away. I do not.
Here in central IL the cheapest old style wooden sewing machine case is $20.00 and up.
Instead of throwing them away, I repair them. It’s a lot of work, but in the long run, it’s cheaper and more rewarding.
So, read on for an account of how I repaired the case Caroline sent me.
 09-05-2012, 01:55 AM
#2
Super Member
Thread Starter
Join Date: Feb 2012
Posts: 8,091
ACT I:
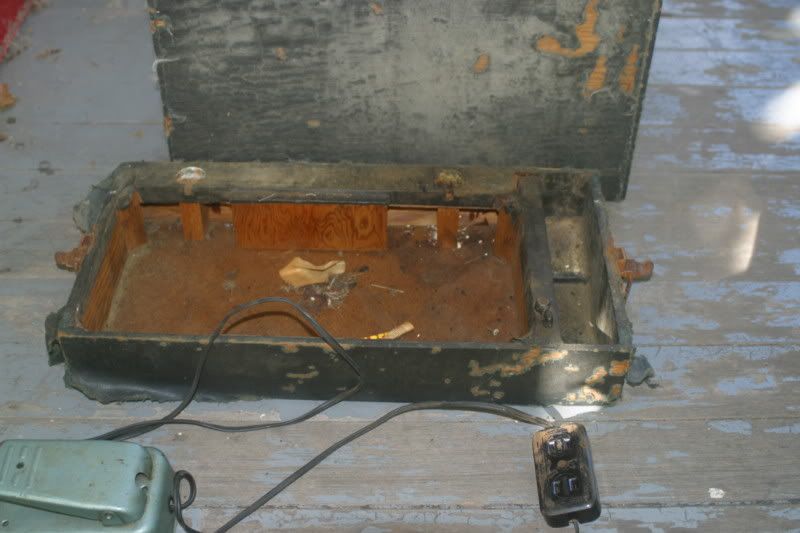
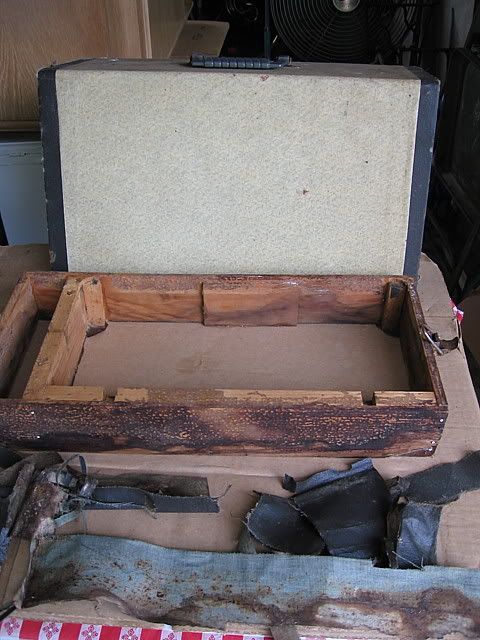
The case top is in good condition, some torn material and scuffed places, and very dirty. But the bottom was in pretty bad shape. The sides and end are made from plywood. The center brace of ľ” wood. The bottom was most likely made from masonite. The same material peg board is made from. It’s good until it gets wet, then its junk.
I didn’t start taking pictures until after I was mostly finished repairing the case bottom, I wish I’d started sooner. Let me describe it: the plywood ends were almost completely de-laminated. The water had broken the glue bond and the wood was pealing apart. About the only thing holding them together was the rivets through the latches.
The sides were also de-laminating in several places, and three of the corners had come apart. The fabric on it was rotten and falling off.
So, I pealed the fabric off, then took each piece of plywood and spread the layers apart. Then using a plastic credit card I worked the wood glue, I use Elmer’s Wood Glue Max, all the way through and between each layer of wood. Then clamped it tight with wax paper between the case part and pieces of wood and metal I used to spread the clamping force.
After the box walls were repaired I nailed the pieces together using paneling nails. I use these kind of nails because the barbs hold good.
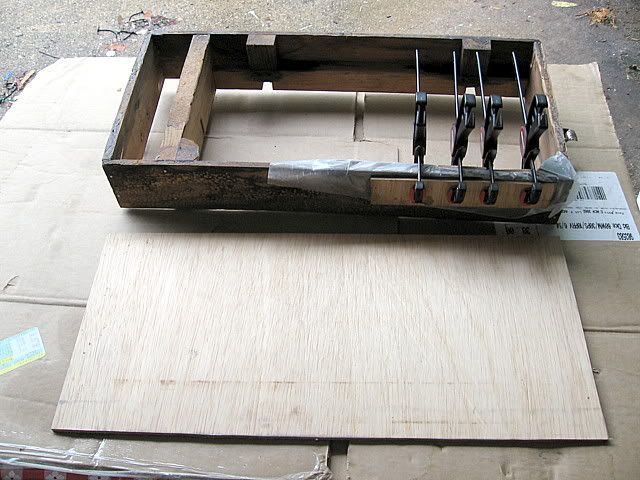
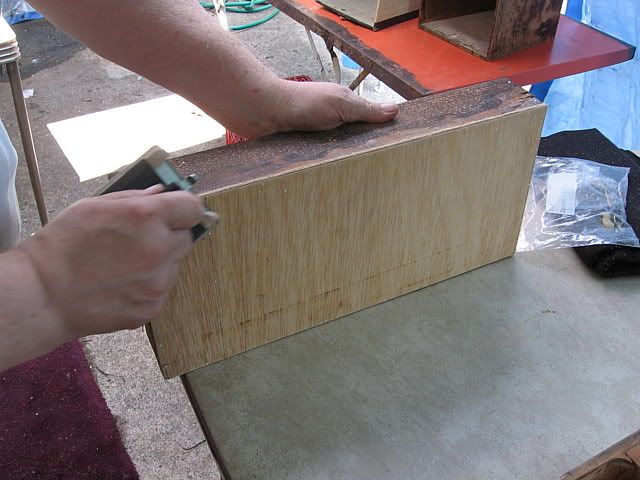
Then I cut out a new bottom from Ľ” plywood. Free stuff, no cost.

Glued it and clamped it together, then I nailed the new bottom to the frame.

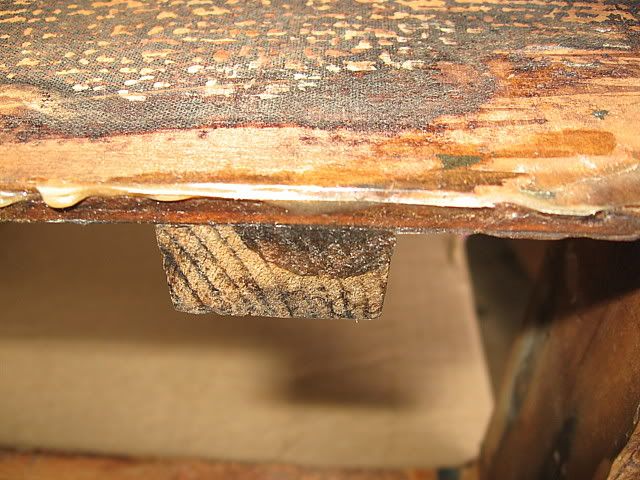
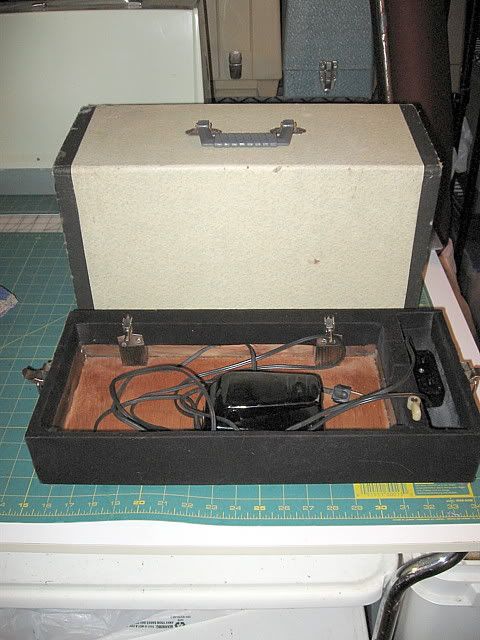
After putting the box back together I put in a new base for the cord block. The cord block is screwed to the floor of the case with a wood screw. So an additional thickness of wood is glued in the box so the screw doesn’t penetrate the bottom.
Here is the repaired bottom from the outside.
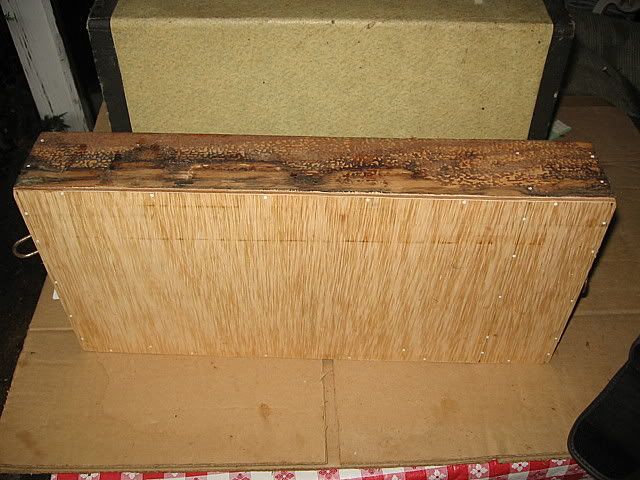
You can see all the nails I used, in addition to the glue, to make my repairs stronger.
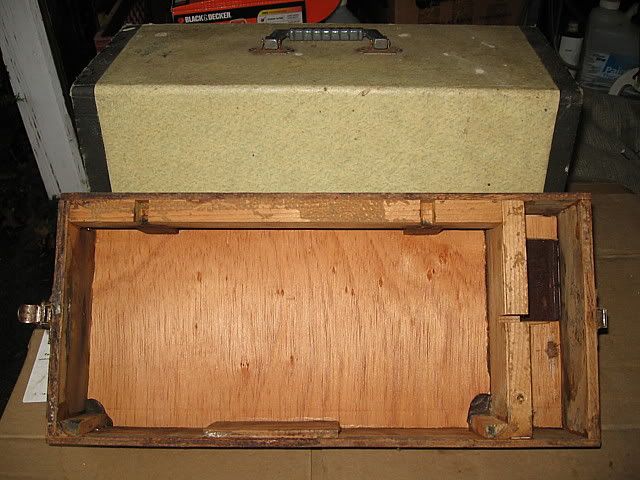
When I got to this point I put the top on and closed the latches. It fit! Yayyyyy!
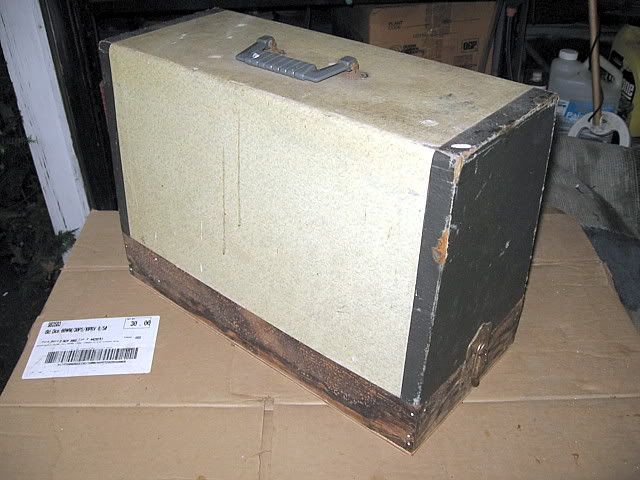
The case top is in good condition, some torn material and scuffed places, and very dirty. But the bottom was in pretty bad shape. The sides and end are made from plywood. The center brace of ľ” wood. The bottom was most likely made from masonite. The same material peg board is made from. It’s good until it gets wet, then its junk.
I didn’t start taking pictures until after I was mostly finished repairing the case bottom, I wish I’d started sooner. Let me describe it: the plywood ends were almost completely de-laminated. The water had broken the glue bond and the wood was pealing apart. About the only thing holding them together was the rivets through the latches.
The sides were also de-laminating in several places, and three of the corners had come apart. The fabric on it was rotten and falling off.
So, I pealed the fabric off, then took each piece of plywood and spread the layers apart. Then using a plastic credit card I worked the wood glue, I use Elmer’s Wood Glue Max, all the way through and between each layer of wood. Then clamped it tight with wax paper between the case part and pieces of wood and metal I used to spread the clamping force.
After the box walls were repaired I nailed the pieces together using paneling nails. I use these kind of nails because the barbs hold good.
Then I cut out a new bottom from Ľ” plywood. Free stuff, no cost.
Glued it and clamped it together, then I nailed the new bottom to the frame.
After putting the box back together I put in a new base for the cord block. The cord block is screwed to the floor of the case with a wood screw. So an additional thickness of wood is glued in the box so the screw doesn’t penetrate the bottom.
Here is the repaired bottom from the outside.
You can see all the nails I used, in addition to the glue, to make my repairs stronger.
When I got to this point I put the top on and closed the latches. It fit! Yayyyyy!
09-05-2012, 02:00 AM
#3
Super Member
Thread Starter
Join Date: Feb 2012
Posts: 8,091
ACT II:
After letting all the glue dry it was time to prep the box for the new fabric cover.
The old fabric was glued on using some kind of asphalt adhesive. I needed to sand that down a bit so the new spray glue would stick better. Also I wanted to bevel the edges of the new bottom so it wouldn’t be so sharp and possibly wear the new fabric.
Then I brought out the fabric I was going to use, it’s a pants weight cotton polyester blend. My wife and I measured it to make sure there was enough for two bottoms and a top. I’m also going to use this to recover my SEWMOR 404 box.
Next I laid the fabric out and with my wife’s help marked it and cut it.
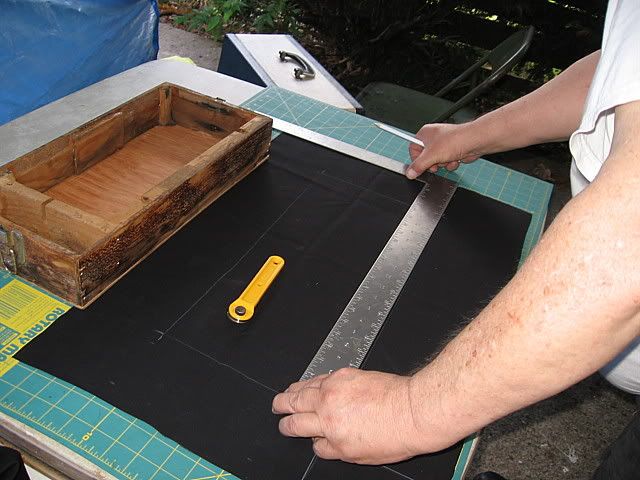
I measured and test fit the material so I wouldn’t have too much trimming after gluing the material on. We cut the corners out and cut out the holes needed because the latches were still on. I won’t need to do that for the HOTHER or SEWMOR cases as the latches have been removed.
Once the fabric was cut, I cut out and glued in the pieces for the middle support and the small area where the cord block is attached. Then sprayed the bottom of the box and the fabric, counted to 30 then set the box on the fabric and pressed down a bit. When I turned it over I had just enough time to smooth out the few wrinkles that were there. That stuff sticks quick.
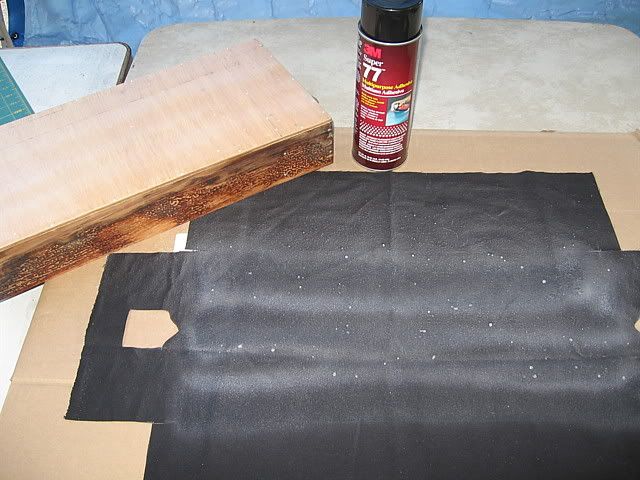
Next I sprayed each side of the box and fabric one at a time, also spraying the top edge and inside of the box where the fabric would stick. Then carefully put each section in place smoothing it out as I went.
It didn’t take too long to do, but it was a bit tedious.
Once it was finished I was really surprised at how good it looked. Here is a couple pics of the finished repairs.


My one and only complaint is overspray. I have to find a way to keep it to a bare minimum.
The case top was thoroughly cleaned. The paint splatters was removed with a plastic scrubber and Simple Green, then the entire top was washed with Simple Green. It’s actually a blueish white color. The next step will be to use some acrylic fabric pain to touch up the damaged black parts. As it is, it looks much better now.
The box is finished, all that was left to do now is rewire the cord block and this project will be finished.
After letting all the glue dry it was time to prep the box for the new fabric cover.
The old fabric was glued on using some kind of asphalt adhesive. I needed to sand that down a bit so the new spray glue would stick better. Also I wanted to bevel the edges of the new bottom so it wouldn’t be so sharp and possibly wear the new fabric.
Then I brought out the fabric I was going to use, it’s a pants weight cotton polyester blend. My wife and I measured it to make sure there was enough for two bottoms and a top. I’m also going to use this to recover my SEWMOR 404 box.
Next I laid the fabric out and with my wife’s help marked it and cut it.
I measured and test fit the material so I wouldn’t have too much trimming after gluing the material on. We cut the corners out and cut out the holes needed because the latches were still on. I won’t need to do that for the HOTHER or SEWMOR cases as the latches have been removed.
Once the fabric was cut, I cut out and glued in the pieces for the middle support and the small area where the cord block is attached. Then sprayed the bottom of the box and the fabric, counted to 30 then set the box on the fabric and pressed down a bit. When I turned it over I had just enough time to smooth out the few wrinkles that were there. That stuff sticks quick.
Next I sprayed each side of the box and fabric one at a time, also spraying the top edge and inside of the box where the fabric would stick. Then carefully put each section in place smoothing it out as I went.
It didn’t take too long to do, but it was a bit tedious.
Once it was finished I was really surprised at how good it looked. Here is a couple pics of the finished repairs.
My one and only complaint is overspray. I have to find a way to keep it to a bare minimum.
The case top was thoroughly cleaned. The paint splatters was removed with a plastic scrubber and Simple Green, then the entire top was washed with Simple Green. It’s actually a blueish white color. The next step will be to use some acrylic fabric pain to touch up the damaged black parts. As it is, it looks much better now.
The box is finished, all that was left to do now is rewire the cord block and this project will be finished.
09-05-2012, 02:02 AM
#4
Super Member
Thread Starter
Join Date: Feb 2012
Posts: 8,091
ACT III:
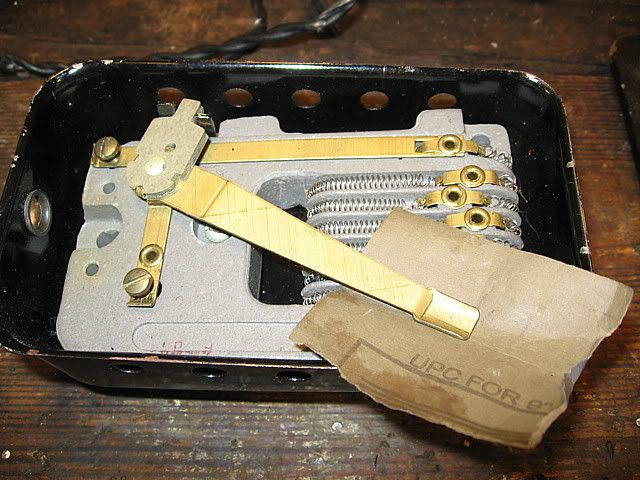
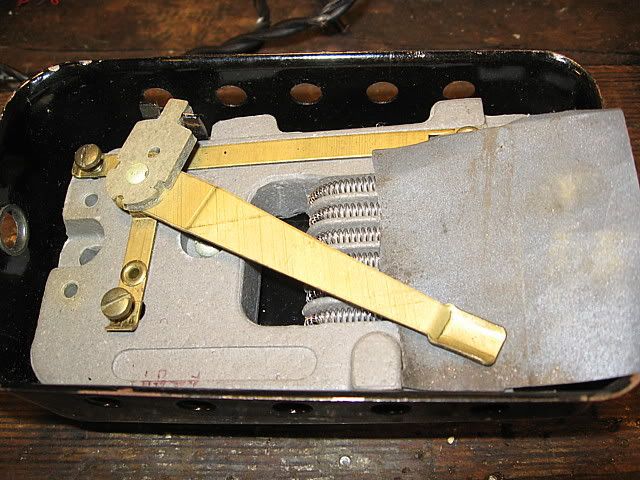
The wiring on this cord block was somewhat different from most. The outlet cord was in good condition. A few scuffs and abraded places but flexible and sound with no bare spots.
The block was pretty bad. The rivets or screws, I’m not really sure what they are, were badly rusted. I had to use my Dremel tool to grind the heads off so I could remove the cardboard bottom to the block. Once the cardboard part was removed I was able to turn the rivet-screws out so perhaps they were screws with a very fine thread.
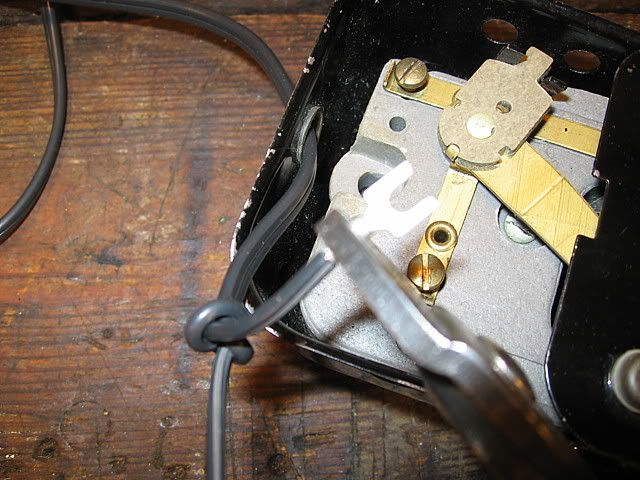
The cord from the cord block to the foot controller was broken in so many places there was a lot of bare wire. What little insulation was there was crispy as uncooked spaghetti.
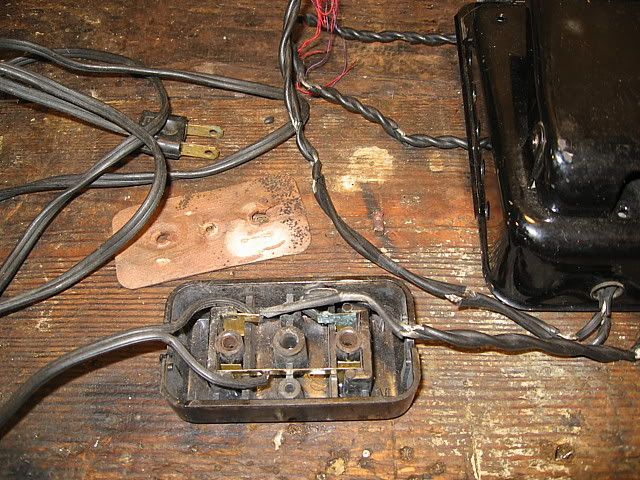
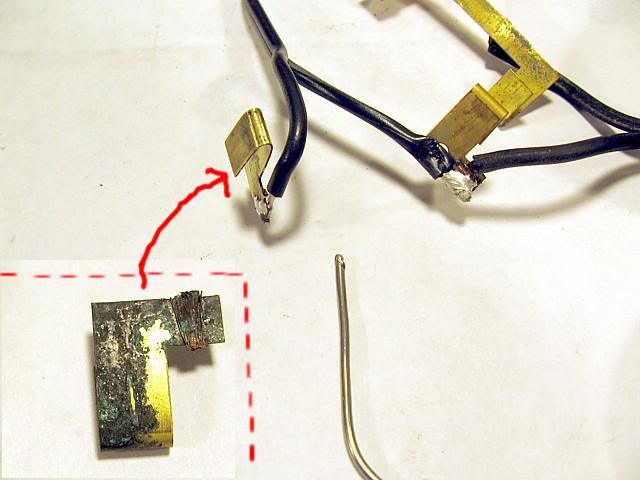
Inside I found corroded contacts on one side and fairly clean contacts on the other side.
I removed the corroded contacts and cleaned them, then soldered new wire to them.
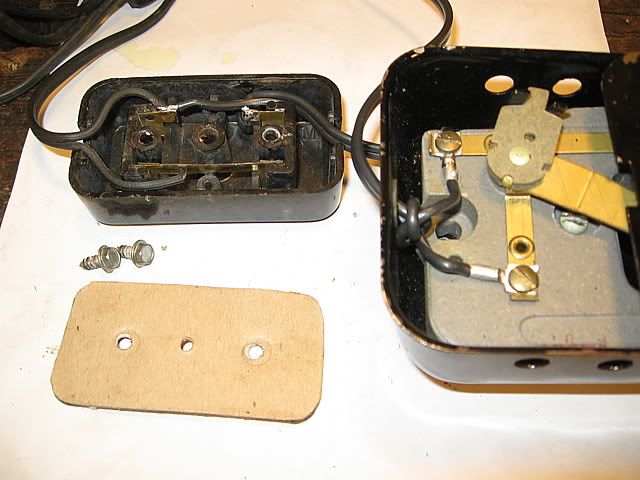
Since the cardboard back to the cord block was moldy and damaged I added a layer of tablet back to it and glued it on. Then I scared up a couple #6 size sheet metal screws to replace the old rivet-screws. I set these aside while I worked on the foot controller.
This foot controller was in great shape. It is very clean inside, no corrosion, no signs of over heating, nothing wrong at all.
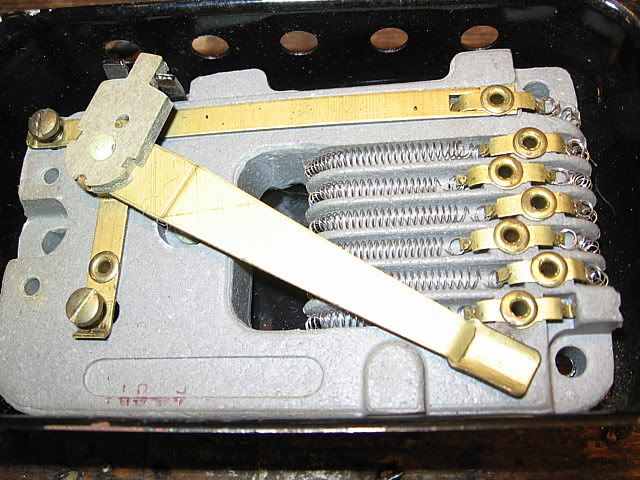
But just in case there was some corrosion I couldn’t see I cleaned the contacts anyway.
First I put a piece of 600 grit sand paper rough side down and while holding it loosely around the arm I worked the arm back and forth a couple times with the foot pedal.
Then I reversed the sand paper and rand the arm over it to clean its’ contact area.
After that I put the new cord through the hole in the controller housing and tied an Underwriters knot in it to prevent stress on the connections.
Then I crimped on the new connectors,
and soldered them for added security.
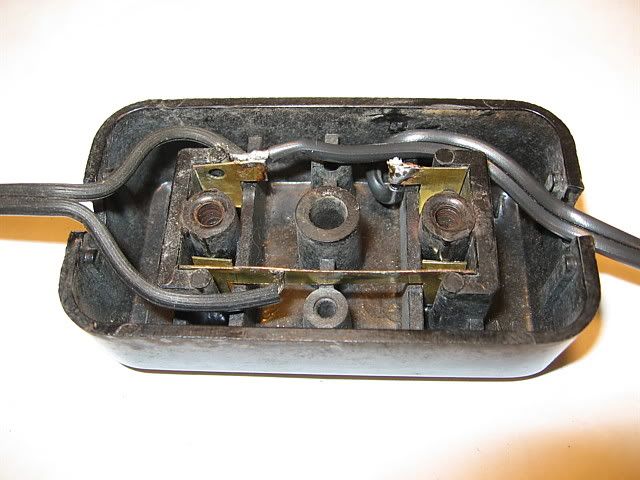
The wiring is all repaired now. But before I reassembled it here’s a pic of all the newly done repairs.
The wiring on this cord block was somewhat different from most. The outlet cord was in good condition. A few scuffs and abraded places but flexible and sound with no bare spots.
The block was pretty bad. The rivets or screws, I’m not really sure what they are, were badly rusted. I had to use my Dremel tool to grind the heads off so I could remove the cardboard bottom to the block. Once the cardboard part was removed I was able to turn the rivet-screws out so perhaps they were screws with a very fine thread.
The cord from the cord block to the foot controller was broken in so many places there was a lot of bare wire. What little insulation was there was crispy as uncooked spaghetti.
Inside I found corroded contacts on one side and fairly clean contacts on the other side.
I removed the corroded contacts and cleaned them, then soldered new wire to them.
Since the cardboard back to the cord block was moldy and damaged I added a layer of tablet back to it and glued it on. Then I scared up a couple #6 size sheet metal screws to replace the old rivet-screws. I set these aside while I worked on the foot controller.
This foot controller was in great shape. It is very clean inside, no corrosion, no signs of over heating, nothing wrong at all.
But just in case there was some corrosion I couldn’t see I cleaned the contacts anyway.
First I put a piece of 600 grit sand paper rough side down and while holding it loosely around the arm I worked the arm back and forth a couple times with the foot pedal.
Then I reversed the sand paper and rand the arm over it to clean its’ contact area.
After that I put the new cord through the hole in the controller housing and tied an Underwriters knot in it to prevent stress on the connections.
Then I crimped on the new connectors,
and soldered them for added security.
The wiring is all repaired now. But before I reassembled it here’s a pic of all the newly done repairs.
09-05-2012, 02:04 AM
#5
Super Member
Thread Starter
Join Date: Feb 2012
Posts: 8,091
EPILOG:
All the work I’ve done to refurbish this sewing machine case may seem like a waste of time and effort to some. It takes so much time and materials to do the repairs, it’s not worth it, or so they say.
Well, I have time, it took less than two days to fix this box, and to me the refurbishing of these cases not only is worth it, but it’s a cost saving thing as well.
I’ve repaired at least six cases in various states of disrepair and damage and have two I’m working on now that have been repaired, but are needing recovering.
Add to this list the case from Caroline and that makes 9.
If I’d had to buy replacement cases for all these broken ones I would have had to shell out over a $100.00. Around here they run $20.00 + per each.
If I add up all my parts and supplies I doubt very much that I’d have over $40.00 invested in the repairs of all these cases.
My supplies; glue, nails, plywood, stain, shellac is also being used to repair two treadle and three e-machine cabinets. Most of this has been bought over time or found for free, so the cost is really minimal.
Here is the repaired case Caroline sent me awaiting its’ new occupant:
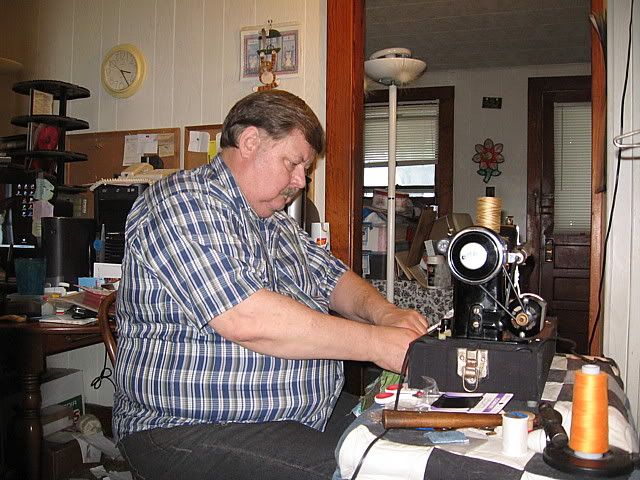
And just for those who don’t believe I can drive a sewing machine here’s a pic of yours truly sewing a grocery bag with our newly acquired ALDENS ZZ machine sitting in the newly repaired case:
Joe
All the work I’ve done to refurbish this sewing machine case may seem like a waste of time and effort to some. It takes so much time and materials to do the repairs, it’s not worth it, or so they say.
Well, I have time, it took less than two days to fix this box, and to me the refurbishing of these cases not only is worth it, but it’s a cost saving thing as well.
I’ve repaired at least six cases in various states of disrepair and damage and have two I’m working on now that have been repaired, but are needing recovering.
Add to this list the case from Caroline and that makes 9.
If I’d had to buy replacement cases for all these broken ones I would have had to shell out over a $100.00. Around here they run $20.00 + per each.
If I add up all my parts and supplies I doubt very much that I’d have over $40.00 invested in the repairs of all these cases.
My supplies; glue, nails, plywood, stain, shellac is also being used to repair two treadle and three e-machine cabinets. Most of this has been bought over time or found for free, so the cost is really minimal.
Here is the repaired case Caroline sent me awaiting its’ new occupant:
And just for those who don’t believe I can drive a sewing machine here’s a pic of yours truly sewing a grocery bag with our newly acquired ALDENS ZZ machine sitting in the newly repaired case:
Joe
 09-05-2012, 06:43 AM
#9
Super Member
Join Date: Jan 2011
Location: Sierra Vista, AZ
Posts: 3,992
I am going down to take pics of one of the cases, yes I have several, that is in need of R&R. What kind of spray glue did you use? What size is the small clamps you used? I am taking my truck in for an oil change this morning and will be making a hardware store shopping list. I will post my R&R pics also.
09-05-2012, 06:50 AM
#10
Super Member
Join Date: Jan 2010
Location: Outer Space
Posts: 9,319
You can't even get the cases for $20 here. I've asked around locally and they're not easy to find in any condition. The new plastic ones that have the two separate areas for vintage machines run $25-$30 online plus shipping. I'm with you. If I can save one, I'd do it. Thanks for the pics. I've never received one in that state, but I would try tackling it too.

Thread
Thread Starter
Forum
Replies
Last Post
J Miller
For Vintage & Antique Machine Enthusiasts
30
08-31-2013 12:18 PM
ArizonaKAT
For Vintage & Antique Machine Enthusiasts
6
09-11-2012 08:00 AM
craftybear
Links and Resources
1
10-09-2011 05:03 PM
grayhare
General Chit-Chat (non-quilting talk)
3
07-22-2011 06:30 AM
