
2012-2013 Dear Jane Stickle 2d Cyber Party Pictures and Discussion
 08-15-2012, 12:21 AM
#1461
Super Member
Join Date: Jul 2010
Location: England, U.K.
Posts: 1,588
So sorry I forgot to put which block - it is I7 mac and muff !!
DottyD.
DottyD.
 08-15-2012, 05:38 AM
#1462
Senior Member

Join Date: Aug 2009
Location: Montana
Posts: 372
Dotty D your triangles are beautiful. For I7 I drafted a foundation pattern for the edges with the small triangles. Starch the living daylights out of your fabric before you sew, that really helps with wonkiness. I used the freezer paper method from ThatQuilt for my blocks. The freezer paper helps to stabilize the small pieces. Good luck!!
08-15-2012, 03:53 PM
#1463
Senior Member

Join Date: Sep 2010
Location: Tampa, Florida
Posts: 823
Hi, Dotty -- when I made I-7 for my first DJ I appliqued the tiny triangles and I wasn't at all happy with it. I thought I'd try paperpiecing it this time. Have you seen the thread about basting with glue? It really helped me with some tiny paperpieced blocks.
08-16-2012, 02:20 PM
#1465
Senior Member
Thread Starter

Join Date: Oct 2010
Location: Agoura Hills, CA
Posts: 926
All blocks are wonderful!!! DottyD - you are so far ahead [should we really help!  ...only kidding]
Haven't done that one yet - not on schedule til next February, although I have to get back to this!! The Olympics didn't get me behind - it was the IRS, California Secretary of State and my daughter's non-profit public benefit corp.... ugh the paper work is done but my grandson's quilt remains to be quilted [birthday was yesterday ] and my brain is fried!
At any rate - I did look at although I haven't looked at "that quilt" recommendations. We frequently differ. When I make that block I will make the border triangles using reverse applique. It would seem the easiest. I agree that fabric cooperates more when it is starched like crazy. On the other hand, make sure you starch it and let it cool before you mark the triangles so that your marks will come out! alternative is to make the triangle marking slightly smaller so that you can turn it completely under the white. When you come to the inner corners, take teeny stitches - I would clip it from the very center of the triangle towards the three corners [kind of like the mercedes symbol?? or pyramid] don't cut anywhere else inside. I will call my friend who is also making a DJ but with Rita Verocca and their group is making it like a round the world starting in the center - they have done that block already.
hope to get back to all of you!
Gus
ps - knee hanging in
...only kidding] Haven't done that one yet - not on schedule til next February, although I have to get back to this!! The Olympics didn't get me behind - it was the IRS, California Secretary of State and my daughter's non-profit public benefit corp.... ugh the paper work is done but my grandson's quilt remains to be quilted [birthday was yesterday
] and my brain is fried!At any rate - I did look at although I haven't looked at "that quilt" recommendations. We frequently differ. When I make that block I will make the border triangles using reverse applique. It would seem the easiest. I agree that fabric cooperates more when it is starched like crazy. On the other hand, make sure you starch it and let it cool before you mark the triangles so that your marks will come out! alternative is to make the triangle marking slightly smaller so that you can turn it completely under the white. When you come to the inner corners, take teeny stitches - I would clip it from the very center of the triangle towards the three corners [kind of like the mercedes symbol?? or pyramid] don't cut anywhere else inside. I will call my friend who is also making a DJ but with Rita Verocca and their group is making it like a round the world starting in the center - they have done that block already.
hope to get back to all of you!
Gus
ps - knee hanging in
08-16-2012, 06:43 PM
#1466
Senior Member
Thread Starter
Join Date: Oct 2010
Location: Agoura Hills, CA
Posts: 926
OK ladies,
I'm about to start sewing, but I did look ahead a little and have some advice for E-7 [which I have yet to make...]
You will notice by looking at Brenda's pattern there are no seams - she has made it far more complicated than it needs to be! Jane's original block and thatquilt.com's instructions have seam lines to avoid the dreaded "Y-seam" - but I see a far far easier way to do this one!! If you continue the diagonal lines to the straight line, you will see that there are 16 half-square triangles.... my friend!! They finish to a very slightly generous 1" To make half square triangles you need to add 7/8" to the finished size. My suggestion is that you either cut 8 - 2" squares of each fabric, mark the diagonal, and sew 1/4" to each side & then cut down marked line ... or ... use 1" triangle paper - make eight of them taking a very scant 1/4" seam. After pressing to the dark fabric - lay your squares out to match the general directions of the cut-down half square triangles [HST] represented by the block, match the 1 1/4" marking on your ruler to the dark corners of your HST's. Now you can add the sashing in between the pieces - cut a generous 3/4" to finish 1/4" and add the border.
wahlah!! - no paper piecing required!
Gus
If it doesn't make sense - ask a question or PM me - I probably won't make it til next week sometime.
08-16-2012, 07:04 PM
#1467
Senior Member
Thread Starter
Join Date: Oct 2010
Location: Agoura Hills, CA
Posts: 926
E-6 ... havent tackled that either!! oh oh...
but here is what I will do - no paper piecing! why?? outside triangles finish around 3 1/2" - but be generous - this is the outside edge and is easier to cut down. For those nasty center sections- why not start with a 1 1/2" square of print, add a background border all the way around and slice it once diagonally? Add the other triangles to even out the square, add the next round of triangles and then you are left with a simple border and corner stone round before those outside triangles.
RS4 - not done and haven't quite decided whether to make it like the pattern or the original - notice there really aren't "diamonds" there are squares - in fact there are little pieces of pink check coming inward around that bottom center triangle. BE VERY CAREFUL if you follow thatquilt.com's triangle instructions - they all seem to leave off the seam allowance!
I do have to say - the oldest block I have yet hanging over my head is D-12 and I just read thatquilt.com's directions - love them!!! I wasn't looking forward to the corners, but that doesn't have to be insane!
happy sewing!
Gus
08-18-2012, 08:16 AM
#1468
Super Member

Join Date: Jul 2011
Location: Neuquen - Argentina
Posts: 2,288
Hello to all!
Gus... thanks for all the tips! I am very behind but will take them into account when it reaches those blocks!
I already have all parts prepared to devote to row C, I hope to do something this weekend!
That you pass wonderful!
A strong hug to all!
Gus... thanks for all the tips! I am very behind but will take them into account when it reaches those blocks!
I already have all parts prepared to devote to row C, I hope to do something this weekend!
That you pass wonderful!
A strong hug to all!
08-18-2012, 01:18 PM
#1469
Senior Member
Join Date: Sep 2010
Location: Tampa, Florida
Posts: 823
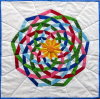
Here are the blocks for Weeks 31 and 32. Gus, I may remake E-7 later using your HST suggestion. I think it will come out much better.
[ATTACH=CONFIG]356380[/ATTACH]
[ATTACH=CONFIG]356379[/ATTACH]
[ATTACH=CONFIG]356380[/ATTACH]
[ATTACH=CONFIG]356379[/ATTACH]
08-19-2012, 08:45 AM
#1470
Senior Member
Thread Starter
Join Date: Oct 2010
Location: Agoura Hills, CA
Posts: 926
Well....
still not sewing got fabrics picked out - does that count???
Also looked at TR8 more closely and figured out another way to do it. I think that katybob also used thatquilt.com's instructions??? and they do look fantastic! As much as I love to reverse applique, I think I will sew it differently...
When you look carefully at Jane's picture - you will notice that there are actually some seams continuing from all four sides of that center diamond! The smaller lower diamonds have background triangles above them connecting them to the large diamond and then there is a y-seam connecting the lower half of the small diamonds to the bottom. I would actually make the background extend down here and reverse applique the curvy bottom edge behind the background. If you wanted to, you could avoid the y-seams altogether by paper-piecing the entire bottom sections:
look at the right side: piece "1" is small diamond, add triangle to top edge, add background piece that extends from bottom of diamond to bottom edge of block [the corner also shows some background], lastly add a piece of background to edge of small diamond that will connect to the larger diamond. Jane actually has a seam line extending upward into the border from the bottom edges of the large diamond. I think it would make more sense to assemble the lower corners first and attach them to the diamond one at a time, next attach border to one side, attach upper diamond to the end of the other border and attach that in one section to the other side of the large diamond-lower triangle assembly.
Make sense?? I think it will be easier to get sharp points on those pesky small diamonds at the bottom by piecing.
Gus
still not sewing
got fabrics picked out - does that count???Also looked at TR8 more closely and figured out another way to do it. I think that katybob also used thatquilt.com's instructions??? and they do look fantastic! As much as I love to reverse applique, I think I will sew it differently...
When you look carefully at Jane's picture - you will notice that there are actually some seams continuing from all four sides of that center diamond! The smaller lower diamonds have background triangles above them connecting them to the large diamond and then there is a y-seam connecting the lower half of the small diamonds to the bottom. I would actually make the background extend down here and reverse applique the curvy bottom edge behind the background. If you wanted to, you could avoid the y-seams altogether by paper-piecing the entire bottom sections:
look at the right side: piece "1" is small diamond, add triangle to top edge, add background piece that extends from bottom of diamond to bottom edge of block [the corner also shows some background], lastly add a piece of background to edge of small diamond that will connect to the larger diamond. Jane actually has a seam line extending upward into the border from the bottom edges of the large diamond. I think it would make more sense to assemble the lower corners first and attach them to the diamond one at a time, next attach border to one side, attach upper diamond to the end of the other border and attach that in one section to the other side of the large diamond-lower triangle assembly.
Make sense?? I think it will be easier to get sharp points on those pesky small diamonds at the bottom by piecing.
Gus

Thread
Thread Starter
Forum
Replies
Last Post
kluedesigns
Blocks of the Month and Week
6167
02-19-2013 08:53 AM
Cre8tvlwyr
Blocks of the Month and Week
875
01-14-2012 09:00 PM
Janstar
Blocks of the Month and Week
52
10-30-2011 04:23 PM
sandpat
Blocks of the Month and Week
35
12-12-2010 09:54 AM
Lacelady
Blocks of the Month and Week
89
06-17-2010 06:40 AM
