
Dresden Plate Spring challenge 2021
 05-04-2021, 03:55 PM
#61
Super Member

Join Date: Jul 2013
Location: South Dakota
Posts: 8,121
Those are really neat Watson!
Here are some that I've been working on. I don't know if I'd have the disciple to stick with it if I was making a bunch the same though.
The brown stripe with the cream is two plates that I'll put together. I'm thinking of appliqueing circles on the outer ends to match what I put in the center, just not sure what that will be yet.

 05-06-2021, 08:10 AM
#63
Super Member
Join Date: Jul 2013
Location: South Dakota
Posts: 8,121
Queenbarbiej - you finish the rounded edges before you sew the petals together. I simply traced the curve onto the wrong side of the petal, then I cut muslin squares for the facing and sewed along the traced line. Then I used my pinking shears to trim off the excess fabric, turned and pressed. I sewed the curves with a rather short stitch to give a smoother curve.
I recently bought the large set of the Perfect Circles templates, they go from 2.5" to 4". I used a pencil to mark the exact center so I could get them lined up correctly for tracing. I also them to create the centers. They are heat resistant
At that point sewing the petals together is the same as when you sew and turn the points first..
I had always looked at these and thought that turning the outer edge after all the petals were sewn together would be a nightmare, had no idea you did it first! I've been very surprised to find how easy and fun these are to make.
05-06-2021, 12:46 PM
#64
Super Member

Join Date: Nov 2010
Location: Mars
Posts: 2,549
Originally Posted by Watson

Another experiment. This isn't applique'd yet, just sitting on a towel.
Watson
Watson
 That kind of plate would be so pretty scattered across a wholecloth top, or on a pillow or a wallhanging.
05-06-2021, 12:54 PM
That kind of plate would be so pretty scattered across a wholecloth top, or on a pillow or a wallhanging.
05-06-2021, 12:54 PM
#65
Super Member
Join Date: Nov 2010
Location: Mars
Posts: 2,549
Originally Posted by Queenbarbiej
Beautiful Macybaby. I've never done the rounded dresden plate. Is it easy?
You could also finish the curved ends with a starch-prepared method - brush some heavy starch on the curved end and press the edge over a heat-resistant template - you can do this before you sew the wedges together or afterward. Steam press the sewn plate flat, use a little School Glue stick to baste it to the block and sew around the edges.
Or you could mark a quarter-inch hem all around the plate with a wash-out marker and use needle-turn applique to apply it to the block. I love needle-turn, but I'm juggling too many projects right now to even think about hand applique, but it's a nice project to take with you in the car or to work on while you're watching tv.

Last edited by thepolyparrot; 05-06-2021 at 12:56 PM.
05-06-2021, 01:04 PM
#66
Super Member
Join Date: Nov 2010
Location: Mars
Posts: 2,549
Originally Posted by Macybaby
The brown stripe with the cream is two plates that I'll put together. I'm thinking of appliqueing circles on the outer ends to match what I put in the center, just not sure what that will be yet.
The circles idea sounds pretty amazing - very inventive!
05-06-2021, 05:03 PM
#67
Senior Member
Thread Starter

Join Date: Jun 2011
Location: Ontario, Canada
Posts: 305
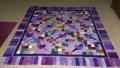
Originally Posted by Macybaby
Here is a picture of the Round Robbin quilt I used the plates on. I only added the four corners, the rest was done by other participants.
05-06-2021, 05:05 PM
#68
Senior Member
Thread Starter
Join Date: Jun 2011
Location: Ontario, Canada
Posts: 305
Originally Posted by juliasb
I have decided to drop out of this. I was iffy to start with and since my time just can hold another activity the completion of my current Dresden Plate will have to wait. To think I could pull out the WIP and finish it up while working on the projects I have going was not to smart on my end. I will watch this thread. I love to see other Dresden Plate quilts and I will post here a pic of one of my first ones. I made this King Size quilt more than 30 years ago.
05-06-2021, 05:10 PM
#69
Senior Member
Thread Starter
Join Date: Jun 2011
Location: Ontario, Canada
Posts: 305
Originally Posted by Watson
My first Dresden plate and I'm hooked. I've been looking at Dresden plate videos all day long!
Still needs a centre.
Watson
Still needs a centre.
Watson
05-06-2021, 05:26 PM
#70
Senior Member
Thread Starter
Join Date: Jun 2011
Location: Ontario, Canada
Posts: 305
My plan today was to do a border - and I was going to make a fancy border - diamonds. I pulled out my border book that I bought and never used and figured out everything, did the math, cut, and started sewing strips. And then I realized the border would only add 1.4" and I didn't think it would like right that thin. I decided to set aside those pieces for another quilt and just went for a typical border.
Normally I would add the yellow all the way around, then the blue. But I thought hey why not sew the yellow and blue strips together first? It will have the same outcome! Nope, nope it doesn't. Got a small yellow stripe thing happening in the corners, whoops. Now I know why you go around one border at a time. My plan is to sandwich it this weekend and maybe even quilt it.
I can't get the photo with a border added, but will post on the weekend hopefully


