
Singer 15-91 ugly bottom stitching


 06-15-2012, 06:44 AM
#32
Member
Thread Starter
Join Date: Jun 2012
Location: White Plains, NY
Posts: 11
Originally Posted by SunlitenSmiles

oh it is not in the tension correctly, it is on the wire but not the metal 'U'.
06-15-2012, 07:11 AM
#33
Member
Thread Starter
Join Date: Jun 2012
Location: White Plains, NY
Posts: 11
Originally Posted by Charlee
Mike, are you holding both top and bobbin threads as you start your seam for the first stitches? Then you can let them go and just stitch....
06-15-2012, 08:47 AM
#34
Member
Join Date: Jun 2012
Posts: 11
Well, taking the slack out of the first stitch will make the second stitch tighter, which will make the third one tighter...so, yes, IME, holding the thread tails as you begin does help.
Should that not work, you could always start sewing before where you need to, then go back and pick out the thread from the first few messy stitches.
Should that not work, you could always start sewing before where you need to, then go back and pick out the thread from the first few messy stitches.
06-15-2012, 10:02 AM
#35
Member
Thread Starter
Join Date: Jun 2012
Location: White Plains, NY
Posts: 11
Originally Posted by crisscross
Well, taking the slack out of the first stitch will make the second stitch tighter, which will make the third one tighter...so, yes, IME, holding the thread tails as you begin does help.
Should that not work, you could always start sewing before where you need to, then go back and pick out the thread from the first few messy stitches.
Should that not work, you could always start sewing before where you need to, then go back and pick out the thread from the first few messy stitches.
In any case, thanks to everyone who is trying to help. I really appreciate it!
06-15-2012, 10:51 AM
#36
Senior Member

Join Date: Feb 2012
Location: Oregon
Posts: 809
Ditto on all the above suggestions. Re-thread, larger needle, check for burrs, hold the thread ends when starting.
Have you considered getting a teflon roller foot to improve fabric handling since you say your fabric is slippery? My Hubby sews canvas a lot (for his black powder reenactor hobby) and uses a roller foot and size 18 needles for the heaviest work. The 15-91 uses low shank attachments so a aftermarket roller foot shold be easy to find ... You say you recently got the machine - did you give it a good oiling everywhere before you started using it?
Have you considered getting a teflon roller foot to improve fabric handling since you say your fabric is slippery? My Hubby sews canvas a lot (for his black powder reenactor hobby) and uses a roller foot and size 18 needles for the heaviest work. The 15-91 uses low shank attachments so a aftermarket roller foot shold be easy to find ... You say you recently got the machine - did you give it a good oiling everywhere before you started using it?
06-15-2012, 02:54 PM
#37
Senior Member
Join Date: May 2012
Posts: 911
Mike,
I put 4 hrs on mine last night....and read many sites on threading and needle position,, then tried them all. I had this same problem when I got this, finally cured the problem but can't remember what it was..
last night, I had the same problem as you,, it's not constant. using 100/18 110/18 100/16 and a ploy thread.
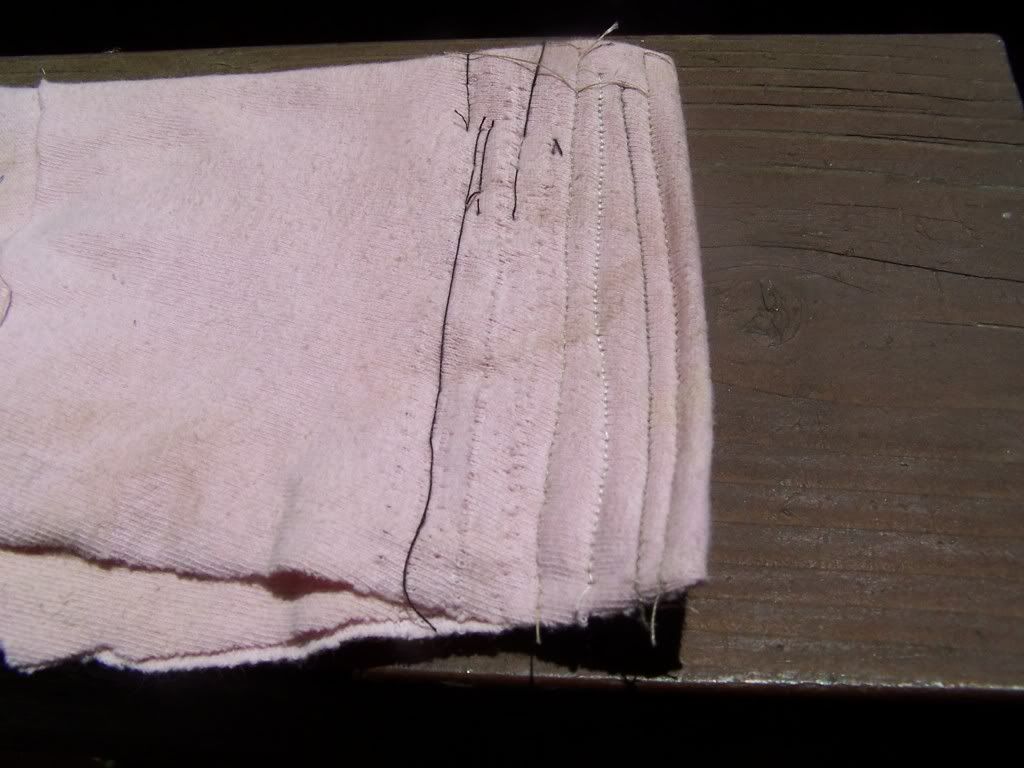
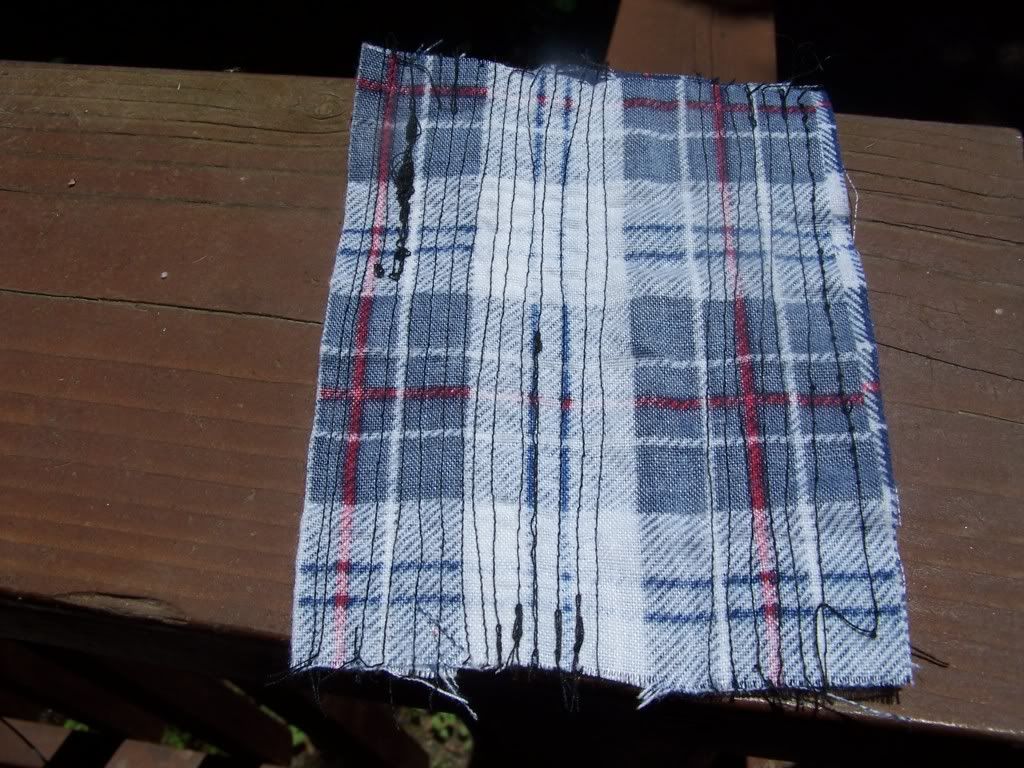
My balling happens most often as it leaves the fabric,, the white stitches are from a standard treadle black is the 15 - 91
1st is 8 layers of T shirt next is only two
I put 4 hrs on mine last night....and read many sites on threading and needle position,, then tried them all. I had this same problem when I got this, finally cured the problem but can't remember what it was..
last night, I had the same problem as you,, it's not constant. using 100/18 110/18 100/16 and a ploy thread.
My balling happens most often as it leaves the fabric,, the white stitches are from a standard treadle black is the 15 - 91
1st is 8 layers of T shirt next is only two
Last edited by xxxxxxxxxx; 06-15-2012 at 02:57 PM.
06-16-2012, 12:30 AM
#38
Senior Member
Join Date: May 2012
Posts: 911
I played with mine during the day,,, and again tonight ,, I hope problem solved... teh pic he posted and the diagram are right ,, around the tensoiner over the hook and down to the spring then take up lever..
once again I took teh bobbin area apart down to removing the cast iron part that the hook rides in...
now you can see the loop form very well. most of the loop is on the left side ? outside, Hmm the hook is on the left side of the needle...
we know the cut out on the needle is there for the hook to past by on some machines.. ( one needle fits many ) .
we read here to put the flat side the needle on the right side / machine side , which also puts that cut out on the right side... but the cut out goes on the hook side ?? Ido and watch the loop form and twist side ways as the needle goes up.. so I turn the needle so that cut is facing teh hook, now the loop forms and stays open.
Isew and bingo she's working good BUT still at time I get a slight balling at the start if I don't pull the tails... if I raise the foot set teh pacth and go there's no balling .. I never had a ball in the run.
That needle in this machine has to go in with the flat to the outside, left ..putting the cut out facing the hook..
The 8 layers of T shirt were a piece of cake, it never missed in 5 pass or balled,
Ok taht was fun , now back to threading a new home LOL
Last edited by xxxxxxxxxx; 06-16-2012 at 12:33 AM.
06-16-2012, 05:22 AM
#39
Member
Thread Starter
Join Date: Jun 2012
Location: White Plains, NY
Posts: 11
Well, I think I finally found the problem. Top tension. After disassembling and reassembling the shuttle, checking that every joint is oiled, I decided it had to be a setting. So, I basically tried every combination of bobbin tension, and upper tension. I found that the higher the top tension, the less the underside bunching. My only problem now is that I have the top tension at max (10), and I am getting 97% good stitches. I imaging an 11 or 12 would get me 100%
Only problem is that there is no 11 or 12... So I am thinking that my top tension adjuster is bad, worn out spring perhaps? I'm going to see if I can replace the assembly before I start sewing my $1000 boat canvas. I finally see light at the end of the tunnel!
Thanks again for all the helpful suggestions.
One more request: A recommendation for a good place to buy a tension assembly online? :-)
Edit: Never mind. I found one on singeronline for a whopping $6.00!
Last edited by mikec; 06-16-2012 at 05:30 AM.
06-16-2012, 05:48 AM
#40
Power Poster
Join Date: Mar 2011
Location: Somewhere
Posts: 15,506
Originally Posted by mikec
Well, I think I finally found the problem. Top tension. After disassembling and reassembling the shuttle, checking that every joint is oiled, I decided it had to be a setting. So, I basically tried every combination of bobbin tension, and upper tension. I found that the higher the top tension, the less the underside bunching. My only problem now is that I have the top tension at max (10), and I am getting 97% good stitches. I imaging an 11 or 12 would get me 100%
Only problem is that there is no 11 or 12... So I am thinking that my top tension adjuster is bad, worn out spring perhaps? I'm going to see if I can replace the assembly before I start sewing my $1000 boat canvas. I finally see light at the end of the tunnel!
Thanks again for all the helpful suggestions.
One more request: A recommendation for a good place to buy a tension assembly online? :-)
Edit: Never mind. I found one on singeronline for a whopping $6.00!
Only problem is that there is no 11 or 12... So I am thinking that my top tension adjuster is bad, worn out spring perhaps? I'm going to see if I can replace the assembly before I start sewing my $1000 boat canvas. I finally see light at the end of the tunnel!
Thanks again for all the helpful suggestions.
One more request: A recommendation for a good place to buy a tension assembly online? :-)
Edit: Never mind. I found one on singeronline for a whopping $6.00!
Last edited by miriam; 06-16-2012 at 05:52 AM.

Thread
Thread Starter
Forum
Replies
Last Post


