
Tissue Box Cover with Pockets - Instructions
 09-22-2014, 03:32 PM
#1
Junior Member
Thread Starter
Join Date: Aug 2014
Location: Pittsburgh
Posts: 138
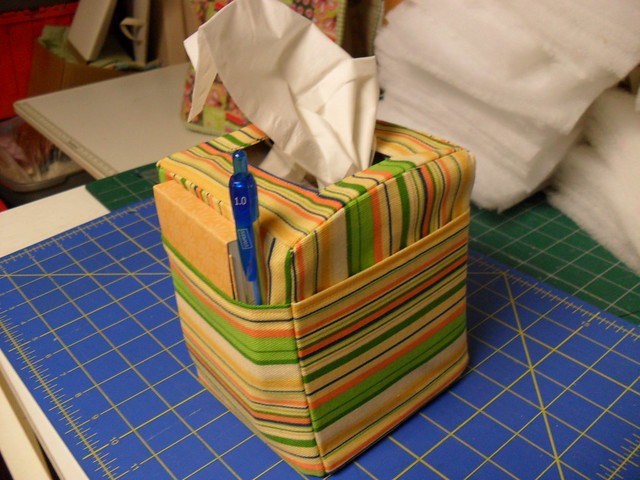
These instructions work for any size square tissue box.
Supplies Needed:
14″ of 54″ home dec fabric - you could also use a quilting cotton but I would interface all structure pieces.
Thread to match your fabric
Pins
Scissors
Ruler
Tape measure
Pen
Sewing machine
Iron and ironing board
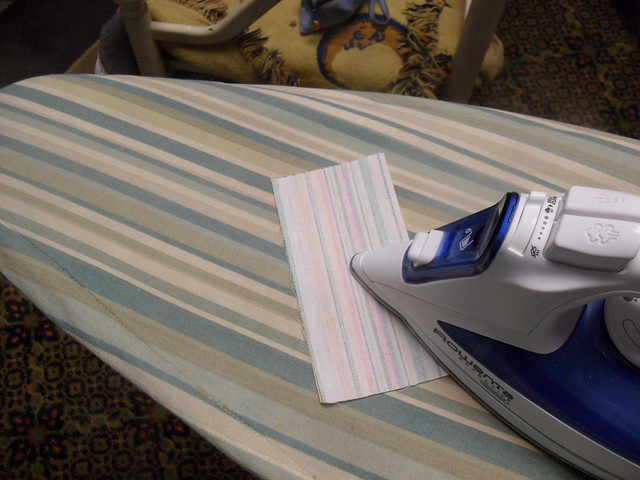
1. Press your fabric.
2. Measure your tissue box. Add 1″ to the width and height for the top. Add 1″ to the width & height for the sides. Mine was 4-1/2″ x 4-1/2″ for the top. 4-1/2″ x 5-1/2 for the sides. I cut 2 pieces 5-1/2″ x 5-1/2″ for the top. I cut 4 pieces 5-1/2″ x 6-1/2″ for the sides. For the pockets, use your side dimensions minus 1-1/2″ from the height and cut 4 pieces. My side dimensions with the 1″ added was 5-1/2″ x 6-1/2″ so I cut 5-1/2″ x 5″. Got it? So I have now have:
2 pieces 5-1/2″ x 5-1/2″ for top
4 pieces 5-1/2″ x 6-1/2″ for sides
4 pieces 5-1/2″ x 5″ for pockets
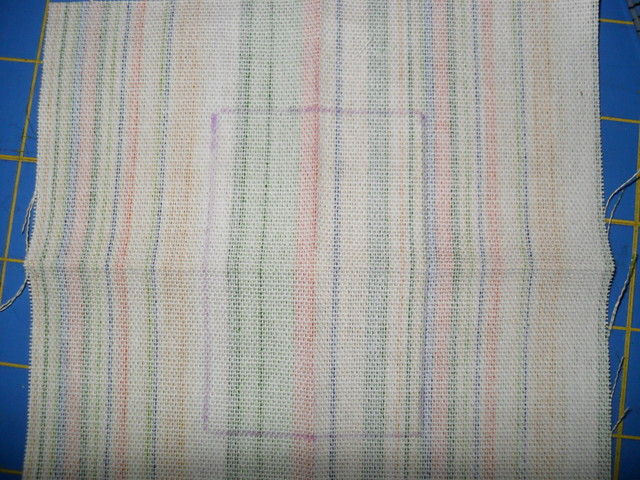
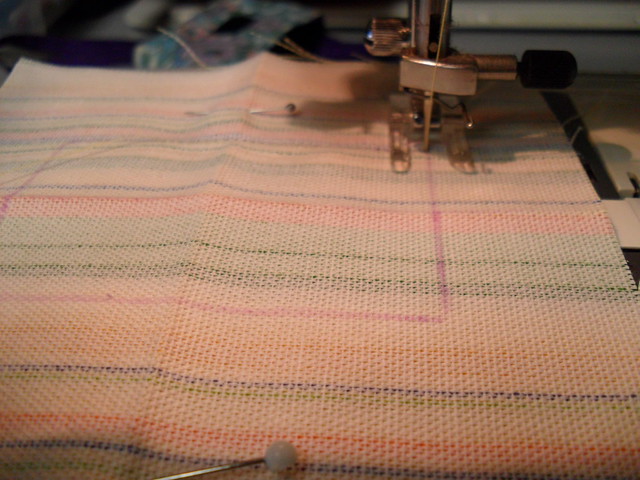
3. To make the top of your box. Take one of the top pieces and take to the ironing board. Press perfectly in half to crease. Open up and press perfectly in half the other way to make another crease.
With a marking pen, draw a 2″ x 3″ rectangle. Because the piece is creased, I know my center point and my rectangle will be perfectly placed. Use that center point as your guide.
Place the other matching piece, right sides together. Sew along the line you have just drawn.
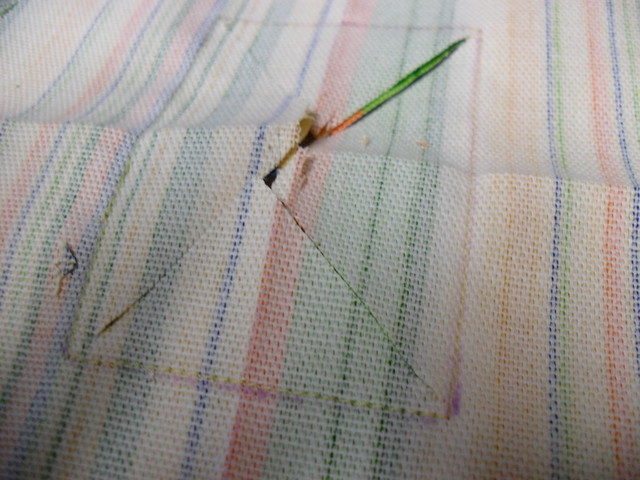
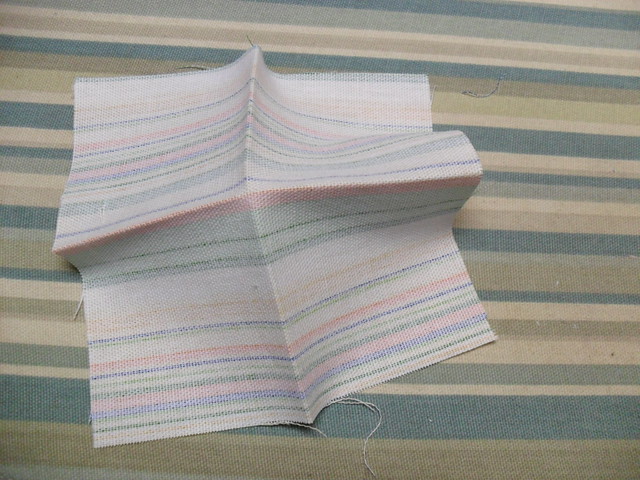
Cut in the center of the rectangle and cut to the points as shown.
Cut out the rest of the rectangle.
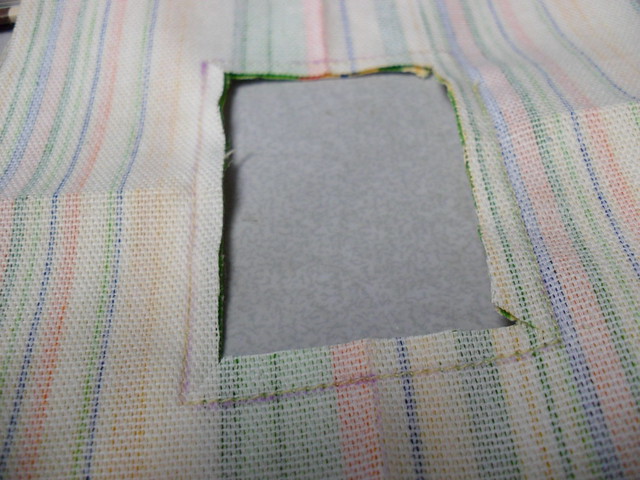
Push one side through the hole to the other side so that wrong sides are together. Press.
Top stitch close to the edge of the hole as shown. I serged all the raw edges of the top together only because this was going into a basket that was being raffled at a nursing home. You do not have to do this. Chances are this won�t ever be washed and simply cutting the edges with pinking shears would be more than enough. Unless you serge the edges together, you need to baste all the raw edges of the top together. Baste very close to the outer edge.
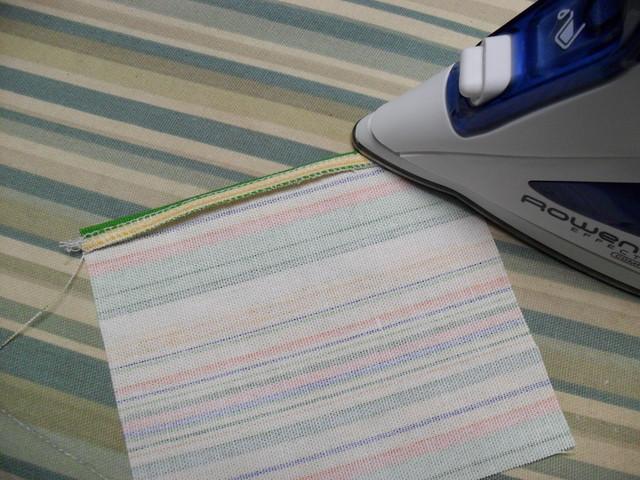
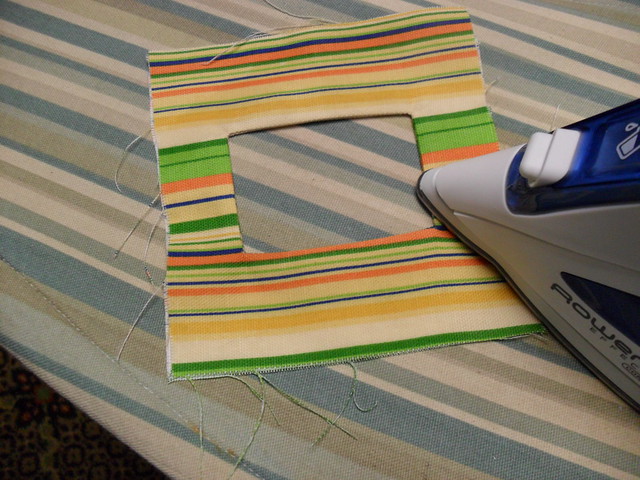
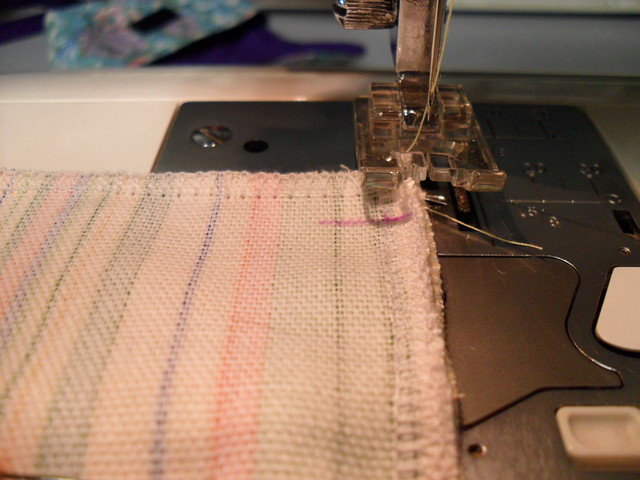
For the pocket (which are my 5-1/2″ x 5″ pieces), again I serged the top raw edge but you do not need to do that unless you have a serger and want to serge it. You could just as easily press down about 1/8″, press again about 1/4″ and top stitch.

Tip: When I am top stitching the edge of something and part of my machine foot is off the fabric, my machine has a tendency to suck the fabric down in the machine. To stop this from happening I take a scrap piece of paper and start sewing the paper. I then put my fabric on the paper and continue sewing. The paper easily tears away from the stitching when I�m done sewing.

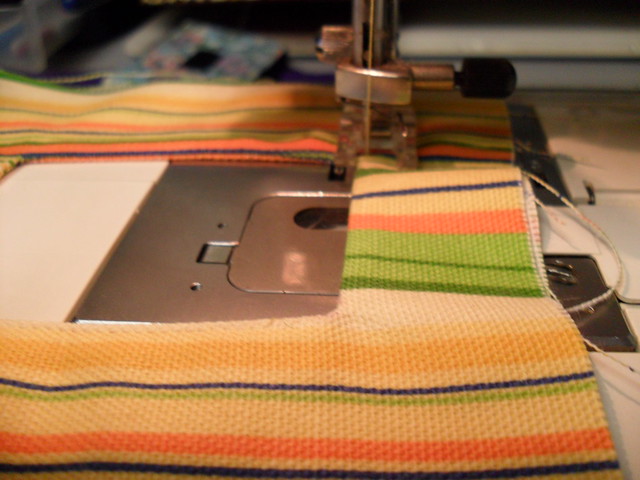
See how smoothly it stitches my edge.
For the sides, lay your side piece (mine was 5-1/2″ x 6-1/2″ face down. Place the top stitched pocket piece (mine was 5-1/2″ x 5″ ) right side down as shown. Stitch along the bottom. Again, you may serge or stitch using your sewing machine using a 1/2″ seam allowance. Do this for all 4 sides.
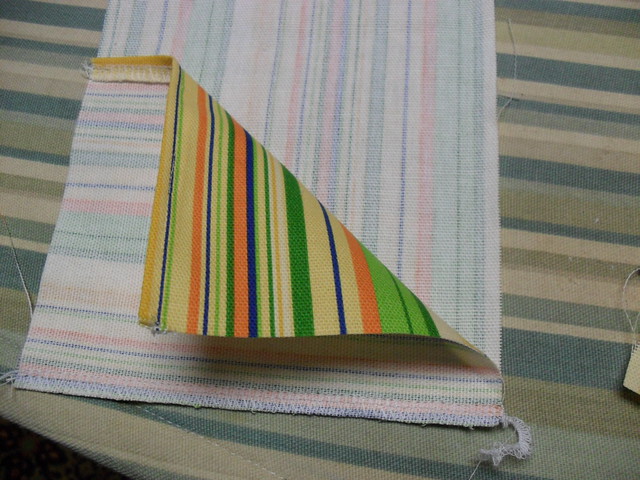
Flip pocket around to front and press.
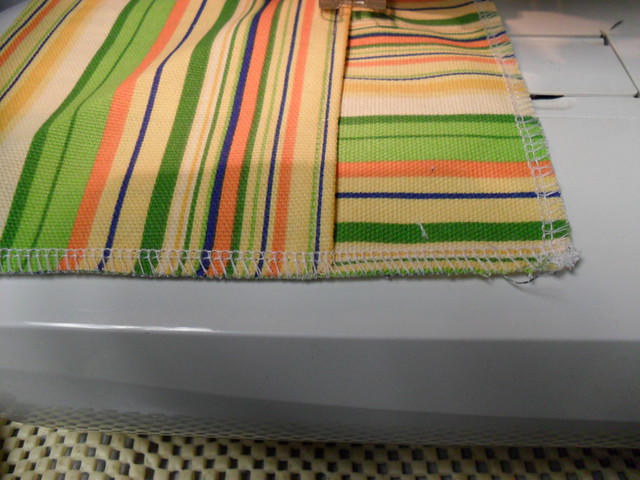
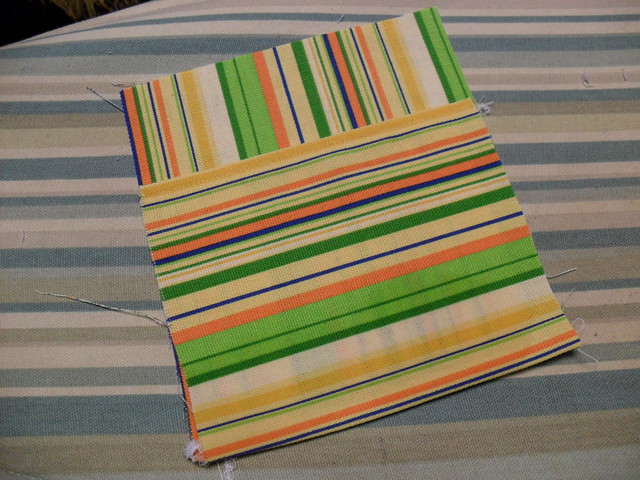
Because this is for a raffle I serged the 3 raw edges of the side pieces. If you are not serging, baste the pockets down.
To sew the sides together, mark each side piece at the 1/2″ from the top as shown. That is your starting point to stitch. Stitch using a 1/2″ seam allowance and stitch to bottom taking care to match the tops of the pockets together. I put a pin at the top of the pockets to keep them in place.
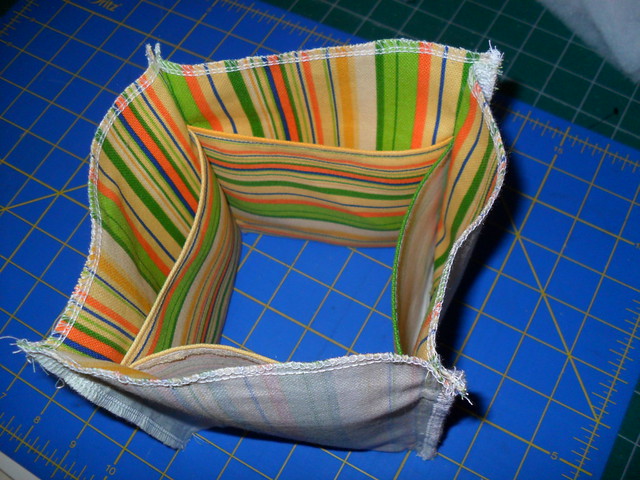
Keep sewing the 4 pieces right sides together until you have a box shape as shown.

On your top piece, mark 1/2″ in from both the top and the side on all 4 corners. The center of the x is your pivoting point.
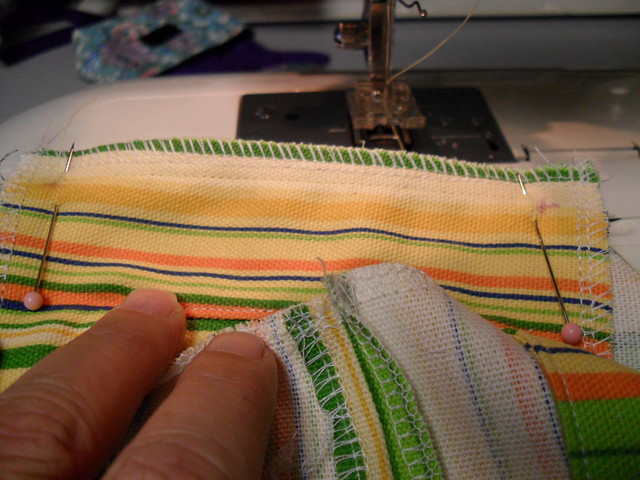
Starting with one side, pin the right side of the side to the right side of the top (that would be the side without the markings) together. Drop your needle in the center of the x and continue sewing till you reach the center of the other x. Drop your needle in the x, lift your machine foot and rotate your fabric to sew down another side. Before continuing to sew, place another pin at the new second x spot. Continue doing this until the top is sewn on. Turn right side out. Press if needed.
That is it. You are done. Quick, simple and oh so easy. If you have any questions, let me know.
 09-22-2014, 05:30 PM
#2
Junior Member
Thread Starter
Join Date: Aug 2014
Location: Pittsburgh
Posts: 138
My sample isn't quilted but it could be quilted or appliqued. I'll make a quilted sample this week so everyone can use up some scraps. I'm a scrappy happy kind of girl anyway. The pockets would be beautiful pieced or with an applique. The sides and top would be great with cotton and batting with a tight stipple. This is just your base and the end result would be the result of your quilting imagination.


Thread
Thread Starter
Forum
Replies
Last Post
craftybear
Links and Resources
2
10-25-2010 09:13 PM


