
Colorado get-together?
 03-03-2021, 06:20 AM
#231
Super Member

Join Date: Mar 2015
Location: Denver, CO
Posts: 4,254
Dorothy
Dorothy, the only one of our group who sews for a living, tells us about her recent activities:
Hello!
It was a short month!
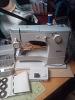
I have been doing a focus on sewing under garments which involve Lots of stretch fabric mostly blends with lycra. Most of the time I use a Pfaff 1514 (I may have # wrong) because of its flawless handling of knits, IDT foot and 3 stitch zig zag for elastic. I sent it in for a service. (The needle threader does work, but seems to take more time than normal - stab the thread through the hole.)
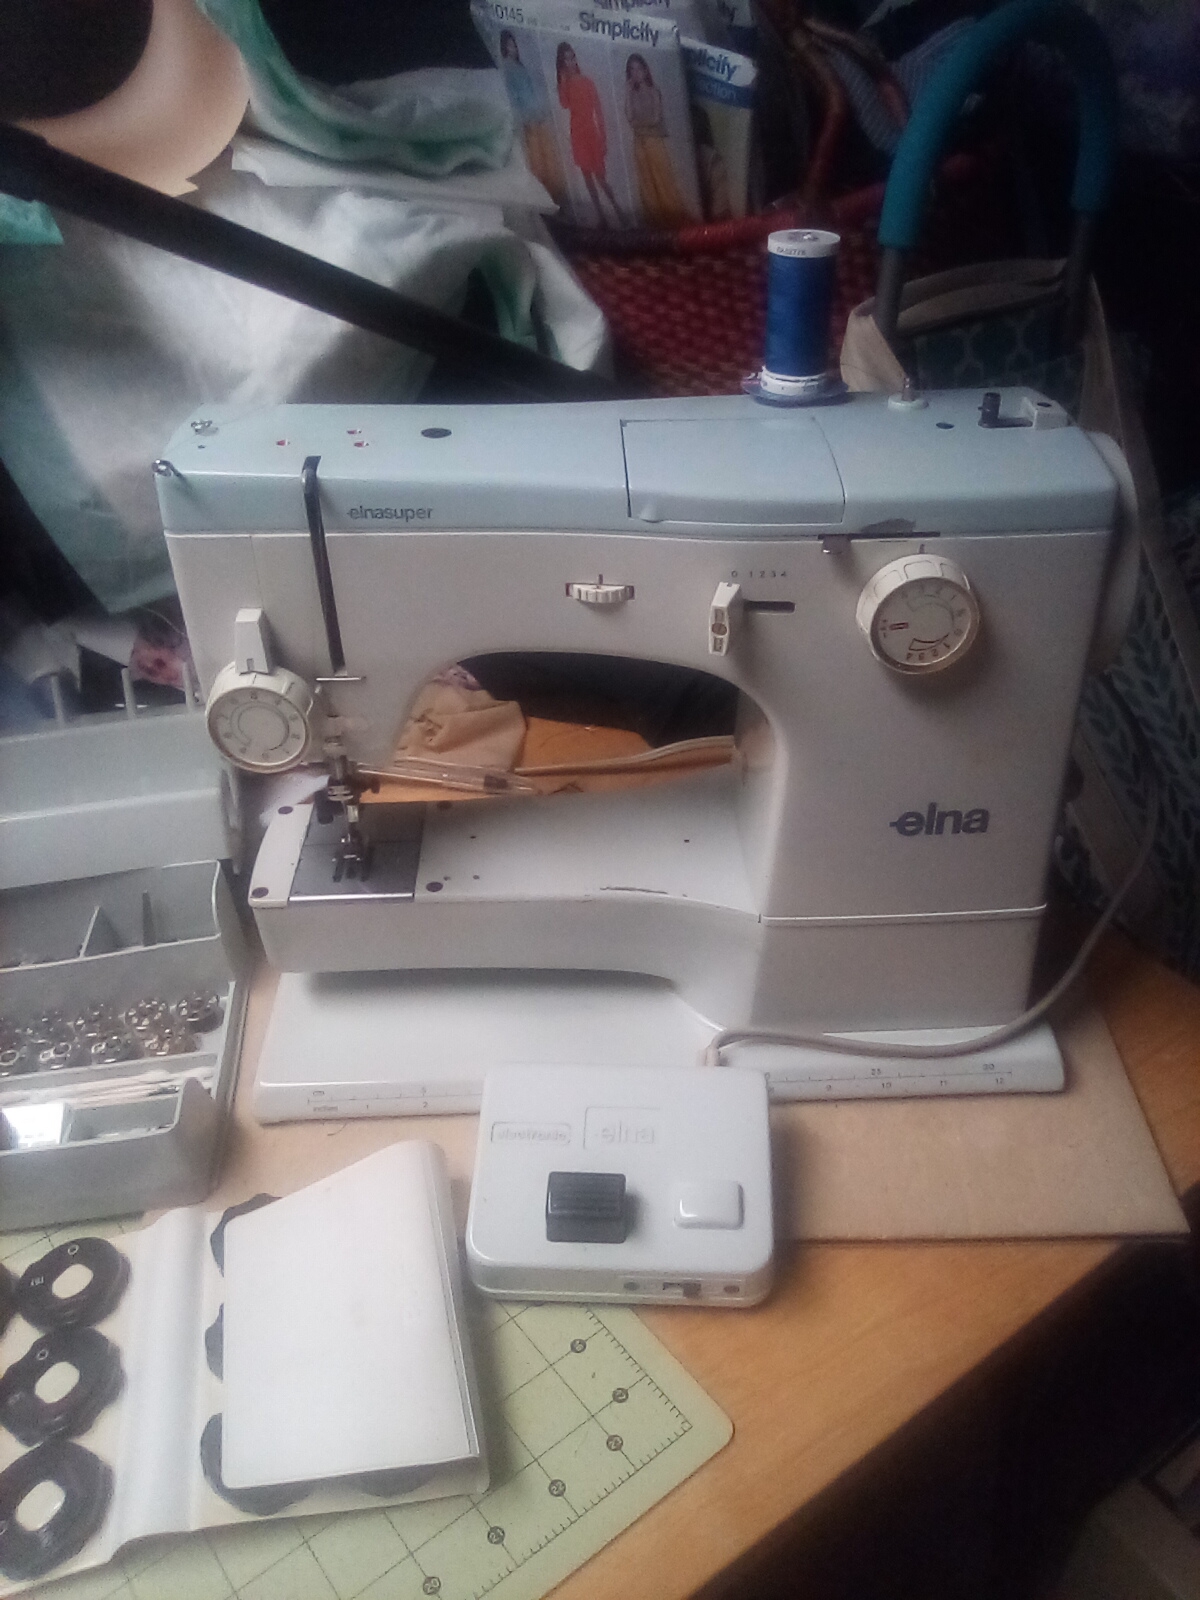
The Elna 62C has been Stepping Up and stitching very nicely on layers of Rayon Spandex and Power Mesh. I am very pleased as all I could reference in my history was sewing Quiana knits on my Kenmore before stretch needles and what a Miserable time it was.
Of course, A serger will do the seams for neatness. The elastic will be done with the Elna.
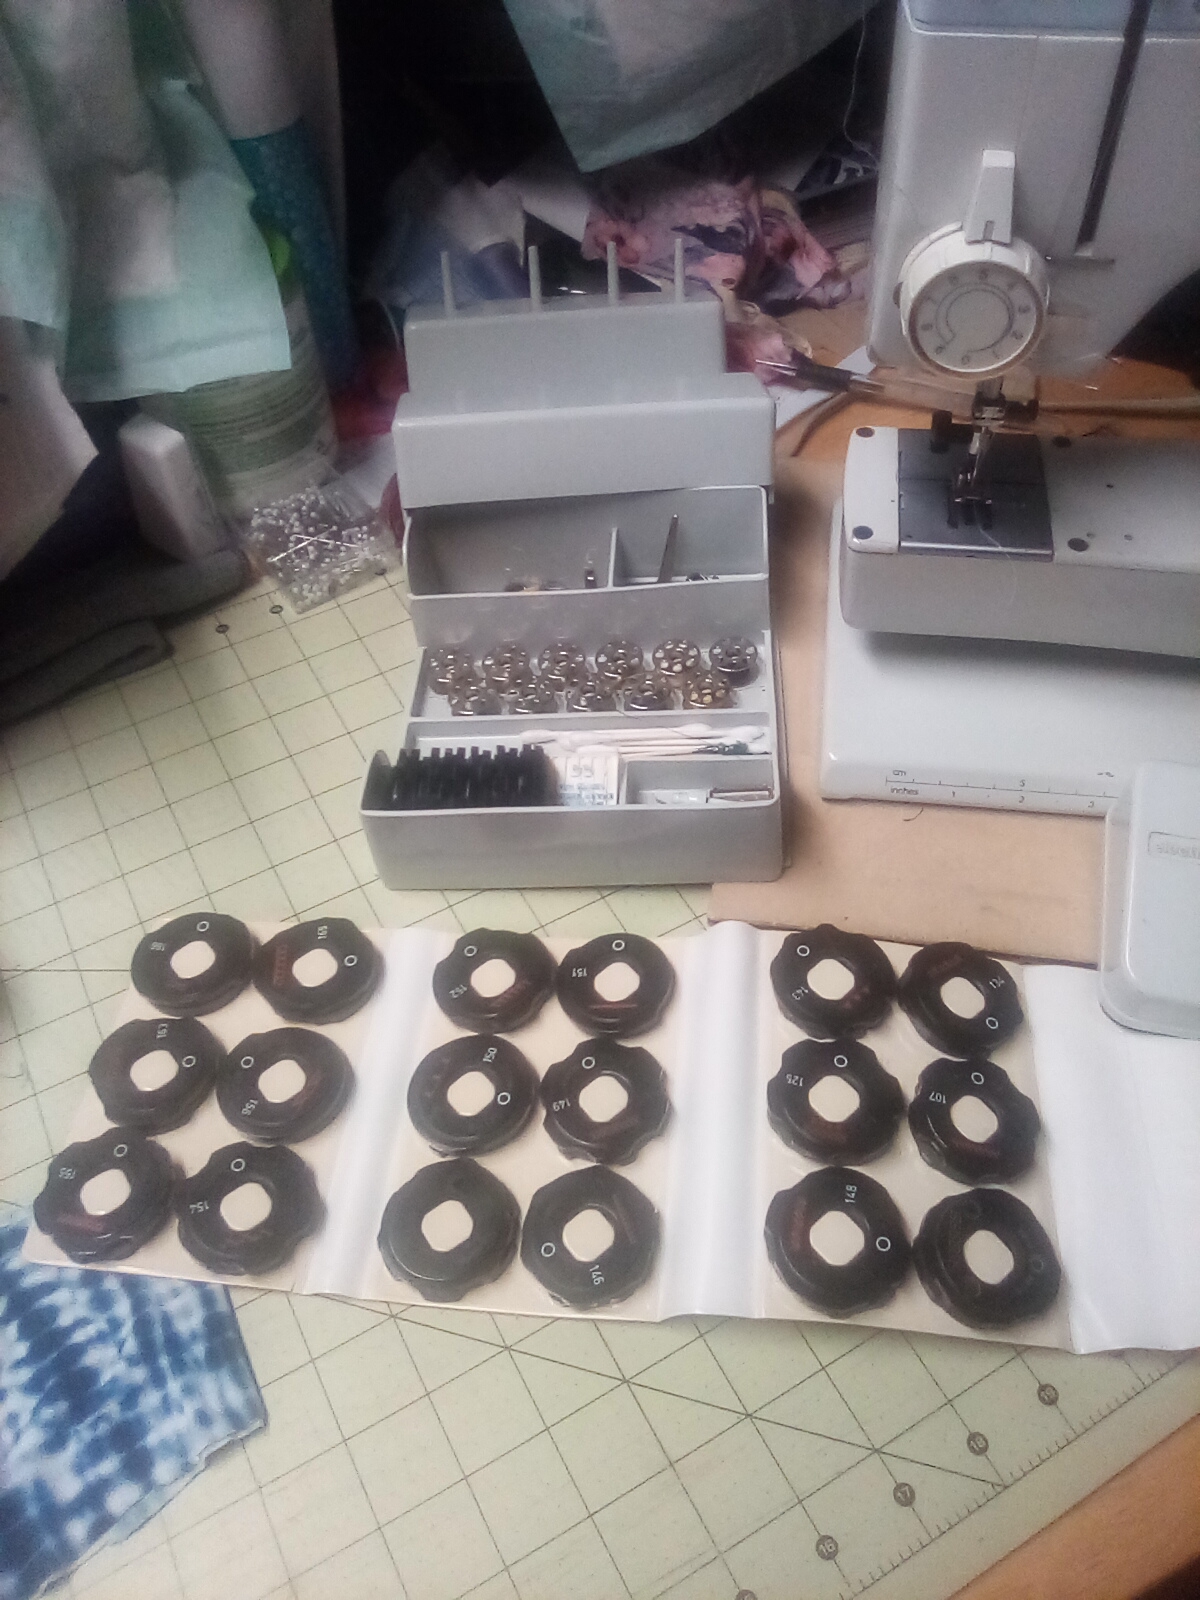
The 62C was purchased from the original owner including the fold down/ collapsible table. It had been set up so long she had to go look to see if the table did break down! The kit was complete! The only issue (Ha! It was covered in layers of masking tape to testify it was Used!) was the reverse which was slow to respond, half length stitches. Oil & patience have much improved the general sewing. There may still be a slight issue with the double cams, but have not checked recently. Most stitching can be accomplished using the 5 built in stitches which is really convenient! It is picky about every setting unlike a Singer 319 swing needle which I do not have stretch needles for. The photos are of the machine plus fabric being sewn. The table is deep in storage so no current photo.
I am signed up for a class "Men's Wear" utilizing the Garment Designer Software by Susan Lazear which starts Saturday. I need to get prepped for the class.
Dorothy
Dianne
Diane got a nice looking machine recently, which she tells us about in some detail:
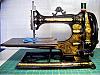
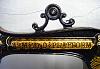
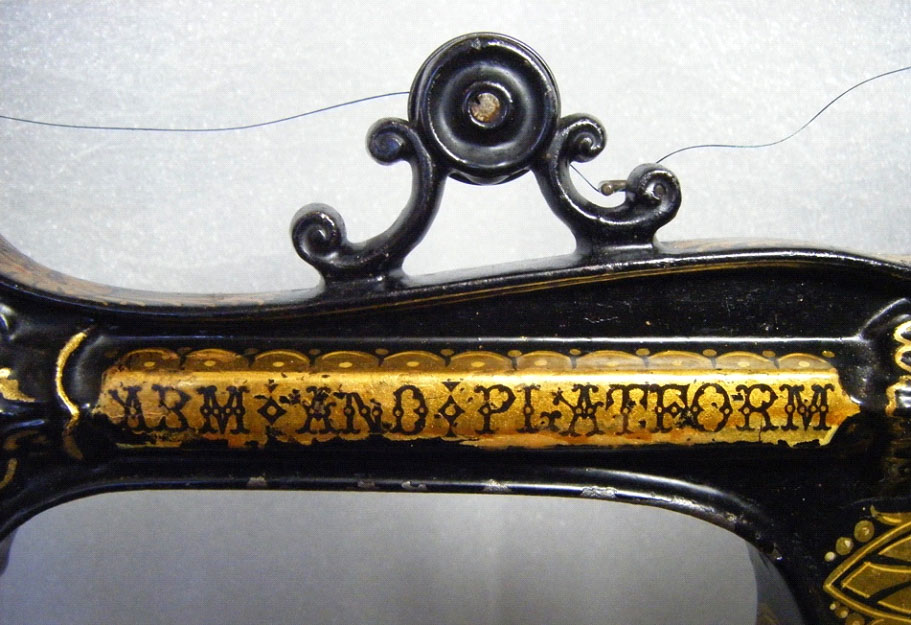
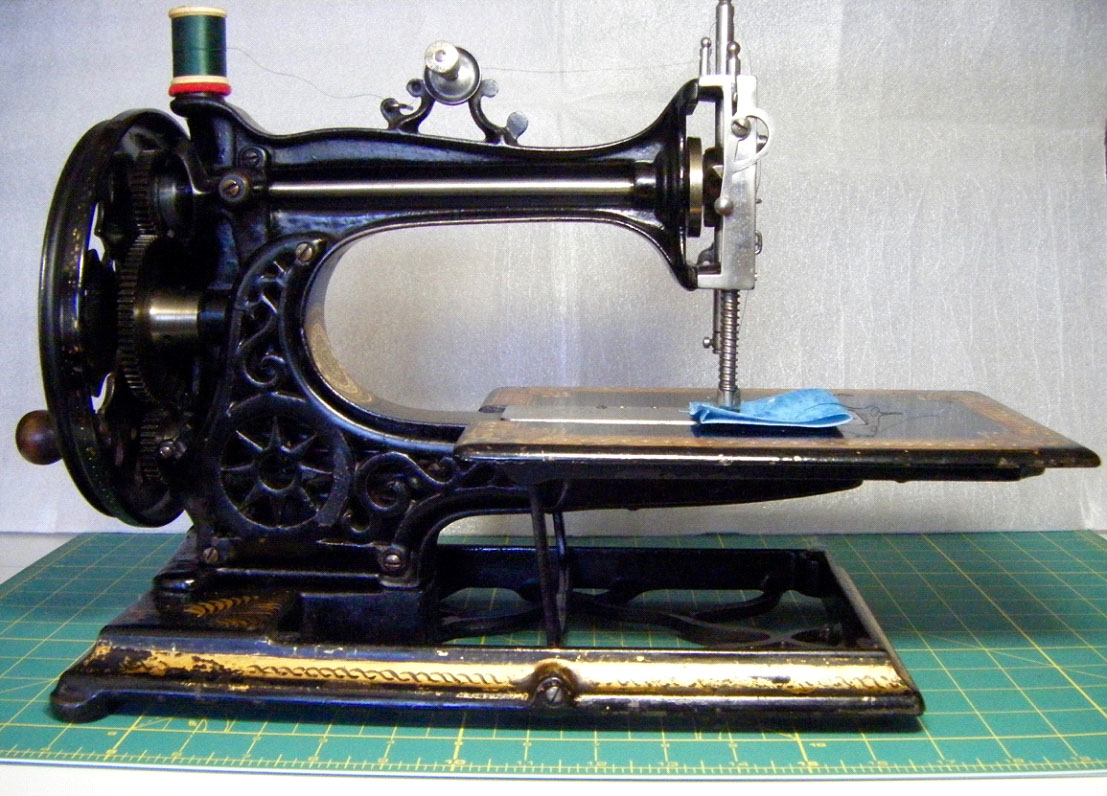
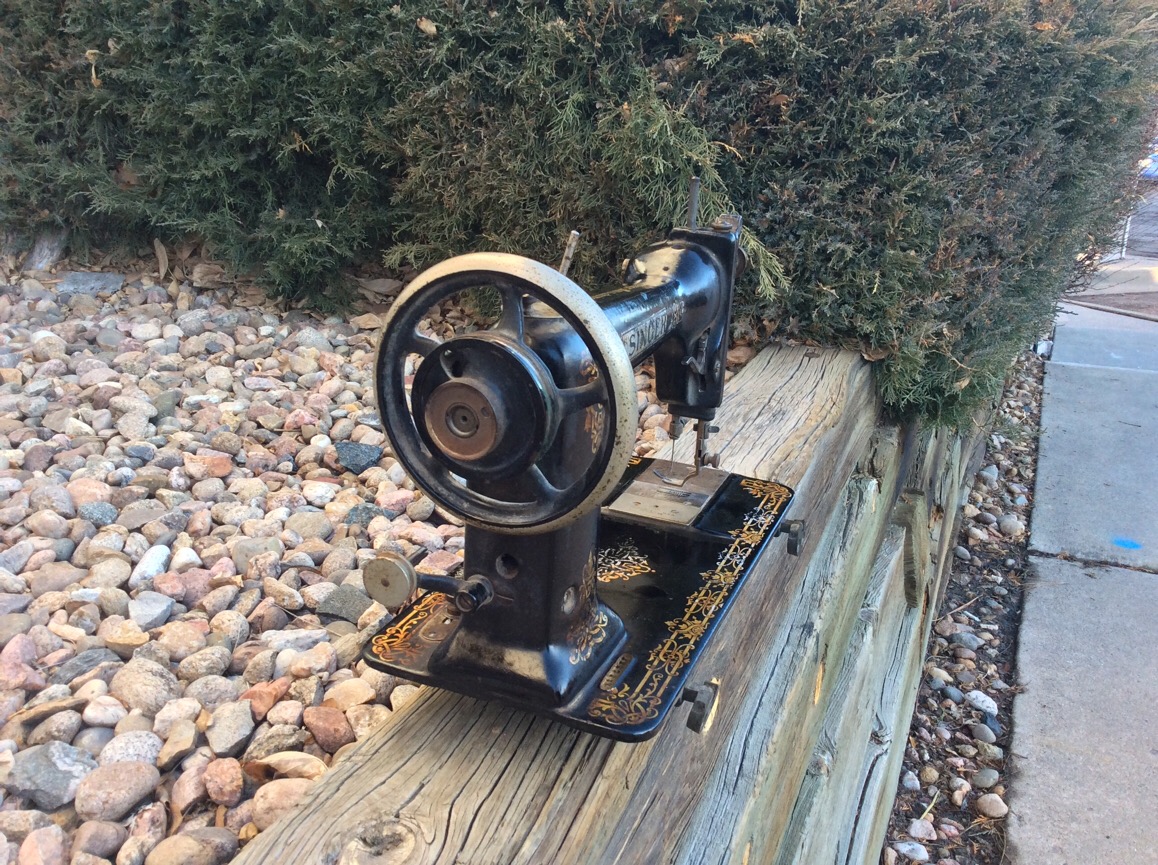
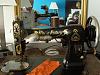
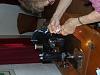
The Edward Ward�s Arm and Platform is one of those iconic sewing machines that every collector lusts after. This one was acquired recently, and it has taken time to clean, adjust, fabricate a missing part and get it to produce stitches. Finally, with the help of my husband, that has been accomplished.
This is not the most perfect example, but it is very good and I am thrilled to have it. We do not have a good photo setup for something of this size, so please bear with these pictures. My impression is the one often mentioned � Ed Ward was a perfectionist, and no detail escaped his attention. At a glance the machine appears to have a simple upper tensioner�..but no.
... to be continued
Dorothy, the only one of our group who sews for a living, tells us about her recent activities:
Hello!
It was a short month!
I have been doing a focus on sewing under garments which involve Lots of stretch fabric mostly blends with lycra. Most of the time I use a Pfaff 1514 (I may have # wrong) because of its flawless handling of knits, IDT foot and 3 stitch zig zag for elastic. I sent it in for a service. (The needle threader does work, but seems to take more time than normal - stab the thread through the hole.)
The Elna 62C has been Stepping Up and stitching very nicely on layers of Rayon Spandex and Power Mesh. I am very pleased as all I could reference in my history was sewing Quiana knits on my Kenmore before stretch needles and what a Miserable time it was.
Of course, A serger will do the seams for neatness. The elastic will be done with the Elna.
The 62C was purchased from the original owner including the fold down/ collapsible table. It had been set up so long she had to go look to see if the table did break down! The kit was complete! The only issue (Ha! It was covered in layers of masking tape to testify it was Used!) was the reverse which was slow to respond, half length stitches. Oil & patience have much improved the general sewing. There may still be a slight issue with the double cams, but have not checked recently. Most stitching can be accomplished using the 5 built in stitches which is really convenient! It is picky about every setting unlike a Singer 319 swing needle which I do not have stretch needles for. The photos are of the machine plus fabric being sewn. The table is deep in storage so no current photo.
I am signed up for a class "Men's Wear" utilizing the Garment Designer Software by Susan Lazear which starts Saturday. I need to get prepped for the class.
Dorothy

Dianne
Diane got a nice looking machine recently, which she tells us about in some detail:
The Edward Ward�s Arm and Platform is one of those iconic sewing machines that every collector lusts after. This one was acquired recently, and it has taken time to clean, adjust, fabricate a missing part and get it to produce stitches. Finally, with the help of my husband, that has been accomplished.
This is not the most perfect example, but it is very good and I am thrilled to have it. We do not have a good photo setup for something of this size, so please bear with these pictures. My impression is the one often mentioned � Ed Ward was a perfectionist, and no detail escaped his attention. At a glance the machine appears to have a simple upper tensioner�..but no.

... to be continued
 03-03-2021, 06:30 AM
#232
Super Member
Join Date: Mar 2015
Location: Denver, CO
Posts: 4,254
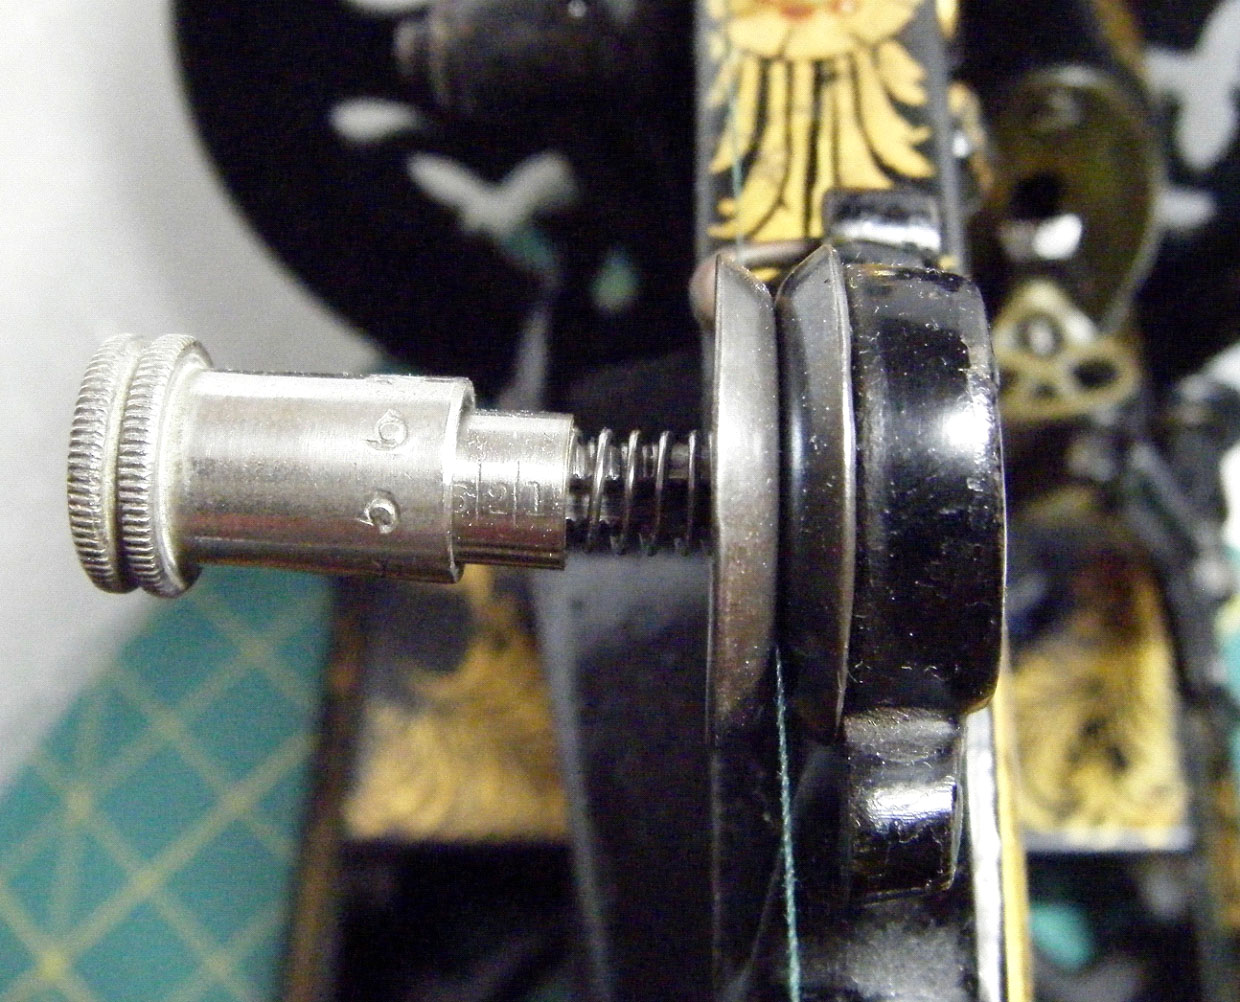
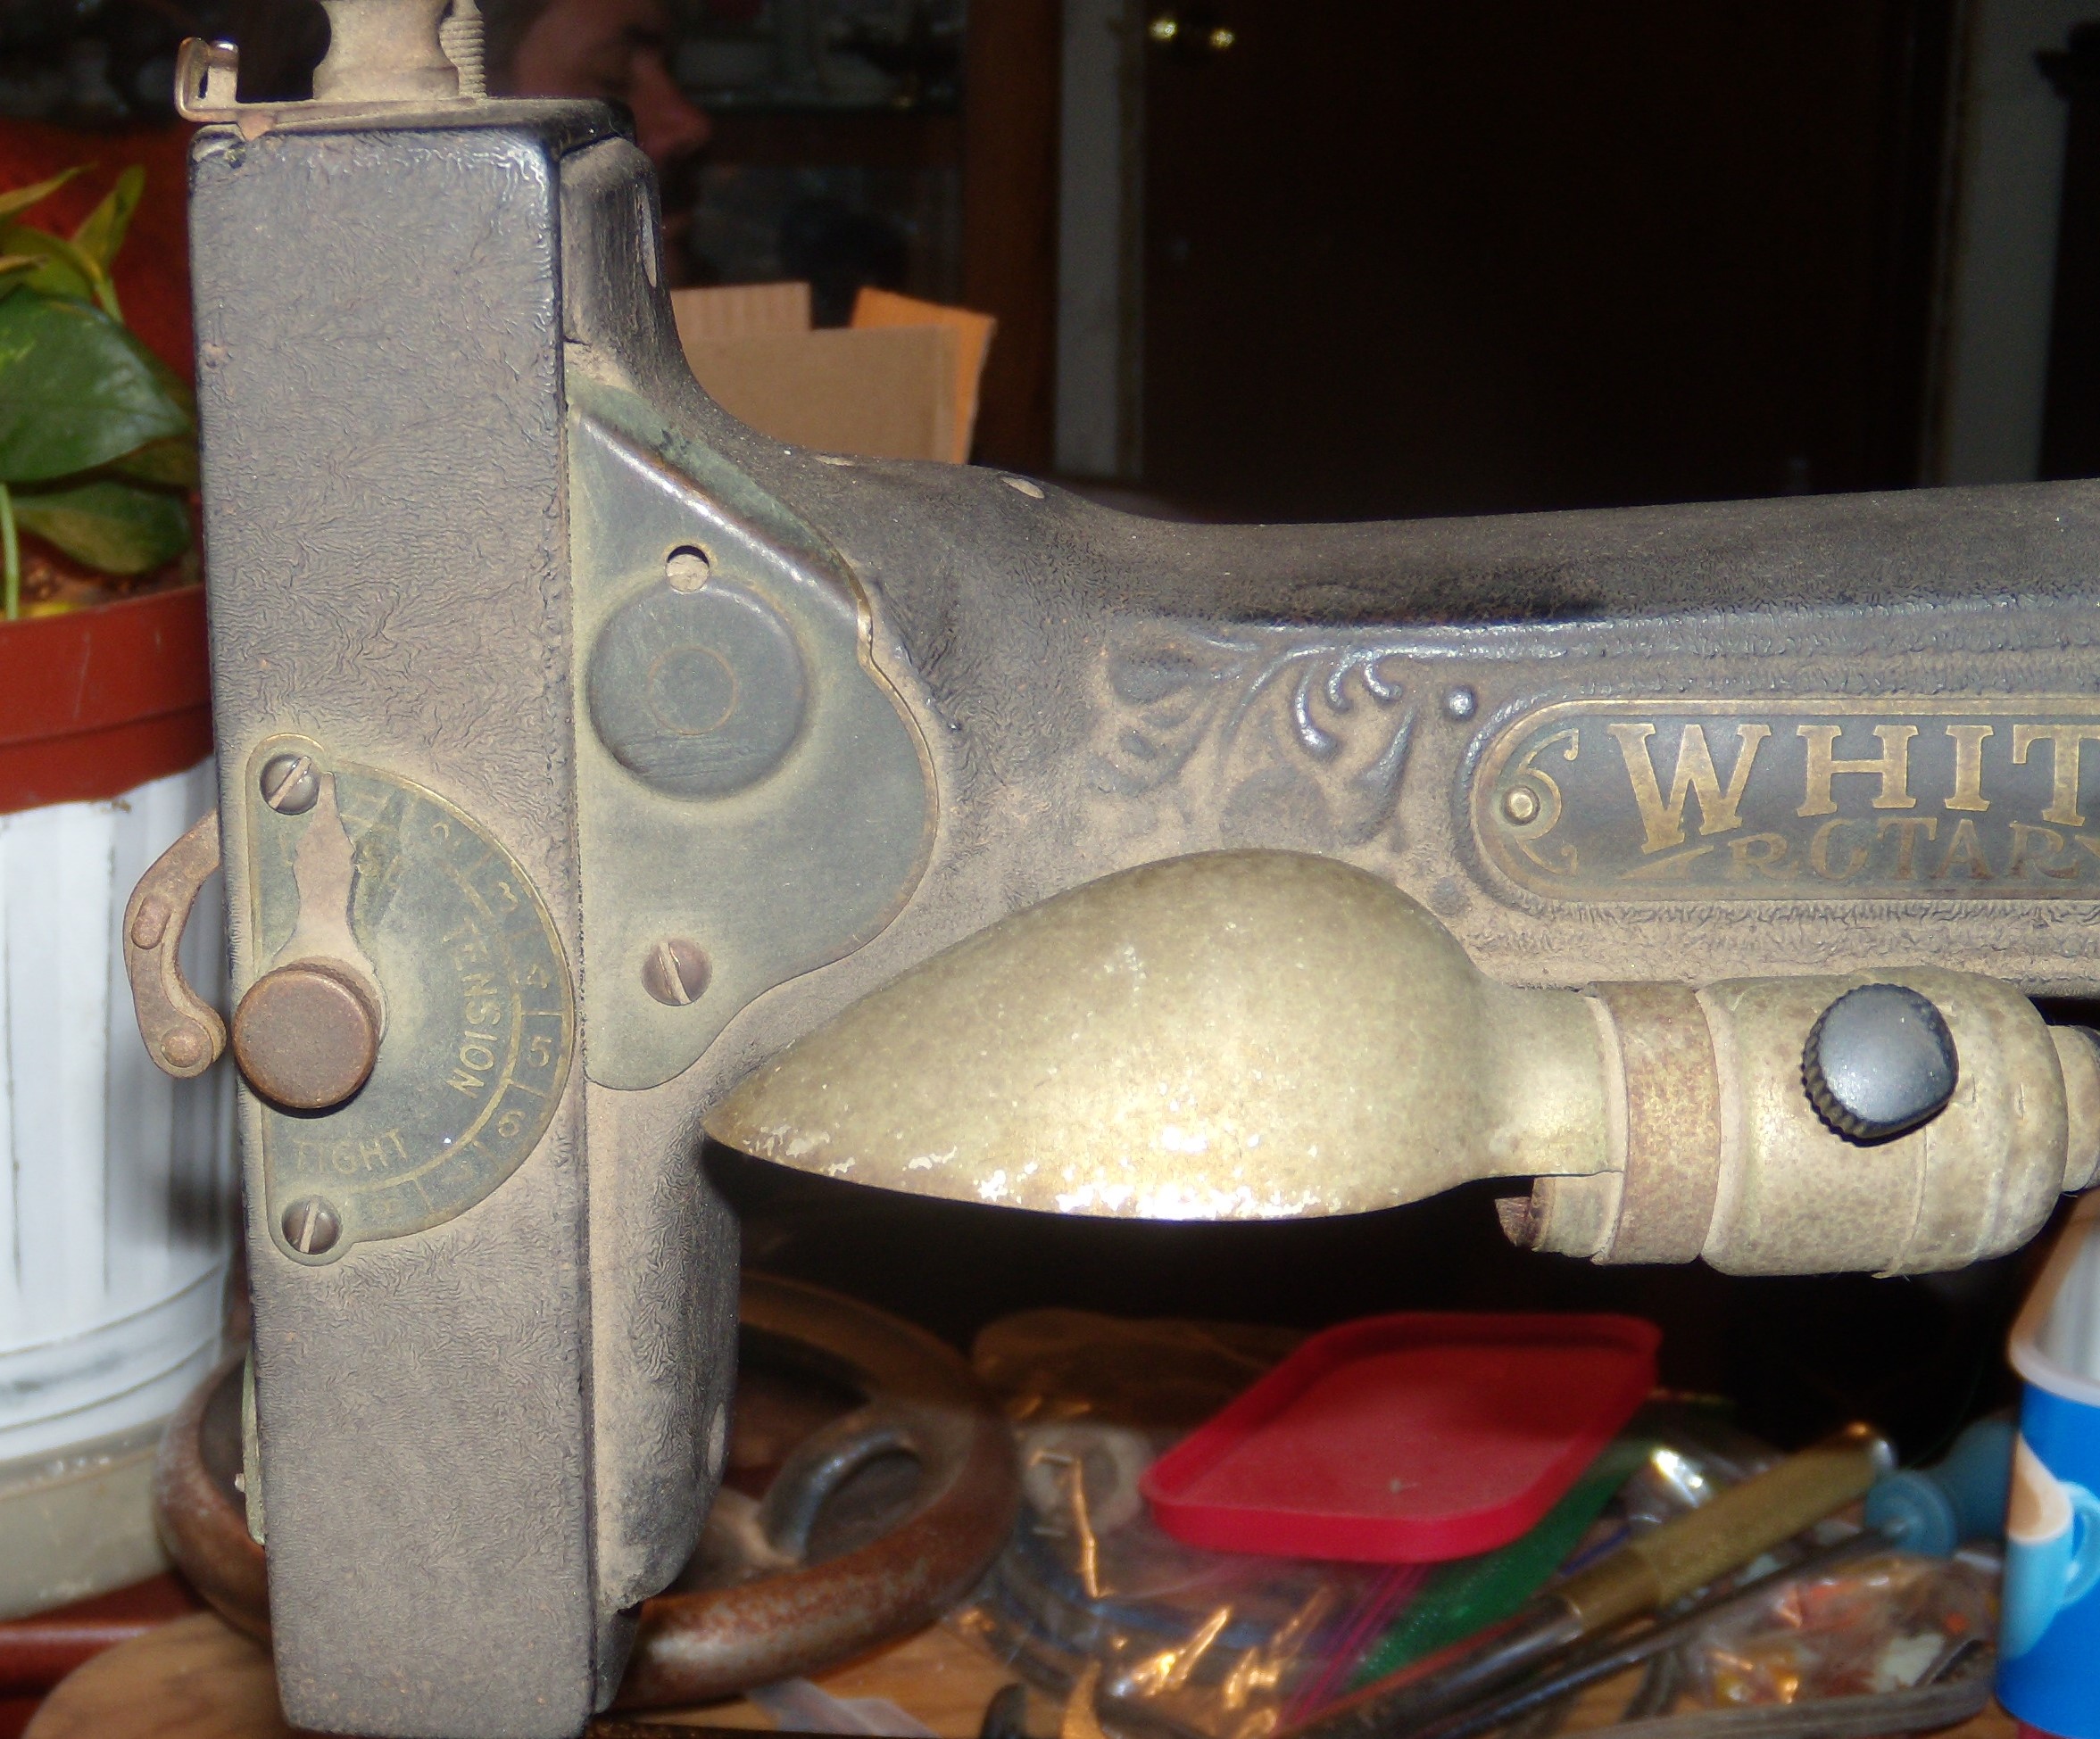
There are two numbered scales to adjust the upper tension on Ward�s patented tensioner. And they work nicely in tandem.
To disconnect the mechanism and wind a bobbin, the lever you turn is labeled, in case you should forget how you have the machine set, Machine or Winder.
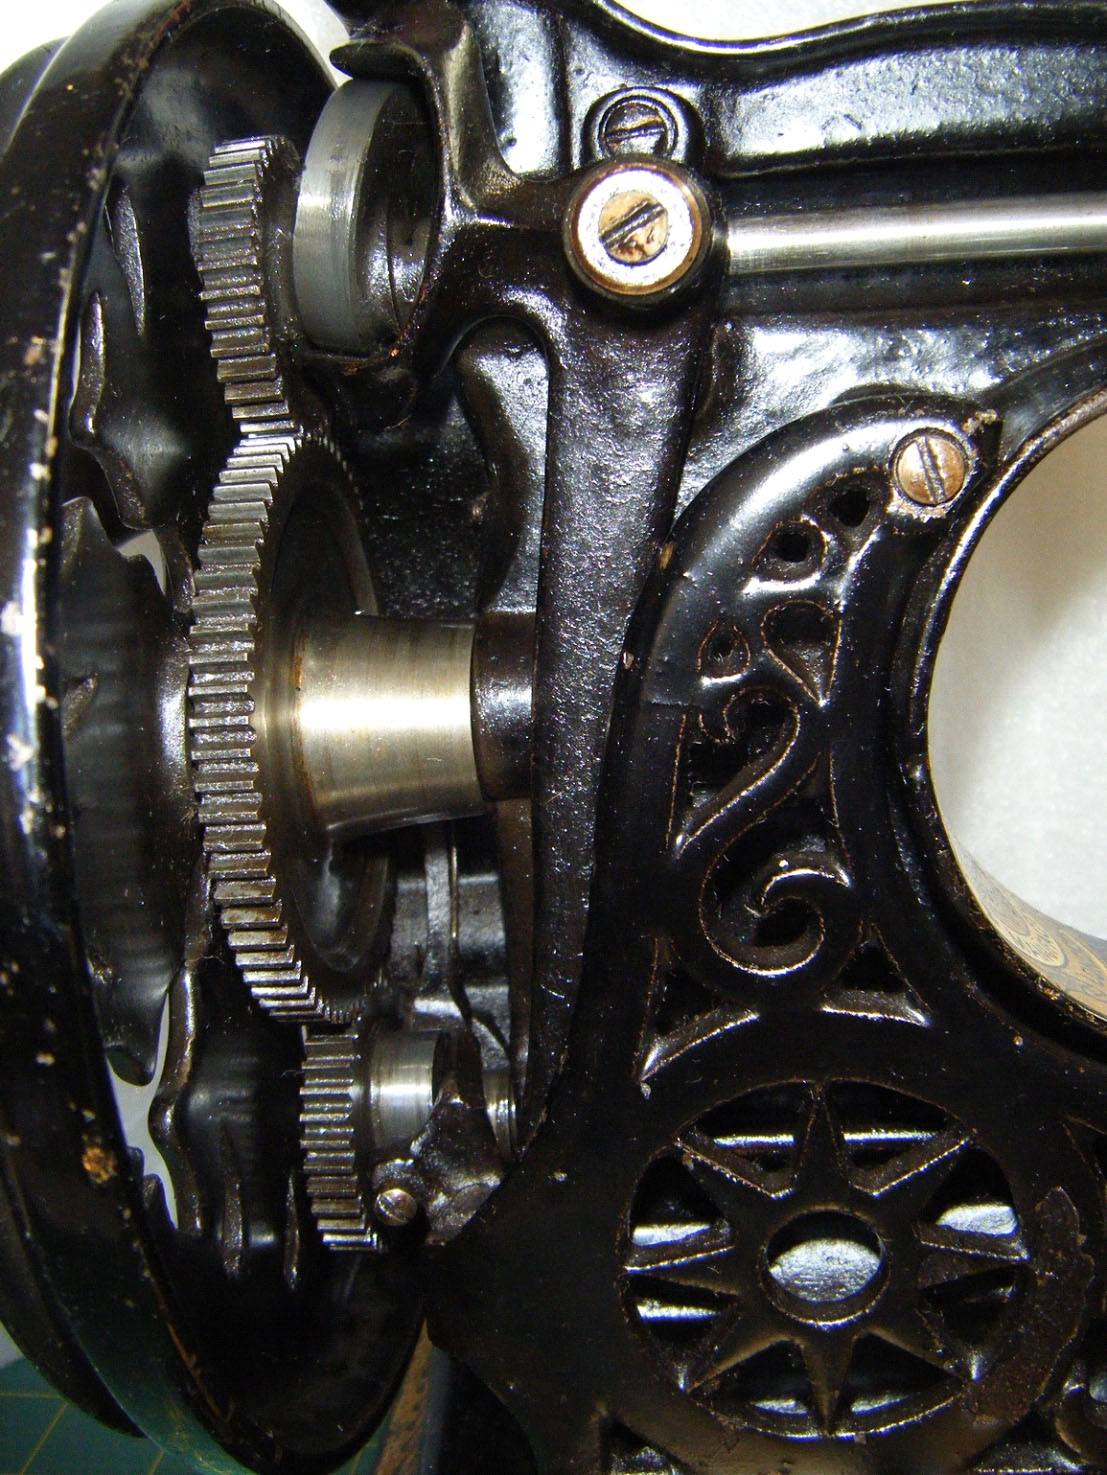
Turning the machine around reveals that the back is open, with the gears and cams easily visible, easy to oil. Everything looks built to last a long, long, time.
... to be continued
03-03-2021, 06:43 AM
#233
Super Member
Join Date: Mar 2015
Location: Denver, CO
Posts: 4,254
To change between arm and platform sewing is simple and quick. A hinged bracket comes up from underneath with the platform, the end of which has a screw head which simply slides into a slot. Two seconds, at most. It is the easiest method to make this transformation that I have seen, and it seems to have been the first or among the first.
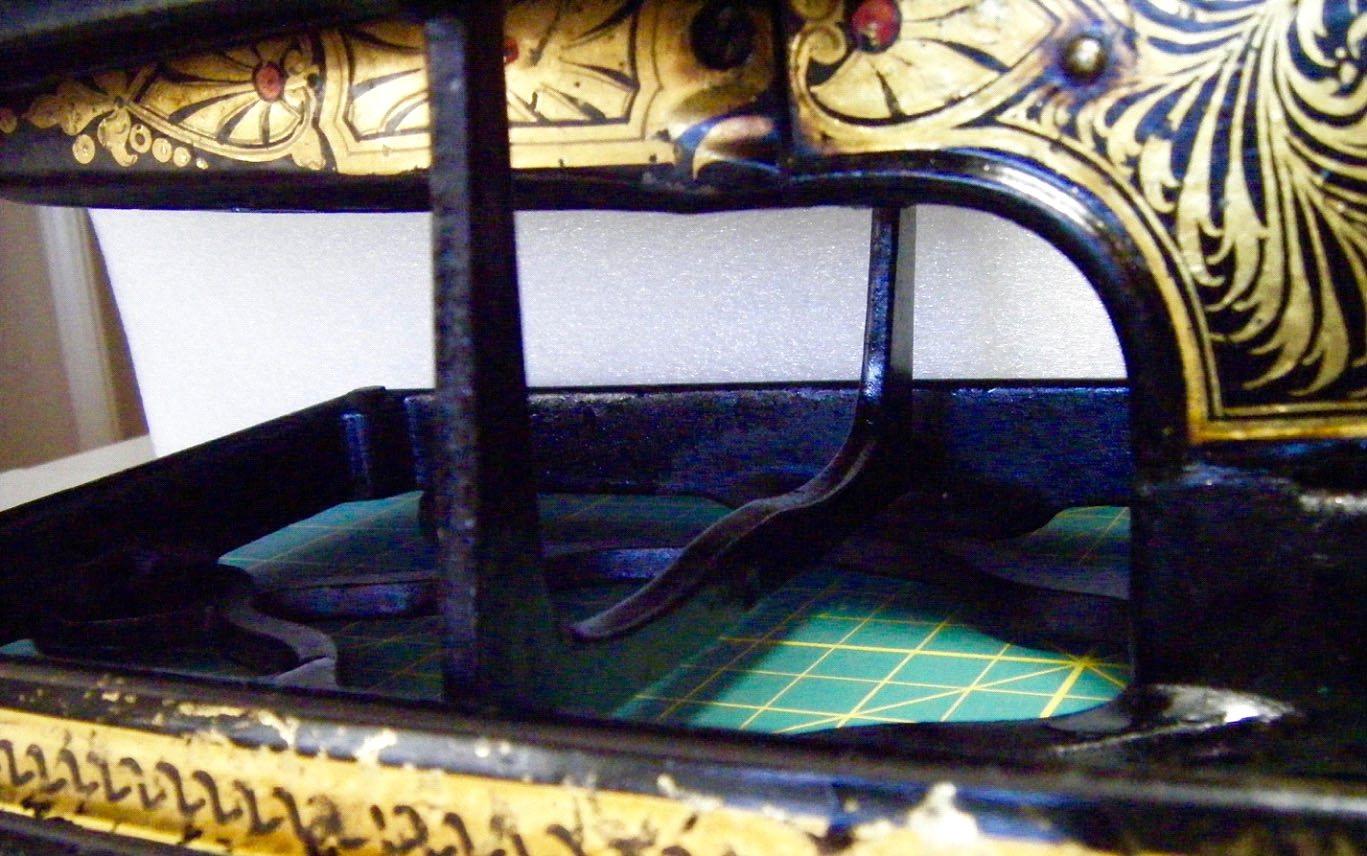
Like the back, the bottom of the machine is open, with a grid of the casting to provide needed strength. Despite all this openness, the machine is not as lightweight as you might expect, being about 22 pounds.
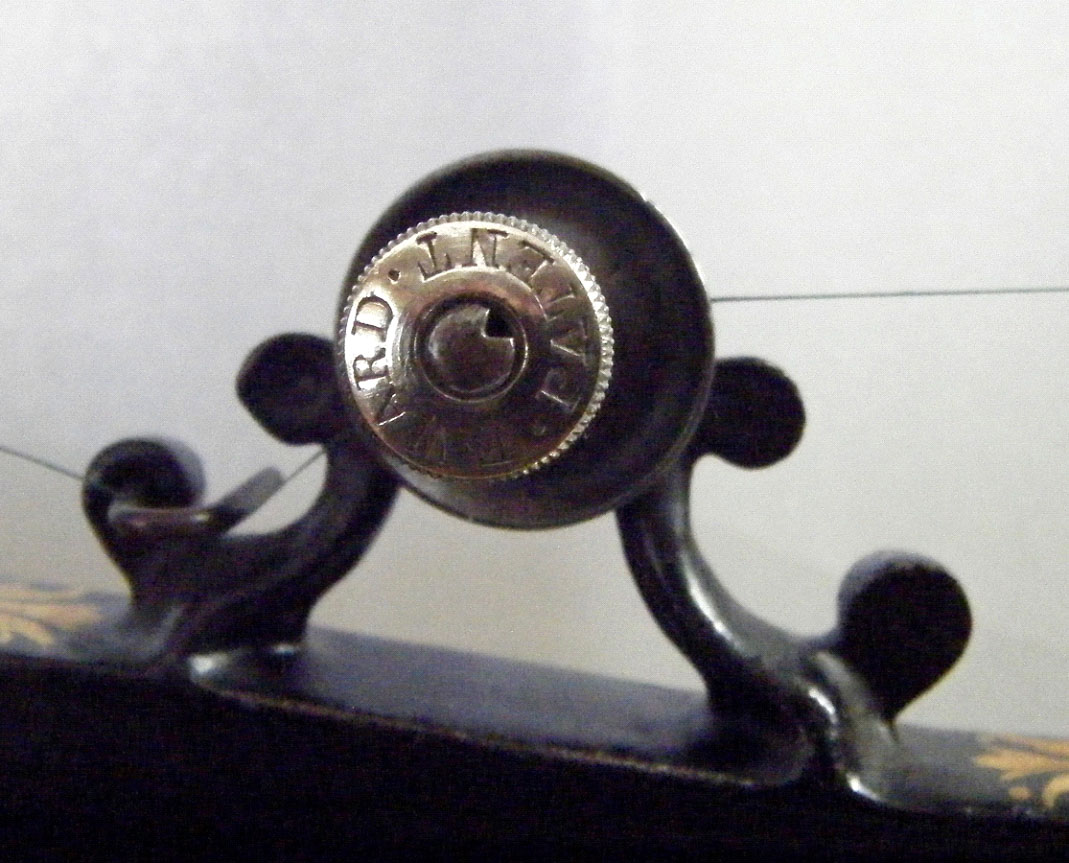
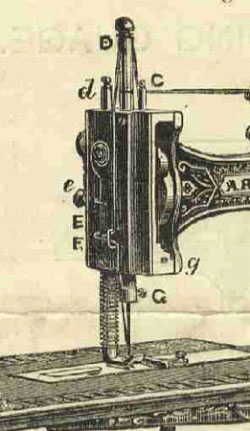
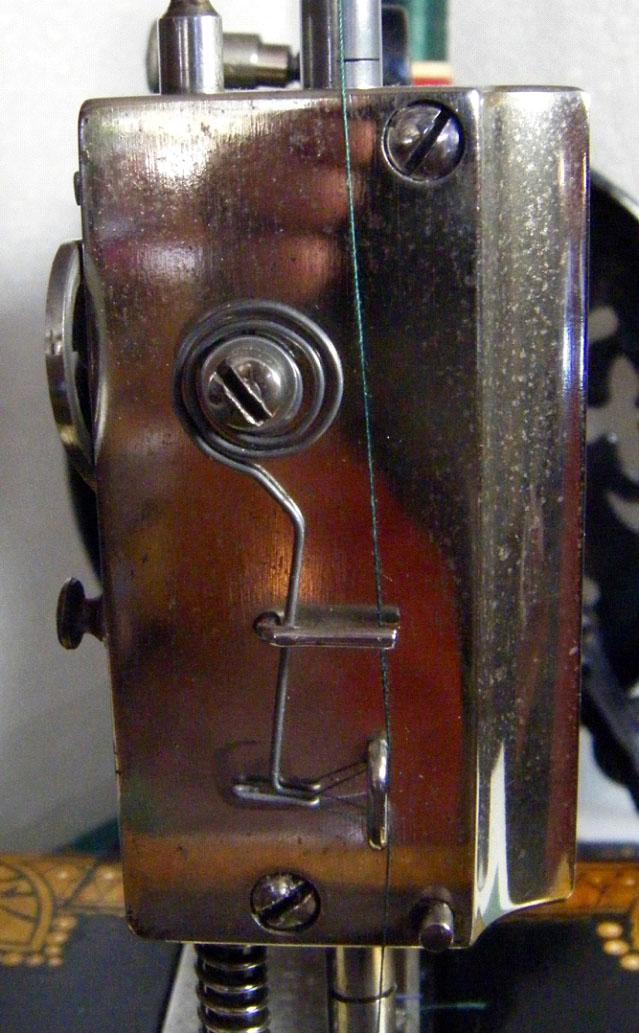
The missing part on this machine was essential to make it sew, and this is where my husband was called upon to help. Like the New Home Midget, the faceplate of the machine uses a coiled spring with a pigtail to advance and then tighten the thread for each stitch with proper tension. This should be made of spring steel, but when we obtained some of the correct gauge, that was obviously not going to happen. Spring steel is simply too stiff to work with, lacking the knowledge and tools to do so. Dan instead made a replica of ordinary steel wire. It looked almost exactly like the spring in an old drawing of the machine, so we figured if nothing else, it would look correct. But would it sew?

Threading the machine, determining what needle it required, and getting the �boat� shuttle threaded for reasonable tension are issues that needed attention. The shuttle and bobbin are about the size of the parts in the previously mentioned New Home machine � as in very small. A 29x3 needle was tried, knowing it was used in machines from the UK contemporary with this one � the 1870s. This needle pulled up the bobbin thread, but not consistently, and wouldn�t make stitches, despite being repeatedly moved up and down in the slot to find the sweet spot. A search for a similar needle was on, because the 29x3 was close to correct. The Boye #27, used for the Wheeler & Wilson #8, looked almost the same. The obvious difference was in distance from eye to point. (I didn�t measure them, so there could be other differences.)
With this needle in place, and adjusted to correct height, the Arm and Platform is happy to sew. The coiled spring needed to be turned slightly to give it a full range of motion between stops to make the longest stitches. Those stitches are still rather short, but acceptable for ordinary sewing. On several Arm and Platform machines seen for sale that have their spring, it is often obvious that they have been bent and mangled, likely because of stitching problems. In this case it was only necessary to loosen the screw and turned the entire piece slightly so it rests against the left stop when not in use, instead of hanging straight down as in the old drawing. The range of motion is quite limited, which probably is what limits stitch length. The spring twitches twice with each stitch. Fascinating!
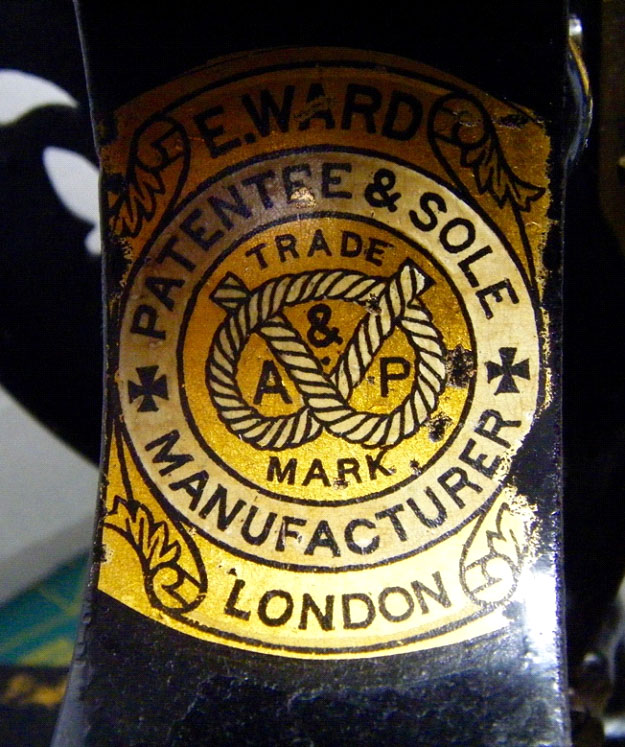
In 1877 Ed Ward introduced an improved �self-threading� shuttle, but my machine does not have that type. This narrows down its manufacture to between 1873 and 1877, according to online sources. There is information about Mr. Ward and his background online, especially the Sewalot website.
Janey
Janey has this to share.
I had been talking to my sister about "Grandmother's Flower Garden" quilts. Specifically about the one she has that our Grandmother made. She told me about a book written by a client/friend of hers called "Tattered & Torn." As I was making an order on Amazon for a couple of hand cranks (and other things), I added the book to my order. It is a book in series by Carol Dean Jones and didn't take long to finish reading it. Without going in to a great detail about the book, part of it was about a "Grandmother's Flower Garden" that was found in an antique shop and trying to find out more about it. It was determined that it was a bed quilt originally that was made into a Civil War Cot Quilt.
I'm still waiting on one of the hand cranks. When I looked at the one I received and was comparing it to the previous reproduction hand crank that I have on the Lotus 66, the rubber on the finger fell apart on the 66. I think I may try some clear plastic tubing on it. I'm wondering if anyone has tried shrink tubing on one.
In Closing
While we have these get togethers primarily for ourselves, we value our readership and would welcome any comments or contributions from others. So, if you have a thought, a comment or question, please feel free to add to our postings here without hesitation.
We will post here again next month. Spring must be just around the corner!
 03-06-2021, 02:43 PM
#235
Super Member
Join Date: Mar 2015
Location: Denver, CO
Posts: 4,254
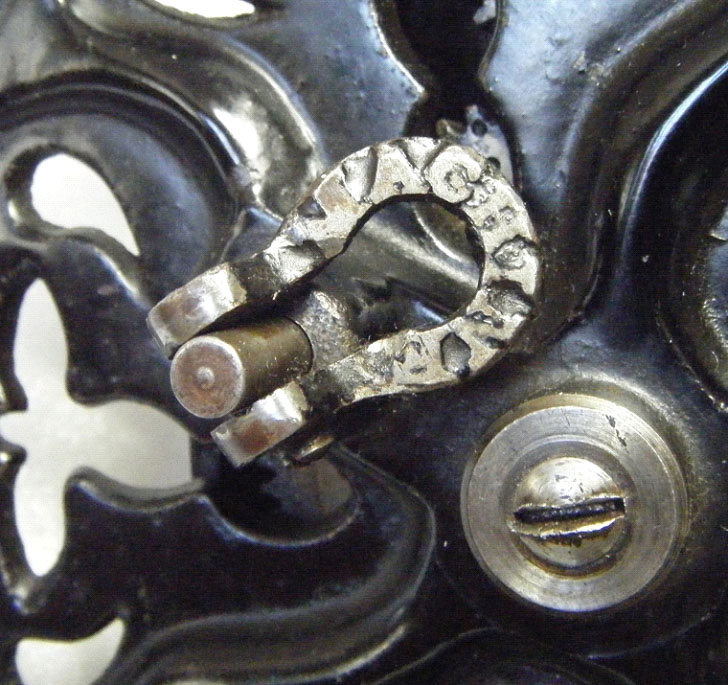
The picture of the face plate for Dianne's machine was inadvertently cropped. Here is the correct picture.

I remembered that it looks similar to my 1936-1942 New National and Dianne emailed the following.
Quote:
I remembered that it looks similar to my 1936-1942 New National and Dianne emailed the following.
Quote:
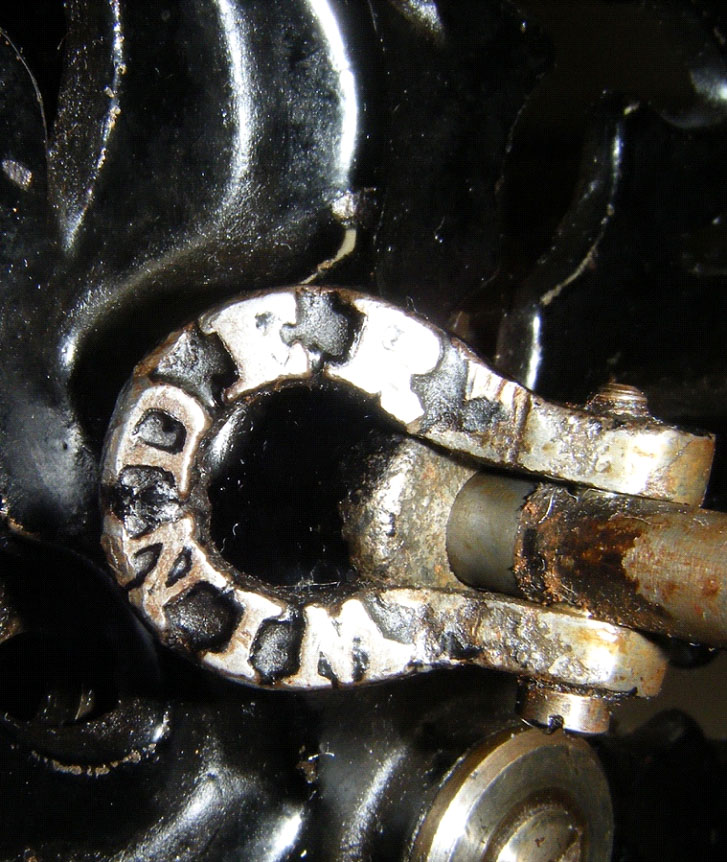
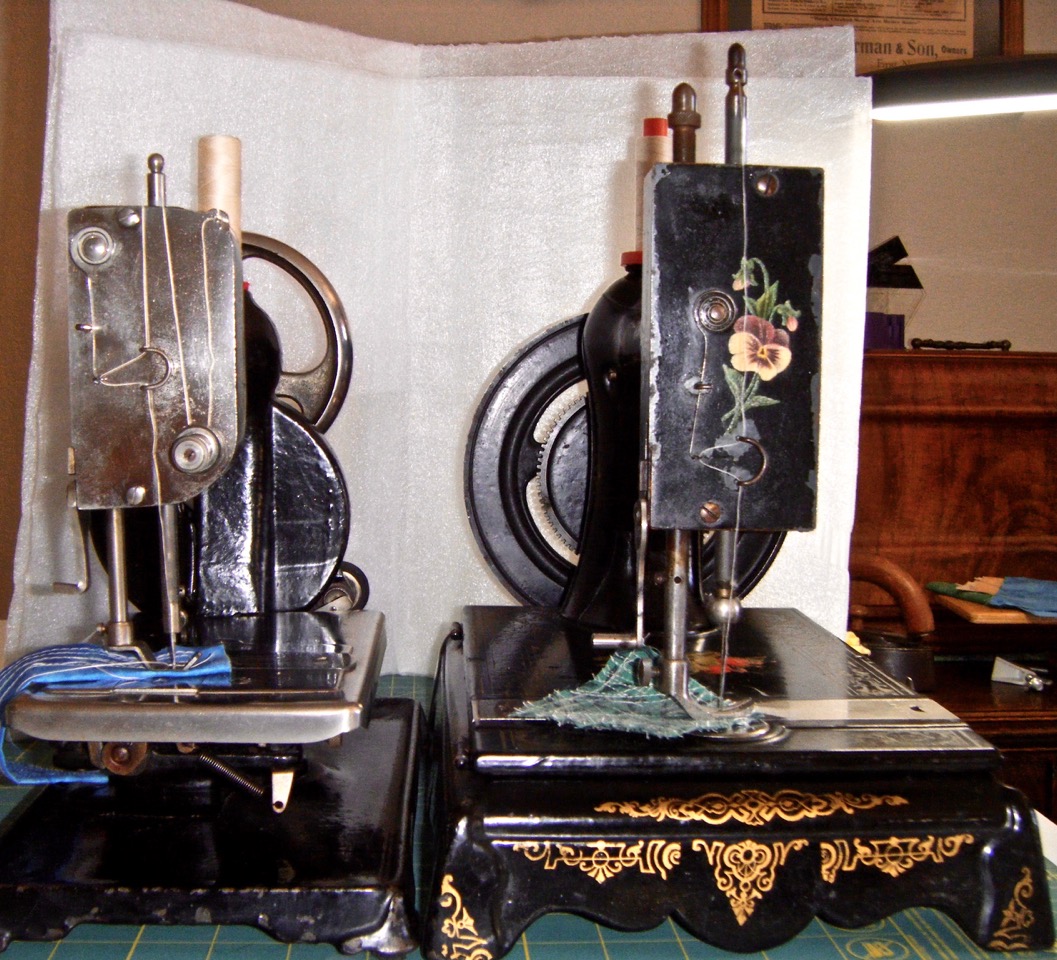
OK, so I needed to pull both machines out for reference. On the left, the New Home Midget, although mine just says New Home. And the New National by New Home on the right. In the New National manual (falling apart) it calls this the Take-up Spring, with the Take-up Hook on the end where the thread catches it.

Both of these machines were the less or least expensive machines of their day made by New Home - New National about 1896? and Midget around 1912?. This spring must do the work of the take up lever, but apparently also the check spring in a more normal tensioner. It is simplicity defined. It is very curious that Ed Ward, in designing his ‘perfect machine’ would come up with this solution. Obviously, he did not copy from these New Homes, which came much later. Is this another of his inventions?
Have we seen other very early machines with a Take-up Spring? I haven’t, but am not an expert on them, or anything else, for that matter! Anyway, food for thought!
Dianne
Janey - Neat people never make the exciting discoveries I do.
Both of these machines were the less or least expensive machines of their day made by New Home - New National about 1896? and Midget around 1912?. This spring must do the work of the take up lever, but apparently also the check spring in a more normal tensioner. It is simplicity defined. It is very curious that Ed Ward, in designing his ‘perfect machine’ would come up with this solution. Obviously, he did not copy from these New Homes, which came much later. Is this another of his inventions?
Have we seen other very early machines with a Take-up Spring? I haven’t, but am not an expert on them, or anything else, for that matter! Anyway, food for thought!
Dianne
03-31-2021, 05:23 AM
#236
Super Member
Join Date: Mar 2015
Location: Denver, CO
Posts: 4,254
Over one weekend, Colorado received its fourth largest snowfall ever in the month of March. Fortunately, snow disappears quickly here. With a little shoveling and a few days of sunshine, it was gone within a week.
While we are still under social distancing, some of our members have been exchanging thoughts and ideas via email; Janey with Cheryl and Courtney with James.
We have a few contributions for this month's meeting from our members.
James
James was the first to send his adventures with sewing machines over the last month. He sends a description and some pictures of machines he has been working on:
I finally got my 1879 English hand crank Willcox and Gibbs working properly. It took a good amount of sewing oil and lamp oil to unfreeze everything. I had to add a hair dryer to get the internal plunger spring unstuck since there was no other way to access it. My next problem was that the automatic tensioner was not working properly as my looper kept getting snarled with multiple threads. Pulling the thread by hand while cranking revealed that the tensioner was not holding the thread at the right point in the cycle. I gave the tensioner a good cleaning with dental floss and everything worked perfectly. I will be working on my first small sewing project ever on this machine! A small quilted place mat using the Ohio Star design to make it simple and interesting.
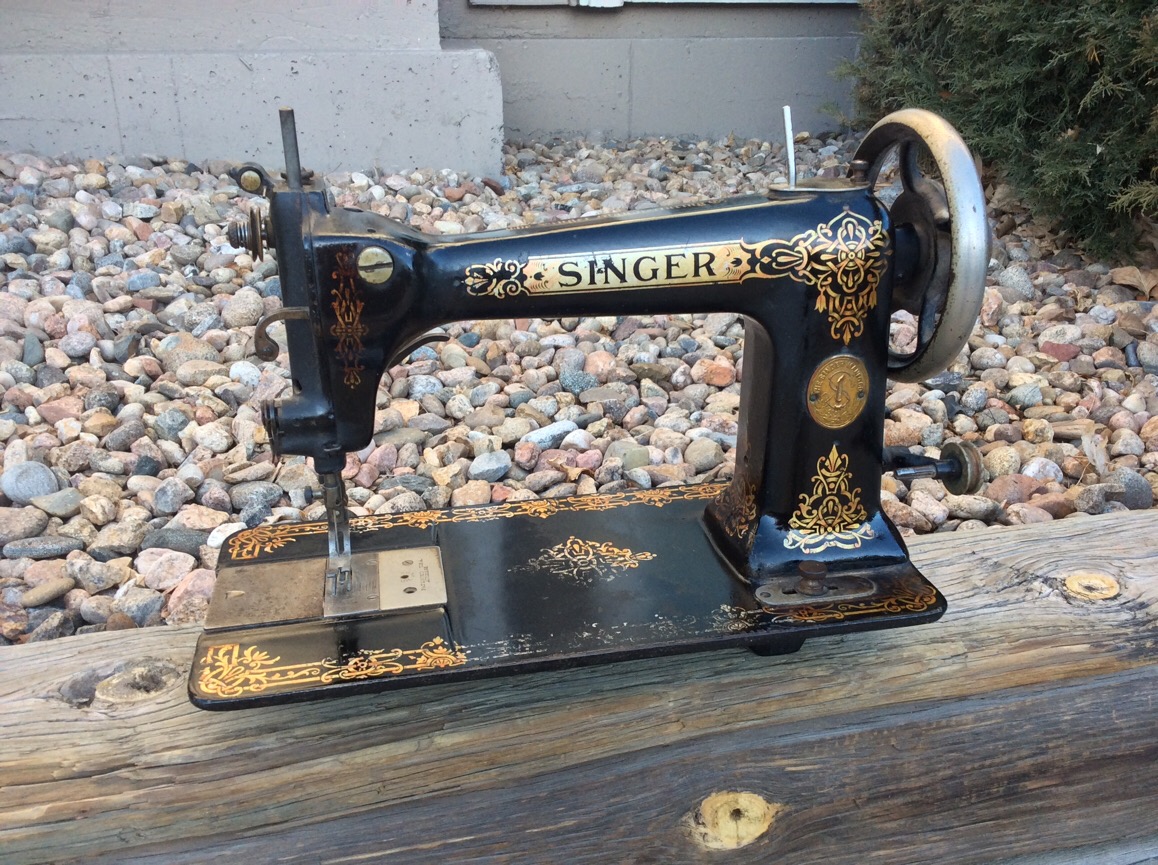
A recent machine I acquired a while back is a Singer 9W7 that probably dates from around 1910 based on the serial number. This one uses the older Wheeler and Wilson bagel type bobbins and of course the longer needle. I have not gotten around to work on it but things move freely and the front decals are in pretty nice shape with extensive wear on the bed and more decal loss at the rear. Still a nice looking machine.
James

Courtney
Courtney has a particular liking for Willcox & Gibbs machines. He tells us about what he has been working on recently:
Dear All,
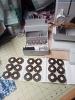
Most of my sewing machine time this past month was spent with mister's Willcox and Gibbs. The small portable W&G treadle I built a few years back has been sitting idle and collecting dust during the pandemic because the local museums have been closed for the pandemic. I got the treadle out and dusted it off and gave it a good oiling. I had been having a bit of trouble at times with the old belt so I thought I would try a urethane belt. Instead of "welding"� the urethane together I thought I would try a W&G ferrule. The ferrule seems to screw tight to the urethane and so far it seems to be holding well. The picture I have included shows the ferrule attaching the two ends of the green urethane belt.
While I had the treadle out I thought I would try and get my very early glass tension W&G machine into sewing condition. I bought the machine a few months ago but had not really tried it out. The serial number dates the machine at about 1859. I put the machine in the treadle and gave it a try. A couple of the parts are worn but after a bit of fiddling with the glass tension I was able to get it to sew a good seam. I think I will make a Sanitary Commission housewife. Who knows I may have made some 160 years ago during the Civil War!
Since the urethane belt seemed to be working well on the treadle, I thought I would try one on a W&G English hand-crank. The leather belt has been slipping some. I cut the belt to length and again secured it with a W&G ferrule. Even though the urethane belt I am using is only 4mm (instead of 5mm) it seems to be working well. For display purposes the leather belts are most authentic, but for use the modern urethane belts seem to grip better.
Finally I have had several emails with James who has been working on his English hand-crank. I was finally able to free his presser foot bar but was still having troubles. After emailing back and forth several times, I think he has gotten it working.
... to be continued
While we are still under social distancing, some of our members have been exchanging thoughts and ideas via email; Janey with Cheryl and Courtney with James.
We have a few contributions for this month's meeting from our members.
James
James was the first to send his adventures with sewing machines over the last month. He sends a description and some pictures of machines he has been working on:
I finally got my 1879 English hand crank Willcox and Gibbs working properly. It took a good amount of sewing oil and lamp oil to unfreeze everything. I had to add a hair dryer to get the internal plunger spring unstuck since there was no other way to access it. My next problem was that the automatic tensioner was not working properly as my looper kept getting snarled with multiple threads. Pulling the thread by hand while cranking revealed that the tensioner was not holding the thread at the right point in the cycle. I gave the tensioner a good cleaning with dental floss and everything worked perfectly. I will be working on my first small sewing project ever on this machine! A small quilted place mat using the Ohio Star design to make it simple and interesting.
A recent machine I acquired a while back is a Singer 9W7 that probably dates from around 1910 based on the serial number. This one uses the older Wheeler and Wilson bagel type bobbins and of course the longer needle. I have not gotten around to work on it but things move freely and the front decals are in pretty nice shape with extensive wear on the bed and more decal loss at the rear. Still a nice looking machine.
James


Courtney
Courtney has a particular liking for Willcox & Gibbs machines. He tells us about what he has been working on recently:
Dear All,
Most of my sewing machine time this past month was spent with mister's Willcox and Gibbs. The small portable W&G treadle I built a few years back has been sitting idle and collecting dust during the pandemic because the local museums have been closed for the pandemic. I got the treadle out and dusted it off and gave it a good oiling. I had been having a bit of trouble at times with the old belt so I thought I would try a urethane belt. Instead of "welding"� the urethane together I thought I would try a W&G ferrule. The ferrule seems to screw tight to the urethane and so far it seems to be holding well. The picture I have included shows the ferrule attaching the two ends of the green urethane belt.
While I had the treadle out I thought I would try and get my very early glass tension W&G machine into sewing condition. I bought the machine a few months ago but had not really tried it out. The serial number dates the machine at about 1859. I put the machine in the treadle and gave it a try. A couple of the parts are worn but after a bit of fiddling with the glass tension I was able to get it to sew a good seam. I think I will make a Sanitary Commission housewife. Who knows I may have made some 160 years ago during the Civil War!
Since the urethane belt seemed to be working well on the treadle, I thought I would try one on a W&G English hand-crank. The leather belt has been slipping some. I cut the belt to length and again secured it with a W&G ferrule. Even though the urethane belt I am using is only 4mm (instead of 5mm) it seems to be working well. For display purposes the leather belts are most authentic, but for use the modern urethane belts seem to grip better.
Finally I have had several emails with James who has been working on his English hand-crank. I was finally able to free his presser foot bar but was still having troubles. After emailing back and forth several times, I think he has gotten it working.

... to be continued
03-31-2021, 05:27 AM
#237
Super Member
Join Date: Mar 2015
Location: Denver, CO
Posts: 4,254
Dorothy
Dorothy, who is the only one of our group that sews professionally, tells us a little about her time on the job:
I hope this finds you all in good spirits and health!
Nothing vintage sewing wise, but I was sewing at worK.
Our facility was doing a much larger sample Design than is typical, as the client does trials at the Moab Easter Gathering.
All this leading to a lesson in "problem solving" on a binding machine. The machine is new, basic & runs well. Wed I was bragging how well it was doing, tensions good and tape moving through the folder well!
The next day, all Hope left the building when my fellow sewer said threads were fraying, changed needle & not pick up thread. The needle turned out to be 3/16" shorter than the one formerly in the machine (ugh). Dropped the needle and continued. Put a new roll of binding on and it would not go through the folder! New bobbin and bobbin thread wrapped around the hook assembly. Down. Not working.
Mechanic called in. Needle bar adjusted down to work with our common needle.
Bobbin issue - (pre wound) are rocking (too short, or core too big) catching on the latch and wrapping around the race.
Folder- the supplier provides the Max size is folder width, your tape should be less width. Previous folders (different supplier) would accept the width +/- .06". Found another folder moved it to the throat plate. Outer foot contacting the folder. Begged Mike to grind .125" off the toe and up and running.
Friday morning machine not working?!??
The hook is catching in the needle eye. You can hear & see it! Lowered the needle bar. Still needs smaller needle size (it was a 25, might need 22) or move hook back for more clearance. Back tack and thread wraps around the hook. (Something is still off.)
Needle hole is small, pristine and breaking needles readily, easily sewing through thickness. The hole will be enlarged. Abrasive cord in the hole.
Problem solving becomes a trial with so many variables at the same time. It will get resolved. Hopefully at our leisure without a deadline.
Sew On!
Dorothy
A little later, as a follow-up, Dorothy sent another note:
Our cat had surgery 3 weeks ago and was most uncomfortable with the plastic cone, slipping it off 4 times before she was brought home. Using quilting cotton, quilt batting and buckram, I devised a cone that has, for the most part, kept her from the stitches. I hope to make some to donate to the Vet my daughter interned with probably experimenting with a different stiffening material. I suspect a floral wire bound in at the edge would help prevent edge fold and accidental access to stitches.
It has worked well, she tolerates having it on. Demands neck scratches under the collar on a regular basis and hopefully, will get the last stitches removed this week.

Janey
Janey has acquired some things over this last snowy month. Among her delights are two apron patterns she was wanting (with help from Cheryl) and some handcranks for older sewing machines. She shares a little about her new things:
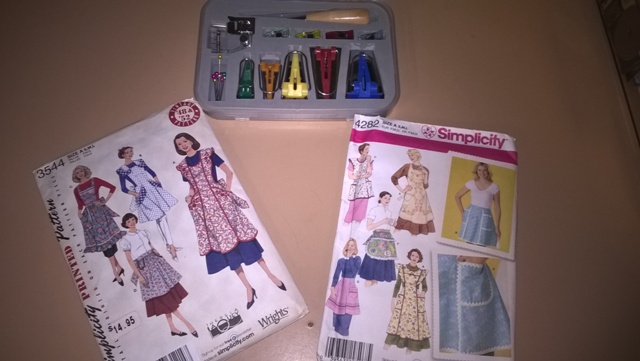
I really like aprons, but do not use them. I have always liked the aprons that my grandmothers wore. I found that Simplicity 3544 was the most like the ones that I remember. I also like Simplicity 4282, Maybe, someday, I may actually make one. It does take a lot of bias tape, which I would probably have to make. Fortunately, I also have a set of bias tape makers that would make it easier.

As mentioned last month, "the rubber on the finger fell apart" and needed something to buffer the metal. That hand crank was bought from Sew-Classic. I ended up trying some plastic tubing. I found that if I used the 1/2" ID 5/8" OD that it would fit on the finger that had lost its rubber. I also had some 5/8" ID, 3/4" OD that I managed to put over the smaller tubing. It actually fills in between between the spokes so there isn't as much play.

I only had one of the two hand cranks that I had ordered from Amazon, recently. John has tried one on his 128, but not the other. John noticed that there is a difference in the feel of the hand cranks. It appears that most of the hand cranks have the same picture. I found one that had different pictures and ordered one of each.
In Closing
With summer coming, we all hope for times where we can interact more personally. Until then, this thread is a way to share things between ourselves and with others. We will post again next month with our springtime activities.
Dorothy, who is the only one of our group that sews professionally, tells us a little about her time on the job:
I hope this finds you all in good spirits and health!
Nothing vintage sewing wise, but I was sewing at worK.
Our facility was doing a much larger sample Design than is typical, as the client does trials at the Moab Easter Gathering.
All this leading to a lesson in "problem solving" on a binding machine. The machine is new, basic & runs well. Wed I was bragging how well it was doing, tensions good and tape moving through the folder well!
The next day, all Hope left the building when my fellow sewer said threads were fraying, changed needle & not pick up thread. The needle turned out to be 3/16" shorter than the one formerly in the machine (ugh). Dropped the needle and continued. Put a new roll of binding on and it would not go through the folder! New bobbin and bobbin thread wrapped around the hook assembly. Down. Not working.
Mechanic called in. Needle bar adjusted down to work with our common needle.
Bobbin issue - (pre wound) are rocking (too short, or core too big) catching on the latch and wrapping around the race.
Folder- the supplier provides the Max size is folder width, your tape should be less width. Previous folders (different supplier) would accept the width +/- .06". Found another folder moved it to the throat plate. Outer foot contacting the folder. Begged Mike to grind .125" off the toe and up and running.
Friday morning machine not working?!??
The hook is catching in the needle eye. You can hear & see it! Lowered the needle bar. Still needs smaller needle size (it was a 25, might need 22) or move hook back for more clearance. Back tack and thread wraps around the hook. (Something is still off.)
Needle hole is small, pristine and breaking needles readily, easily sewing through thickness. The hole will be enlarged. Abrasive cord in the hole.
Problem solving becomes a trial with so many variables at the same time. It will get resolved. Hopefully at our leisure without a deadline.
Sew On!
Dorothy
A little later, as a follow-up, Dorothy sent another note:
Our cat had surgery 3 weeks ago and was most uncomfortable with the plastic cone, slipping it off 4 times before she was brought home. Using quilting cotton, quilt batting and buckram, I devised a cone that has, for the most part, kept her from the stitches. I hope to make some to donate to the Vet my daughter interned with probably experimenting with a different stiffening material. I suspect a floral wire bound in at the edge would help prevent edge fold and accidental access to stitches.
It has worked well, she tolerates having it on. Demands neck scratches under the collar on a regular basis and hopefully, will get the last stitches removed this week.

Janey
Janey has acquired some things over this last snowy month. Among her delights are two apron patterns she was wanting (with help from Cheryl) and some handcranks for older sewing machines. She shares a little about her new things:
I really like aprons, but do not use them. I have always liked the aprons that my grandmothers wore. I found that Simplicity 3544 was the most like the ones that I remember. I also like Simplicity 4282, Maybe, someday, I may actually make one. It does take a lot of bias tape, which I would probably have to make. Fortunately, I also have a set of bias tape makers that would make it easier.
As mentioned last month, "the rubber on the finger fell apart" and needed something to buffer the metal. That hand crank was bought from Sew-Classic. I ended up trying some plastic tubing. I found that if I used the 1/2" ID 5/8" OD that it would fit on the finger that had lost its rubber. I also had some 5/8" ID, 3/4" OD that I managed to put over the smaller tubing. It actually fills in between between the spokes so there isn't as much play.

I only had one of the two hand cranks that I had ordered from Amazon, recently. John has tried one on his 128, but not the other. John noticed that there is a difference in the feel of the hand cranks. It appears that most of the hand cranks have the same picture. I found one that had different pictures and ordered one of each.
In Closing
With summer coming, we all hope for times where we can interact more personally. Until then, this thread is a way to share things between ourselves and with others. We will post again next month with our springtime activities.
Last edited by OurWorkbench; 03-31-2021 at 05:30 AM.
04-08-2021, 06:36 PM
#239
Super Member
Join Date: Mar 2015
Location: Denver, CO
Posts: 4,254
I emailed her and she asked me to share this with you.
Janey - Neat people never make the exciting discoveries I do.
"Regarding the cat cone.
It is quilted which was a good part of the comfort for Cat.
It did flex forward or backwards which allowed her to sleep comfortably as it would flex out under her chin and not put pressure on her neck. When she walked it would curve back, not catching on Everything.
The cone shape was 1/4" darts in 6 places from the edge in. Deeper width would result in more cone shape, but still flex at the neck.
Another 1/2" in overall radius would have been the ideal width.
This one had buckram as the stiffener which, wet from her drinking, would reshape crumbled when dry. I am going to experiment with some of the other new bag stiff and how they react to water. Might do a version with floral wire bound in the edge.
Poor cat made it real clear she would not survive with the plastic cone which she pushed off 4 times in 2 hours."
Hope this helps.It is quilted which was a good part of the comfort for Cat.
It did flex forward or backwards which allowed her to sleep comfortably as it would flex out under her chin and not put pressure on her neck. When she walked it would curve back, not catching on Everything.
The cone shape was 1/4" darts in 6 places from the edge in. Deeper width would result in more cone shape, but still flex at the neck.
Another 1/2" in overall radius would have been the ideal width.
This one had buckram as the stiffener which, wet from her drinking, would reshape crumbled when dry. I am going to experiment with some of the other new bag stiff and how they react to water. Might do a version with floral wire bound in the edge.
Poor cat made it real clear she would not survive with the plastic cone which she pushed off 4 times in 2 hours."
Janey - Neat people never make the exciting discoveries I do.
04-28-2021, 04:45 AM
#240
Super Member
Join Date: Mar 2015
Location: Denver, CO
Posts: 4,254
We're hoping for some lilac blooms this year, which we like and enjoy. Every year, springtime in Colorado goes two steps forward and one step back. In some years, our optimistic lilacs begin to bloom, only to be stopped by a late hard freeze. Despite some recent cold snaps, blooms look OK-- and we're hopeful for some wonderful lilac fragrances this spring. Fingers crossed.
With summer coming, our members have many interesting projects for the May meeting, along with lots of pictures, even including a roving report from the road. So let's get started with the May Colorado get together.
Cheryl & Chris
Cheryl and Chris, who also live some distance north of Denver, send the following about what they have been doing:
I've been practicing using my adjustable hemmer while going over seams so I can use it to hem a long ruffle made from multiple joined sections. I'm using an 1891 Singer VS2 that Chris recently refinished. You can see the refinished bonnet behind the arm of the VS2. Some small stains are still visible under the new finish on the cabinet. They were too deep to remove without destroying the veneer. We call them "history."

Leon & Iris
Like the words from the song "On The Road Again", Leon and Iris sent their description of a recent trip they made.
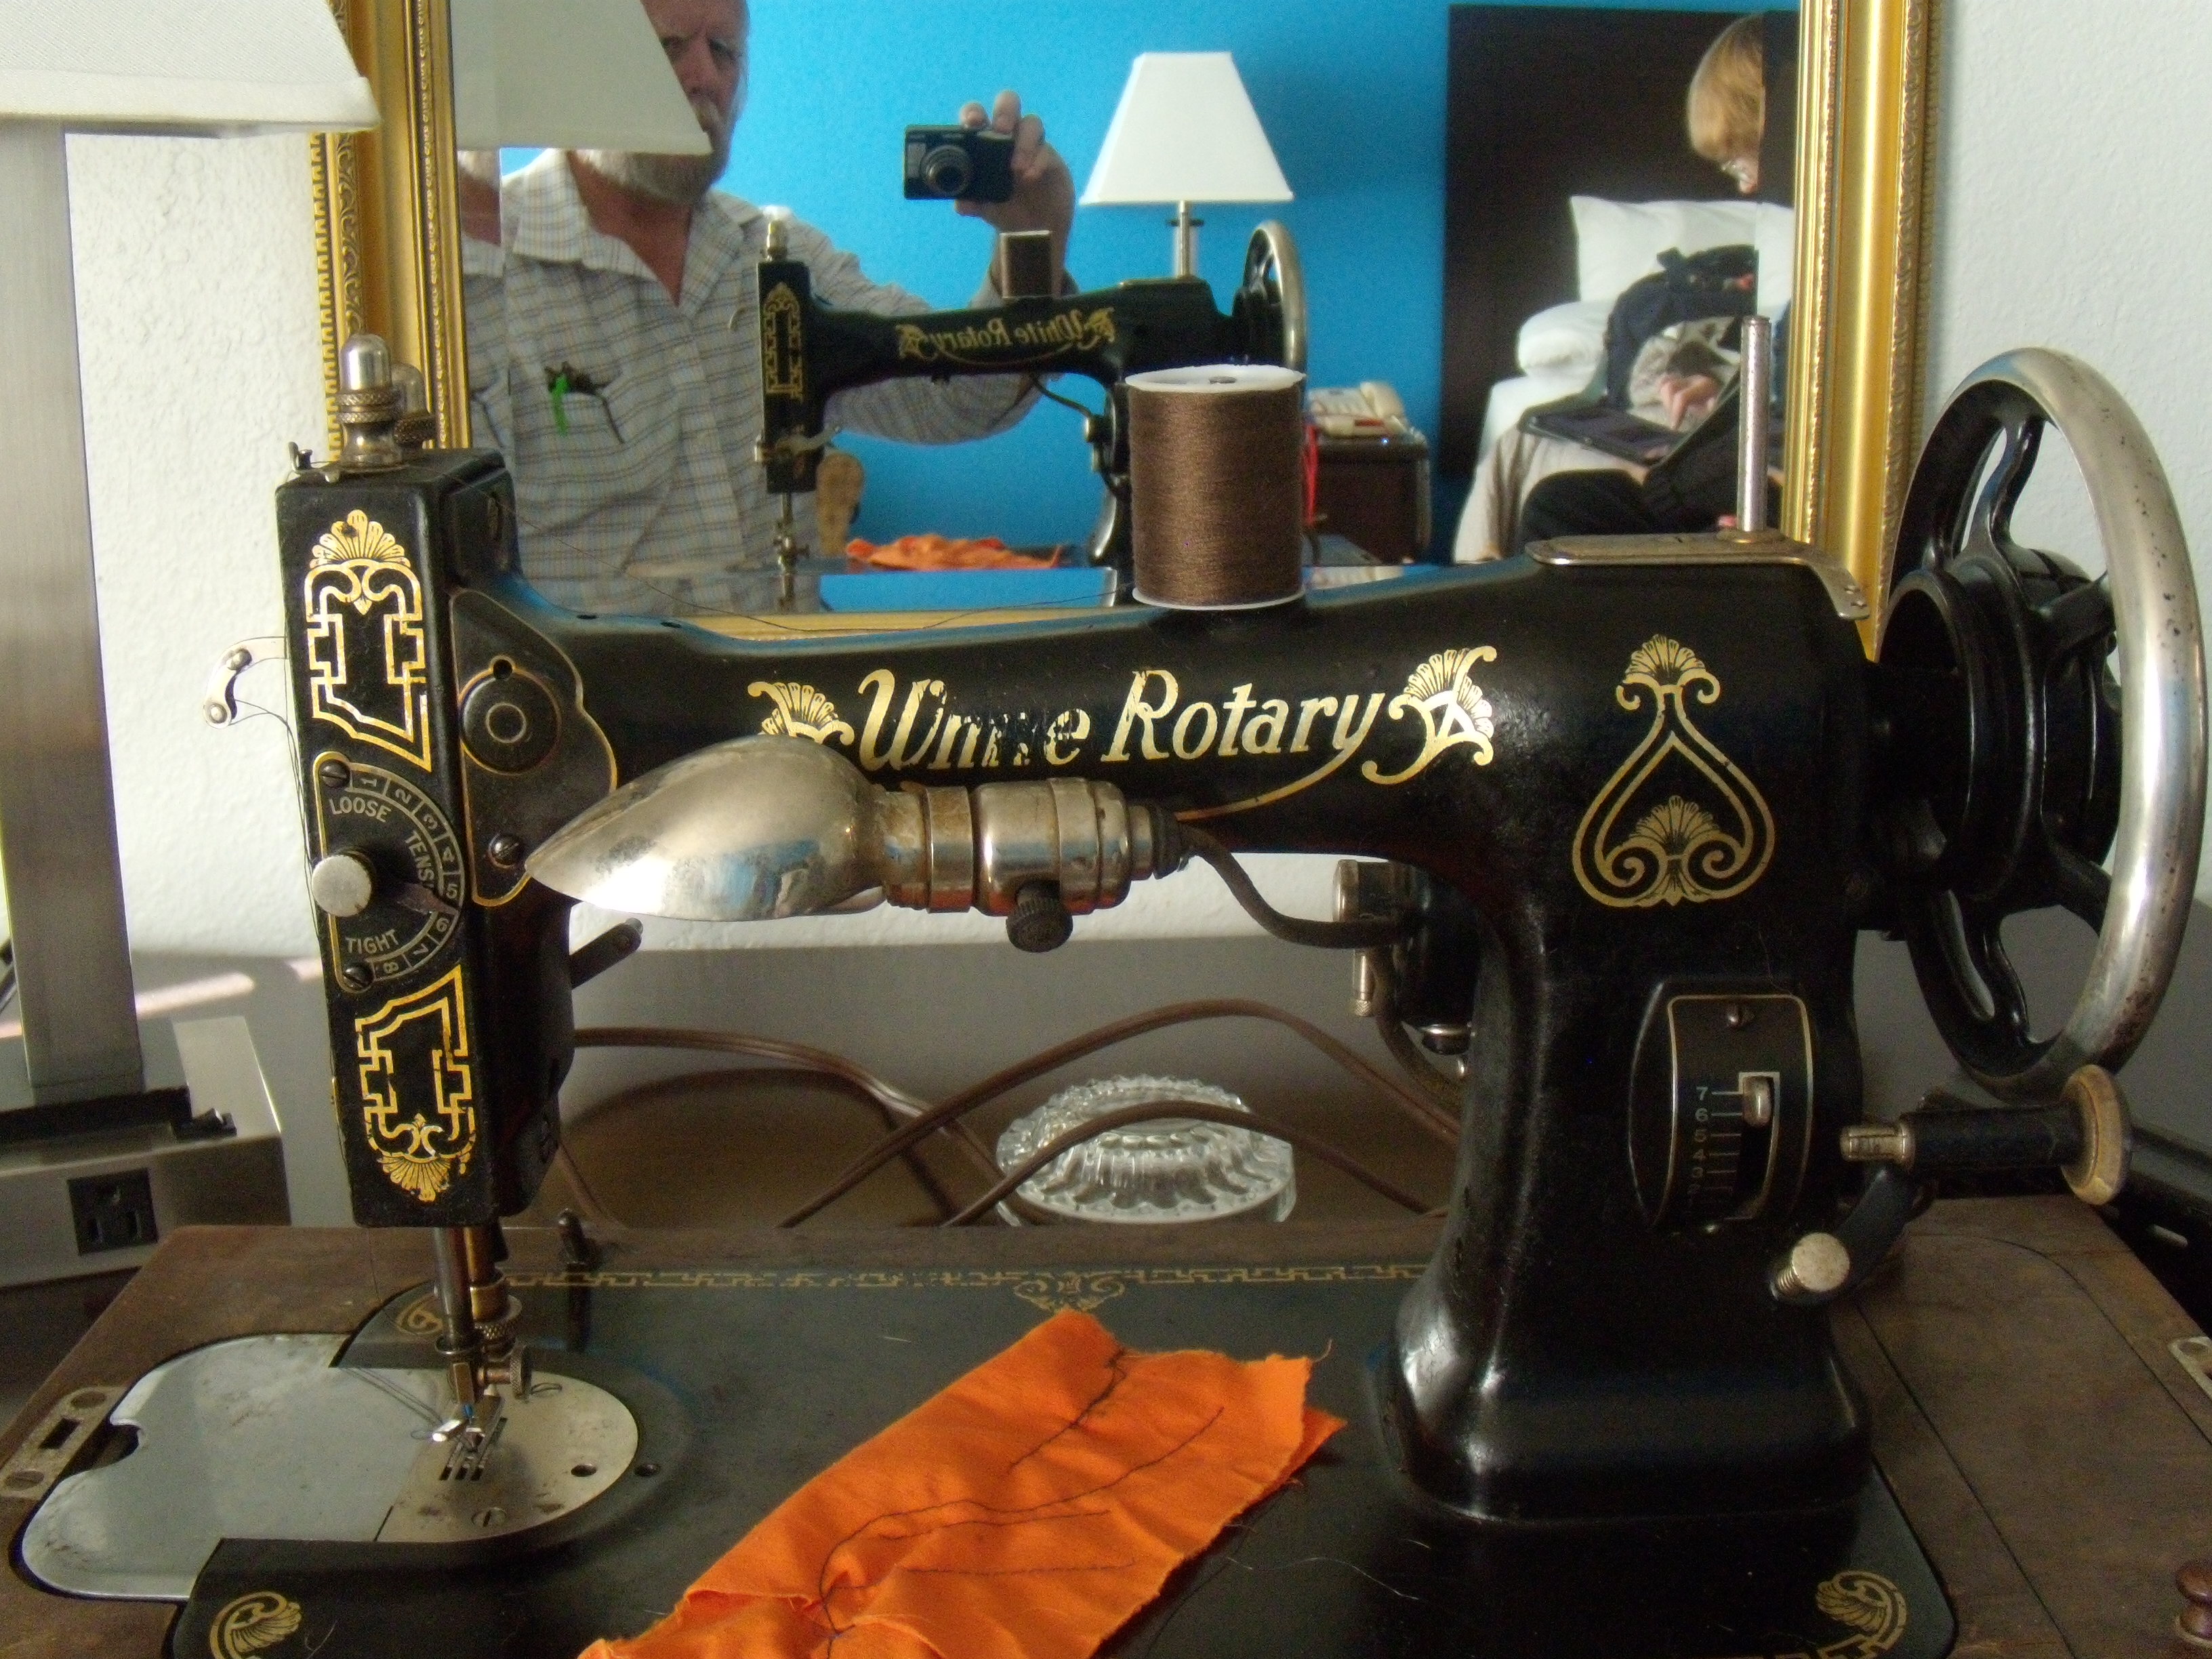
Iris and I are big fan's of Alice Duncan. She writes Daisy Gumm Majesty mysteries about a woman trying to provide for her family in the 19teens and 1920s in Pasadena. We started a fan page about things surrounding Daisy's fictional life. ( who knows what a monkey puzzle tree looks like?) Anyway Daisy sews her own clothes and her garb for her spiritualist medium gig. In an early book Alice wrote that Daisy sews on a "side treadle White" Huh??. As I got to know Alice I corrected her. Alice sent me a pic of her woe begotten Embossed White We decided that Alice needed a working embossed machine so we took one to her. If I couldn't fix hers in a couple of days. I'd give it to her.. It needed a few bits and her cabinet needed the bracket for her drawers re -installed.. I put the new to her White in her cabinet, Iris showed her how to thread it and she almost cried when she used a shiny new to her machine. I also dropped off an older rotary White since that is was Daisy would have actually used. It will go to her daughter.
We also brought a portable as a just in case, but Alice didn't need it. Iris's daughter grabbed it when we got to Fort Worth. We ended up trading three working machines for a dead embossed White and a dead Singer 99. The White is now stitching but I am not done with it yet. the 99s spins freely but needs more work. A great trade, I believe.
We were not abducted by aliens in Roswell, but saw lots of images of them.
Even the street lights have elongated eyes on them.
Till next time.


... to be continued
With summer coming, our members have many interesting projects for the May meeting, along with lots of pictures, even including a roving report from the road. So let's get started with the May Colorado get together.
Cheryl & Chris
Cheryl and Chris, who also live some distance north of Denver, send the following about what they have been doing:
I've been practicing using my adjustable hemmer while going over seams so I can use it to hem a long ruffle made from multiple joined sections. I'm using an 1891 Singer VS2 that Chris recently refinished. You can see the refinished bonnet behind the arm of the VS2. Some small stains are still visible under the new finish on the cabinet. They were too deep to remove without destroying the veneer. We call them "history."

Leon & Iris
Like the words from the song "On The Road Again", Leon and Iris sent their description of a recent trip they made.
Iris and I are big fan's of Alice Duncan. She writes Daisy Gumm Majesty mysteries about a woman trying to provide for her family in the 19teens and 1920s in Pasadena. We started a fan page about things surrounding Daisy's fictional life. ( who knows what a monkey puzzle tree looks like?) Anyway Daisy sews her own clothes and her garb for her spiritualist medium gig. In an early book Alice wrote that Daisy sews on a "side treadle White" Huh??. As I got to know Alice I corrected her. Alice sent me a pic of her woe begotten Embossed White We decided that Alice needed a working embossed machine so we took one to her. If I couldn't fix hers in a couple of days. I'd give it to her.. It needed a few bits and her cabinet needed the bracket for her drawers re -installed.. I put the new to her White in her cabinet, Iris showed her how to thread it and she almost cried when she used a shiny new to her machine. I also dropped off an older rotary White since that is was Daisy would have actually used. It will go to her daughter.
We also brought a portable as a just in case, but Alice didn't need it. Iris's daughter grabbed it when we got to Fort Worth. We ended up trading three working machines for a dead embossed White and a dead Singer 99. The White is now stitching but I am not done with it yet. the 99s spins freely but needs more work. A great trade, I believe.
We were not abducted by aliens in Roswell, but saw lots of images of them.
Even the street lights have elongated eyes on them.
Till next time.


... to be continued

Thread
Thread Starter
Forum
Replies
Last Post
sewcrazygirl
General Chit-Chat (non-quilting talk)
10
04-21-2011 08:51 PM
