
Montgomery Ward Treadle
 02-19-2022, 07:09 PM
#1
Member
Thread Starter
Join Date: Feb 2022
Posts: 2
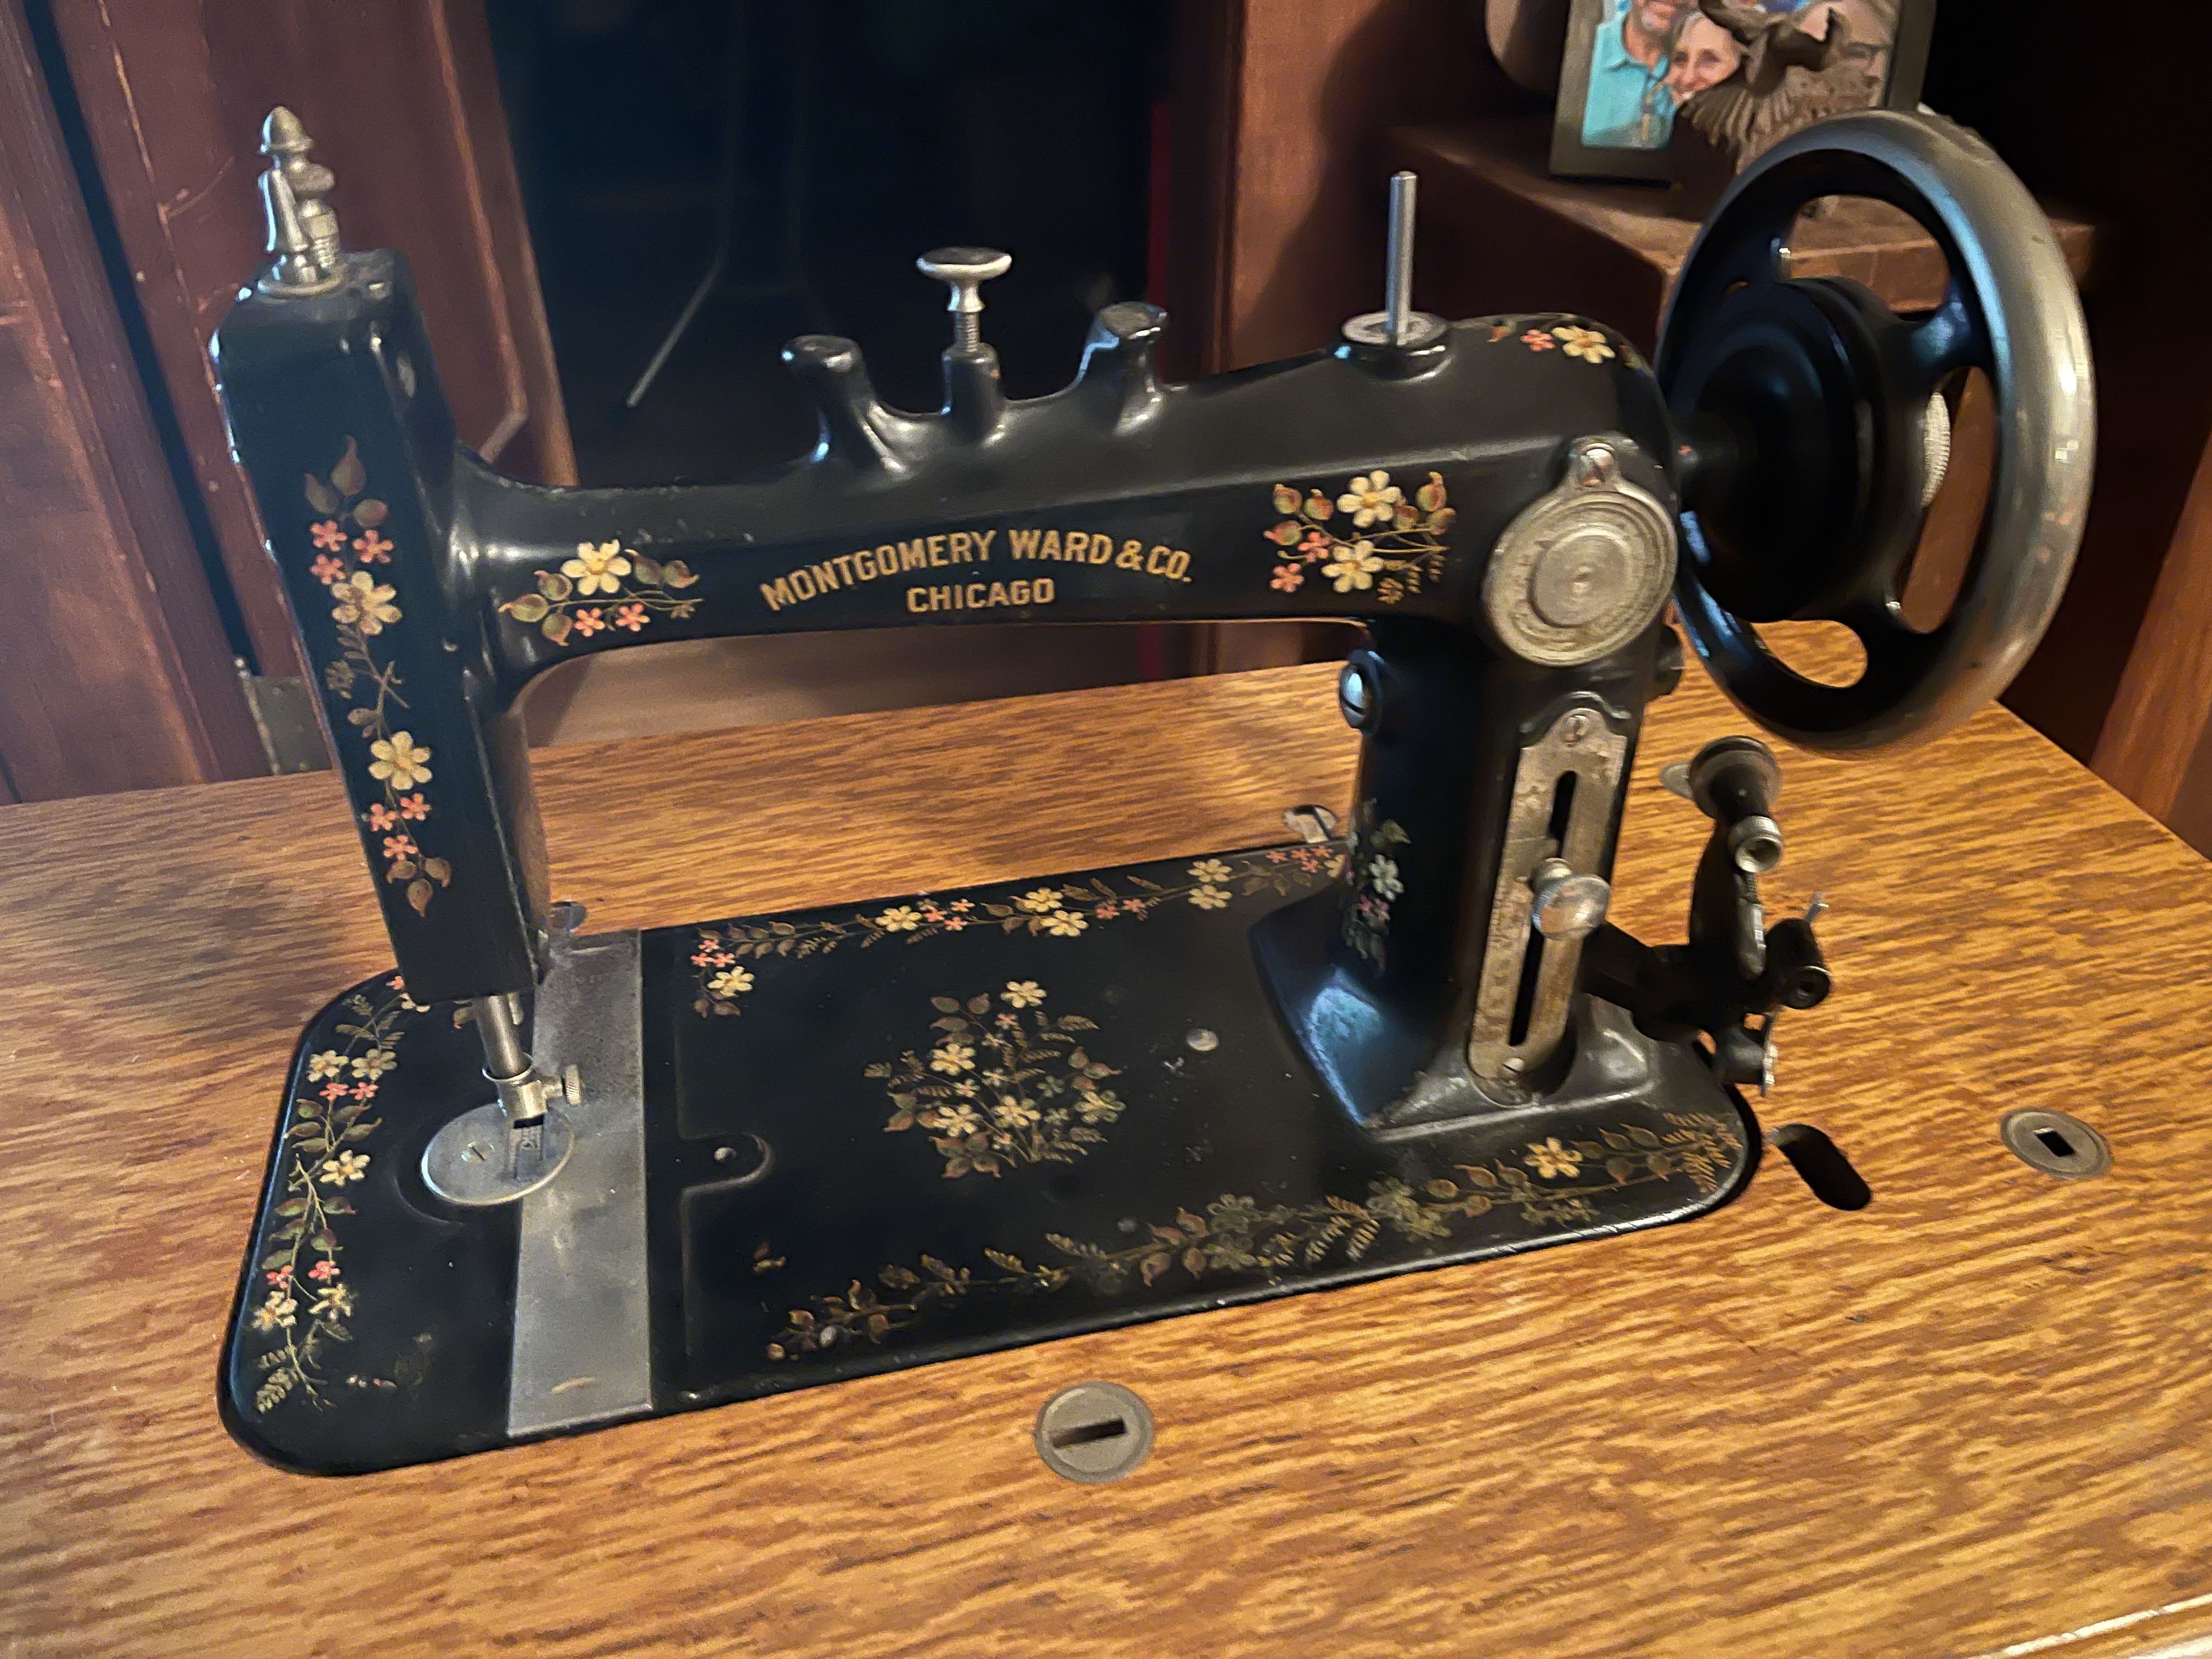
Hi! I just purchased a vintage Montgomery Ward Improved High Arm treadle machine with cabinet. The cabinet is in good shape, and the machine looks ok and I'd like to restore it.
Does anyone know where I can get a manual? I understand that this machine was made by National for MW.
Does anyone know a repair person in California who might be interested in helping me restore this machine back to working order?
I'll try to upload photos-- so far I'm not having luck.
Thank you!
Does anyone know where I can get a manual? I understand that this machine was made by National for MW.
Does anyone know a repair person in California who might be interested in helping me restore this machine back to working order?
I'll try to upload photos-- so far I'm not having luck.
Thank you!
 02-20-2022, 06:58 AM
#2
Super Member

Join Date: Mar 2015
Location: Denver, CO
Posts: 4,254
Most of us do our own restoring. There are a couple of good threads here on QB to get started. For the machine oiling and cleaning - How to Clean Up and use a vintage sewing machine - videos by Muv and Fav Then for the woodwork - Cleaning and Reviving furniture(Sewing cabinets)
I found a couple of ads - one that says from 1895 https://www.reddit.com/r/sewing/comm...vert_in_their/ and another from 1910 https://www.vintageadbrowser.com/leaflets-ads-1910s
My guess is that your machine will probably would use 20x1 needles, which can be hard to find. Many have used modern needles (15x1 aka 130/705H) by dropping the needle a bit. Someone has used a magnetic sheet cut so that it takes the space difference so that you can use regular needles.
As for posting pictures my response is - We like pictures. In order to post pictures on Quilting Board, you will probably need to reduce or compress the picture to a file size that is smaller than 2MB. How to post images can be found at https://www.quiltingboard.com/attach...020-01-17-.pdf
Don't forget to scroll over to the far right to find and click on the "Upload" button.
I have found that only the big red "Reply" button or "Quote" work to give me the paper clip icon to work for adding pictures.
https://www.quiltingboard.com/attach...p-location.jpg
Some additional info regarding reducing images at post #4 and images for the scroll and upload button can be found at #5 of quilt block ID?
Another way to post pictures can be found at 2021/2022, 2.5� Birthday Swap
Or simply - Make sure pictures are smaller than 2MB
Click on red "Reply" button
Click on the paper clip icon
Click browse - choose picture/s. (only 5 allowed per post)
Once they show up as being loaded, Scroll over to the right side and click on "Upload"
After the pictures show up as being attached, you can close that window and go back to the screen to finish posting your post.
Janey - Neat people never make the exciting discoveries I do.
Not affiliated with off-site link(s)

 02-20-2022, 08:28 AM
#4
Super Member
Join Date: Mar 2015
Location: Denver, CO
Posts: 4,254
That is a very nice looking machine & cabinet.
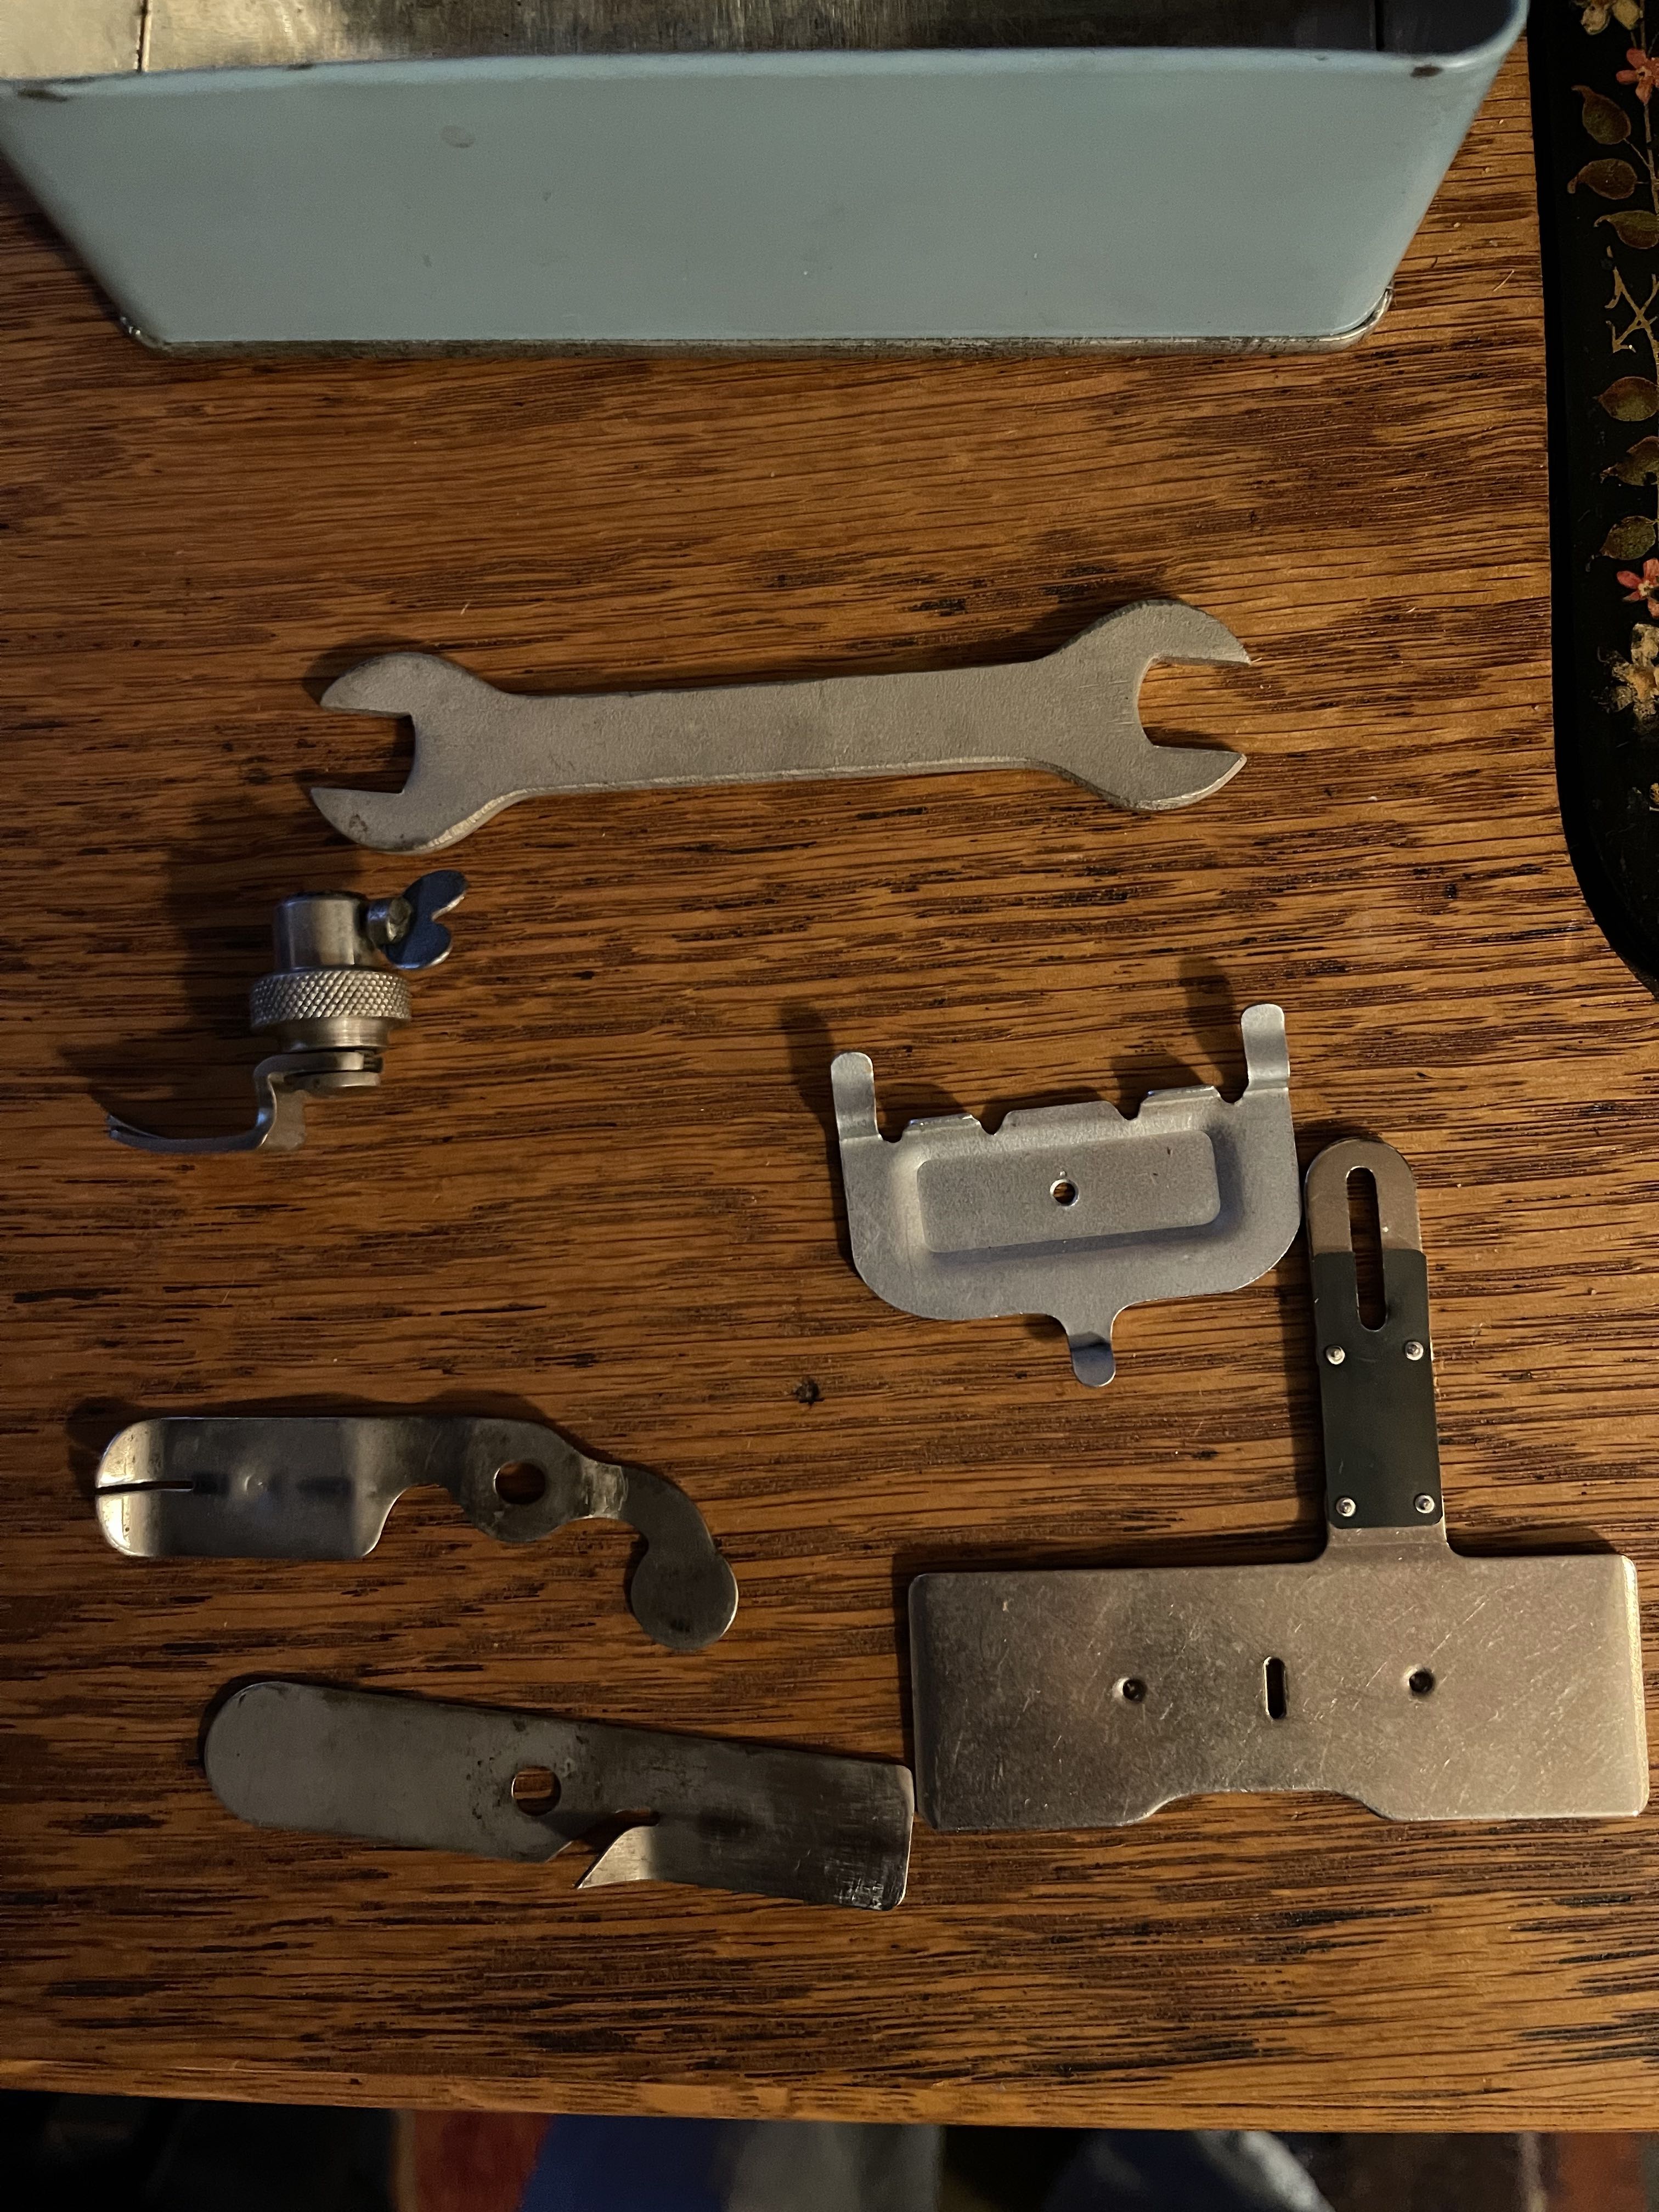
The two pieces in the lower left of the third pictures got on the top of machine as they are parts of the tension that are called a leaf tension. Perhaps http://needlebar.org/nbwiki/index.ph...2natvelox1.jpg will show how they go together.
The two items on the right are feed dog covers for making buttonholes. The one in the middle, I do not think will work for your machine.
Janey - Neat people never make the exciting discoveries I do.
Not affiliated with off-site link(s)
02-22-2022, 11:13 AM
#5
Super Member

Join Date: May 2016
Location: near Topeka kansas
Posts: 4,524
The leaf tension should look something like this the screw in the middle will but a bit of tension between the two bits of steel. Clean them up before they go on.
https://www.quiltingboard.com/member...738-606501.jpg
https://www.quiltingboard.com/member...738-606501.jpg
02-22-2022, 01:07 PM
#7
Super Member
Join Date: May 2016
Location: near Topeka kansas
Posts: 4,524
https://www.quiltingboard.com/member...738-623737.jpg
presser foot in place on a leaf tension New HOme.
presser foot in place on a leaf tension New HOme.
02-22-2022, 01:10 PM
#8
Super Member
Join Date: May 2016
Location: near Topeka kansas
Posts: 4,524
