
Needle position adjustment on a Dressmaker 2000 machine
 06-17-2012, 08:41 AM
#11
Senior Member
Join Date: Apr 2012
Location: Illinois...near St. Louis
Posts: 392
Originally Posted by J Miller

We have two Japanese ZZ machines that park the needle to the left for straight stitch. Neither of them have a R-C-L lever for the needle position.
This machine does. Based on others we have it should park in the middle with the lever in the middle position.
path49, I'll pop the top off and get some pics today (Sunday).
For those two machines that park to the left I have offset straight stitch feet that go a long way to making a 1/4" seam. A lot easier for me than measuring 1/4" right from the needle and making a mark on the foot.
My wife can eye ball it real good, but she's been doing that for ever.
Joe
 06-17-2012, 08:53 AM
#12
Super Member
Thread Starter
Join Date: Feb 2012
Posts: 8,091
OK, I hope this is seen.
First I have a correction. The machine in question is a Domestic 7000. Not a 2000. I misread the label.
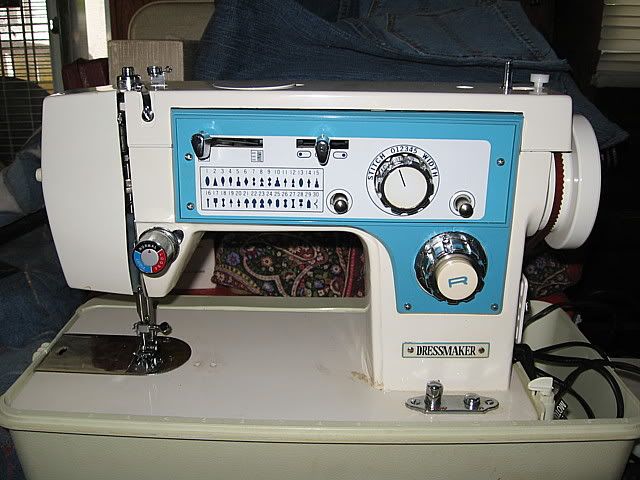
Here are the pics I promised path49:
Front w/ cams:
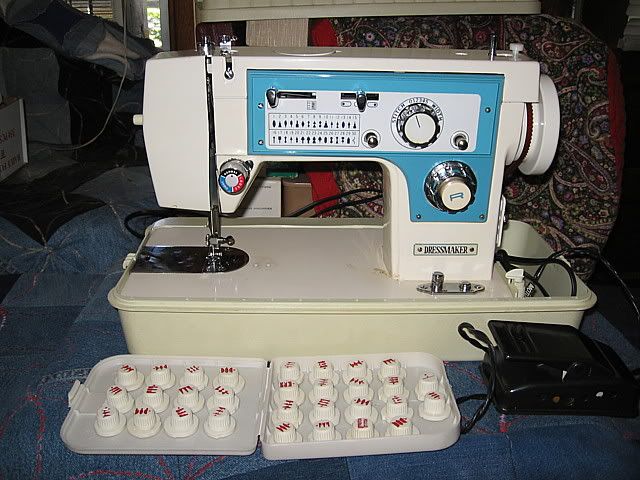
Front a bit closer:
Top, full length:
Top, a bit closer:
Top, close up of the needle position section:
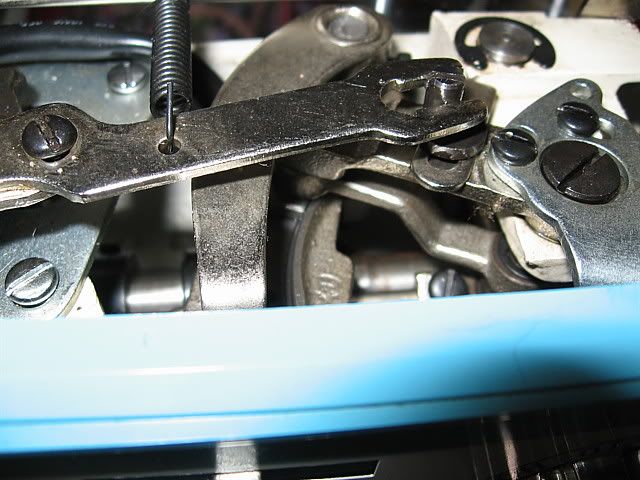
Needle position close up a:
Needle position close up b:

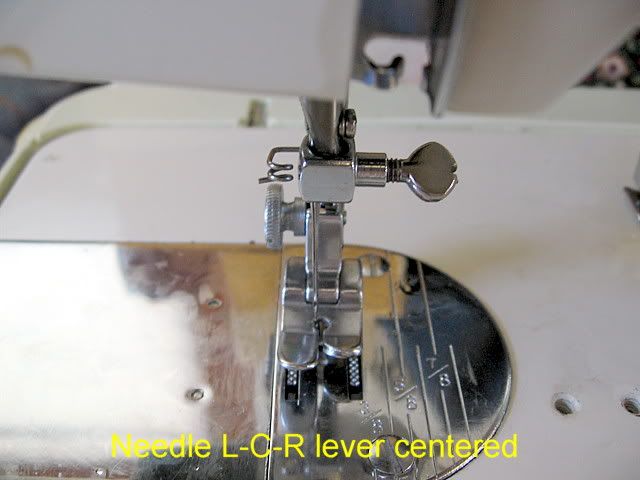
Now, in the pics of the machine you can see the needle R-C-L lever is centered. In the first needle close up I put a straight stitch foot on so you could see more clearly how off center it is.
In the second needle picture I removed the foot and moved the R-C-L lever to the left. You can see the needle is hitting the edge of the slot on the needle plate.
There must be an adjustment so that is what I'm trying to get assistance with.
TIA
Joe
First I have a correction. The machine in question is a Domestic 7000. Not a 2000. I misread the label.
Here are the pics I promised path49:
Front w/ cams:
Front a bit closer:
Top, full length:
Top, a bit closer:
Top, close up of the needle position section:
Needle position close up a:
Needle position close up b:
Now, in the pics of the machine you can see the needle R-C-L lever is centered. In the first needle close up I put a straight stitch foot on so you could see more clearly how off center it is.
In the second needle picture I removed the foot and moved the R-C-L lever to the left. You can see the needle is hitting the edge of the slot on the needle plate.
There must be an adjustment so that is what I'm trying to get assistance with.
TIA
Joe
06-17-2012, 09:10 AM
#13
Super Member
Thread Starter
Join Date: Feb 2012
Posts: 8,091
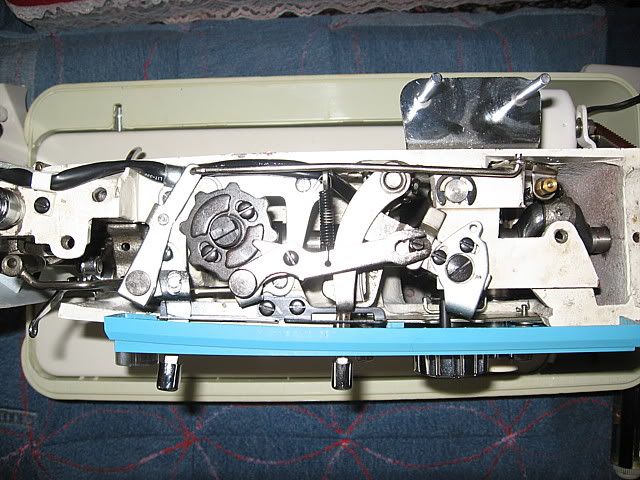
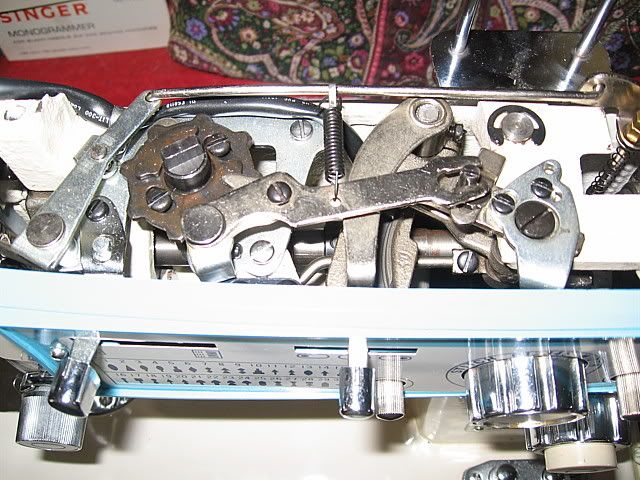
OK, here's a pic of the left side open:
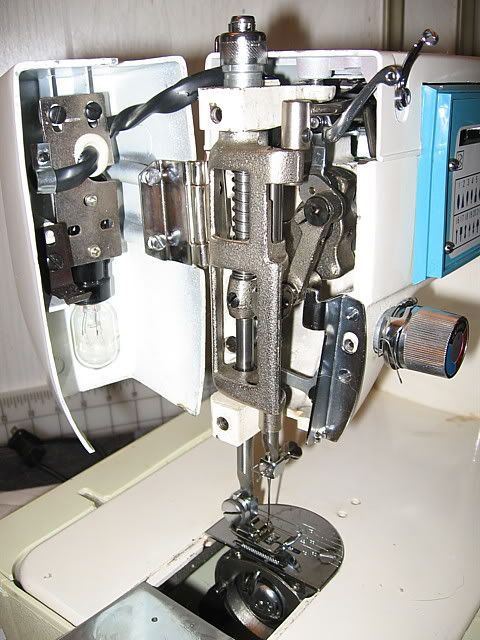
I don't see how you could adjust the needle position from there. Remember the bobbin carrier moves back and forth in conjunction with the needle.
The whole shebang has to be adjusted.
Joe
I don't see how you could adjust the needle position from there. Remember the bobbin carrier moves back and forth in conjunction with the needle.
The whole shebang has to be adjusted.
Joe
06-17-2012, 09:21 AM
#14
Senior Member
Join Date: Apr 2012
Location: Illinois...near St. Louis
Posts: 392
Nope...totally UNLIKE my Kenmores! On a Kenmore there's a curved arm that is connected to the front of the needle bar with what looks like a screw/bolt. It's actually an eccentric. On a Kenmore you loosen the nut behind the needle bar that's screwed onto the threads of the eccentric...then turn the eccentric bolt & it moves the needle bar. When it's in position, just tighten the nut.
I doubt that you'll have to adjust the bobbin carrier...the needle bar getting knocked out of position probably didn't move the carrier. I've never had to do any adjustments there.
Let me look in a generic repair book I have & I'll see if I can find anything in there.
I doubt that you'll have to adjust the bobbin carrier...the needle bar getting knocked out of position probably didn't move the carrier. I've never had to do any adjustments there.
Let me look in a generic repair book I have & I'll see if I can find anything in there.
Last edited by path49; 06-17-2012 at 09:41 AM.
06-17-2012, 10:05 AM
#16
Senior Member
Join Date: Apr 2012
Location: Illinois...near St. Louis
Posts: 392
Nothing similar enough in the book to give any advice. If I were you, I'd try slightly loosening every screw slightly (from the top L-C-R control all the way to the needle bar) that looked like there's adjustment capability (a slot, possible eccentric, etc)...& try moving the needle bar to center. Then tighten them all. Your adjustment (set screw, eccentric, slot...whatever) is for sure SOMEPLACE between the L-C-R control & the needle bar. Then deal with the bobbin carrier if necessary.
06-17-2012, 10:50 AM
#18
Senior Member
Join Date: May 2012
Posts: 911
I misread, thinking you said there isn't a L _C _ R lever.. this one doesn't have that ,, on my singer 237 it's under the top cover where your looking... but it seems I had to take something else out to get at the adjustment ??
On this one the foot will only raise less than a 1/4 inch, That has to be wrong ??
On this one the foot will only raise less than a 1/4 inch, That has to be wrong ??
09-30-2012, 05:54 PM
#20
Super Member
Join Date: Sep 2009
Location: Massachusetts, USA
Posts: 1,775
Are you sure the needle is facing the correct way. On one of my machines I remember my needle hitting, just like yours, and when I did a search on the correct way to face the needle I found that I had it in wrong. When I changed it around it fit perfectly through the hole.

Thread
Thread Starter
Forum
Replies
Last Post
sews
For Vintage & Antique Machine Enthusiasts
31
10-24-2020 01:13 PM
Noel
For Vintage & Antique Machine Enthusiasts
17
07-05-2018 08:27 PM
Jothesewer
For Vintage & Antique Machine Enthusiasts
11
08-20-2012 06:49 PM


