
New York Beauty Quilt Along Begins Oct 1st
 10-10-2012, 01:50 AM
#181
Super Member

Join Date: Jul 2012
Location: New York
Posts: 5,665
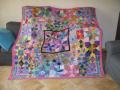
Here are my first blocks. I decided on batiks and stocked up a few weeks ago. Never realized there were so many batiks. Let's just say I've got the big box of crayons. I'm enjoying pping the blocks. This is my first attempt. There were quite a few rip outs... not having enough fabric to flip over... stitching on the wrong line. I think I have the hang of it now and have started on the next blocks.
They are beautiful. When I make one I am using colorful Batiks too.
 10-10-2012, 02:39 AM
#182
Power Poster

Join Date: Jul 2010
Location: SoCal
Posts: 11,917
Nice blocks ladies. I am still in the starting blocks, the patterns are printed out and I have plenty of batiks but nothing has happened yet. Hopefully this weekend. Even if I can just master block 0 that would be great. If I'd do 4 of those each month I would still end up with a nice quilt.
10-10-2012, 06:40 AM
#184
Junior Member
Join Date: Sep 2012
Location: Saskatoon SK Canada
Posts: 280
I have a question ladies.
When I sewed the curved pieces together, I had to take the paper off to get a nice curve. It would be nice to be able to stop any stretching by keeping the paper on. Is there a trick that someone has that they can share. I've made my blocks 12 inch, which should make it easier, but it did not seem to do that.
Also, is there a trick to cutting out the pieces. What I did was cut out each piece (actual size), lay all the like colored pieces on my ironing table about an inch apart. I then took a piece of friezer paper and ironed it onto the pieces. I then could iron the pieces onto my fabric and cut out. I could then cut rectangles and cut them apart later, or cut the freezer paper piece out (leaving enough seam allowance) and plop it into a little space to conserve fabric. Some of these blocks have many pieces and I'm wondering if someone has a slick way of cutting them out as the above was quite time consuming.
I'm sure I'll have more questions as I tackle more blocks, but thought I would try to pick the brains of some expert paper piecers. I welcome any suggestions.
amh
Saskatoon SK Canada
10-10-2012, 07:49 AM
#185
Super Member
Join Date: Mar 2011
Location: The Netherlands
Posts: 6,063
Oh dear such beautiful blocks! I love to see them!
amh, I can't help you here as I only made one on these blocks for my Sylvia and I didn't have lots of troubles with that one. But it's quite some time ago and I don't remember if I left the paper on or not. I'm sure you will get your answers though from our expert paper piecers
amh, I can't help you here as I only made one on these blocks for my Sylvia and I didn't have lots of troubles with that one. But it's quite some time ago and I don't remember if I left the paper on or not. I'm sure you will get your answers though from our expert paper piecers
10-10-2012, 07:55 AM
#186
Junior Member

Join Date: Jun 2011
Location: New Orleans area
Posts: 164
I found I had to take the paper off to sew the curved pieces. Also I just cut small rectangular pieces for the piecing. I probably did have more waste but have gotten better at cutting smaller pieces as I went along.
10-10-2012, 09:16 AM
#187
Super Member
Thread Starter

Join Date: Jul 2010
Location: Salem, Oregon
Posts: 2,438
Everyone's blocks are looking fanstatic! I finished Block 1 this morning. I had 4 of Block 0 practically done when I realized I had used GoogleChrome as my browser when printing out the blocks and it printed them smaller so the finished size would not have matched the blocks I had already sewn, URGH all that fabric wasted.
Tip: For curved pieces. I sew along the seam line. Then I rip the paper out from the seam line area leaving the majority of the paper on the block. I snip along the curved pieces to allow for curving the seam. I also smash the paper down if it's bugging me. I also use LOTS of pins. I may have pictures of this at home I will try and post them tonight.
Here are my Block 1's
10-10-2012, 11:52 AM
#190
Super Member
Thread Starter
Join Date: Jul 2010
Location: Salem, Oregon
Posts: 2,438
I have a question ladies.
When I sewed the curved pieces together, I had to take the paper off to get a nice curve. It would be nice to be able to stop any stretching by keeping the paper on. Is there a trick that someone has that they can share. I've made my blocks 12 inch, which should make it easier, but it did not seem to do that.
Also, is there a trick to cutting out the pieces. What I did was cut out each piece (actual size), lay all the like colored pieces on my ironing table about an inch apart. I then took a piece of friezer paper and ironed it onto the pieces. I then could iron the pieces onto my fabric and cut out. I could then cut rectangles and cut them apart later, or cut the freezer paper piece out (leaving enough seam allowance) and plop it into a little space to conserve fabric. Some of these blocks have many pieces and I'm wondering if someone has a slick way of cutting them out as the above was quite time consuming.
I'm sure I'll have more questions as I tackle more blocks, but thought I would try to pick the brains of some expert paper piecers. I welcome any suggestions.
amh
Saskatoon SK Canada
When I sewed the curved pieces together, I had to take the paper off to get a nice curve. It would be nice to be able to stop any stretching by keeping the paper on. Is there a trick that someone has that they can share. I've made my blocks 12 inch, which should make it easier, but it did not seem to do that.
Also, is there a trick to cutting out the pieces. What I did was cut out each piece (actual size), lay all the like colored pieces on my ironing table about an inch apart. I then took a piece of friezer paper and ironed it onto the pieces. I then could iron the pieces onto my fabric and cut out. I could then cut rectangles and cut them apart later, or cut the freezer paper piece out (leaving enough seam allowance) and plop it into a little space to conserve fabric. Some of these blocks have many pieces and I'm wondering if someone has a slick way of cutting them out as the above was quite time consuming.
I'm sure I'll have more questions as I tackle more blocks, but thought I would try to pick the brains of some expert paper piecers. I welcome any suggestions.
amh
Saskatoon SK Canada

Thread
Thread Starter
Forum
Replies
Last Post
hawghugger
Links and Resources
13
11-18-2013 04:15 PM
barnbum
General Chit-Chat (non-quilting talk)
44
08-26-2009 10:09 AM


