
Trouble getting seams to match up
 10-13-2014, 05:43 PM
#11
Super Member

Join Date: Jan 2009
Location: Southern California
Posts: 6,254
To me it seams the star part where the triangle meets is cut off slightly which means your seams are probably off a little, enough to make your seams not line up. Also it looks like the squares sewn to the flying geese units look longer than the flying geese units are. Are you maybe using different brand rulers
 10-13-2014, 06:09 PM
#12
Junior Member
Thread Starter
Join Date: Sep 2014
Posts: 178
To me it seams the star part where the triangle meets is cut off slightly which means your seams are probably off a little, enough to make your seams not line up. Also it looks like the squares sewn to the flying geese units look longer than the flying geese units are. Are you maybe using different brand rulers
10-13-2014, 07:50 PM
#13
Super Member
Join Date: Jul 2010
Location: Ontario, Canada
Posts: 3,526
Okay, the measurements you quoted match up exactly to what I have for a finished 4 inch block. But when I look at your block, the center point of your flying geese is sewn in on the top and bottom. WHY?? Did all four flying geese pieces look the same before you tried to attach them to the neighbouring pieces? Or did some not overlap in the center? It just looks like you sewed a half inch seam instead of a quarter inch seam when you attached the top piece, center piece and bottom piece.
The only thing I can think of is that the flying geese did not meet correctly in the center of the top and bottom pieces. Therefore when you sew those pieces to the center piece, the seam allowance is cutting off the point.
You could try this: Take a couple of pieces of scrap fabric. Cut one piece 1 1/2 x 2 1/2. Then cut two pieces 1 1/2x 1 1/2 and draw a diagonal line across those two pieces. Now lay one piece with the diagonal on it on the end of the larger piece. Sew along the diagonal. Finger press the seam. It should match almost exactly to the original 1 1/2x2 1/2 Now sew the other diagonally marked piece onto the other side and finger press. How does that compare to the two pieces you have already sewn to your center piece on your original block? (this is a way of doing flying geese and wasting a lot of material but some people prefer it because it is more exact.)
Please let us know if any of these suggestions have helped.
Oops just re-read your last post. You should center the triangles. An easy way of doing that is to fold the sides to be sewn and just finger press a bit. Then match the little creases and pin if necessary.
Last edited by GingerK; 10-13-2014 at 07:56 PM.
10-13-2014, 10:02 PM
#14
Power Poster
Join Date: May 2008
Location: MN
Posts: 24,474
Those are small pieces.
Your flying geese units should measure 1-1/2 x 2-1/2 inches after they are assembled. What size are yours?
I am not a fan of cutting squares into HSTs (half square triangles) and QSTs (quarter square triangles) because my finished units always end up "skimpy" - at best - when I do that.
I have decided that the reason they end up skimpy - is that when I cut around a ruler or other template - the cut pieces are a tiny bit larger than the stated size - maybe by only 1/32 of an inch or so - but still a bit larger than the stated size.
When cutting up squares - I think the pieces end up "smaller" somehow - and then the finished units are too small for the other components.
My seams are pretty close to a "real" 1/4 inch and usually my blocks end up being fairly close to the expected size.
I have not cut strips with the June Tailor shape cutter yet - but I will check the measurement of them before sewing them together.
10-13-2014, 10:08 PM
#15
Super Member
Join Date: Jun 2010
Location: England Alton Towers
Posts: 6,673
Ry a scant 1/4" and I always make sure I don't loose the point on the flying geese. If you have cut everything sorry about the problem . I would check with the pattern designer by mail or call to see if they have a correction sheet.
Plenty of help here good luck.
Plenty of help here good luck.
10-14-2014, 04:19 AM
#16
Junior Member

Join Date: Feb 2010
Location: North Carolina
Posts: 147
another problem with this block is if you carefully pin on both sides of the seam it will help. seams tend to move as you are sewing them. this used to be one of my favorite blocks! good luck!
10-14-2014, 05:10 AM
#17
Power Poster

Join Date: Dec 2009
Location: Outside St. Louis
Posts: 38,213
I find that with a lot of blocks. Pinning does help. I try to avoid these types of patterns. More likely to happen the more small pieces there is. Cutting slightly bigger pieces and trimming down may help too.
10-14-2014, 05:23 AM
#18
Power Poster
Join Date: Dec 2010
Location: Michigan
Posts: 11,276
You said you measured your seams. The quarter inch seam is sort of a misnomer because you don't measure the seam, you measure the resultant unit. Here's the standard way to check:
http://www.quiltingboard.com/tutoria...ce-t89997.html
For these tiny stars to come out right, you need to measure accurately, sew accurately and press accurately. Make sure that you are not pressing a tiny crease in the seam. Use a bit of spray starch or sizing. Measure as you go. After you make a flying geese unit (Flying goose!), measure the unit. If it's not exactly 2.5" by 1.5", your seams are not going to match, so you need to figure out what you need to change to make this unit exact. if it's too small, your seams are too big no matter what they measure. If it's too big, your seams are too small. Again, ignore the actual seam measurement and sew whatever width you need to make these units come out exact. I'm not a fan of how the pattern told you to make these FG units because of the bias cuts.
Last edited by PaperPrincess; 10-14-2014 at 05:25 AM.
10-14-2014, 08:28 AM
#20
Super Member
Join Date: Mar 2011
Location: Pratt Kansas
Posts: 1,222
I do not have a lot of flying geese experience. I do know they are tricky.
That said, I'm not sure your measurements work to the situation.
I would graph it with accurate graph paper. 1/4" equals 1 square graph paper.
Draw your finished flying goose unit twice.
Then draw 1/4 seam allowance lines around the center unit, then around a wing unit (your red triangles). Cut these out of the graph paper. Now. Do these cut papers match what you are starting with in cut fabric units?
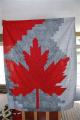
Your picture shows the red is cut into triangles already. Most instructions I have read for flying geese show sewing a square to a rectangle then trimming the corners off.
(Her center square is fine, it is only sewn on two sides.)
That said, I'm not sure your measurements work to the situation.
I would graph it with accurate graph paper. 1/4" equals 1 square graph paper.
Draw your finished flying goose unit twice.
Then draw 1/4 seam allowance lines around the center unit, then around a wing unit (your red triangles). Cut these out of the graph paper. Now. Do these cut papers match what you are starting with in cut fabric units?
Your picture shows the red is cut into triangles already. Most instructions I have read for flying geese show sewing a square to a rectangle then trimming the corners off.
(Her center square is fine, it is only sewn on two sides.)

Thread
Thread Starter
Forum
Replies
Last Post
