
A Flurry of Featherweights

 11-09-2014, 10:56 AM
#12
Junior Member
Thread Starter

Join Date: Jan 2014
Location: Samsonville, New York
Posts: 268
Take the belt off and move the wheel by hand to see if you have it moving freely. If it's cleaned and oiled well enough then I would suspect the motor next. Double check the wiring and the motor. Mine had thread wound around the spindle coming off the motor and I never would have found it had I not taken the time to look.
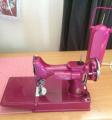
So, I'm trying to take the motor apart without disconnecting it from the machine. I have it dismounted and I took out the set screw on the pulley, but I don't know how the pulley shaft is supposed to come off. The diections I've found say to remove the set screw and take off the pulley. Does it pull off? (If it's supposed to pull, it doesn't.) Does it need to be twisted? (I tried holding a small screwdriver blade in the flat hole and then trying to unscrew the outer part, but nothing moved easily.)
Help?[ATTACH=CONFIG]498245[/ATTACH] (Now that I see this photo, I'll scrub some more dirt away...)
11-09-2014, 11:05 AM
#13
Junior Member
Thread Starter
Join Date: Jan 2014
Location: Samsonville, New York
Posts: 268
Thank you - that's a great idea. Even if I could find another Featherweight with some major flaws, but a good extension bed, maybe I could switch out - although it seems like they cost a lot no matter what. The bed is actually slightly dented as well as scratched, so even repainting isn't going to completely fix it. So, I think replacing the extension bed would be a good option.
11-09-2014, 11:50 AM
#14
Super Member

Join Date: Oct 2010
Location: Arley,Alabama
Posts: 1,737
Congratulations on your purchases; even though it is more than I would have paid for some in such bad shape. I know your feeling that the good ones are just not showing up any more--even here in FW country. My sister found a white one for me not too long ago for $65, but it was a MESS. DH and I finally got it cleaned up and running, and I do love it--have already pieced two quilts on it. Would someone please tell me how to get hold of this "Glenn's tutorial (or whatever). I keep seeing references to it, but don't know how to pull it up and study it.
Someone's kid had a field day on that one of yours. Makes me mad at kids all over for that--even though it could have been a mad husband, brother, sister, or self. That is shameful. I'm getting myself all worked up here over mistreatment of a sewing machine, and I guess I have to go to church this morning to ask for forgiveness for my mean thoughts.....
Someone's kid had a field day on that one of yours. Makes me mad at kids all over for that--even though it could have been a mad husband, brother, sister, or self. That is shameful. I'm getting myself all worked up here over mistreatment of a sewing machine, and I guess I have to go to church this morning to ask for forgiveness for my mean thoughts.....
Glenn

Super Member
[h=2]Cleaning and repairing the shellac clear coat on vintage sewing mcahines[/h]
Supplies needed: Shellac
Denatured alcohol
Linseed oil (boiled)
Rags (old t-shirts or old tighty whites)
1. Clean the head with you favorite method to remove dirt and grime.
2. Wrap you finger with a couple of layers with the t-shirt.
3. dip finger in alcohol and place a few drops of linseed oil on the finger
4. now start rubbing the bed with light circular motions, add more oil if finger sticks to the finish.
We are now melting the old shellac into a smooth coating trying to eliminate the dull brown spots of old shellac.
5.Now go from left to right in a straight line ligthly lifting the finger and the repeat. you can also go from right to left if you like. Now we are trying to get rid of any swirl marks that were left by the rag.
Stay away of the decals at this time. Cont this tech until you have a smooth finish on the entire head.
When you hav a smooth and clear finish on the head(as clear as it will get and you will know)
6. Now go over the the decals with the same method above very lightly.
7. Let this cure for about a day then with new rag on finger dip it in shellac and place a few drops of oil and with a circular motion go over the decals and the head. Cont. dipping finger in shellac and a few drops of linseed oil and do this over the entire head and decals. this is adding more clean shellac to protect the decals and the japan coating. Always ending in the straight line finishing to get rid of the swirl marks made by the rag.
8. Do this until it looks good to you and smooth and shiny. Let cure for a week and then wax if you want. You favorite brand of wax is okay although it is not needed now.
Please note: I recommend you practice this french polish method on an old machine first so you can get the hang of it. Please do not hesitate to ask questions anytime. I am always here to help.
11-09-2014, 01:07 PM
#15
Junior Member
Thread Starter
Join Date: Jan 2014
Location: Samsonville, New York
Posts: 268
Thanks to everyone for your help! I can officially announce that Chugger can be renamed Zippy. Not a squeak is left, and it starts right up and runs very speedily and evenly - sews beautifully, too. I gave it another coat of glaze and it's nice and shiny. I am so proud of myself and grateful to you, because four days ago, this was a machine that was filthy inside and out and couldn't run at all. Now it's so beautiful and runs great! I honestly think fixing machines is more fun than finding them in great shape, although that perfect Kenmore is still making me awfully happy. So, I guess it's good either way.
11-10-2014, 05:22 AM
#17
Super Member
Join Date: May 2012
Location: Central Wisconsin
Posts: 4,391
11-10-2014, 10:09 AM
#18
Junior Member
Thread Starter
Join Date: Jan 2014
Location: Samsonville, New York
Posts: 268
All polished up and sewing nicely! Everyone else is going to have to wait till after the holidays or I will never, ever be ready. I have a delusion that I am going to sew doll clothes for all the granddaughters...and clean up all the sewing machines in progress that are strewn throughout the house. [ATTACH=CONFIG]498346[/ATTACH]
 11-10-2014, 10:00 PM
#20
Junior Member
Thread Starter
Join Date: Jan 2014
Location: Samsonville, New York
Posts: 268
Thank you! It was really fun to fix it up. It's a 1941. I haven't had a chance to really sew with it, but I was playing with my scrap fabric doing twists and swirls. Even though the feed dogs don't drop, it's pretty accommodating about letting the fabric move around, but it feeds nice and straight forward and reverse if I don't move the fabric. I'm really happy with it.

Thread
Thread Starter
Forum
Replies
Last Post
