
pott motor rewire.
 01-31-2013, 01:26 PM
#11
Senior Member
Join Date: Apr 2012
Location: Jersey Shore
Posts: 528
I'm with the crew...replace the wires up to the actual motor. After soldering use shrink to insulate the exposed solder joint. Even though the motor may seem to be operating properly, it may only be working on a few tiny stands of wire which will burn it out and make the wiring overheat...better safe than sorry. Rewiring is a critical part of making these old machines safe to use again...good luck!
 01-31-2013, 02:18 PM
#12
Super Member
Join Date: Feb 2012
Posts: 8,091
PATTIESPEARL
Take a close look at the wires to the armature of this motor, and the light, and the cord block. The insulation has crumbled off all the way up inside the the motor, to the light, and to the cord block. If the wires are just cut and spliced outside the motor housing you could have a disaster in the making. The insulation in these old machines tend to either melt or petrify and crumble off. It's rare to find one in really good condition.
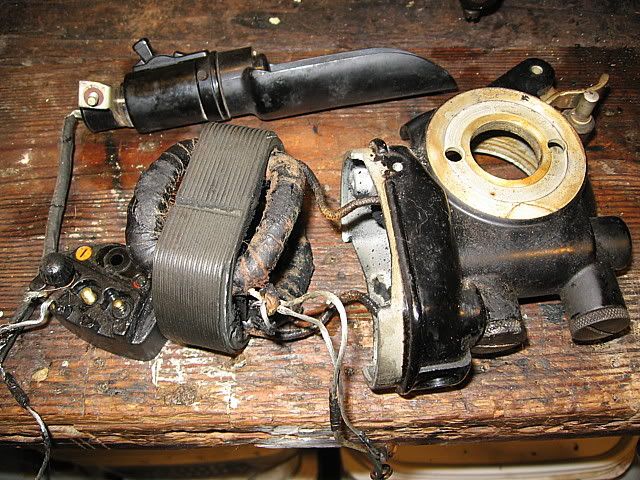
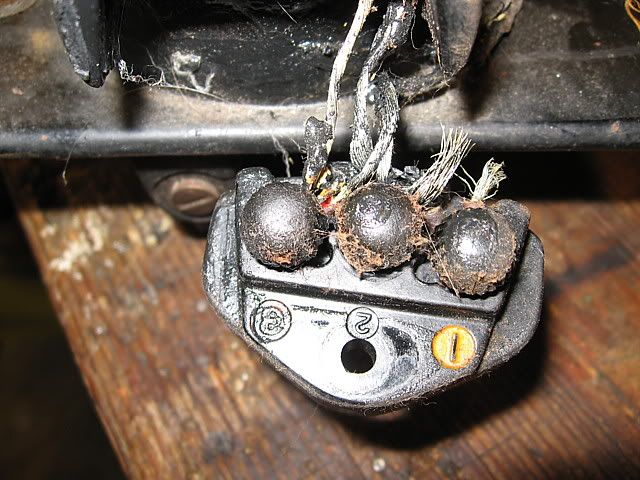
This is why I posted the two links I posted. There is no short cuts to electrical motor wiring repair. If you do it right you're good to sew, if you do it wrong it could be a shocking experience.
Joe
Take a close look at the wires to the armature of this motor, and the light, and the cord block. The insulation has crumbled off all the way up inside the the motor, to the light, and to the cord block. If the wires are just cut and spliced outside the motor housing you could have a disaster in the making. The insulation in these old machines tend to either melt or petrify and crumble off. It's rare to find one in really good condition.
This is why I posted the two links I posted. There is no short cuts to electrical motor wiring repair. If you do it right you're good to sew, if you do it wrong it could be a shocking experience.
Joe
02-01-2013, 04:25 AM
#13
Senior Member
Thread Starter
Join Date: Jun 2010
Location: Mountain View, Oklahoma
Posts: 559
I will read it well. May even try to put the old motor in it. I did not understand when the man that i bought it from said that it could not be done. My original motor is very good.
03-22-2013, 02:10 PM
#14
Senior Member
Thread Starter
Join Date: Jun 2010
Location: Mountain View, Oklahoma
Posts: 559
Thank you JMiller. I live almost at the end of the world when it comes to buying supplies. I got the last of them by mail day before yesterday. I read and copied to a usb drive, the article by Mr Rains. I have taken the motor apart and totaly rewired it, put in new oil wicks. I have it all back together now and it sews beautifully. I was a little afraid to do this on my own, but my dh has such tremors that he can not do things like this any more.
03-22-2013, 06:46 PM
#16
Super Member
Join Date: Feb 2012
Posts: 8,091
PattiesPearl,
I'm glad you took the chance. Isn't it great when you accomplish something yourself.
 Sewing machine motors are fairly easy. I don't usually do household type electric wiring but sewing machine motors don't bother me a all.
Joe
I'm glad you took the chance. Isn't it great when you accomplish something yourself.
Sewing machine motors are fairly easy. I don't usually do household type electric wiring but sewing machine motors don't bother me a all. Joe
03-23-2013, 08:18 AM
#17
Senior Member
Thread Starter
Join Date: Jun 2010
Location: Mountain View, Oklahoma
Posts: 559
I have never been afraid to tackle a sewing project or reupholstering project, but motors and things of that nature were my husbands passion and I thought it would be too complicated. afraid that I might have some "leftover" parts. I only had one leftover part and couldn't figure out what it was. found out that it was something extra that my dh had placed in the box with the solder pencil.

Thread
Thread Starter
Forum
Replies
Last Post
Beautiful_Sound
For Vintage & Antique Machine Enthusiasts
8
12-01-2015 09:32 AM
Beautiful_Sound
For Vintage & Antique Machine Enthusiasts
10
10-30-2015 08:36 PM
miriam
For Vintage & Antique Machine Enthusiasts
45
04-09-2014 11:52 PM
