I also posted this on my blog (linked in siggy), but I wanted to post the instructions here as well as many new quilters are afraid to try paper piecing, and I find this method to be so easy. Even people that have been paper piecing for a long time will enjoy this method I think. I may have to split this into a few posts. So bear with me!!
I do not claim to be the originator of this method in any way, shape, or form. I first saw the method demonstrated on the Twiddletails website when I jumped into her Geese in the Forest paper piecing quilt pattern. I have shown my progress on this quilt on my blog before, but I am enamored with this quilt.
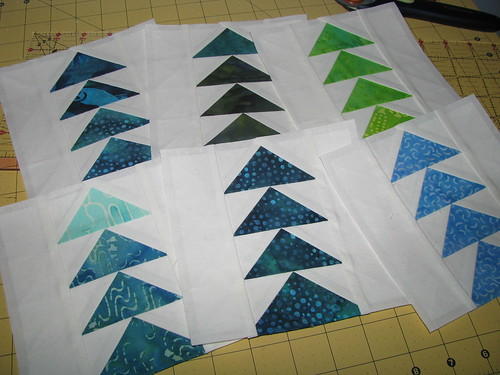
I am not sure if she is the originator of this paper piecing method, but this is how I do all of my paper piecing now. Even my Dear Jane blocks get done in this method. I love it!! My method is slightly different from the tutorial I saw on Twiddletails. I hope you like it enough to give it a try as it's really not that hard, and you will discover so many benefits over the traditional way of paper piecing (which I will point out as we go).
Before you get started, you need freezer paper. You can find this at the grocery store in rolls. That is what I used when I started, but then I discovered this stuff:

This is freezer paper that is cut into sheets that fit in your printer. In my tutorial I used the rolls because I didn't have any of this on hand when I was taking the pictures (a few months ago actually). But let me tell you, this pre-cut stuff is well worth the slightly added cost. Trying to tame the curled paper to fit in your printer is no treat. I do have the freezer paper sheets in my store (link in siggy), but your LQS may even have it, trust me it is worth it.
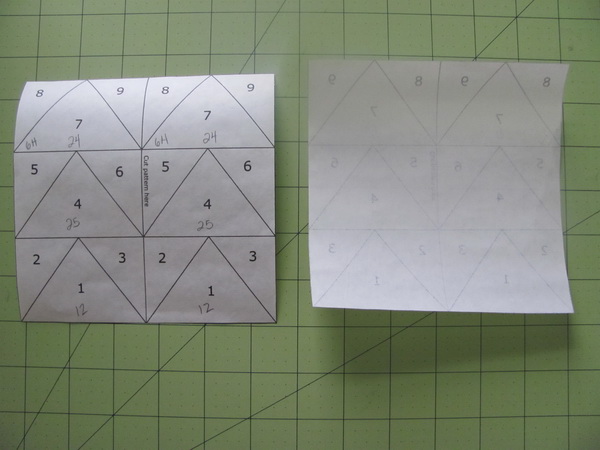
Once you have your freezer paper, you will want to print your pattern right on there. Be sure to print on the papery side,
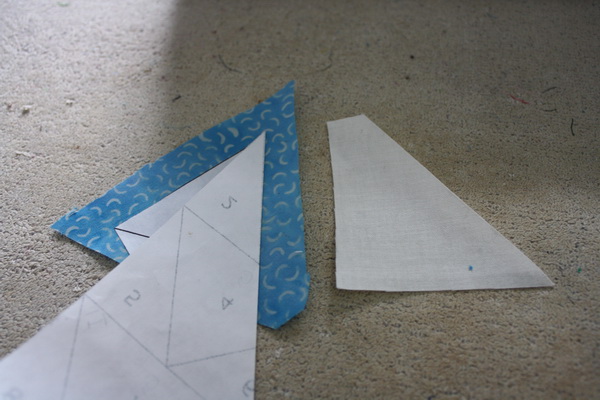
not the shiny side. Any printer will work, as the papery side is just like normal paper. If your block is directional, please remember that your block will be a mirror image of what is printed, so if the pattern has not already done it for you, you may need to use an image software to flip your design before printing. Once printed, cut the pattern out on the seam line. Follow your pattern instructions to determine where else to cut, you are not cutting out each individual piece, just the blocks that will be paper pieced together.
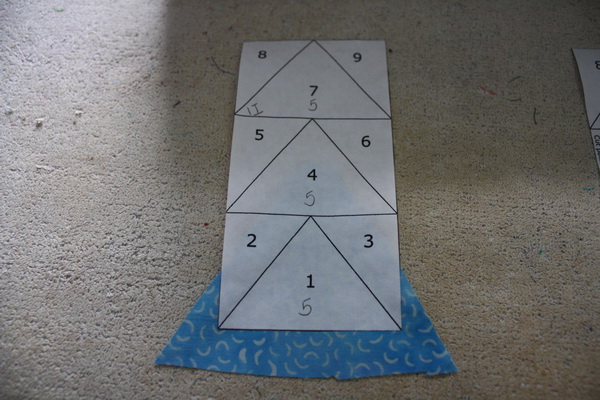
Now I pick out my pieces of fabric for the block, I usually rough cut the shapes of each piece leaving a generous seam allowance.
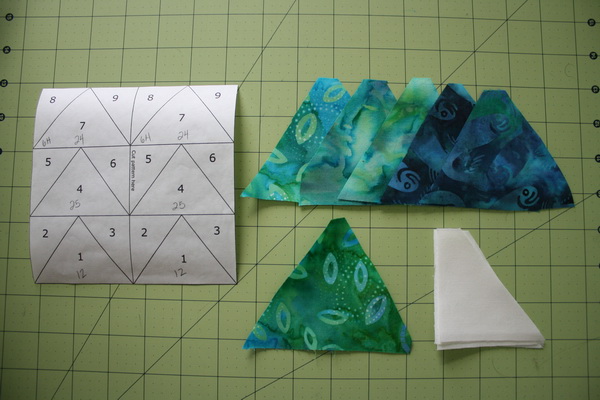
You can see that I have cut down the line in the middle of the block. This is specified in the instructions for the block. Some blocks will have no extra cuts, some will have a few, just be sure to follow your pattern.
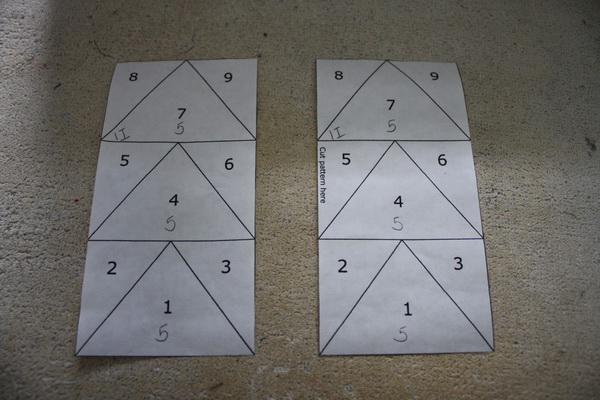
In these pics you can see that I have hand written numbers on the pieces. This corresponds to the fabric I will use. You certainly don't have to do this part, but it does make it a lot easier to keep everything in line while you are piecing. The printed numbers are for the actual paper piecing, they will tell us what order to sew in.
Take your fabric piece number one, and lay it right side down under spot number one. The wrong side of the fabric should be touching the freezer paper. Make sure to leave at least a 1/4 inch around all the sides. Iron the freezer paper to the fabric. Try to only iron in the number one spot, it will make doing the rest of the block so much easier.
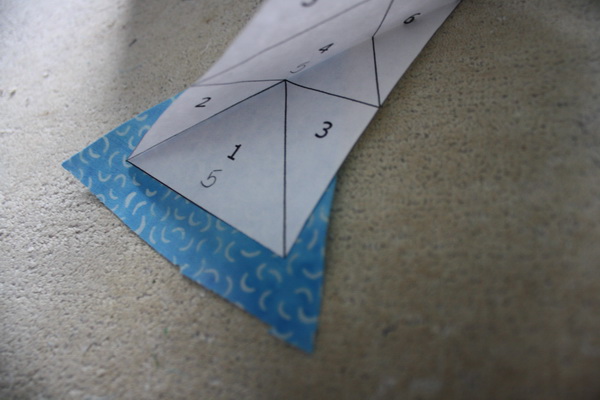
Fold along the line between the number one and number two spot. You should be able to see your lines easily through the back of the freezer paper.

Pick your fabric piece number two up.