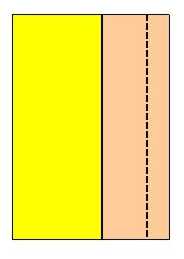
A narrow, even, perfectly straight strip is quite easy if you use the last seam line sewn as the next seam's sewing guide. (quilt top is yellow, narrow inner border is tan, and wide outer border is green)
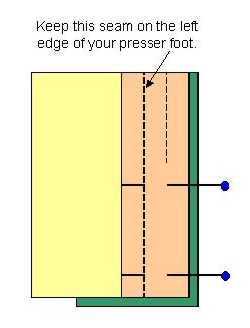
With right sides together, sew the first seam of the strip to the adjacent fabric in the usual way; place right sides together and sew 1/4 inch from the right edge..
Press the seam towards the quilt top (you need to be able to see it clearly). Next, place the outer border fabric so that it lies face up underneath the narrow one and pin. The backside of the quilt top will be facing you and what was the bottom will now be on the top. Line your Ľ" presser foot up with its left edge against the seam you just made in step one. Use that seam line as your guide all the way down the strip (forget about the seam allowance). Your goal is a perfect seam-to-seam distance, not a perfect seam allowance.
Finished backside.
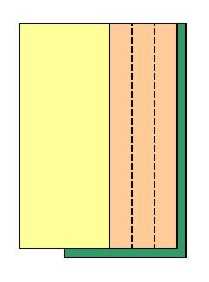
Finished front after trimming.

This is easy, accurate, and very effective in a variety of applications. You can go as narrow as 1/8 inch very precisely or as wide as your sewing guide (that's the bar thingie that came with your machine for grid quilting) allows.
This is something I learned from Joen Wolfrom's books and I've used it in several quilts. It works beautifully and is very, very easy!