I started out by downloading the "patterns" from the web. I am only using them for general fabric placement as I'm going larger. But they are numbered for placement so I don't have to figure that out. Edited to add - site is Pintagle - I know I found one page that had all 100 of the blocks in one spot, but I don't know where it is or if it's still there. You can find them one at a time with each completed block. - OK I found it , I looked up "I dropped my button box" and there it was!
https://pintangle.com/faq-pages/cq-details/
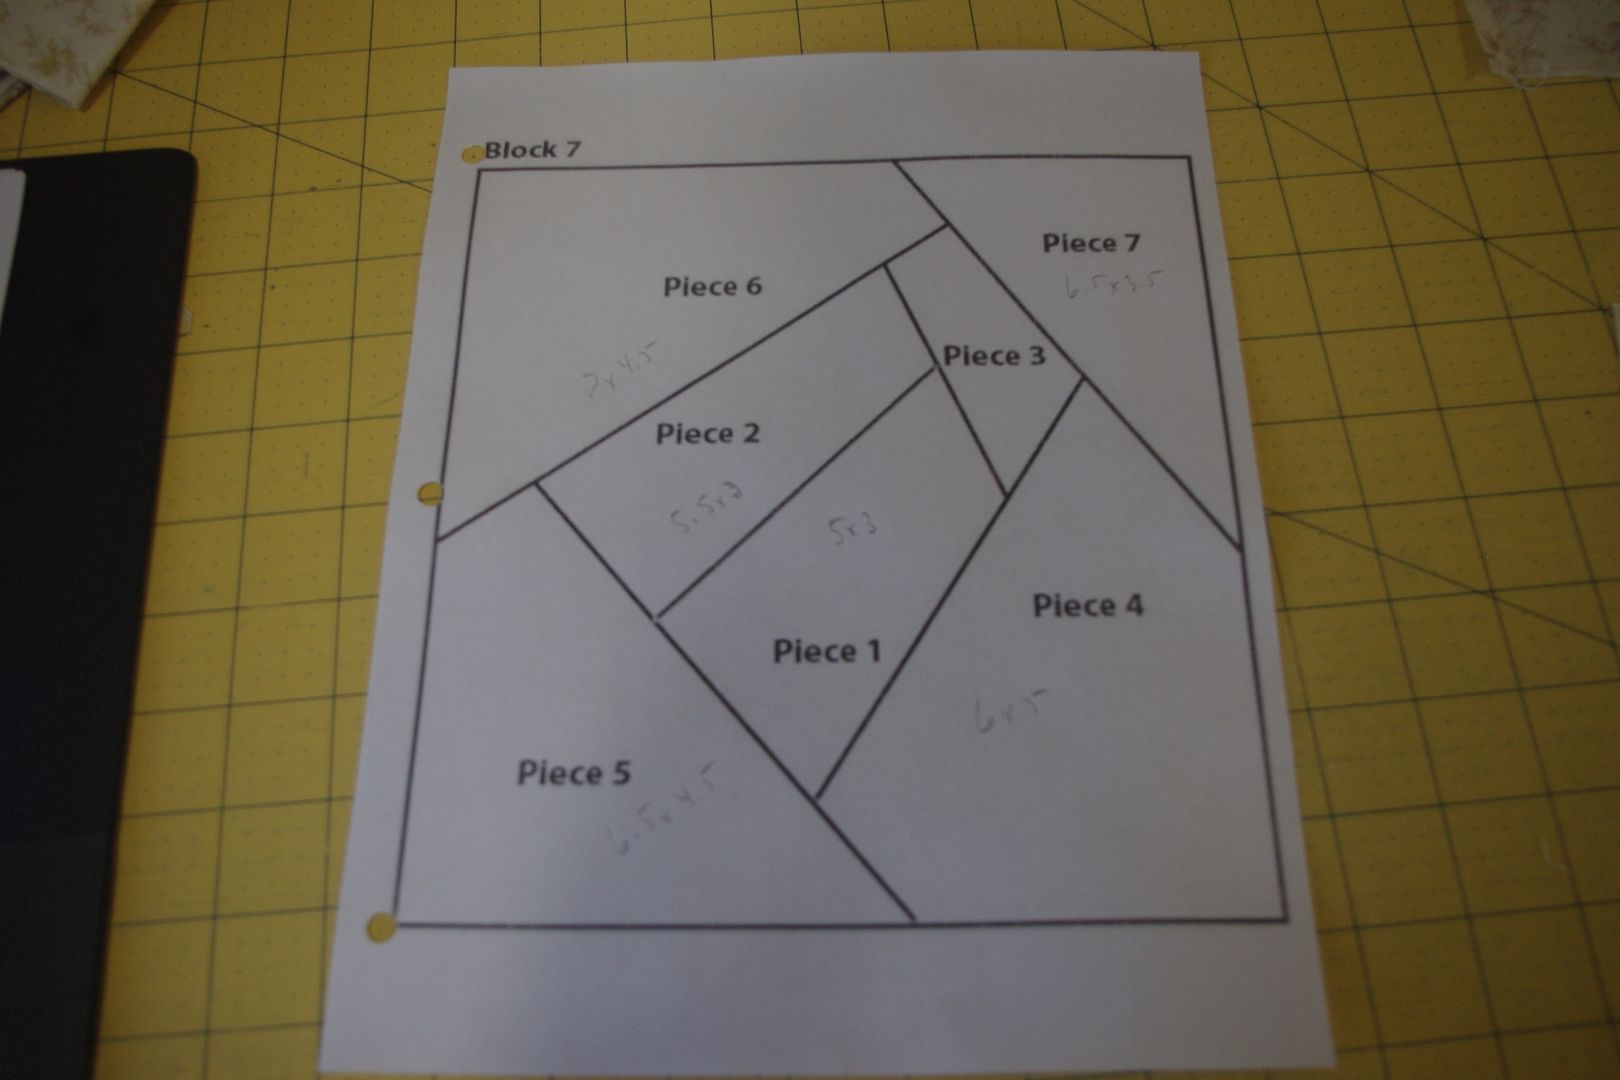
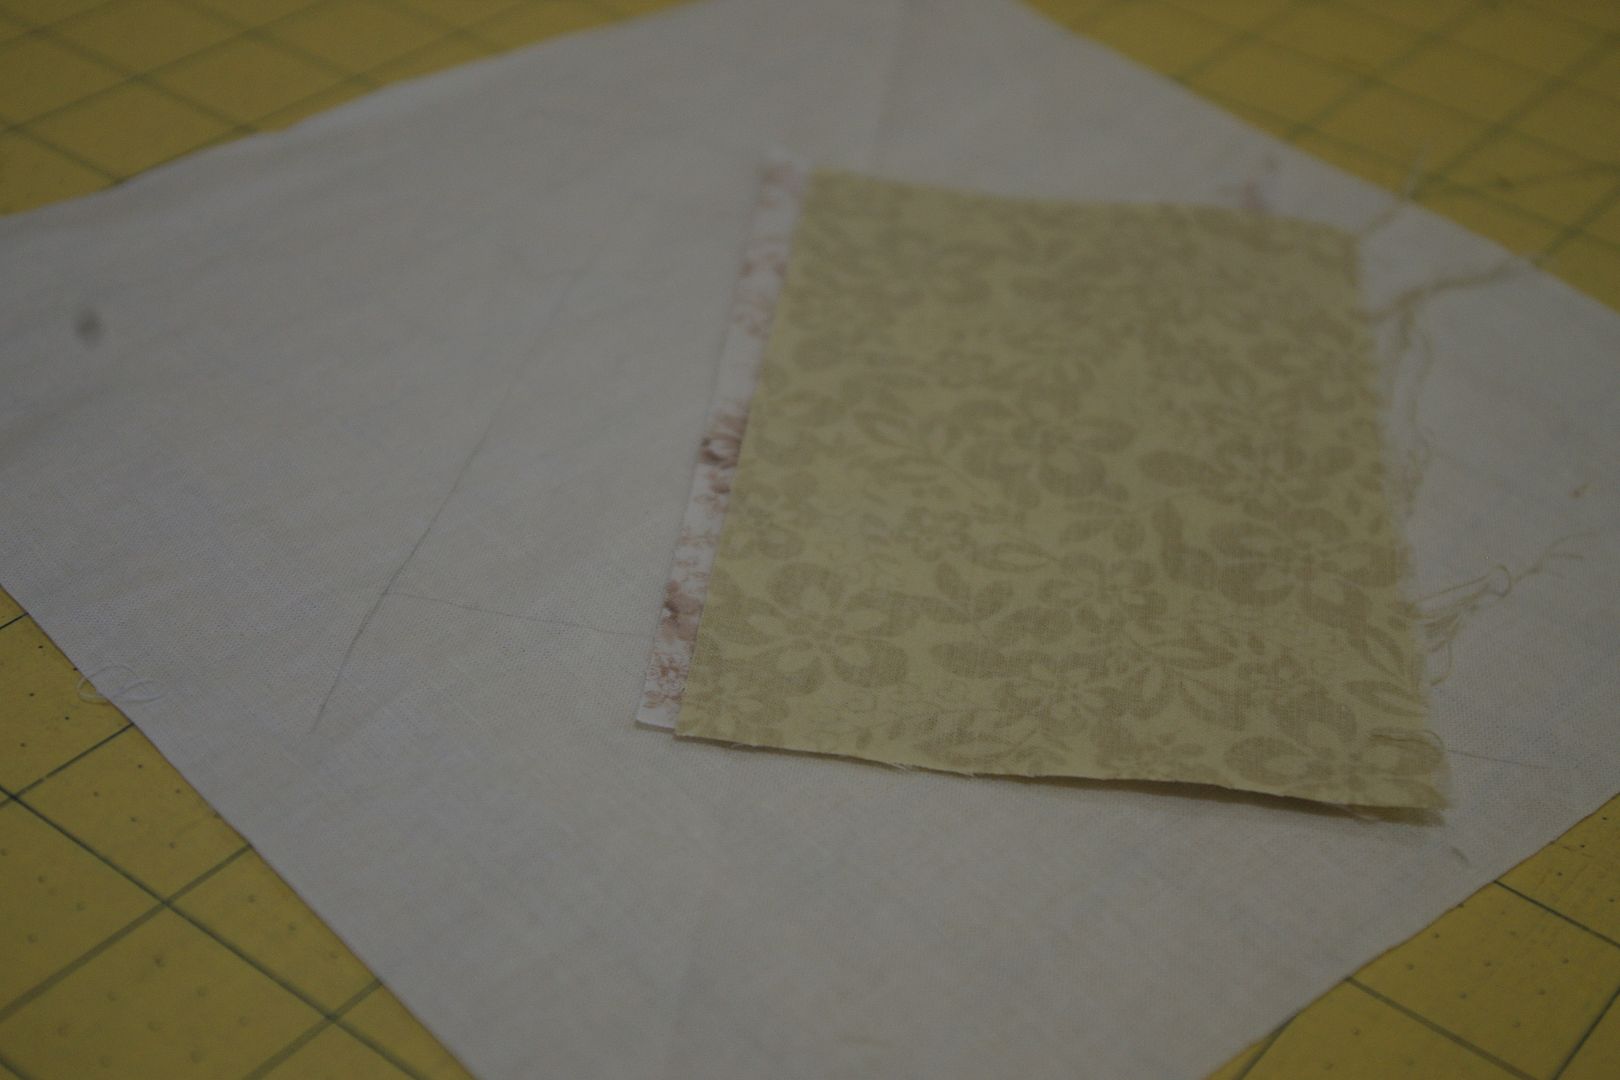
Then I take muslin and trace basic where I want the fabric to go.
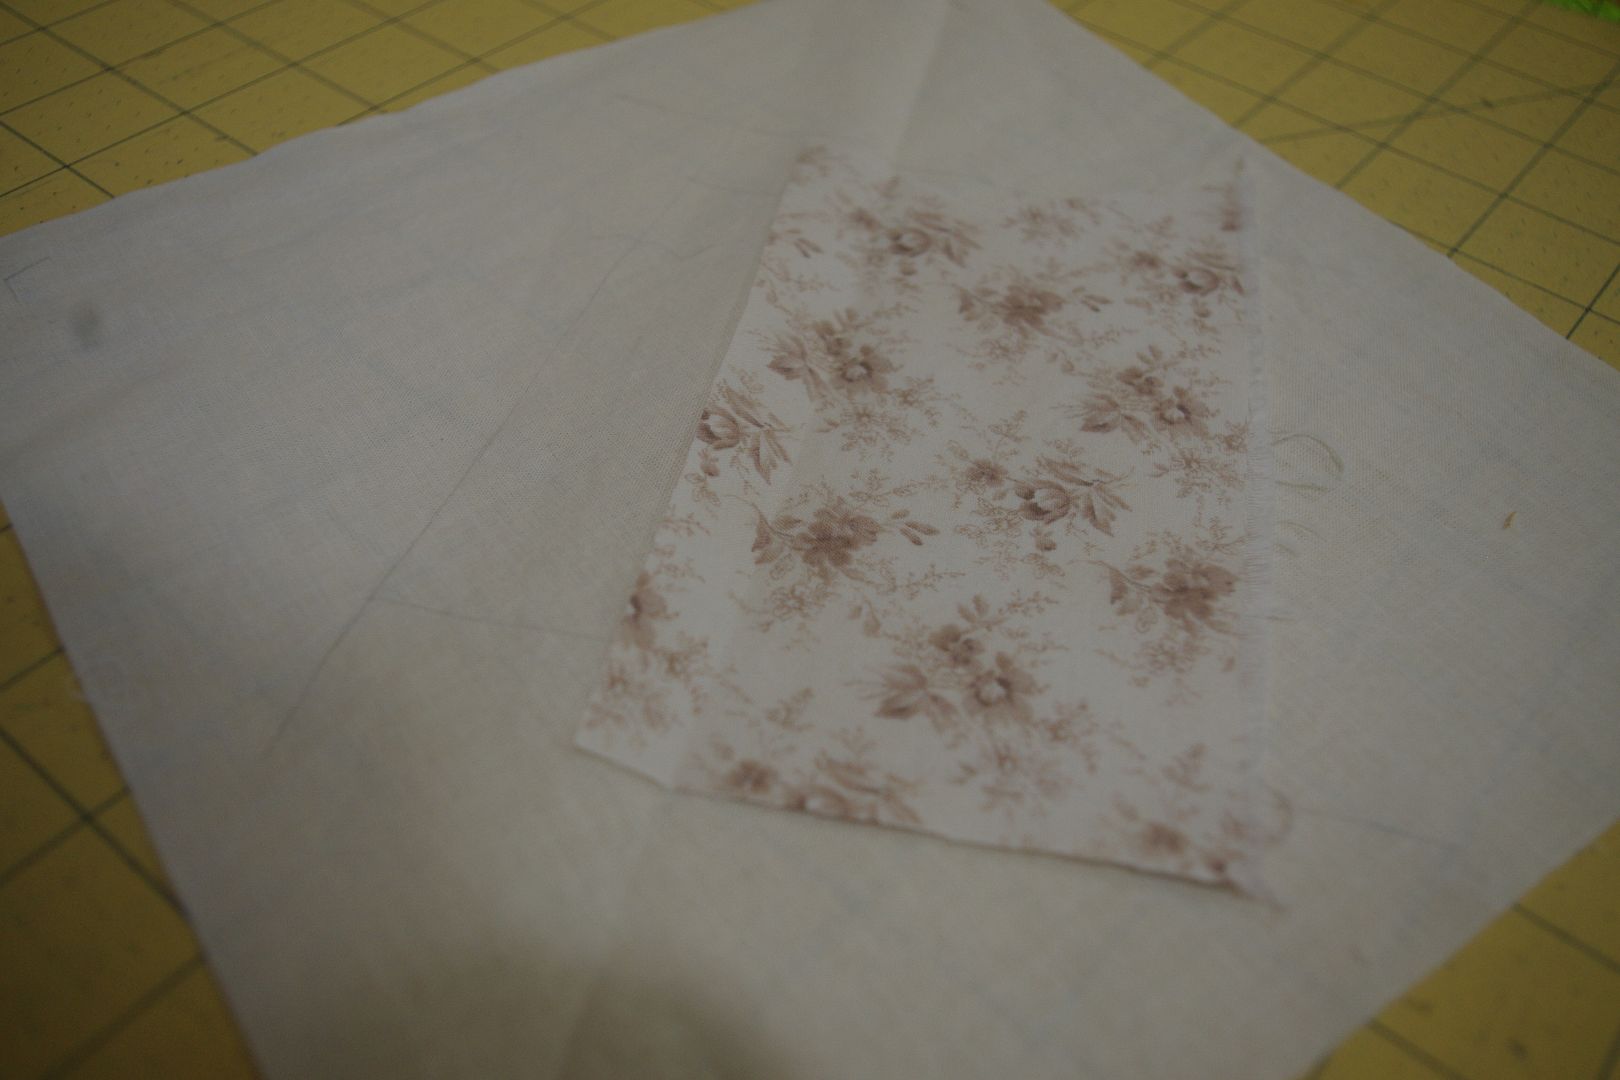
I usually use washable school glue to hold the first piece in place, just a few dabs so it stays put. Then I fold over and finger crease the seam line and lay the second piece on top.
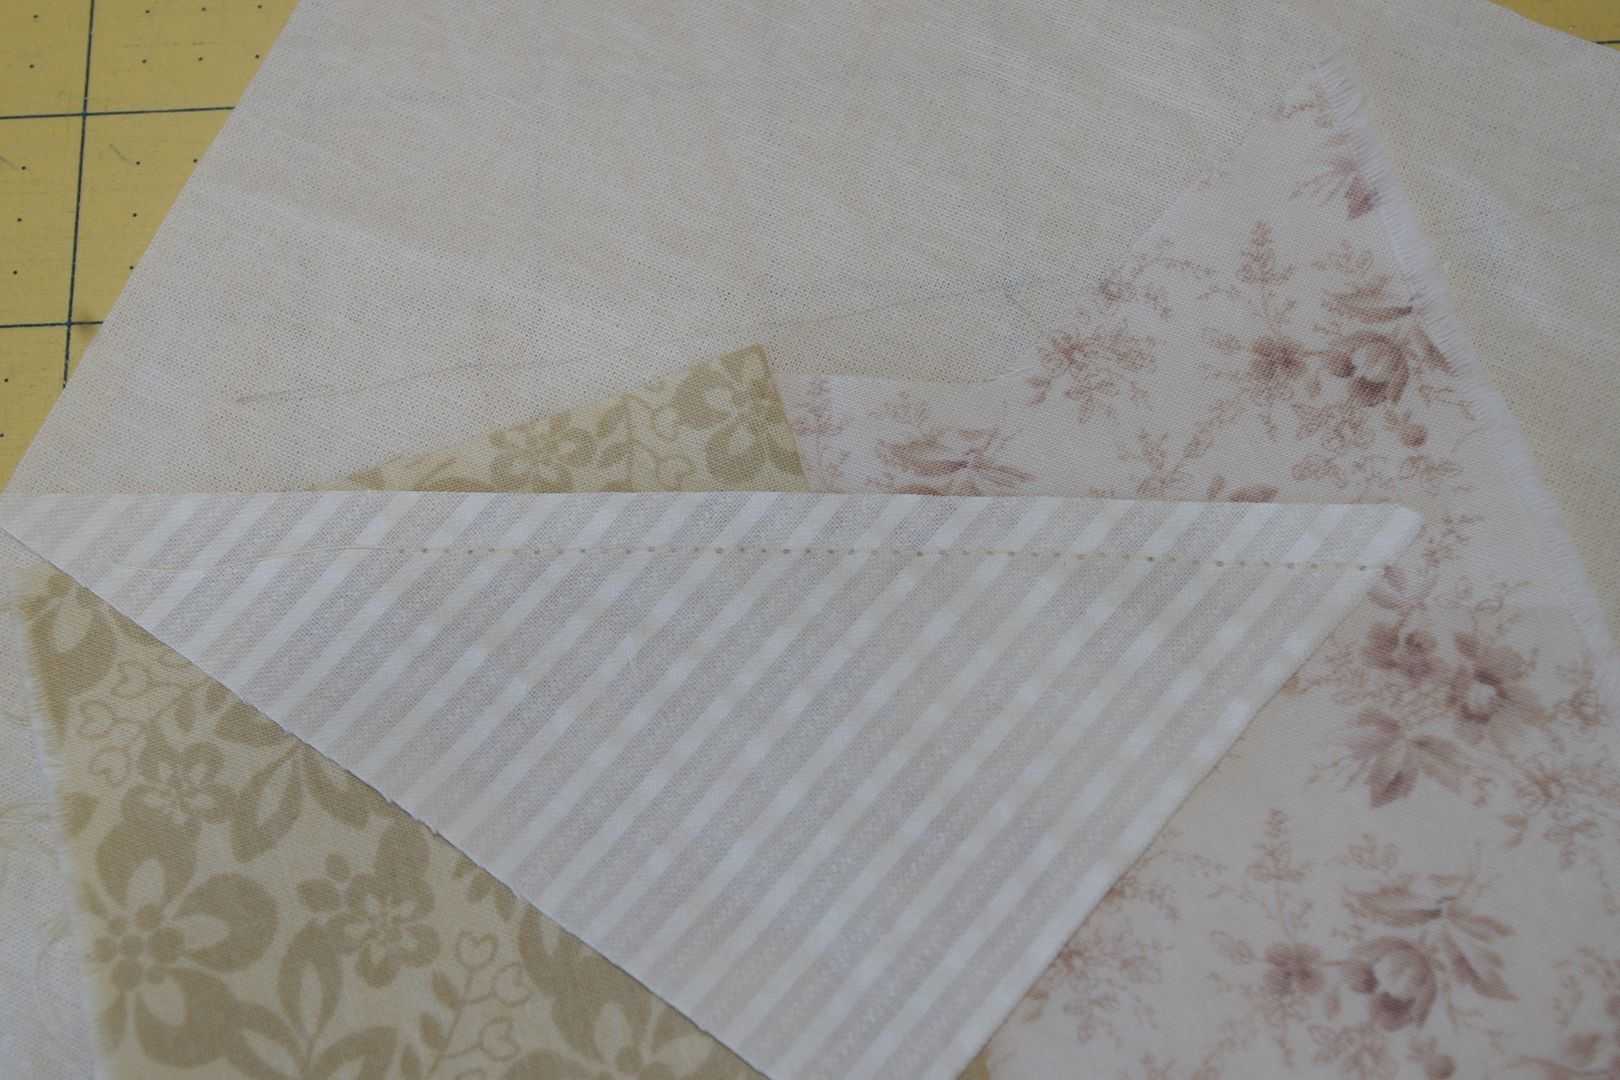
I do it the same way I do paper pecing, except that I don't remove the paper, and sometimes have to remove a bit of stitching for trimming the overlap.
After sewing, I trim the seam to about 1/4" with scissors, (Do Not Trim The Muslin). THen I finger crease the next seam and repeat.
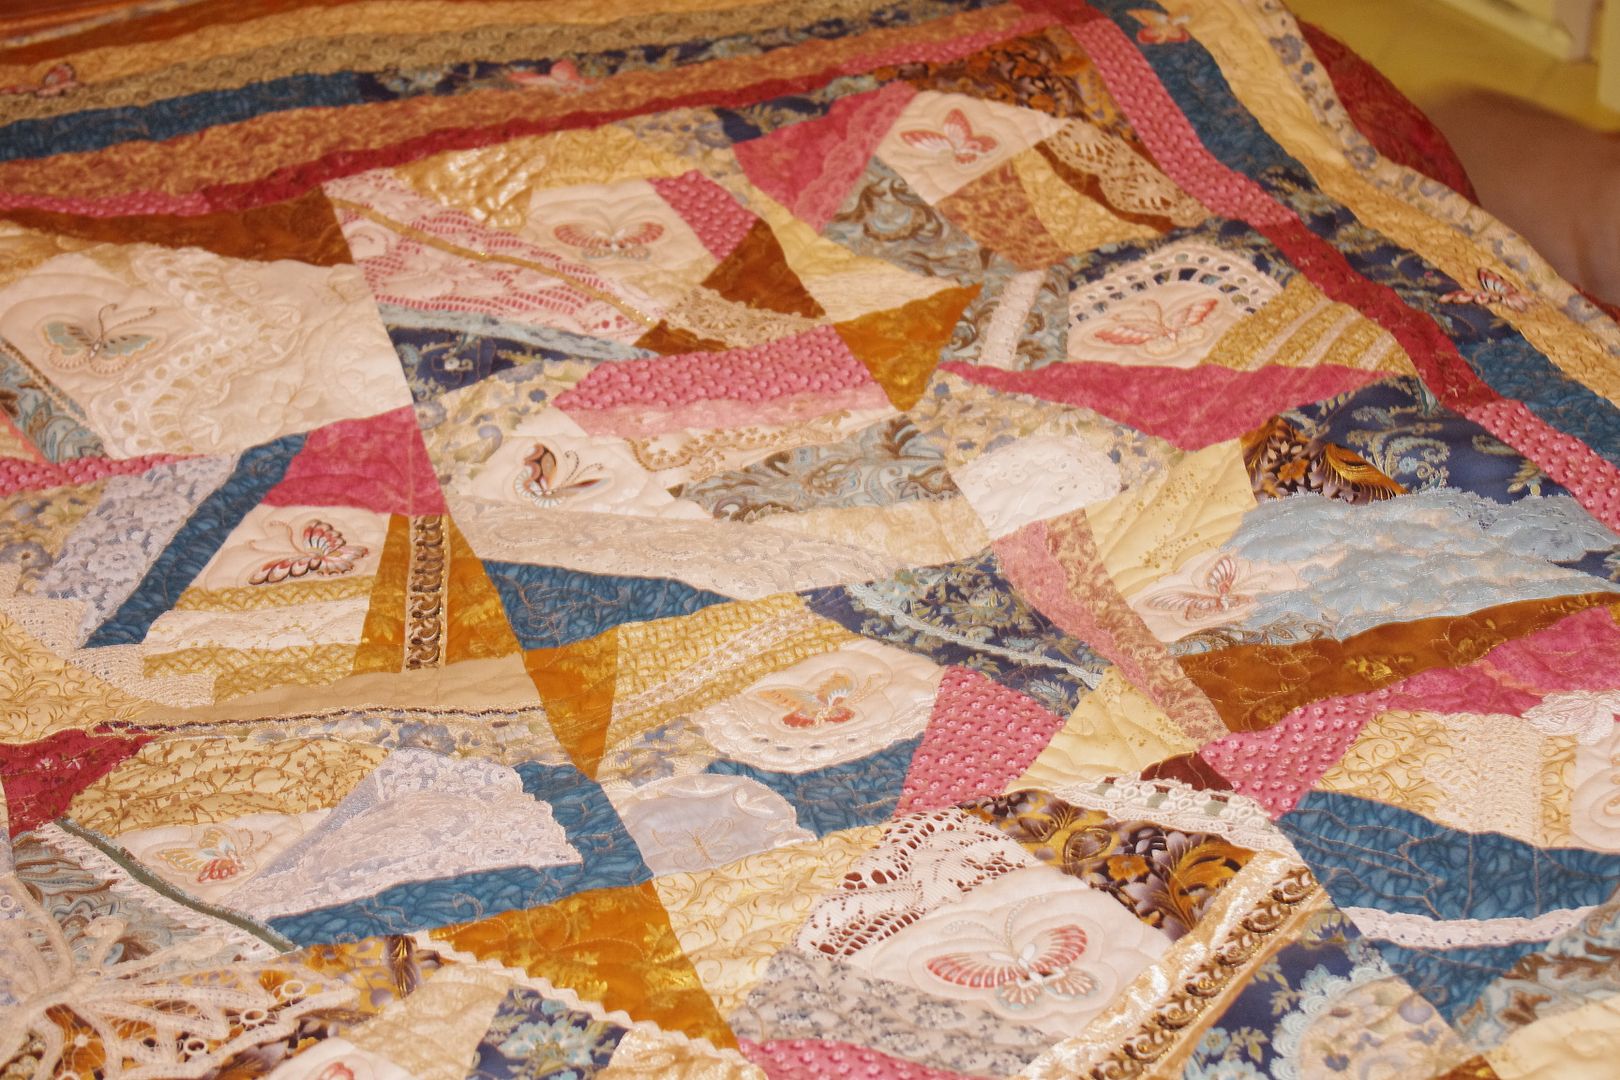
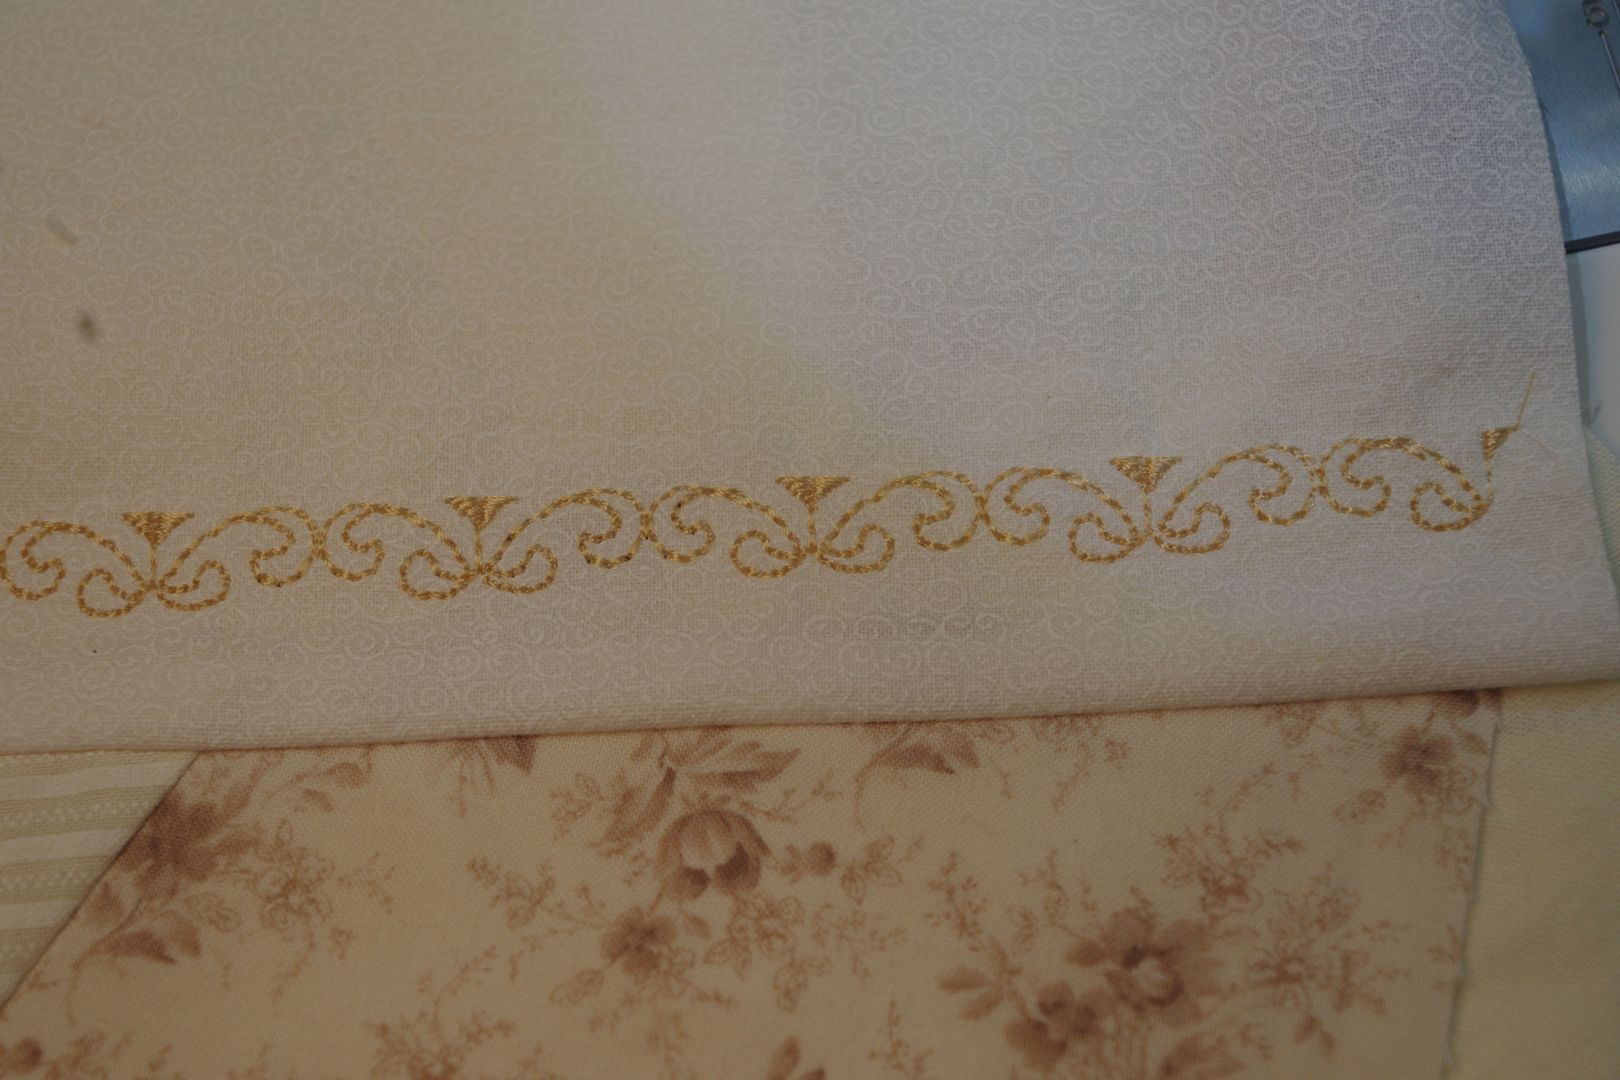
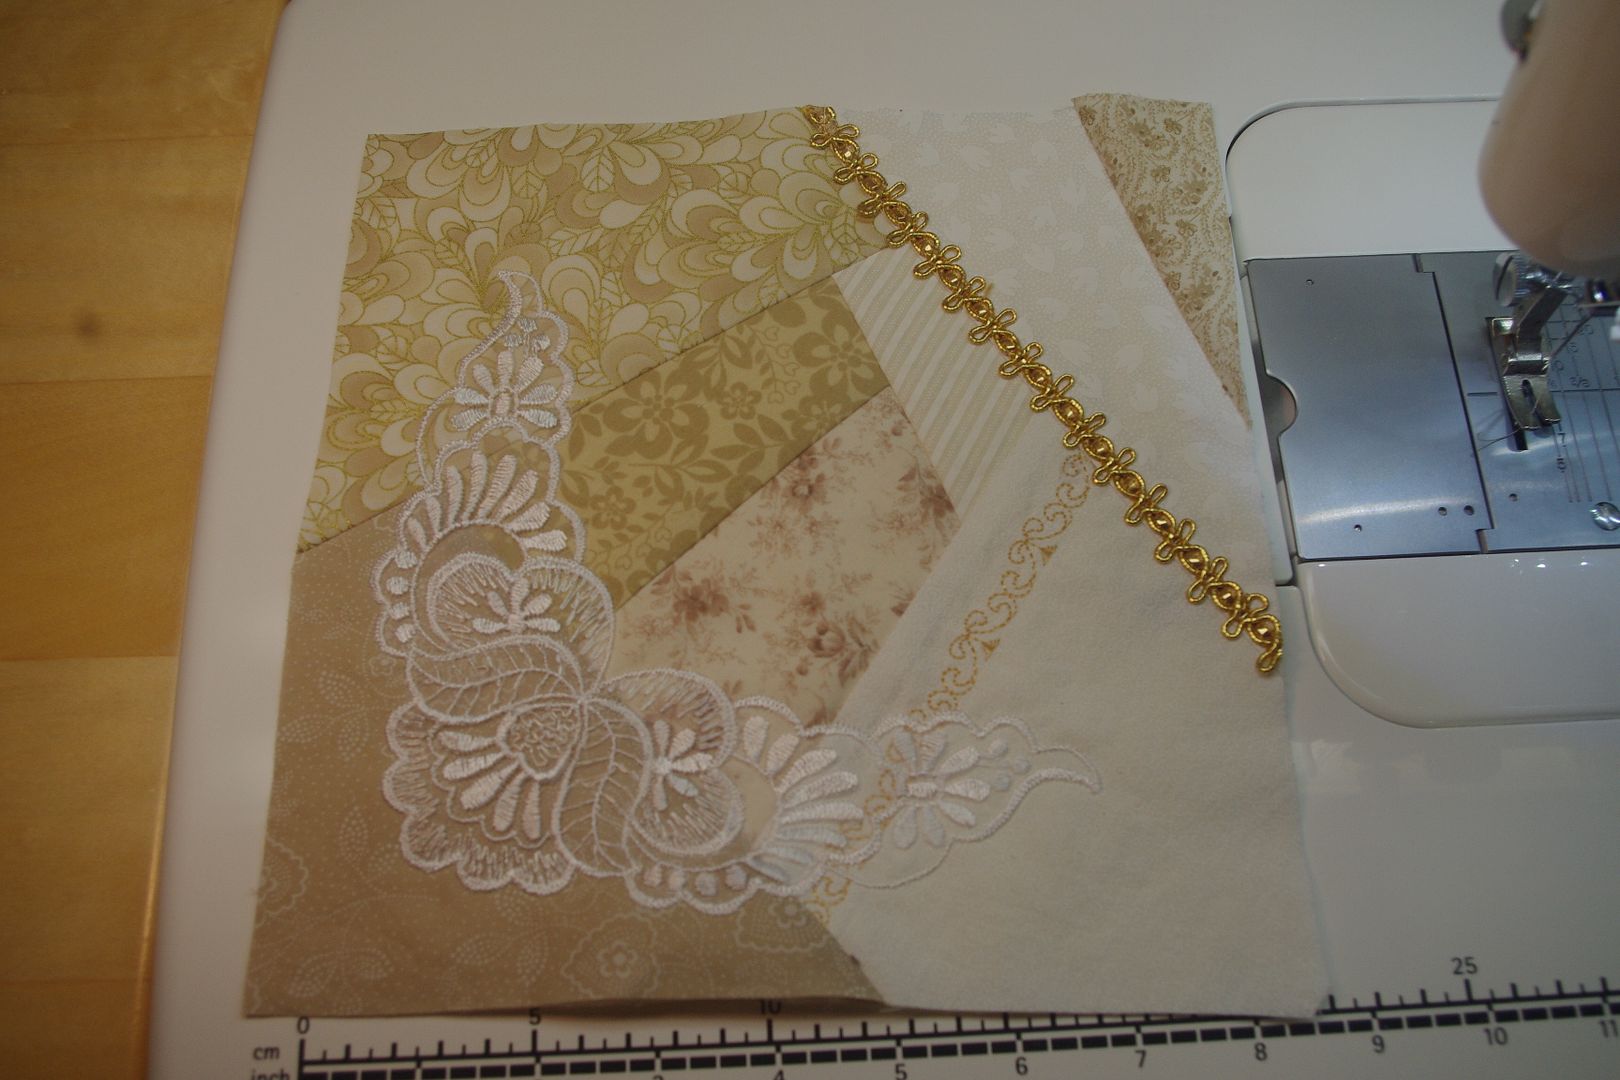
Since I am doing this 100% machine stitching (Using a lot of those fancy stitches that we normally have no use for). I will do that as I"m working as that way the ends are "under" the overlapping peices. I am also putting in lace and trims (most of it is vintage)
I did another similar, but didn't use fancy stitching and tehn quilted it "extending" the lace to the adjacent blocks.

I had a fabric with well spaced butterflies - and fussy cut them to use one in each block.