
Tumbler Blocks
 10-22-2020, 03:10 AM
#1
Junior Member
Thread Starter

Join Date: May 2008
Posts: 259
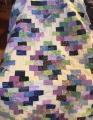
I found a bag of pre-cut tumbler blocks, so decided to make a small quilt. I sewed pairs. but when I went to sew the pairs together they didn't go together. I don't understand how pairs can go together but pairs can' go together. Can someone help?
 10-22-2020, 03:25 AM
#2
Power Poster
Join Date: Feb 2009
Location: Northern Michigan
Posts: 12,861
I can show you a picture of a tumbling block quilt laid out- not sewn together yet- if you look close you can see how if you sew them together in columns ( top to bottom, then sew the strips together how easily they go together. Hopefully this will help you see how they go together.
10-22-2020, 05:59 AM
#3
Super Member
Join Date: Jan 2014
Location: Central NM
Posts: 1,576
If they are all the same size and you are sewing in rows, second one has to be flipped top to bottom and off set a little for the to sew even across top and bottom.
Here's a link
https://www.diaryofaquilter.com/2020...utorial-2.html
Here's a link
https://www.diaryofaquilter.com/2020...utorial-2.html
10-22-2020, 06:13 AM
#5
Super Member
Join Date: May 2017
Location: Sunny Florida
Posts: 4,422
They are sewn in columns or rows not pairs with pairs.
Info and patterns here.
https://www.accuquilt.com/search?q=tumbler
Info and patterns here.
https://www.accuquilt.com/search?q=tumbler
10-22-2020, 01:47 PM
#6
Super Member
Join Date: Jan 2011
Location: Central FL
Posts: 1,478
Originally Posted by ckcowl

I can show you a picture of a tumbling block quilt laid out- not sewn together yet- if you look close you can see how if you sew them together in columns ( top to bottom, then sew the strips together how easily they go together. Hopefully this will help you see how they go together.
10-22-2020, 02:14 PM
#7
Super Member
Join Date: Dec 2010
Location: Chula Vista CA
Posts: 7,340
I was wondering which tumbler she was making. Since I have the Accuquilt dies each one comes out the same but when I used a template not so much. So maybe what you should do to start is make a cardboard template and see if they are the same. Maybe they have been stretched over the years.
 10-23-2020, 06:14 AM
#10
Super Member

Join Date: Mar 2015
Location: Denver, CO
Posts: 4,254
Originally Posted by seazteddy
I found a bag of pre-cut tumbler blocks, so decided to make a small quilt. I sewed pairs. but when I went to sew the pairs together they didn't go together. I don't understand how pairs can go together but pairs can' go together. Can someone help?
Originally Posted by Julienm1
If they are all the same size and you are sewing in rows, second one has to be flipped top to bottom and off set a little for the to sew even across top and bottom.
Here's a link https://www.diaryofaquilter.com/2020...utorial-2.html
Here's a link https://www.diaryofaquilter.com/2020...utorial-2.html
Originally Posted by seazteddy
the blocks are bigger on1 sides, 1 smaller and 2 same size. Missouri star has a tutorial and called them tumbler blocks....
Julie posted a good link and the full size picture of how to offset the edges is at https://1.bp.blogspot.com/-NaTZ1fwPr...0/IMG_6493.JPG
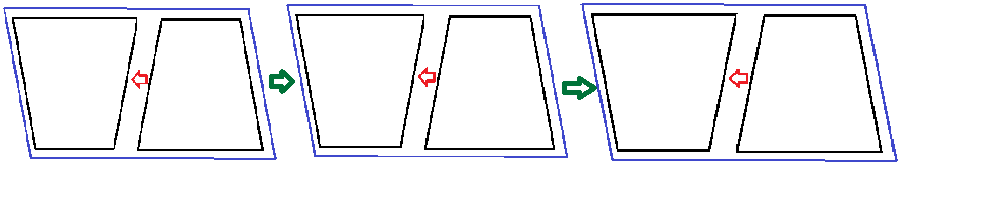
I did a drawing in Paint. Hopefully, your pieces are more consistent then what I was able to do. If you sewed the pairs (indicated by black lines) together on the side indicated by the red arrows, you should have a parallelogram (indicated by the blue line). Then you should be able to sew them together as indicated by the green arrows.
We like pictures. In order to post pictures on Quilting Board, you will probably need to reduce or compress the picture to a file size that is smaller than 2MB. How to post images can be found at https://www.quiltingboard.com/attach...020-01-17-.pdf
Don't forget to scroll over to the far right to find and click on the "Upload" button.
I have found that only the big red "Reply" button or "Quote" work to give me the paper clip icon to work for adding pictures.
https://www.quiltingboard.com/attach...p-location.jpg
Some additional info regarding reducing iimages at post #4 and images for the scroll and upload button can be found at #5 of quilt block ID?
Janey - Neat people never make the exciting discoveries I do.
Not affiliated with off-site link(s)
