
Using crayons for shading on quilts?
 02-18-2015, 09:59 AM
#1
Super Member
Thread Starter

Join Date: Jun 2010
Location: Clinton, OK
Posts: 1,736
Hello quilters! Did I read somewhere that we can use crayons for shading on art quilts? Or how about colored pencils? Does anyone know about this? Is there a way to set the colors? Help, please???
 02-18-2015, 10:50 AM
#2
Super Member

Join Date: Jan 2009
Location: Southern California
Posts: 6,259
you can use both, color pencils you have to set with textile medium, inktense pencils might be a little different, havnt played with them yet, crayons you just iron with paper towel covering. You can also use inks and paints as well.
02-18-2015, 12:57 PM
#4
Power Poster
Join Date: Apr 2011
Location: Ontario, Canada
Posts: 18,351
Running1 ... I was intrigued when I read about it a couple couple yrs ago and made a mug rug for my trial run. It is has been washed many times, and is as good today as it was then. So, make something small for your own in-home test and if you're in a hurry to know, wash and dry it with every load you do for the next while.
02-18-2015, 02:02 PM
#5
Senior Member
Join Date: Aug 2012
Posts: 556
I found some videos about shading
https://www.youtube.com/watch?v=VJN41E2Akto
Here are the whole bunch of videos too many to post but this link should help you get to them. I found them very informative.
https://www.youtube.com/watch?v=K5Py...D716E2F3E594FD
https://www.youtube.com/watch?v=VJN41E2Akto
Here are the whole bunch of videos too many to post but this link should help you get to them. I found them very informative.
https://www.youtube.com/watch?v=K5Py...D716E2F3E594FD
 02-18-2015, 02:07 PM
#7
Super Member

Join Date: May 2009
Posts: 7,741
I have used Inktense pencils and set it with 100% aloe vera lotion purchased at Walmart with good results.
Do a search on the board using Inktense pencils... here's one by Janeknapp
http://www.quiltingboard.com/main-f1...g-t131922.html
On using crayons you set it using a paper towel or paper towels once, then I throw it in the wash and into a hot dryer. That should hold it. Like QuiltE said try it on a small piece of fabric.
Last edited by SewExtremeSeams; 02-18-2015 at 02:09 PM.
02-18-2015, 02:12 PM
#8
Power Poster

Join Date: Jul 2010
Location: PA
Posts: 10,703
Once the dye from the crayon is set you should not have to ever do it again.
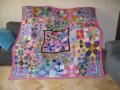
I have experimented with coloring on fabric and I really like the way you can shade the color. Start with a light touch and then go over it several times till you get the effect you want. I am showing my Little Susan again as a sample of how nice coloring can be.
I transferred the design to the fabric after I pressed freezer paper to the back, using a light box. Then I colored the areas I wanted to and pressed with a hot dry iron and flat paper towels to remove any excess wax. Peel away the freezer paper and finish. I overlaid the edges with stem stitching and french knots for some texture.
[ATTACH=CONFIG]510711[/ATTACH]
I hope every one gives coloring a try. It was fun.
peace
Last edited by ube quilting; 02-18-2015 at 02:16 PM.
02-18-2015, 05:47 PM
#10
Super Member

Join Date: Jan 2012
Location: Texas
Posts: 2,507
You may not believe it, but I made a potholder in art class in the third grade...and...my DM used that in her kitchen until I was over 50!!! We used the crayons and the teacher ironed them for us and sewed the binding.

Thread
Thread Starter
Forum
Replies
Last Post
M.I.Late
Tutorials
93
01-18-2012 10:55 AM
