Border on!
Subscribe
#21
 01-15-2026
Quote:
. I didn’t have to miter the corners but since all the angled pieces were sewn at 45*, I thought miters would look best. I found a good YouTube video that made it easier. The instructor said to pin the extra length matching the raw side edges of the extensions, iron in the 45* fold, open it back up ( leaving the pins in) and draw a sewing line in on the fold to sew on. It worked well and was easy.Originally Posted by sheilar
Beautiful quilt, but why did you need to make mitered border? Just curious��


#24
[QUOTE=AngeliaNR;8190615]That is a beautiful quilt. Is it from a pattern or your own design?[/QUOT. This is a replica of a quilt that was posted on QB. I wish I could give credit but when I got a new IPad, I lost some of my saved posts. She displayed hers hanging from her balcony and kindly shared the dimensions of the pieces. I looked through 30 pages of the thread of Scrappy Quilt Show Right Here but didn’t see it. If anyone recognize who did the original, please post the name.

#26

Beautiful Quilt. I saw the original thread a long time ago and saved a picture of the quilt, but unfortunately did not link to the thread. I had forgotten about this pattern, but after seeing yours think I need to make one sometime soon. I certainly will not be making one as large as yours.
#29

raspberryparade09 , 01-11-2019 01:41 PM
Senior Member
It is a very pretty quilt. I think it would make a nice Quilt of Valor quilt. Can you share the sizes that you used? Thanks!!
#30
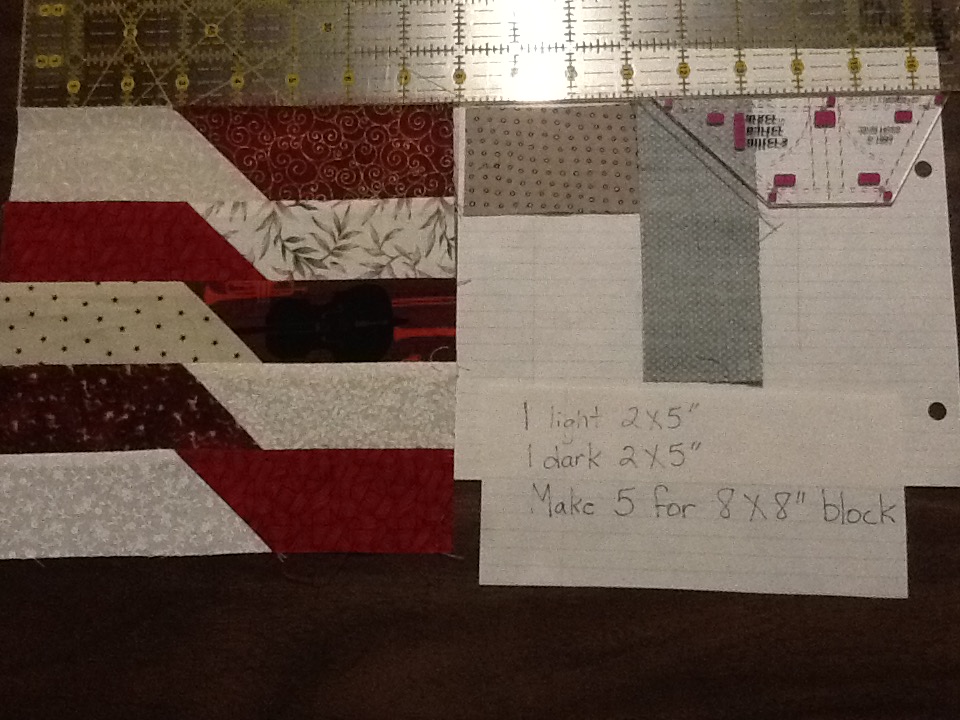
[ATTACH=CONFIG]606610[/ATTACH]My pieces were 2X5 because I wanted to use up lots of light and dark scraps. You can make it any size you like to get a square block. Mine sewn together ended up 8X8. The quilt has 12X12 rows of 8 inch blocks.