
My Jazzy Snazzy Sewing Chair

 07-04-2013, 05:25 AM
#53
Junior Member
Thread Starter

Join Date: Aug 2011
Location: Elkhart IN
Posts: 226
Measured the top and seat just to where the plastic frame met the original upholstery. I only wanted the 9 patches on the part that didnt get tucked under.
Then I flipped the chair upside down, there were 4 large screws holding the seat on. Removed those and was able to lift it off. I removed the old ratty fabric that was on it, left the foam, since it was sort of formed to the shape of the molded seat and was in fairly good condition. I didnt want to have a lot of seam bulk to tuck underneath either the top or the bottom, so I set the 9 patches together to the finished size, then ran a 3 in border around all of that. I covered the foam with a very light fabric I found (again trying to avoid bulk) and then put the nine patch on top of that. Used electric staple gun to tack to the wood under neath. I did it just like we do our quilt battings in a sandwich basting..corner to corner, then worked equally on both sides til it was all tacked down. Once I had it tacked I used a razor knife to trim as needed. I placed it back on the base occasionally to check fit. Put the 4 screws back in. Seat is complete.
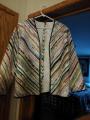
My back is just like yours , the arms and big plastic back are all one big molded unit, no where to see screws to remove the upholstered part. Pinterest to the rescue, they showed a girls hubby manhandling her chair. You leave the original cover on and you can slightly pull the plastic away just enough to push the fabric in!! So I made the 9 patch top, did the batik border again, however this time I laid it on and carefully trimmed it down to where I just had semi rounded corners, no seams to tuck in. Then the muscle part comes in. I had a plastic putty knife and a butter knife. Started in the middle top shoving the fabric in between the upholstered back and the plastic back. Once I got started it was very easy, just working side to side. The hardest part was the bottom edge, just because I had to hold the fabric/putty knife and hang on to chair at the same time.
When it came to the legs, I sewed 2 9 patches together on one edge, added black fabric strips on sides to make it wide enough to clear the casters, made a "sleeve" with an elastic casing on the front (again to go over casters, but not be too sloppy) and near the base end, I made a casing but left a seamed opening (like on a long sleeved shirt) and put a strip of velcro on each side, so I could snug it up.
Hope this helps! Please PM me if you have any other questions
I have had such a good reaction to it, I am thinking of advertising my services to others! LOL
Last edited by qltgrose; 07-04-2013 at 05:30 AM. Reason: correct some of what I wrote


 07-05-2013, 04:19 AM
#58
Junior Member
Join Date: Feb 2011
Location: KC MO area
Posts: 200
thank you so much for the instruction. I have a chair like that with a stain on the seat and is waiting for me to make a new cover, but had not figured it out yet. NOW, I think I can do it! Thanks again.
07-09-2013, 12:36 PM
#60
Super Member
Join Date: Aug 2008
Location: MO
Posts: 1,057
Very cool. We have office chairs we use for dining room chairs. They are more comfortable than the chairs that came with the set. I've been meaning to cover them for ages--another project on my list, way behind the others. Yours looks very nice.

Thread
Thread Starter
Forum
Replies
Last Post
gale
Mission: Organization
30
11-03-2014 01:43 AM
