
What order do you use in sewing the pieces in a block?
 09-15-2013, 09:04 AM
#21
Super Member

Join Date: Jul 2012
Location: Orange County, CA
Posts: 3,040
Generally speaking, when I'm constructing my quilt blocks, I much prefer to do as much chain piecing as possible, so I'll do all the sub-set parts of the blocks, then move on to putting the sub set pieces together and making the block., again, chain piecing. Is that what you mean?
For matching your seams/intersections, I'm personally a big fan of sewing from the back. That way, you can 'hit' the intersection/point just right.
Hope that helps (and hope that answered your question)--
You've got a good start. Please keep us posted.
Jane
For matching your seams/intersections, I'm personally a big fan of sewing from the back. That way, you can 'hit' the intersection/point just right.
Hope that helps (and hope that answered your question)--
You've got a good start. Please keep us posted.
Jane
 09-15-2013, 09:11 AM
#22
Power Poster
Join Date: May 2008
Location: MN
Posts: 24,440
Originally Posted by jclinganrey

Generally speaking, when I'm constructing my quilt blocks, I much prefer to do as much chain piecing as possible, so I'll do all the sub-set parts of the blocks, then move on to putting the sub set pieces together and making the block., again, chain piecing. Is that what you mean?
For matching your seams/intersections, I'm personally a big fan of sewing from the back. That way, you can 'hit' the intersection/point just right.
Hope that helps (and hope that answered your question)--
You've got a good start. Please keep us posted.
Jane
For matching your seams/intersections, I'm personally a big fan of sewing from the back. That way, you can 'hit' the intersection/point just right.
Hope that helps (and hope that answered your question)--
You've got a good start. Please keep us posted.
Jane
 09-15-2013, 10:31 AM
#24
Super Member
Join Date: Sep 2010
Location: Myrtle Beach, SC
Posts: 8,103
I sew blocks into rows. When I have row 1 and 2 done, I sew them together. I'll call that 'unit 1'. Then I repeat the process for rows 3 and 4 together to make 'unit 2'.
Then I sew the unit 1 and unit 2 together.
After that, I sew the blocks for row 5 and 6 together into rows, then sew of rows 5 and 6 together (unit 3), sew the blocks for row 7 and 8 together, then sew rows 7 and 8 together (unit 4).
When I am all done making rows of blocks, I sew Unit 1 to unit 2. (rows 1, 2, 3, 4) We'll call that "Set A"
Then i sew unit 3 to unit 4. (rows 5, 6, 7, 8) We'll call that "Set B"
Then I sew Set A to Set B.
Assuming there were only 8 rows, I'm done.
The reason I sew the rows together that way is that if I sew in 'units' (as described above), I am not wrestling with a lot of fabric while I join the rows. That makes it easier for me to sew the rows together "straight".
Putting Set A and B together is tougher because at that point, I'm working with the entire quilt top. I pin the sets together, then roll Set A and Set B up - toward the sewing machine needle - so that the fabric doesn't produce much drag on the quilt top while I sew the units together.
Please don't forget to show us your finished quilt when you're done. It's off to a great start!
09-15-2013, 01:14 PM
#26
Senior Member
Join Date: Feb 2013
Location: 1000 miles from nowwhere
Posts: 671
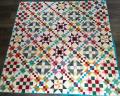
i would make lots of flying geese block and do the other 2[hst 's] then sew the small blocks together [chaining all of them of course ] then geese to small blocks [as they are all alike ] then you will have a pile like the four blocks you have in pic...easy to sew those without laying out ...remember red and blue right to red and blue left red blue right red blue left and if you chain with out cutting [aka swiss cheese ] you can make sure they are in the right place before you sew the other direction
09-15-2013, 01:39 PM
#27
Super Member
Join Date: Jul 2010
Location: DFW / Texas
Posts: 1,254
Also, here is what I had been taught to do by several seasoned quilters
sew block pieces together
then sew 2 blocks together down the center
keep sewing 2 blocks together until you have your row completed
then sew each set of 2 together until you have completed the row
then sew each long completed row together to complete your quilt.
sew block pieces together
then sew 2 blocks together down the center
keep sewing 2 blocks together until you have your row completed
then sew each set of 2 together until you have completed the row
then sew each long completed row together to complete your quilt.

 09-15-2013, 06:02 PM
#30
Junior Member
Join Date: May 2012
Location: Kansas
Posts: 140
Break it down into flying geese, half quarter squares and then add the half triangle to that, do each 1/4th part
then sew them together. If it can't be broken into fourths, do the parts that go together then put it together;
does that make sense. I make mistakes sometimes, when I don't look at directions first....especially if I start
inthe center, so I have learned to read first, then put the right parts together then sections. Good Luck!

Thread
Thread Starter
Forum
Replies
Last Post
jesserejon
Main
22
12-15-2010 11:07 PM
