
asking for basic help with 12" windmill block
 10-26-2014, 07:11 AM
#1
Member
Thread Starter

Join Date: Jan 2013
Posts: 34
Hey there - happy Sunday!
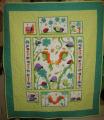
Adam here again, with another block assembly question that just shows how little I know! I am assembling my first "windmill" four-patch 12" block for my sampler. If you look at the pictures, you'll see my basic arrangement for each of the 4 units.
Question: I need a basic primer/tutorial/how-to on determining where to begin sewing what pieces together - which to do first, etc.
Now, I did get the information verbally in my evening class weeks ago, but I need more than just that one shot to remember!!
Here's the pics - and any feedback is welcome!
 10-26-2014, 07:20 AM
#3
Power Poster
Join Date: Mar 2011
Location: Ontario, Canada
Posts: 41,462
You need to sew the green triangle to the cream triangle and then sew the rose triangle to the other side of the green triangle. This will make a flying geese unit that is a rectangle.
The next step would be to sew the rose square to the cream square to make another rectangle. Sew those 2 rectangles together to form a square which will be 1/4 of the block. Sew the other 3 1/4 in the same manner. Assemble the block by sewing the 4 quarters together. That is the way I would do it but others might have a different idea.
The next step would be to sew the rose square to the cream square to make another rectangle. Sew those 2 rectangles together to form a square which will be 1/4 of the block. Sew the other 3 1/4 in the same manner. Assemble the block by sewing the 4 quarters together. That is the way I would do it but others might have a different idea.
 10-26-2014, 07:52 AM
#5
Super Member

Join Date: Jan 2011
Location: Knot Merrill, Southern Indiana
Posts: 5,781
yes what Tartan said.
A word of caution though. All three of your triangles have bias edges. You will be sewing two bias edges together - the two edges of the green triangle to each edge of the rose and cream triangle.
Bias edges STRETCH.
You can do a few things to stabilize those edges.
Heavy starch (and I do mean HEAVY and STIFF)
Paper or some other tear away stabilizer.
Because the pieces are already cut I would opt for a paper stabilizer. If you were to starch them now and iron them I could almost guarantee they will skew under the dampness from the starch and the iron.
10-26-2014, 08:23 AM
#6
Member
Thread Starter
Join Date: Jan 2013
Posts: 34
Originally Posted by DogHouseMom

yes what Tartan said.
A word of caution though. All three of your triangles have bias edges. You will be sewing two bias edges together - the two edges of the green triangle to each edge of the rose and cream triangle.
Bias edges STRETCH.
You can do a few things to stabilize those edges.
Heavy starch (and I do mean HEAVY and STIFF)
Paper or some other tear away stabilizer.
Because the pieces are already cut I would opt for a paper stabilizer. If you were to starch them now and iron them I could almost guarantee they will skew under the dampness from the starch and the iron.
A word of caution though. All three of your triangles have bias edges. You will be sewing two bias edges together - the two edges of the green triangle to each edge of the rose and cream triangle.
Bias edges STRETCH.
You can do a few things to stabilize those edges.
Heavy starch (and I do mean HEAVY and STIFF)
Paper or some other tear away stabilizer.
Because the pieces are already cut I would opt for a paper stabilizer. If you were to starch them now and iron them I could almost guarantee they will skew under the dampness from the starch and the iron.
thanks a bunch for your reminder about bias edges - had I the time, resources, and more time, (I think there's a pattern here!) I would have been reminded BEFORE I committed to my fabric cutting and avoided that completely. Live and learn!
I understand the stabilizer technique - although, brand new baby quilter/sewist here, I have only read about it. As I proceed forward with my learning, I will put these ideas into practice. For now, I am just getting the pieces done best as I can - my job and real life stuff currently "deletes" whatever time I might have for my hobbies.
Every tip or helpful hint is very much appreciated!
Adam
 10-26-2014, 08:46 AM
#8
Member
Thread Starter
Join Date: Jan 2013
Posts: 34
Originally Posted by GrammaNan
If you have trouble with stretching at this point...pin pin pin and you should be OK. I like the pattern and the fabrics. Keep us updated.
One day I will look back at this year in particular and say to myself, "wow. That was quite a year."
Adam

Thread
Thread Starter
Forum
Replies
Last Post
bearisgray
General Chit-Chat (non-quilting talk)
65
02-01-2024 09:04 AM
craftybear
Links and Resources
7
05-01-2011 11:50 PM
