
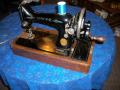
1912 Singer Red Eye - broken thread guide
 09-04-2019, 03:56 PM
#11
Member
Thread Starter
Join Date: Jul 2019
Posts: 8
Last edited by NoraAnn; 09-04-2019 at 03:59 PM.
 09-04-2019, 06:47 PM
#12
Super Member

Join Date: Mar 2015
Location: Denver, CO
Posts: 4,668
Janey - Neat people never make the exciting discoveries I do.
09-06-2019, 05:48 AM
#14
Super Member

Join Date: Jun 2010
Location: Vermont
Posts: 7,149
I have accidentally broken off that little wire on almost every machine I have owned. I kept on using them. You just have to fiddle with the tension a bit. Finally have a machine that doesn't have the wire!!
09-06-2019, 06:14 AM
#15
Member
Thread Starter
Join Date: Jul 2019
Posts: 8
What!! The thread goes diagonally to the tensioner directly from the spool? I must admit, I didn't occur to me to even attempt it...
09-06-2019, 11:14 PM
#16
Senior Member
Join Date: Jan 2015
Location: Wisconsin
Posts: 483
O have trouble picturing this. I have a 66 with the wire thread guide coming through from the back side, located closer to the needle end than the top. It was broken at the "weld" when I got it. We cleaned off and soldered it, and it is fine.
09-07-2019, 04:41 PM
#18
Super Member
Join Date: Jun 2010
Location: Vermont
Posts: 7,149
I mis-read, I meant the very thin wire that is part of the upper thread tension. Never mind...
12-05-2019, 06:44 PM
#19
Member
Thread Starter
Join Date: Jul 2019
Posts: 8
Victory!! After stepping away from the problem for a couple of months, I decided to try again. I bought a spring-loaded tool called a hammerless center punch with the intention of using it to make a little dimple in the broken-off hook so that I could drill it out without the drill wandering. Well, that little thing produces 3500PSI force, so after making the dimple, I just kept pulling the spring back and letting it fly and the broken piece actually moved backward in the hole until it was sticking a fair way out inside the head. From there, I used a 1/16" hardened centerpunch and hammered at it until it moved the last little bit and finally fell out. Bent the punch, and it took a bit to extricate the punch from the hole (I thought, oh no, this hole is cursed!), but I managed not to enlarge it in the process. The replacement hook tapped in firmly, no problem. I just have to reassemble all the parts I removed and it should finally sew. Thanks for all your input!

Thread
Thread Starter
Forum
Replies
Last Post
lmc8
For Vintage & Antique Machine Enthusiasts
1
09-10-2013 05:20 AM
Prim Quilts
For Vintage & Antique Machine Enthusiasts
3
08-11-2013 05:16 AM
