
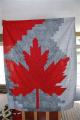
Xing! Quilt designed by Bonnie Hunter
 02-13-2024, 12:48 PM
#1
Member
Thread Starter
Join Date: Oct 2023
Posts: 14
I’ve been plugging away at the Xing! quilt from Bonnie’s “String Frenzy” book, making a lot (well most) of the crumb blocks and the string pieced blocks on my two old treadle machines.
today I started putting the star blocks together and they are NOT turning out the right size! Supposed to be 6.5” square and mine are closer to 7” even after trimming. If I cut them to 6.5” I will lose ever single star point. This is not a problem I typically have, usually my blocks are smaller than they’re supposed to be.
Has anyone else made this quilt? Did you have the same trouble? I looked online for corrections for this one but can’t find any. I hate to go further if I’m missing some obvious correction that I haven’t been able to find….
 02-13-2024, 01:05 PM
#2
Super Member
Join Date: Sep 2011
Posts: 2,590
I would not trim them down and lose those points. Go ahead with the larger sized block and add more (or less) to the string portion of the quilt framing instead. Does that make sense? Keep in mind that my advice is not based on experience with this particular quilt as I have NOT made this quilt. Since the stars are framed by strings, those can change size without destroying your xings.
02-13-2024, 02:36 PM
#3
Super Member
Join Date: Jul 2010
Location: Ontario, Canada
Posts: 3,520
I agree. It is easier to enlarge the string blocks than to muck around with the stars. Thanks for the info on the pattern. I had not seen it before. I am a string-aholic and am always looking for new ways to use my ever-increasing scraps.
If you already have the string blocks made and trimmed, think about a narrow sashing that would bring them up to the star block size. (Hint--if the star blocks are 7 inches unfinished, and your string blocks are 6.5inches unfinished, trim the string blocks to 6 inches square and add a consistent colour 1 inch wide sashing on all 4 sides.)
If you already have the string blocks made and trimmed, think about a narrow sashing that would bring them up to the star block size. (Hint--if the star blocks are 7 inches unfinished, and your string blocks are 6.5inches unfinished, trim the string blocks to 6 inches square and add a consistent colour 1 inch wide sashing on all 4 sides.)
Last edited by GingerK; 02-13-2024 at 02:40 PM.
02-14-2024, 05:57 AM
#4
Member
Thread Starter
Join Date: Oct 2023
Posts: 14
My string blocks are made, and they are finishing at the correct size, 6.5”. Maybe I could cheat the seam allowances on them to size them up a bit, I’ll have to try that. Sure don’t want to lose my star points!
….or I can try a different setting—the pattern has it set on point, maybe a straight setting could work. Wouldn’t have the appeal of the on point setting though. Plus it will finish much smaller.
Am I the only one who keeps saying “I’m not doing an on point quilt again” and then keeps doing it?
….or I can try a different setting—the pattern has it set on point, maybe a straight setting could work. Wouldn’t have the appeal of the on point setting though. Plus it will finish much smaller.
Am I the only one who keeps saying “I’m not doing an on point quilt again” and then keeps doing it?
02-14-2024, 05:58 AM
#5
Member
Thread Starter
Join Date: Oct 2023
Posts: 14
Originally Posted by GingerK

I agree. It is easier to enlarge the string blocks than to muck around with the stars. Thanks for the info on the pattern. I had not seen it before. I am a string-aholic and am always looking for new ways to use my ever-increasing scraps.
If you already have the string blocks made and trimmed, think about a narrow sashing that would bring them up to the star block size. (Hint--if the star blocks are 7 inches unfinished, and your string blocks are 6.5inches unfinished, trim the string blocks to 6 inches square and add a consistent colour 1 inch wide sashing on all 4 sides.)
If you already have the string blocks made and trimmed, think about a narrow sashing that would bring them up to the star block size. (Hint--if the star blocks are 7 inches unfinished, and your string blocks are 6.5inches unfinished, trim the string blocks to 6 inches square and add a consistent colour 1 inch wide sashing on all 4 sides.)
hmmmm..this could work. Would mean a lot more work though….
02-14-2024, 06:07 AM
#6
Super Member

Join Date: May 2011
Location: SW Washington USA
Posts: 4,419
I don't see any corrections in eratta. https://quiltville.blogspot.com/2005/07/errata.html
the book is older so if there are corrections it should be there.
cute quilt though! https://quiltville.blogspot.com/2019...in-denton.html
If you haven't made all the blocks yet you culd do the star points as mavrick stars and make smaller points.
the book is older so if there are corrections it should be there.
cute quilt though! https://quiltville.blogspot.com/2019...in-denton.html
If you haven't made all the blocks yet you culd do the star points as mavrick stars and make smaller points.
02-14-2024, 06:34 AM
#7
Power Poster
Join Date: Jan 2011
Location: Southern USA
Posts: 16,010
When I first started quilting I took a class held at a quilt shop. We used a star pattern that was written to have 1/2" of fabric from each point. Our goal was to have 1/2" from each star point but was fine to square the blocks and still have the points. I can't remember the name of that pattern but do remember how nice it was to not have a lost point when squaring the blocks. I wish all patterns were written like that one.
02-14-2024, 06:56 AM
#8
Member
Thread Starter
Join Date: Oct 2023
Posts: 14
Originally Posted by KalamaQuilts
I don't see any corrections in eratta. https://quiltville.blogspot.com/2005/07/errata.html
the book is older so if there are corrections it should be there.
cute quilt though! https://quiltville.blogspot.com/2019...in-denton.html
If you haven't made all the blocks yet you culd do the star points as mavrick stars and make smaller points.
the book is older so if there are corrections it should be there.
cute quilt though! https://quiltville.blogspot.com/2019...in-denton.html
If you haven't made all the blocks yet you culd do the star points as mavrick stars and make smaller points.
02-14-2024, 08:47 AM
#9
Super Member
Join Date: May 2011
Location: SW Washington USA
Posts: 4,419
here are bonnies. https://quiltville.blogspot.com/2005...ick-stars.html
here are some I've been leader/endering on, put in a 2" brick, using 1.5" scraps. So you can see they can be wild, or just smaller points than the pattern calls for. this particular block finishes at 6"
You can see in the second image, I used long blocks to m ake the star points so they were spiky Also 6" finished so much different look, same technique.
02-14-2024, 08:55 AM
#10
Member
Thread Starter
Join Date: Oct 2023
Posts: 14
Ok. I tried some of the wonky stars. The issue is the way they’re put together in the original pattern—the center block of the star (“crumb block”) is 3 3/8” square. If I make the star points and corners out of 2.5” squares it doesn’t fit.
The pattern has you making 2.5” square with a triangle attached to two adjacent sides for two of the points..the other points are made of a 2.5” square with a two-color triangle attached to adjacent sides.
It’s very hard to explain. I’ll see if I can figure out how to attach pictures.
The pattern has you making 2.5” square with a triangle attached to two adjacent sides for two of the points..the other points are made of a 2.5” square with a two-color triangle attached to adjacent sides.
It’s very hard to explain. I’ll see if I can figure out how to attach pictures.
