
Oh My! Teaching Girl Scouts Quilting
 07-11-2011, 04:40 AM
#11
Senior Member

Join Date: Feb 2011
Location: Stevensville, MD
Posts: 463
I live in that area! If you went the mug rug route, you could always get them even more excited for the project by either taking or directing them somewhere they could pick out their own fat quarter as backing. There are some really lovely quilt shops in the area - I personally visit Cottonseed Glory in Annapolis and Tomorrow's Treasures in Crofton when I want to buy fabric in person, though there may be one closer to you or the troop depending.
 03-15-2025, 11:39 AM
#13
Power Poster
Join Date: Jan 2011
Location: Southern USA
Posts: 17,814
The one piece of advice I would give if the girls are preteens. Have all the kits the same. Because if one girl picks the pink kitty fabric then all the girls will want the pink kitty fabric. We had mothers come to us and say my daughter wants the fabric the other girls have. My group held classes to make pillowcases with the younger girl scouts. We declined the next year.
03-15-2025, 06:36 PM
#14
Junior Member
Join Date: Jan 2019
Location: Pacific Northwest
Posts: 200
I've done this in my daughter's classes a few times. We never used a sewing machine; the blocks were hand stitched. For my first time helping in a class, my daughter was in 2nd grade, and we cut out colored paper pieces and glued them together to make the blocks. I then cut sashing and cornerstones and laid it all out on the garage floor to put it together. The kids were over the moon and the teacher was so pleased. It ended up hanging on the wall in the School District office for several months. The last time was a hand sewing affair where the teacher wasn't too happy. One of the boys lost his needle.
I don't know if I would survive a bunch of kids on sewing machines.
I don't know if I would survive a bunch of kids on sewing machines.
03-15-2025, 07:14 PM
#15
Super Member
Join Date: Jun 2009
Location: Tavistock, Ontario, Canada
Posts: 1,101
I have volunteered with 4-H (Canada) for 42+ years (I keep losing track). I have lead 5 quilting projects - 2 of them during the lockdowns so virtually! have taught (with usually two more adults) anywhere from 6 - 15 kids ranging in age from 9 - 18 at a time.
#! Perfection is highly over-rated! Can't state that enough
#2 Use a stack of painters tape for a seam guide - sticky enough to stay in place, high enough to guide and removable and reusable.
#3 Stress safety - in a fun way. Keep your fingers away from the needle because I will take great relish in making the needle come back up.... don't bleed on the fabric ... using a rotary cutter will be closely supervised - always close the cutter to protect the blade - there will be penance!
Start with 2 1/2" strips - half WOF. Have the members sew them long edges together - 5 strips is a nice size. Usually by the time the kid has stitched four 1/4" seams, the seam allowance is acceptable.
Teach them to press properly.
Cut the strip set into 4 roughly equal blocks. Have kids trade blocks so there is a variety. Sew the resulting combination together - block set 1 + 2 1/2" strip+ block strip 2. Repeat with other set of blocks. Press well.
Birth with batt and backing - Block and backing right sides together. Pin together with batting on the wrong side of the block. Stitch 1/2" around leaving 2"-3" opening for turning. Turn, poking out the corners with a chopstick. Press lightly, folding in the seam of the opening. Stitch around the outside to close the opening.
Pin in the center and as necessary. Remind members to not pin where they want to quilt.
Machine quilt however the member wishes.
They will be imperfect but that is the charm of them.
So far my quilt clubs have done - strips, charms, bordered panel (quilting), Magic blocks (disappearing blocks), intro to landscape (this one was amazing!)
And no, I do not have nerves of steel. I put up with no silliness at the machines, cutting board or ironing board. Once the kid is started, I keep a distance but am always available. Having helpers who know sewing machines is crucial.
I had grey heair when I started.....
03-16-2025, 04:00 AM
#16
Super Member
Join Date: Apr 2008
Location: Northern KY
Posts: 2,041
My advice: Don't go it alone. My guild worked with a girl scout troop a few years ago about the same age. Many had never seen a sewing machine so we had one adult for each girl. Those adults need to know how to sew and know their way around the sewing machine (we all brought our own machines). We did a simple 9 patch with 2.5 inch squares for a mug rug. We precut the fabric and batting to save time. Started with a lesson on sewing machine safety and no one got hurt. It helps to have a machine with adjustable speed because they will be lead-footed.
Make it fun for the girls and praise everybody's efforts. Hopefully some of them will fall in love with quilting.
Make it fun for the girls and praise everybody's efforts. Hopefully some of them will fall in love with quilting.
03-18-2025, 02:50 AM
#17
Senior Member

Join Date: Dec 2011
Location: The Great State of Texas
Posts: 417
I�m a recently retired teacher of middle school (ages 12-14; I taught 7th and 8th grade), and for *many* years I did a quilt project. My mode is very different, teaching four to six classes of 20-25 rather than a small group, but here�s what I did:
From that point, I took the squares home. Inevitably, there would be a few students who didn�t finish, and I�d finish them. I would sew the blocks together myself, after squaring them up, and then ideally the finished quilt would be donated to that class�s Project Graduation when they were seniors.
Nothing fancy: I used a polyester batting and quilting this via the birth-a-quilt method, and for quilting, tied it in the corners of the blocks with yarn. A few years when I was *really* on top of things, I brought the quilt up to school at the end of the year and let the students do the tying part.
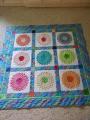
Some years, things didn�t go as planned, and as it happened, the last few years of doing the project, I didn�t finish their quilts, so I still to this day have squares! I just finished one, as a matter of fact, and will donate it. You can see a picture of it in the UFO Challenge thread here on the board, and it is my avatar at the moment (as of 3-18-2025, until I complete another quilt!)
Happy to answer any questions. My students only did quilt *squares,* not an entire quilt each, but hopefully the story still helps!
- Fabric: I cut it up beforehand, and I had a big pile of �big squares� (about 8.5�) and a big pile of �small squares.� (about 5�) The small squares had wonder-under already applied. I let the students choose a big square and a small square.
- Ironing day! We peeled the paper from the wonder under and I guided them (with much supervision) on adhering the small square to the big square with an iron. Magic! The small squares were set on point on top of the big square, giving the illusion of a square in a square block.
- Students put their names on the small squares. Some years I guided them through stitching their name on (writing it in pencil, then stitching over it with thread, simple running embroidery stitch). Some years, I just had them write their name with fabric pens.
- I guided the students through blanket stitching around the edges of their square. This was the most challenging part, but the most satisfying, as once you get moving on this stitch, it looks very impressive for how easy it is!
From that point, I took the squares home. Inevitably, there would be a few students who didn�t finish, and I�d finish them. I would sew the blocks together myself, after squaring them up, and then ideally the finished quilt would be donated to that class�s Project Graduation when they were seniors.
Nothing fancy: I used a polyester batting and quilting this via the birth-a-quilt method, and for quilting, tied it in the corners of the blocks with yarn. A few years when I was *really* on top of things, I brought the quilt up to school at the end of the year and let the students do the tying part.
Some years, things didn�t go as planned, and as it happened, the last few years of doing the project, I didn�t finish their quilts, so I still to this day have squares! I just finished one, as a matter of fact, and will donate it. You can see a picture of it in the UFO Challenge thread here on the board, and it is my avatar at the moment (as of 3-18-2025, until I complete another quilt!)
Happy to answer any questions. My students only did quilt *squares,* not an entire quilt each, but hopefully the story still helps!

Thread
Thread Starter
Forum
Replies
Last Post
wytetygeress
General Chit-Chat (non-quilting talk)
11
02-21-2011 07:51 AM
