
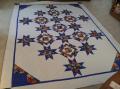
Quick Machine Binding with Flange
 11-23-2010, 06:11 AM
#31
Super Member
Join Date: Nov 2006
Location: Toronto, Canada
Posts: 1,208
Thanks for sharing - I must try this on my next lap quilt
 11-23-2010, 06:12 AM
#32
Power Poster
Join Date: Jun 2010
Location: New York
Posts: 17,564
Thank you for the great tute and binding looks fabulous.
11-23-2010, 06:19 AM
#33
Super Member

Join Date: Jun 2010
Location: Michigan
Posts: 3,601
OMGosh thank you sew much, I hate hate hate and did I mention that I hate bindings but this looks sew much easier. I will definetly give it a try
11-23-2010, 06:23 AM
#34
Super Member

Join Date: Sep 2010
Location: Western Kentucky
Posts: 3,209
Wow! That is neat! I will have to try that sometime very soon! Thank you so much!! :thumbup:
11-23-2010, 06:28 AM
#35
Super Member

Join Date: Aug 2010
Location: Ontario, Canada
Posts: 1,304
That's great! I'll have to give this a try some time soon!
11-23-2010, 06:33 AM
#36
Super Member

Join Date: Oct 2009
Location: St. Cloud, Minnesota
Posts: 1,653
Thank you so much for posting this technique. In the past I've included a narrow binding inside the outer binding, but did it in a separate layer of binding. This is easier, I think - why didn't I think of it?
I also just tried a (new to me anyway) method of binding, from a tute by Sharon Schamber. Use School Glue with a tiny tip on the end of the glue bottle. The glue essentially acts like pins, so you don't need a single pin. After you put a skinny line of glue on and line up the raw edges, you press with a hot dry iron to set the glue. It just needs a few seconds and the glue is dry and holds it all together. She even uses it to join the pieces of binding together, using no pins. They are sewn after glued together. Then you pop the glued seam open, press open and trim seam allowances. It might take longer than using pins, but it's so much more accurate and no struggling with the top portion of the binding moving more than the bottom layer - even if you use a walking foot. And joining the two ends of binding is a breeze! I used this method on 6 placemats a couple days ago and it worked like a charm. You can SID on the other side or do by hand. Since these were placemats and will be washed frequently, I did the last row by machine.
I also just tried a (new to me anyway) method of binding, from a tute by Sharon Schamber. Use School Glue with a tiny tip on the end of the glue bottle. The glue essentially acts like pins, so you don't need a single pin. After you put a skinny line of glue on and line up the raw edges, you press with a hot dry iron to set the glue. It just needs a few seconds and the glue is dry and holds it all together. She even uses it to join the pieces of binding together, using no pins. They are sewn after glued together. Then you pop the glued seam open, press open and trim seam allowances. It might take longer than using pins, but it's so much more accurate and no struggling with the top portion of the binding moving more than the bottom layer - even if you use a walking foot. And joining the two ends of binding is a breeze! I used this method on 6 placemats a couple days ago and it worked like a charm. You can SID on the other side or do by hand. Since these were placemats and will be washed frequently, I did the last row by machine.
11-23-2010, 07:50 AM
#37
Super Member

Join Date: Jun 2010
Location: Bend, Oregon
Posts: 1,853
I love the look of this binding method. Thank you for sharing. I am definitely going to try this.
11-23-2010, 08:54 AM
#38
Banned
Join Date: Mar 2008
Location: Heber City, UT
Posts: 542
Wow, I love this board and what people are willing to share!! What a fun binding idea!! Love, love it - I'll have to try it on my next project. I wonder if you could slip some cording in the fold and make faux piping... hmm.
11-23-2010, 09:05 AM
#39
Super Member

Join Date: Sep 2008
Location: Eastern Canada
Posts: 3,356
Thanks for the tute.
11-23-2010, 09:24 AM
#40
Senior Member

Join Date: Jan 2010
Location: Monticello WI
Posts: 732
That is neat! I can't wait to try it. I hate binding! This looks easy. ;) Thanks for doing this.

Thread
Thread Starter
Forum
Replies
Last Post
