
Squaring Up Quilt Blocks
 06-25-2015, 10:34 AM
#1
Senior Member
Thread Starter

Join Date: Nov 2013
Location: Calgary, Canada
Posts: 516
[h=3]Squaring Up Quilt Blocks (Even If You Know How)[/h]
I am working on a new quilt and have gotten to the "squaring up" stage. This is a good block to demonstrate a few tips on. It will be trimmed to 11 1/2", sewn to 11" with a 1/4" seam allowance.
 Tip #1:
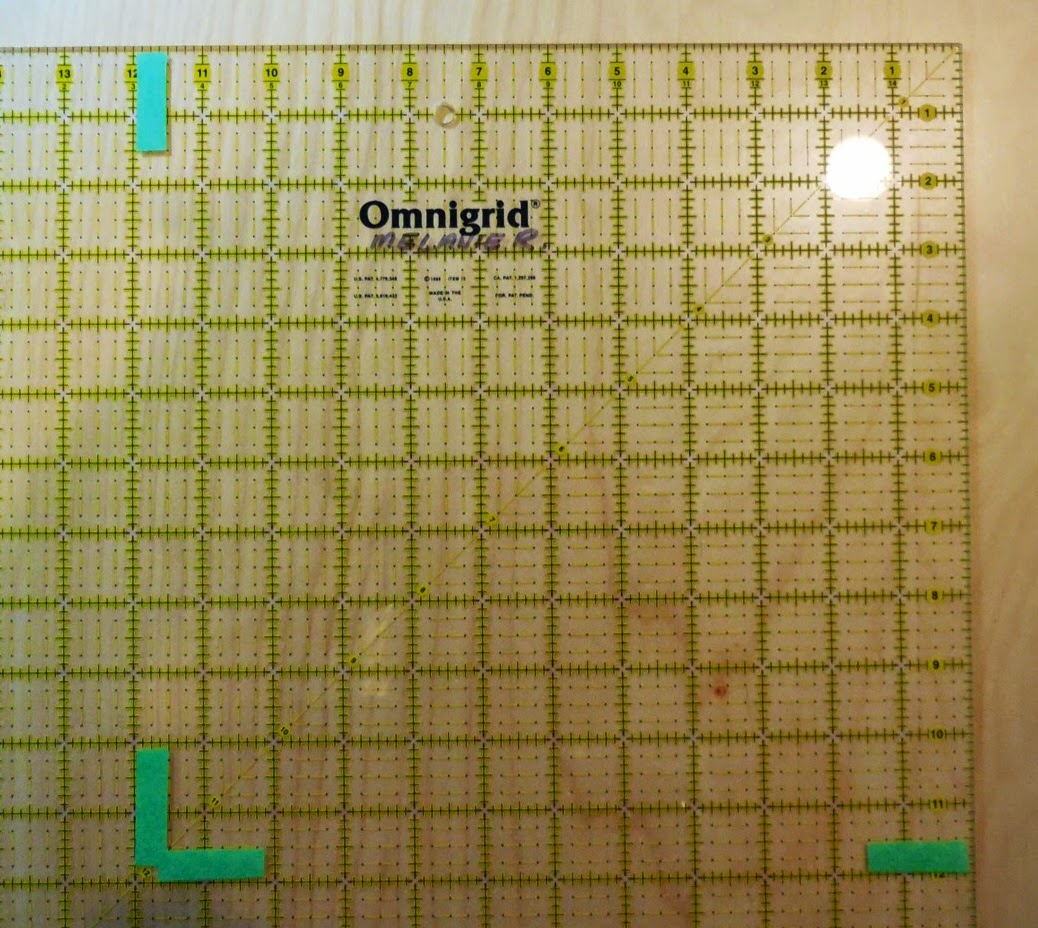
Using painters tape, tape the corner and edges of your block size on your square ruler. I am using a 15" ruler and it has many, many lines. Taping off the size allows me to line up my block at a quick glance. Painters tape can easily be removed from your ruler without leaving residue.
 Tip #2:
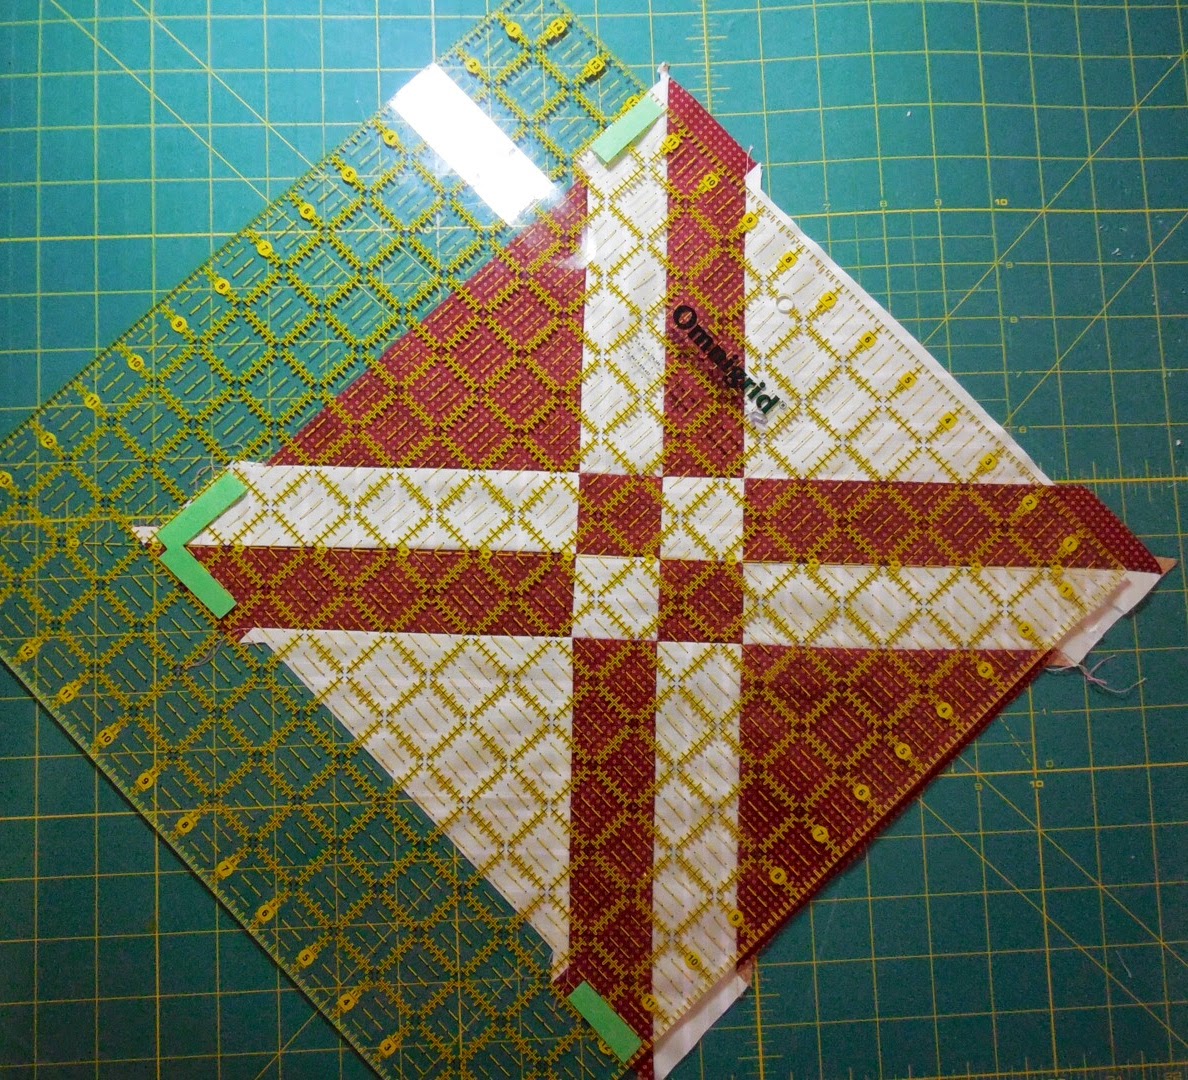
Turn your block to the diagonal before lining up your ruler.
On a block such as this Tavern Puzzle, it is important to line up the diagonal ruler line as well as the corners. Place the diagonal line on your block first, then line up the corners.
Turning your block to the diagonal position now allows you to cut 2 sides of the block at once. Trim.
 Tip #3:
After your first side is cut, flip the block and simply line up the cut edges of your block to the green tape marks. This is so efficient. Now trim the remaining 2 sides of your block in one motion.
I am working on a new quilt and have gotten to the "squaring up" stage. This is a good block to demonstrate a few tips on. It will be trimmed to 11 1/2", sewn to 11" with a 1/4" seam allowance.
Using painters tape, tape the corner and edges of your block size on your square ruler. I am using a 15" ruler and it has many, many lines. Taping off the size allows me to line up my block at a quick glance. Painters tape can easily be removed from your ruler without leaving residue.
Turn your block to the diagonal before lining up your ruler.
On a block such as this Tavern Puzzle, it is important to line up the diagonal ruler line as well as the corners. Place the diagonal line on your block first, then line up the corners.
Turning your block to the diagonal position now allows you to cut 2 sides of the block at once. Trim.
After your first side is cut, flip the block and simply line up the cut edges of your block to the green tape marks. This is so efficient. Now trim the remaining 2 sides of your block in one motion.

 06-26-2015, 02:21 AM
#4
Senior Member
Join Date: Aug 2014
Posts: 335
I bought some of these large square rulers when working on T-shirt quilt for my granddaughter and I have found them to be very useful in making bags and place mats...I have a 15" square and a 10.5" square and use them constantly for squaring up exactly the way you have shown...thanks for the info....I appreciate all the help the QB people have given me
06-26-2015, 02:32 AM
#5
Power Poster
Join Date: Jun 2011
Location: Southern California
Posts: 19,127
Good layout but remember that this won't work on all pieced blocks. I have a method of even over-sizing my 9 patch blocks. Over-sizing might be frown upon by some quilters, but it allows one to make any readjustment in the seams to make the block perfect before trimming.
 06-26-2015, 05:10 AM
#7
Senior Member
Thread Starter
Join Date: Nov 2013
Location: Calgary, Canada
Posts: 516
Good layout but remember that this won't work on all pieced blocks. I have a method of even over-sizing my 9 patch blocks. Over-sizing might be frown upon by some quilters, but it allows one to make any readjustment in the seams to make the block perfect before trimming.
 06-26-2015, 11:49 AM
#10
Senior Member
Thread Starter
Join Date: Nov 2013
Location: Calgary, Canada
Posts: 516
I am referring to the diagonal line on your ruler. On many rulers this line will have 45 degrees marked on it. Always trim your blocks with the ruler measurements, not the mat measurements, for accuracy.

Thread
Thread Starter
Forum
Replies
Last Post
craftybear
Links and Resources
11
09-06-2011 05:19 PM
