
How to Clean Up and use a vintage sewing machine - videos by Muv and Fav
 10-26-2014, 11:09 AM
#111
Member
Join Date: May 2013
Posts: 17
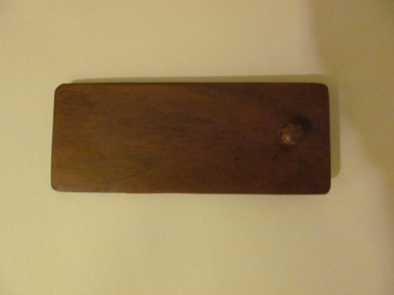
Had a great bit of luck yesterday when I became the proud owner of a 1918 Singer 99K. Not in terrible condition but will certainly look better with some TLC. I'll post some before and after photos. Here is the before image of the cover for the accessories box:

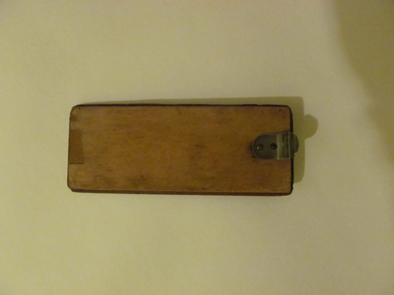
And the after:
The underside of the same item before:
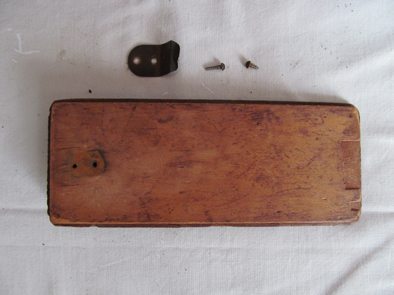
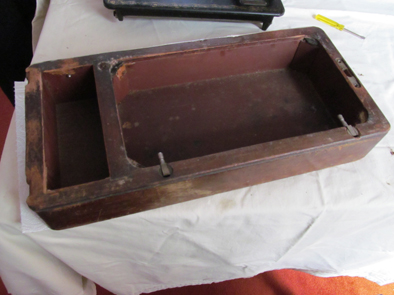
And after:
I'll post more as they are completed. Stitch
And the after:
The underside of the same item before:
And after:
I'll post more as they are completed. Stitch
 10-28-2014, 02:50 PM
#113
Member
Join Date: May 2013
Posts: 17
Hi SteveH,
I like to keep things simple. This is my method. I don't claim it's the perfect way to go but it works for me.First job I do is gently attempt to give the handwheel a turn. If it turns and a needle is attached I check if the needle accurately passes through the hole in the needle plate. My reasoning is that if you get this far then chances are it's a machine worth working on.Next I remove needle, foot, needle plate and any bobbins and thread. Then I remove the machine head from its base and take off handcrank, stop motion screw assembly, handwheel and bobbin winder. I give the machine head and all the other metal pieces which are now detached a good spray with a penetrating oil (WD40) The wooden base or treadle table I coat with a good amount of water-soluble paint stripper. This will remove any varnish/paint/oil/dirt and can be washed away with soapy water without being too harsh on the wooden surface. I then let the wooden parts dry completely and then I firmly but gently give any external surfaces a thorough sanding being careful not to over do it. I then give all external wooden surfaces a good dose of wax furniture polish and then hand buff with a soft cloth. That's it for the wood - no more varnish! I like to see the grain of the wood and if a few dents are visible they give a little character. To clean non painted bare steel parts I use an abrasive cloth such as scotchbrite and very fine abrasive paper. To clean any painted (japanned) parts sewing machine oil and a soft cloth. Treadle ironwork I like to strip back and use a black aerosol spray paint such as hammerite. Hope this helps.
I like to keep things simple. This is my method. I don't claim it's the perfect way to go but it works for me.First job I do is gently attempt to give the handwheel a turn. If it turns and a needle is attached I check if the needle accurately passes through the hole in the needle plate. My reasoning is that if you get this far then chances are it's a machine worth working on.Next I remove needle, foot, needle plate and any bobbins and thread. Then I remove the machine head from its base and take off handcrank, stop motion screw assembly, handwheel and bobbin winder. I give the machine head and all the other metal pieces which are now detached a good spray with a penetrating oil (WD40) The wooden base or treadle table I coat with a good amount of water-soluble paint stripper. This will remove any varnish/paint/oil/dirt and can be washed away with soapy water without being too harsh on the wooden surface. I then let the wooden parts dry completely and then I firmly but gently give any external surfaces a thorough sanding being careful not to over do it. I then give all external wooden surfaces a good dose of wax furniture polish and then hand buff with a soft cloth. That's it for the wood - no more varnish! I like to see the grain of the wood and if a few dents are visible they give a little character. To clean non painted bare steel parts I use an abrasive cloth such as scotchbrite and very fine abrasive paper. To clean any painted (japanned) parts sewing machine oil and a soft cloth. Treadle ironwork I like to strip back and use a black aerosol spray paint such as hammerite. Hope this helps.
11-03-2014, 01:01 PM
#114
Member
Join Date: May 2013
Posts: 17
Hi all,
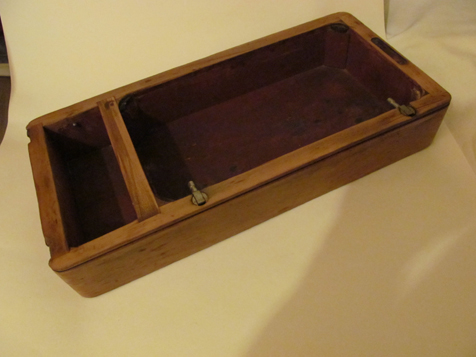
Here are some more before and after shots. Here is a before of the machine base. No real damage but not looking too good:
And here is the after shot. A careful use of paint stripper to go back to bare wood. Then a gentle but firm sanding and a good quantity of wax furniture polish:
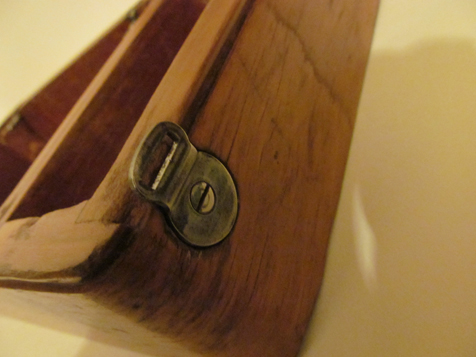
Next is a before of one of the clips on the base where the cover attaches:

And the after shot:
More coming soon folks. Stitch
Here are some more before and after shots. Here is a before of the machine base. No real damage but not looking too good:
And here is the after shot. A careful use of paint stripper to go back to bare wood. Then a gentle but firm sanding and a good quantity of wax furniture polish:
Next is a before of one of the clips on the base where the cover attaches:
And the after shot:
More coming soon folks. Stitch
11-03-2014, 02:04 PM
#115
Banned
Join Date: Oct 2012
Location: San Lorenzo, CA
Posts: 5,361
for the metal work I would suggest you try Brasso and 0000 Steel wool. (The 0000 Steel wool will also do amazing things to the wood without the usual scratching that sand paper gives)
Great job and thanks for sharing what you do!
Great job and thanks for sharing what you do!
11-05-2014, 02:16 PM
#117
Member
Join Date: May 2013
Posts: 17
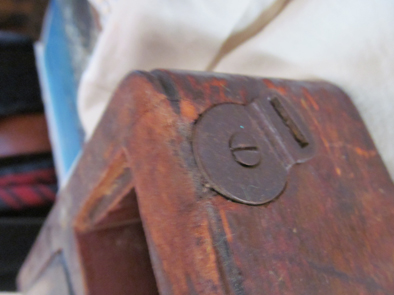
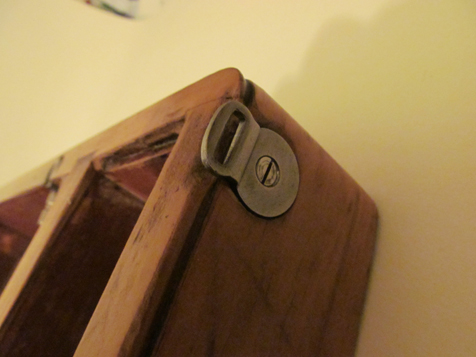
Hi folks here are some more pieces. Firstly the before shot of the other corner where the lid catch fits:
and after:
Next the bobbin winder. Here is the before:
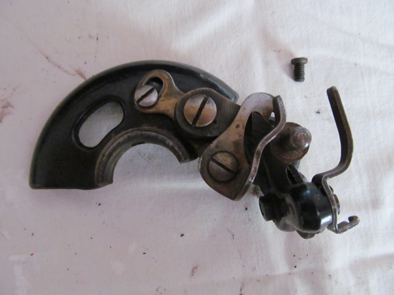
I didn't completely dismantle this part but did remove some bits particularly the thread guides and the cam. All in serviceable order but dirty. Here is the after shot. Admittedly not a huge amount of difference!

That's all for now. Stitch
and after:
Next the bobbin winder. Here is the before:
I didn't completely dismantle this part but did remove some bits particularly the thread guides and the cam. All in serviceable order but dirty. Here is the after shot. Admittedly not a huge amount of difference!
That's all for now. Stitch
06-12-2015, 03:31 PM
#120
Senior Member

Join Date: Jan 2011
Location: Kentucky
Posts: 493
Thanks Miriam! I just found a Singer model 66 today for $20!!! It has a bit of rust on it and is really dusty, so I'm sure the innards need a good thorough cleaning as well. You timed this perfect!! 😄
Donna
Donna

Thread
Thread Starter
Forum
Replies
Last Post
miriam
General Chit-Chat (non-quilting talk)
3
06-10-2012 01:19 AM
miriam
For Vintage & Antique Machine Enthusiasts
15
04-10-2012 01:57 PM
miriam
For Vintage & Antique Machine Enthusiasts
24
01-08-2012 03:45 PM
craftybear
Links and Resources
13
07-24-2011 06:42 PM
craftybear
Links and Resources
0
02-13-2011 09:21 PM
