
Restoring the FW
 09-20-2013, 10:35 AM
#11
Senior Member
Join Date: Jul 2013
Posts: 476
Absolutely! But in addition to that, the worn decals tell the story of your mom raising your family and making your clothes. I prefer that to new decals. About the lead tube, I don't know. Nova montgomery suggests cleaning it with a q-tip and kerosene. I wish there were some kind of paint-on fixative, or someway to wrap it. When I oil the machine I'm mindful of any white/yellowish dust I see, and I always assume there is dust even if I can't see it. I usually put the machine on newspaper and then throw away the newspaper.
 09-20-2013, 11:41 AM
#12
Junior Member

Join Date: May 2010
Location: Nebraska
Posts: 181
I recently bought a beat up 1937 FW, even though I own several others in wonderful shape. I use the heck out of the beat up one and don't worry about pin scratches or scratching it when I change accessories. I would clean your mother's inside and out, wax it and use it as much as she did. You will never have to worry about hurting the decals or scratching the bed.
09-21-2013, 10:27 AM
#13
Super Member
Thread Starter
Join Date: Jan 2007
Location: Omaha, NE
Posts: 1,618
I'm doing everything I can to prevent myself from running to the hardware store and getting what I need before I go grocery shopping. Hubby said something about "having that look in your eye again".....hmmmmm.....I really can't wait to get to work on it. After grocery shopping, I'm locking myself in the basement for a while. 
09-22-2013, 06:36 AM
#14
Super Member
Thread Starter
Join Date: Jan 2007
Location: Omaha, NE
Posts: 1,618
Hubby was AWESOME and saw the list of things I needed and got them. I put the game on downstairs and worked about 12 hours or so on it. I finished about 0300 this morning. I took a nap and now that I'm up I need to address the tension. The machine looks AMAZING! I stitched on some scraps and the tension is very off. I tried to take it off like in MUVs video, but it didn't work at all. The thread take up spring seems stuck and the thread is so hard, like tight, going through the machine that I'm worried it's going to break the needle.
I need some coffee first. I do not know a thing about tension. I'm feeling a little intimidated, but the sight of her all clean and shiny keeps me going. I'll post pictures soon.
I need some coffee first. I do not know a thing about tension. I'm feeling a little intimidated, but the sight of her all clean and shiny keeps me going. I'll post pictures soon.
09-22-2013, 11:02 AM
#15
Senior Member
Join Date: Jul 2013
Posts: 476
Do you mean the check spring in the tension assembly? If you take the tension assy apart, do it slowly and take pictures. Or maybe there are pictures online that show the proper order and orientation of the parts.
If the check spring is stuck, there may be gunk in there, or possibly rust. But you *should* be able to take the assembly apart to inspect/clean it.
If the check spring is stuck, there may be gunk in there, or possibly rust. But you *should* be able to take the assembly apart to inspect/clean it.
09-22-2013, 05:18 PM
#16
Super Member
Thread Starter
Join Date: Jan 2007
Location: Omaha, NE
Posts: 1,618
Do you mean the check spring in the tension assembly? If you take the tension assy apart, do it slowly and take pictures. Or maybe there are pictures online that show the proper order and orientation of the parts.
If the check spring is stuck, there may be gunk in there, or possibly rust. But you *should* be able to take the assembly apart to inspect/clean it.
If the check spring is stuck, there may be gunk in there, or possibly rust. But you *should* be able to take the assembly apart to inspect/clean it.
There's a spring coming out of the tension on the left that looks like a loop, whereas the spring on my 66-16 looks like a hook. Anyway, the knob with numbers on it, the spring all of it is stuck. I can move the knob with numbers clockwise and counter clockwise, but it doesn't seem to be affecting how the top thread is taken into the machine considerably slower and harder than the bobbin thread. I'm going to try and take some more pics and post them.
10-26-2013, 10:02 AM
#17
Super Member
Thread Starter
Join Date: Jan 2007
Location: Omaha, NE
Posts: 1,618
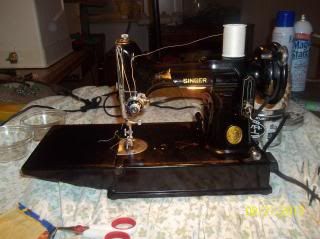
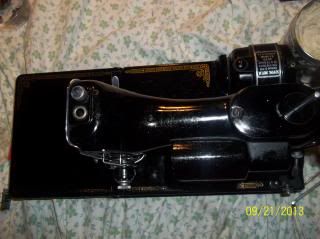
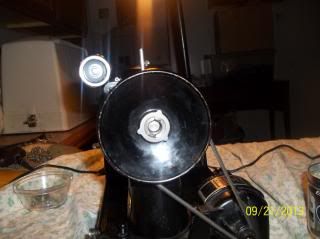
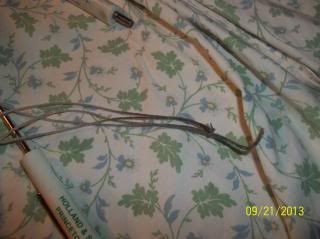
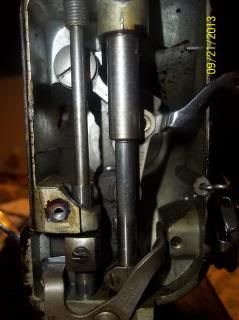
Some "after" pictures. These are just after cleaning. All parts are moveable and working now, and very cleaned up. Only thing stopping me from sewing on her is the tension, but I'm working that one out. I cant believe how different she looks all shiny!
From the front:
Bobbin area
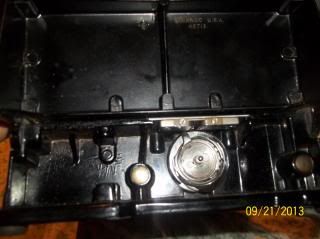
Fold down bed:
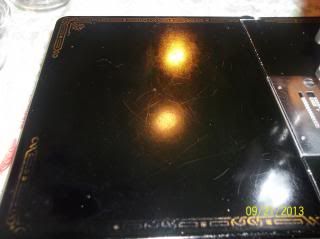
Decal on shaft:
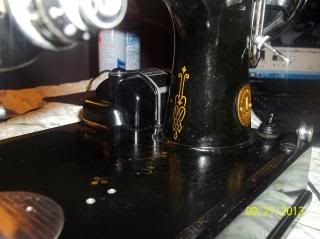
View from above:
Stop Motion: THIS WAS GROSS
All the string I used went black:
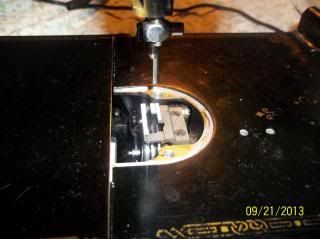
Behind scroll plate:
Before foot:
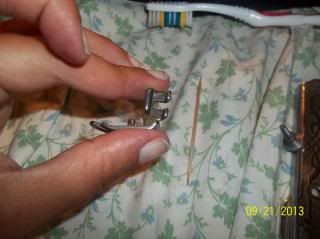
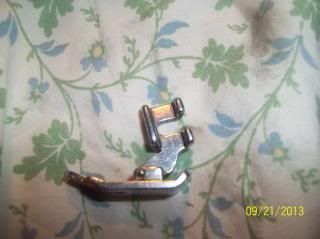
After foot:
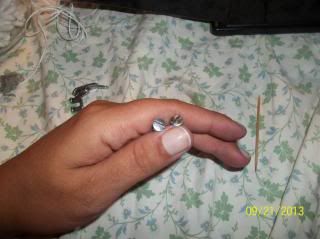
Clean screws:
Clean feed dogs:
From the front:

Bobbin area

Fold down bed:

Decal on shaft:

View from above:

Stop Motion: THIS WAS GROSS

All the string I used went black:

Behind scroll plate:

Before foot:

After foot:

Clean screws:

Clean feed dogs:
 10-27-2013, 02:59 AM
#18
Super Member
Join Date: Oct 2013
Location: Centralia, WA, USA
Posts: 4,890
Very nice job cleaning her up. I wouldn't touch the original finish either. It's in too good of shape as it is to justify re-doing it in my opinion. Also, as already mentioned, the wear marks do tell the story of how much your mother used that machine.
Rodney
Rodney
10-27-2013, 11:40 AM
#19
Senior Member
Join Date: Sep 2012
Location: Delavan
Posts: 468
I am officially a member of the FW club. There was one in a resale shop, and is now in my home. I too have a lot of white powdery stuff in the case. This machine, I think, sat in water. There is quite a bit of mold inside. I think this white stuff could be mold.
Is this possible?
Is this possible?
10-27-2013, 09:17 PM
#20
Senior Member
Join Date: Jul 2013
Posts: 476
I am officially a member of the FW club. There was one in a resale shop, and is now in my home. I too have a lot of white powdery stuff in the case. This machine, I think, sat in water. There is quite a bit of mold inside. I think this white stuff could be mold.
Is this possible?
Is this possible?
Edit: I suppose the felt liner on the drip pan could support mold. Is the white stuff growing on the felt?
Last edited by Sheluma; 10-27-2013 at 09:20 PM.

Thread
Thread Starter
Forum
Replies
Last Post
HeatherQuilts
Main
4
09-02-2010 06:40 PM
