
Something is still off,
 09-28-2014, 08:35 PM
#11
Senior Member
Join Date: May 2012
Posts: 911
if your only an 1/8" down, you need to lower it a whole lot .... just guess but it should be much closer to an inch. lolol..
you do know to leave the front plate off to watch whats going on right ?
I put this problem with a 128, don't know why it did dawn on me right off , but the needle plate hole had small piece missing at the hole, so it won't form a loop. changed that plate and it was sewing like new .
you do know to leave the front plate off to watch whats going on right ?
I put this problem with a 128, don't know why it did dawn on me right off , but the needle plate hole had small piece missing at the hole, so it won't form a loop. changed that plate and it was sewing like new .

 . In fact I have all the plates off so I can see what is where. I wonder if I need the needle plate on?
09-28-2014, 09:46 PM
. In fact I have all the plates off so I can see what is where. I wonder if I need the needle plate on?
09-28-2014, 09:46 PM
#14
Senior Member
Thread Starter
Join Date: Apr 2009
Posts: 609
I lowered the needle bar till it was almost at the bottom of the groove and it picked up the bobbin thread. Made a few stitches and still have to work on the tension a bit. The main thing is, the stuck up rust bucket is alive and she sews. I'll try to get some pic's of her first stitches in who knows how many years.
09-28-2014, 10:11 PM
#15
Senior Member
Join Date: May 2012
Posts: 911
great , if it skips stitches then go to setting the shuttle point to the scarf center .. always have the needle plate in place..
There not rust buckets , just a little dirty... with a protective covering ,, well aged as a fine wine. aka rustbuckets LOL.
There not rust buckets , just a little dirty... with a protective covering ,, well aged as a fine wine. aka rustbuckets LOL.
09-29-2014, 12:24 PM
#16
Super Member
Join Date: Aug 2013
Location: Springfield Oregon
Posts: 1,481
I'm working on a 1928 model 27 Sphinx, In less I'm loosing it (possible), It has a nonadjustable needle bar, it ha a threaded hole in the needle bar, and the clamp that operates it, has a counter bored hole. I don't see any height adjustment. I haven't got it put back together yet to see whether it sews yet, maybe tonight
09-29-2014, 02:07 PM
#19
Super Member
Join Date: Oct 2013
Location: Centralia, WA, USA
Posts: 4,890
Ok, my camera really fought me on getting a clear shot. Here's what I came up with.
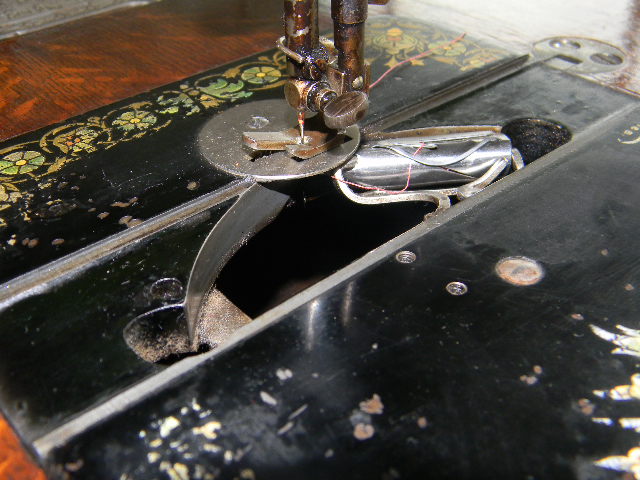
You can barely see the tip of the needle just below the bottom of the bed, it sticks past maybe 1/16 to 1/8" at bottom dead center. Sorry for how dark it is. The flash just would not light that area and I couldn't find a flashlight with good batteries.
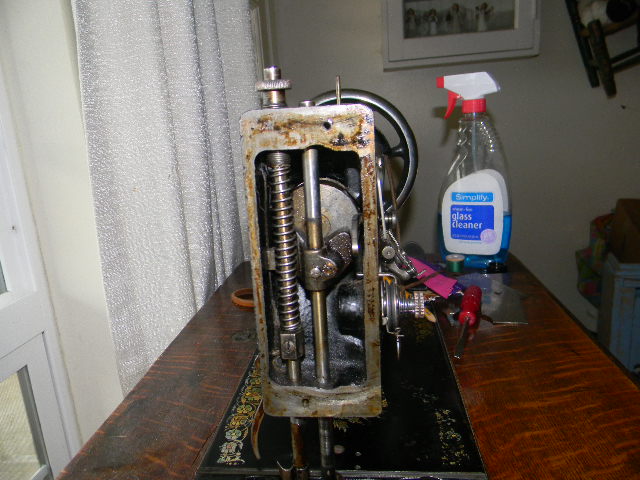
Position of needlebar at bottom dead center
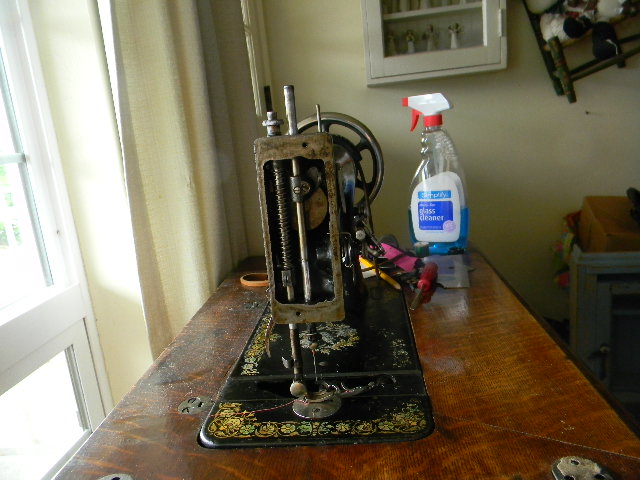
Position at top dead center
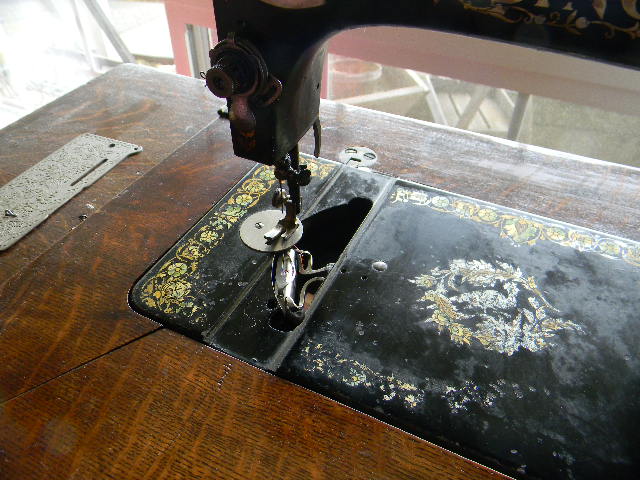
Needle and shuttle at top dead center.
Sorry again for flaking on you. I hope these help.
Rodney
EDIT: I really need to spend some quality time with Ella and a few cleaning supplies. She sews just fine but these pictures are really showing the grime around the needlebar and foot area.
You can barely see the tip of the needle just below the bottom of the bed, it sticks past maybe 1/16 to 1/8" at bottom dead center. Sorry for how dark it is. The flash just would not light that area and I couldn't find a flashlight with good batteries.
Position of needlebar at bottom dead center
Position at top dead center
Needle and shuttle at top dead center.
Sorry again for flaking on you. I hope these help.
Rodney
EDIT: I really need to spend some quality time with Ella and a few cleaning supplies. She sews just fine but these pictures are really showing the grime around the needlebar and foot area.
Last edited by Rodney; 09-29-2014 at 02:10 PM.
09-29-2014, 02:31 PM
#20
Senior Member
Thread Starter
Join Date: Apr 2009
Posts: 609
Thanks Rodney, That is exactly what I needed. She's making stitches but the feed dogs aren't advancing the fabric very well. I think there's enough pressure on the foot and I'm using normal weight quilting cotton. Hopefully its just operator error. The tension is still off a bit but I'm thinking I'll have to live with it. The little springy thingy on the tension was a bit rusty and its still rough after cleaning it the best I could. Can a replacement be made from another tension springy thingy? I'm just glad the old girl is alive and kicking out stitches.

Thread
Thread Starter
Forum
Replies
Last Post
