
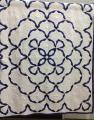
Binding Six-Sided Table Topper???


 06-25-2012, 04:55 AM
#2
Super Member
Join Date: Mar 2010
Location: New Hampshire
Posts: 4,555
You will get the best results if you cut the strips for the binding on the bias grain. This will give the binding a nice drape and it will go smoothly around the corners. Doing the corners doesn't take any special skill- it is remarkably similar to doing right angle corners. It's the bias binding that makes the difference.

 06-25-2012, 07:05 AM
#5
Power Poster
Join Date: Apr 2011
Location: Ontario, Canada
Posts: 17,827
For 6 sided you don't really need bias binding, just straight will do as your sides are straight. Bias is critical when you have curved edges to work with.
Just bind as you would a 90� corner .... you stitch to 1/4" from the corner, then flip the binding back and over, to lined up with the next side. Continue on to the next corner etc.
Then turn your binding to the back side to do your hand sewing. When you get to the corners, again, you are flipping and folding to fit with the 60� angle.
It's no harder than your regular square corners ... just that we make it so in our mind, all because we haven't done it before!!
 06-25-2012, 10:03 AM
#7
Member

Join Date: May 2009
Location: Seward, Alaska and Bullhead City, AZ
Posts: 7
Here's a link to Marci's video - http://www.quilt-video.com/2010/02/0...ng-odd-angles/ I hope it helps 
06-26-2012, 07:05 AM
#9
Super Member
Join Date: Mar 2010
Location: Tennessee
Posts: 2,189
I don't usually cut on bias unless there is a curve and never have a problem with binding odd shapes. You just need to do either Eleanor Burn's way or Kaye Wood's way of binding. You come to the corner or edge (no matter the angle) and STOP 1/4 inch from the next edge..... turn your project so the right side of your 1/4 in foot is on the edge of the next edge (or side) and BACK STITCH off the project. You can either cut these threads or not (until you get use to the procedure I'd cut them). You then fold your binding away from your project so the raw edges of the binding make a straight line with your projects next edge needing binding. This creates a fold in the binding that is the correct angle for the 'turn' on your project. You then fold your binding back down onto your fabric, but keep the angle you made by folding back the binding and create another fold at the raw edge of your fabric you just sewed. The second fold in the binding should be along the edge of the project you just sewed the binding to. Don't have it hang over or short.... This is what creates a great turn on corners any angle..... This is El's way, Kaye's you sew diagonal from your stop point to the corner. I always found El's way easier...
I know it sound confusing, but check out their videos. El's is on her site at quiltinaday.com and Kaye's is on youtube.
Good luck!
I know it sound confusing, but check out their videos. El's is on her site at quiltinaday.com and Kaye's is on youtube.
Good luck!
06-26-2012, 07:10 AM
#10
Super Member
Join Date: May 2011
Location: Pacific NW
Posts: 9,557
Disclaimer: I have not watched the videos posted. I just wanted to add this link to Heather Mulder Peterson's blog, where she shows how she puts binding on a 6-sided table topper.
http://ankastreasures.wordpress.com/...ng-odd-angles/
http://ankastreasures.wordpress.com/...ng-odd-angles/

Thread
Thread Starter
Forum
Replies
Last Post
craftybear
Links and Resources
3
12-25-2010 09:49 PM
