
Vintage Sewing Machine Shop.....Come on in and sit a spell
 11-15-2012, 03:18 PM
Super Member
Join Date: Feb 2012
Posts: 8,091
Originally Posted by Mizkaki

Joe,
Picture please?
Cathy
Picture please?
Cathy
I thought I had a pic of it but I didn't so I had to go take a couple.
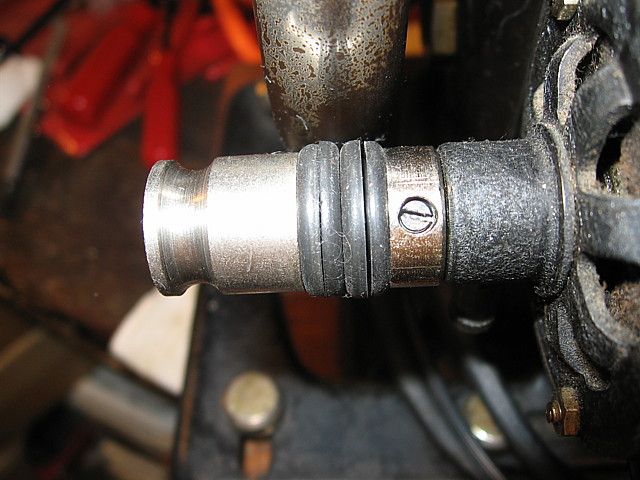
The first pick is a side view of the drive wheel with the two grommets in place of the original flat spotted friction drive. The set screw holds the drive wheel to the motor shaft.
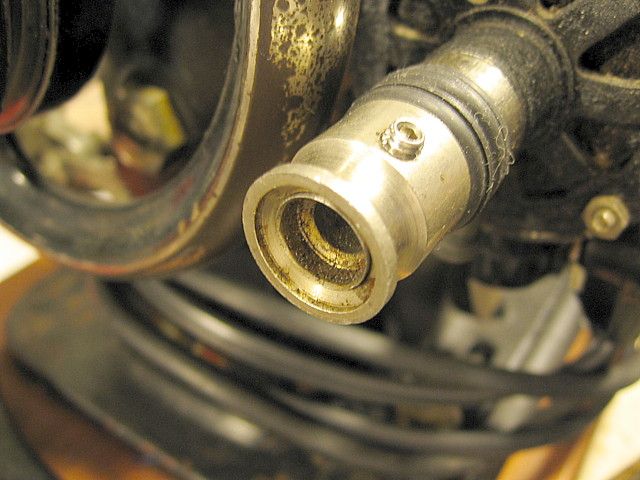
The second pic shows the hollow end with the flared part I filed away. The outer rim was held in by the flare only. The hole for the set screw shown here was there in both the outer rim and the shaft. All I did was put a set screw in it after putting in the grommets.
Joe
 11-15-2012, 08:15 PM
Super Member
Join Date: Dec 2011
Location: Northern CA near Sacramento
Posts: 1,107
Joe,
Here ya go. A picture comparing the the short Boye 2 1/2needle, the 15x1 needle , and the 206x13 needle.
[ATTACH=CONFIG]376815[/ATTACH][ATTACH=CONFIG]376816[/ATTACH]
Cathy
Here ya go. A picture comparing the the short Boye 2 1/2needle, the 15x1 needle , and the 206x13 needle.
[ATTACH=CONFIG]376815[/ATTACH][ATTACH=CONFIG]376816[/ATTACH]
Cathy
Originally Posted by J Miller
Cathy, I'll have to make a note of these numbers. The only other number besides the Kenmore 49 that I'd come up with is the Boye 2�. Are the needles you're talking about flat shank or round shank, and do you have a pic of them? I'm curious as to what the point to the eye looks like. Joe
11-16-2012, 02:58 AM
Super Member
Join Date: Feb 2012
Posts: 8,091
Cathy,
Thanks. I saved the pics and made and noted the needle numbers for future reference.
Joe
Thanks. I saved the pics and made and noted the needle numbers for future reference.
Joe
11-16-2012, 03:26 PM
Power Poster
Join Date: Mar 2011
Location: Somewhere
Posts: 15,507
I think I need a tutorial how to read the needles.
BTW Where is everybody? It sure is quiet around here...
BTW Where is everybody? It sure is quiet around here...
11-16-2012, 03:48 PM
Super Member
Join Date: Feb 2012
Posts: 8,091
BOYE 2� = 40 F1 = 38 Y1 = CC
BOYE 6 or 16 = 15 x 1 = AA
I thiiiiink.
Joe
BOYE 6 or 16 = 15 x 1 = AA
I thiiiiink.
Joe
11-16-2012, 03:49 PM
Super Member
Join Date: Feb 2012
Posts: 8,091
Miriam,
What, no guess on what I did to the 500?
Joe
What, no guess on what I did to the 500?
Joe
11-16-2012, 03:59 PM
Senior Member

Join Date: Jul 2011
Location: Northern California
Posts: 330
I just thought I would post this, if anyone is close to this location.
http://sfbay.craigslist.org/pen/zip/3403325601.html
http://sfbay.craigslist.org/pen/zip/3403325601.html
11-16-2012, 04:45 PM
Power Poster
Join Date: Mar 2011
Location: Somewhere
Posts: 15,507
Originally Posted by J Miller
Miriam,
What, no guess on what I did to the 500?
Joe
What, no guess on what I did to the 500?
Joe
11-16-2012, 05:13 PM
Super Member
Join Date: Feb 2012
Posts: 8,091
.............. which spring?
Joe
Joe
11-16-2012, 07:50 PM
Super Member

Join Date: Apr 2010
Location: Rescue, California
Posts: 4,585
Originally Posted by J Miller

Alright the problem is solved and it was none of the above. But in trying to diagnose the problems I did the following:
Took apart the top tension assembly and cleaned it. Didn't have to, it wasn't the problem, but it never hurts.
Cleaned the bobbin case and hook assembly again.
I went hunting for a couple pics someone here on the forum emailed me of how to assemble the later top tensions. I didn't find it but I found out I had a 500 manual on my thumb drive. So I checked it out and found I had missed a complete step in threading the top end. I printed the page I needed then stood in front of our 401A while I double checked my assembly of the top tension.
Went back downstairs put the tension unit in and rethreaded it correctly.
Then I tried to sew and it made it a whole 3" then crunch and broke the thread. Over and over again my wife and I (she finally got in on the act) worked with the tensions, bobbin, and cleaning trying to find out what the heck it's problem was.
Then it went crunch and just stopped. Rather than go again and break the thread I carefully removed the needle and needle plate to see where the jam up was. Well, the thread was wrapped around the bobbin case and then around the case support on the back side where the case sits. This didn't make sense at all.
It was about then that I realized the bobbin case and hook assembly and the springy thing that holds the bobbin case in was the same as the 401A. So I went upstairs again and opened up the 401A and studied it. Hmmmmmmmm.
Back downstairs to the 500. Make one adjustment and zoom zooom we're sewing. No broken threads, ZZ works, stitch patterns work, and I'm thrilled. I had to go back upstairs to get a slant shank special purpose foot to really try some patterns and when I did, the old lady made a few really nice stitches.
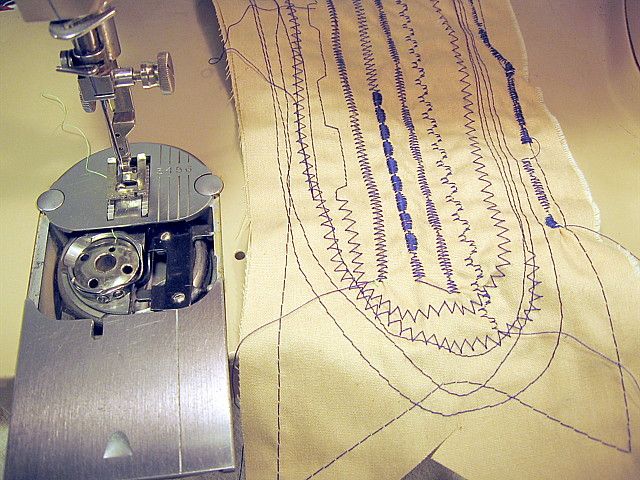
Now, I'm gonna post a pic of the bobbin area and let you all try and figure out what I had to adjust to fix the problem.
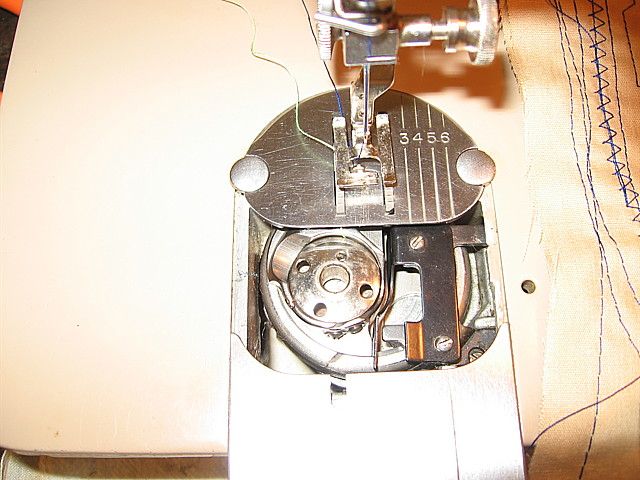
Joe
Nancy

Thread
Thread Starter
Forum
Replies
Last Post
Stitchnripper
Main
5
10-17-2018 09:01 AM
AngieS
Main
38
10-06-2011 10:06 PM
craftybear
Offline Events, Announcements, Discussions
34
09-09-2011 12:36 PM
