
Please Advise Technique for "Square in a Square" Block
 12-11-2011, 02:25 PM
#1
Super Member
Thread Starter
Join Date: Sep 2011
Location: West Texas
Posts: 2,073
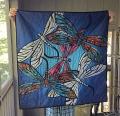
I am starting the cutest quilt, and it uses a "square in a square" block. The instructions say to start with a 4.75" square and sew a 3 and 7/8" triangle to each side. So I think that means that I would be sewing the bias edge of a triangle to each side of the square, which is cut on the straight grain. The goal is to end up with a block that is 6.5" square, and the block would not have any bias edges when finished.
Are there any tips that I should know before starting this process? It seems to me that I should start out with triangles a bit larger, so that I can trim the whole block down to 6.5". Or if my triangles are cut accurately and the seams are 1/4", can I count on the block coming out accurately? Because of the bias, should I sew with the triangle on top of the square or the square on top of the triangle? Would you recommend starching the triangle pieces before sewing?
The left side of the picture in my post shows one of three different sets of these "square in a square" blocks. I will need to make 30 altogether. The right side of my picture shows a small portion of the quilt, but you can see how the "square in a square" block works in. I think this will be a fun quilt to make -- it is simpler than it looks, with each of the blocks being 6.5". My focus fabric is a black and white cow outline print with primary color cows. The "square in a square" is a black and white cowhide print with red and blue bandana corners.
Thanks for any tips you can give me.
Dayle
 12-11-2011, 02:42 PM
#2
Super Member
Join Date: Aug 2011
Location: Louisville, KY
Posts: 1,293
12-11-2011, 03:10 PM
#4
Senior Member
Join Date: Apr 2010
Location: Lived in San Diego now retired in Eagar, AZ.
Posts: 887
I am starting the cutest quilt, and it uses a "square in a square" block. The instructions say to start with a 4.75" square and sew a 3 and 7/8" triangle to each side. So I think that means that I would be sewing the bias edge of a triangle to each side of the square, which is cut on the straight grain. The goal is to end up with a block that is 6.5" square, and the block would not have any bias edges when finished.
Are there any tips that I should know before starting this process? It seems to me that I should start out with triangles a bit larger, so that I can trim the whole block down to 6.5". Or if my triangles are cut accurately and the seams are 1/4", can I count on the block coming out accurately? Because of the bias, should I sew with the triangle on top of the square or the square on top of the triangle? Would you recommend starching the triangle pieces before sewing?
The left side of the picture in my post shows one of three different sets of these "square in a square" blocks. I will need to make 30 altogether. The right side of my picture shows a small portion of the quilt, but you can see how the "square in a square" block works in. I think this will be a fun quilt to make -- it is simpler than it looks, with each of the blocks being 6.5". My focus fabric is a black and white cow outline print with primary color cows. The "square in a square" is a black and white cowhide print with red and blue bandana corners.
Thanks for any tips you can give me.
Dayle
Are there any tips that I should know before starting this process? It seems to me that I should start out with triangles a bit larger, so that I can trim the whole block down to 6.5". Or if my triangles are cut accurately and the seams are 1/4", can I count on the block coming out accurately? Because of the bias, should I sew with the triangle on top of the square or the square on top of the triangle? Would you recommend starching the triangle pieces before sewing?
The left side of the picture in my post shows one of three different sets of these "square in a square" blocks. I will need to make 30 altogether. The right side of my picture shows a small portion of the quilt, but you can see how the "square in a square" block works in. I think this will be a fun quilt to make -- it is simpler than it looks, with each of the blocks being 6.5". My focus fabric is a black and white cow outline print with primary color cows. The "square in a square" is a black and white cowhide print with red and blue bandana corners.
Thanks for any tips you can give me.
Dayle
 12-11-2011, 04:19 PM
#6
Power Poster

Join Date: Mar 2009
Location: Lake Elsinore, CA
Posts: 15,570
I also like to paper piece this block. If you don't, I would recommend starching the pieces. It's okay to cut the outer triangle a little big, but the center square needs to be cut at the correct size to have the final block come out right.
12-11-2011, 04:34 PM
#7
Super Member
Join Date: Aug 2011
Location: Asheville, previously Lake Vermilion, Tarpon Springs, Duluth, St Paul, Soudan
Posts: 1,651
I just did 12 of them for block centers and paper pieced them. They came out perfectly. If you intensely dislike paper piecing, be sure to starch.
12-11-2011, 07:19 PM
#8
Super Member
Thread Starter
Join Date: Sep 2011
Location: West Texas
Posts: 2,073
Thank you, everybody, for the help. I especially appreciate the youtube video and think I will try that method first. If I am not satisfied with the result, I will try the paper piecing. I hope to have a picture of a great quilt when this is finished.
Dayle
Dayle
12-11-2011, 07:44 PM
#9
Super Member

Join Date: Sep 2010
Location: London, Ontario, Canada
Posts: 1,326
When I have to sew a square in a square, I use the same theory as making half square triangles by drawing a line diagonally across the square and sewing 1/4" each side, then cutting them apart.
Instead, draw the line corner to corner on the front of the corner square before you've cut them apart to make triangles. Line the center square up to that line and sew the 1/4" seam. Turn it 180degrees, and sew another center square on the other side of the line . THEN cut them apart along the pencil line. By doing this you've sewn down the bias edges before they are cut, so there is no problem with stretching. Here is a tutorial that shows this technique. http://tjzoriginalz.blogspot.com/201...ways-told.html
Instead, draw the line corner to corner on the front of the corner square before you've cut them apart to make triangles. Line the center square up to that line and sew the 1/4" seam. Turn it 180degrees, and sew another center square on the other side of the line . THEN cut them apart along the pencil line. By doing this you've sewn down the bias edges before they are cut, so there is no problem with stretching. Here is a tutorial that shows this technique. http://tjzoriginalz.blogspot.com/201...ways-told.html


Thread
Thread Starter
Forum
Replies
Last Post
bearisgray
General Chit-Chat (non-quilting talk)
65
02-01-2024 09:04 AM
craftybear
Links and Resources
8
08-18-2011 10:48 PM
craftybear
Links and Resources
2
05-13-2011 08:50 AM
