
Seam Ripping Patterns
 02-20-2018, 07:35 AM
#11
Super Member
Join Date: Jun 2011
Location: Illinois
Posts: 9,018
Originally Posted by Peckish

It took you 3.5 days??? Wow, you're way more patient than I. 
For future reference: I attended a Ricky Tims seminar. He demonstrated (and had all of us try it with much success!) how to rip such seams within seconds. You rip the first couple of inches, then grab the fabric, one in each hand, and quickly pull it apart, as if you were ripping yardage. It works!
For future reference: I attended a Ricky Tims seminar. He demonstrated (and had all of us try it with much success!) how to rip such seams within seconds. You rip the first couple of inches, then grab the fabric, one in each hand, and quickly pull it apart, as if you were ripping yardage. It works!
 02-20-2018, 07:56 AM
#12
Power Poster
Join Date: May 2008
Location: MN
Posts: 24,407
Originally Posted by Geri B
my luck I would rip,the fabric! I watched a YouTube once that showed the "proper" way to rip a seam- unfortunately don't remember where it was---so I'm going to try to explain.....pick out two or three of the stitches, then that little red ball finger goes underneath and between the two seam allowances...holding taut, just push the ripper along that seam and it should just smoothly rip thru.....I always wondered what that little red ball was for......
I also ended up tearing the fabric when I tried to do the "quick rip the seam apart" method.
I still have "better" results doing it the tedious way - either cut every third or fourth stitch or spread the seam and cut the threads/
02-20-2018, 08:06 AM
#13
Super Member

Join Date: Jul 2013
Location: South Dakota
Posts: 8,137
My worst ripping was not a quilt - I sewed about 40 yards of the wrong color of ribbon on a set of vestments - and it was satin stitched both sides. It took me 2 hours per shirt of ripping and there were 12 shirts. Took about half that time to sew the new color on.
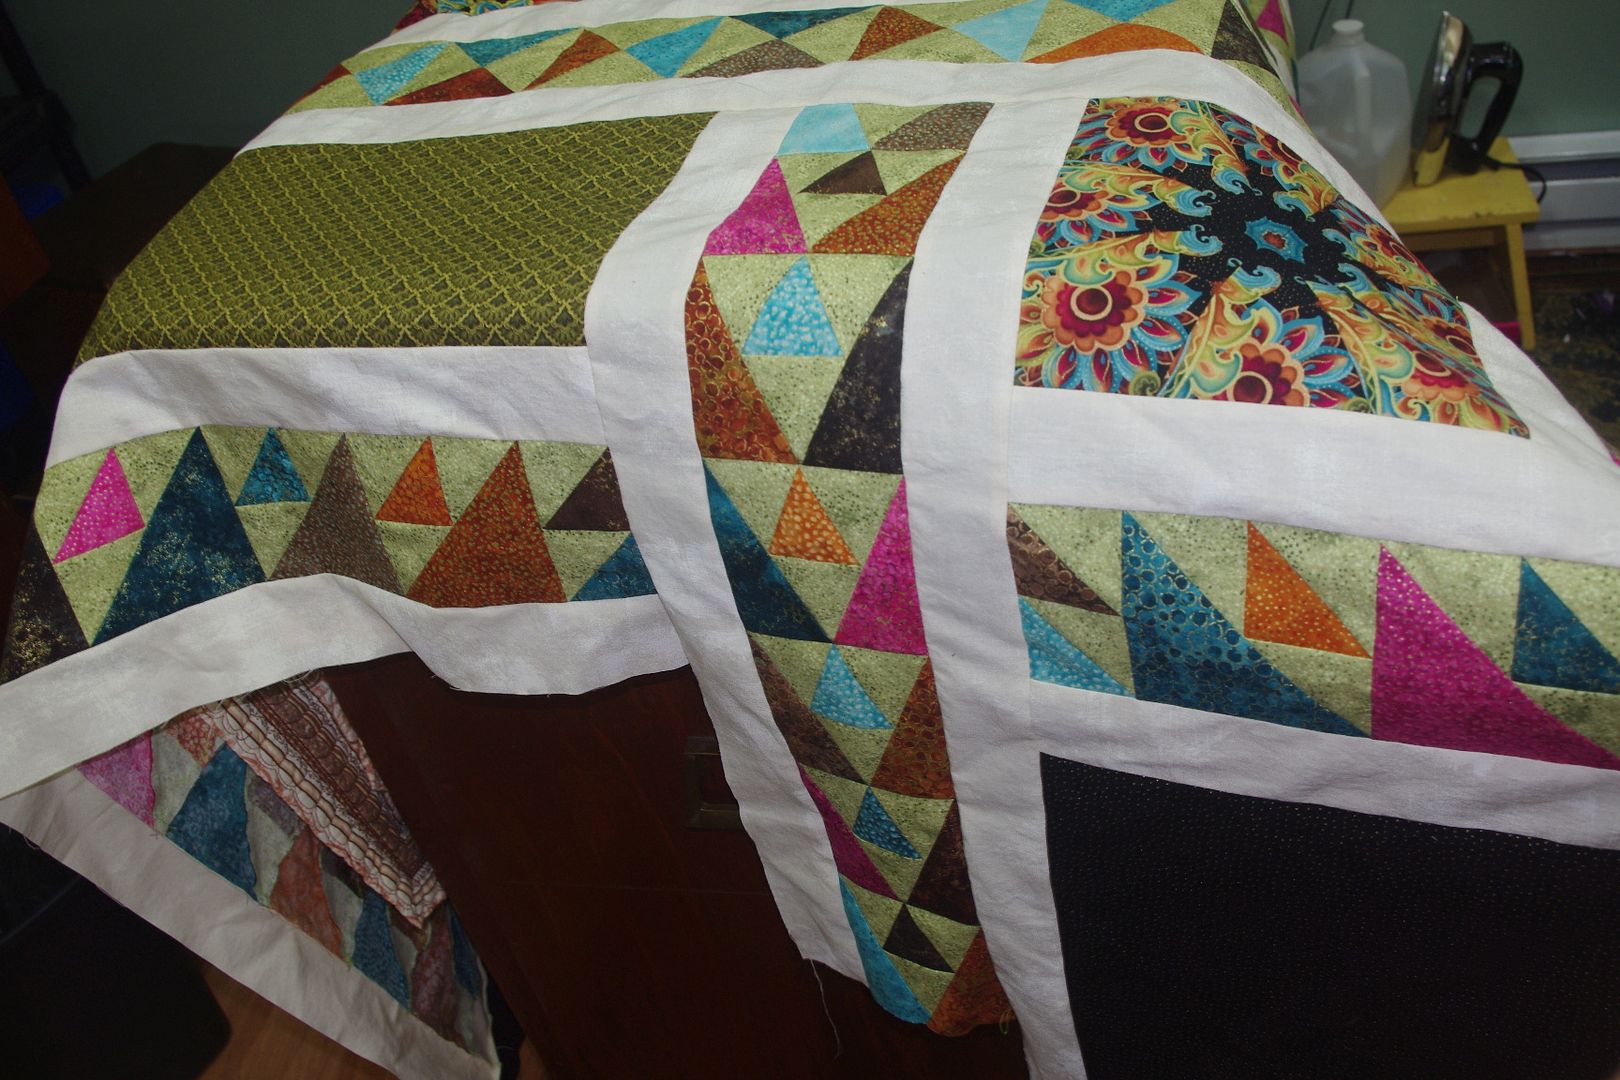
For quilts, I think the worst was a mosaic quilt that I did not realize the mosaic strips were specific. I had just sewed them on and then realized the pattern did not flow.
This is a picture I took at the time, see how the pieces switch directions? the are not suppose to do that. I had three of the four going wrong.
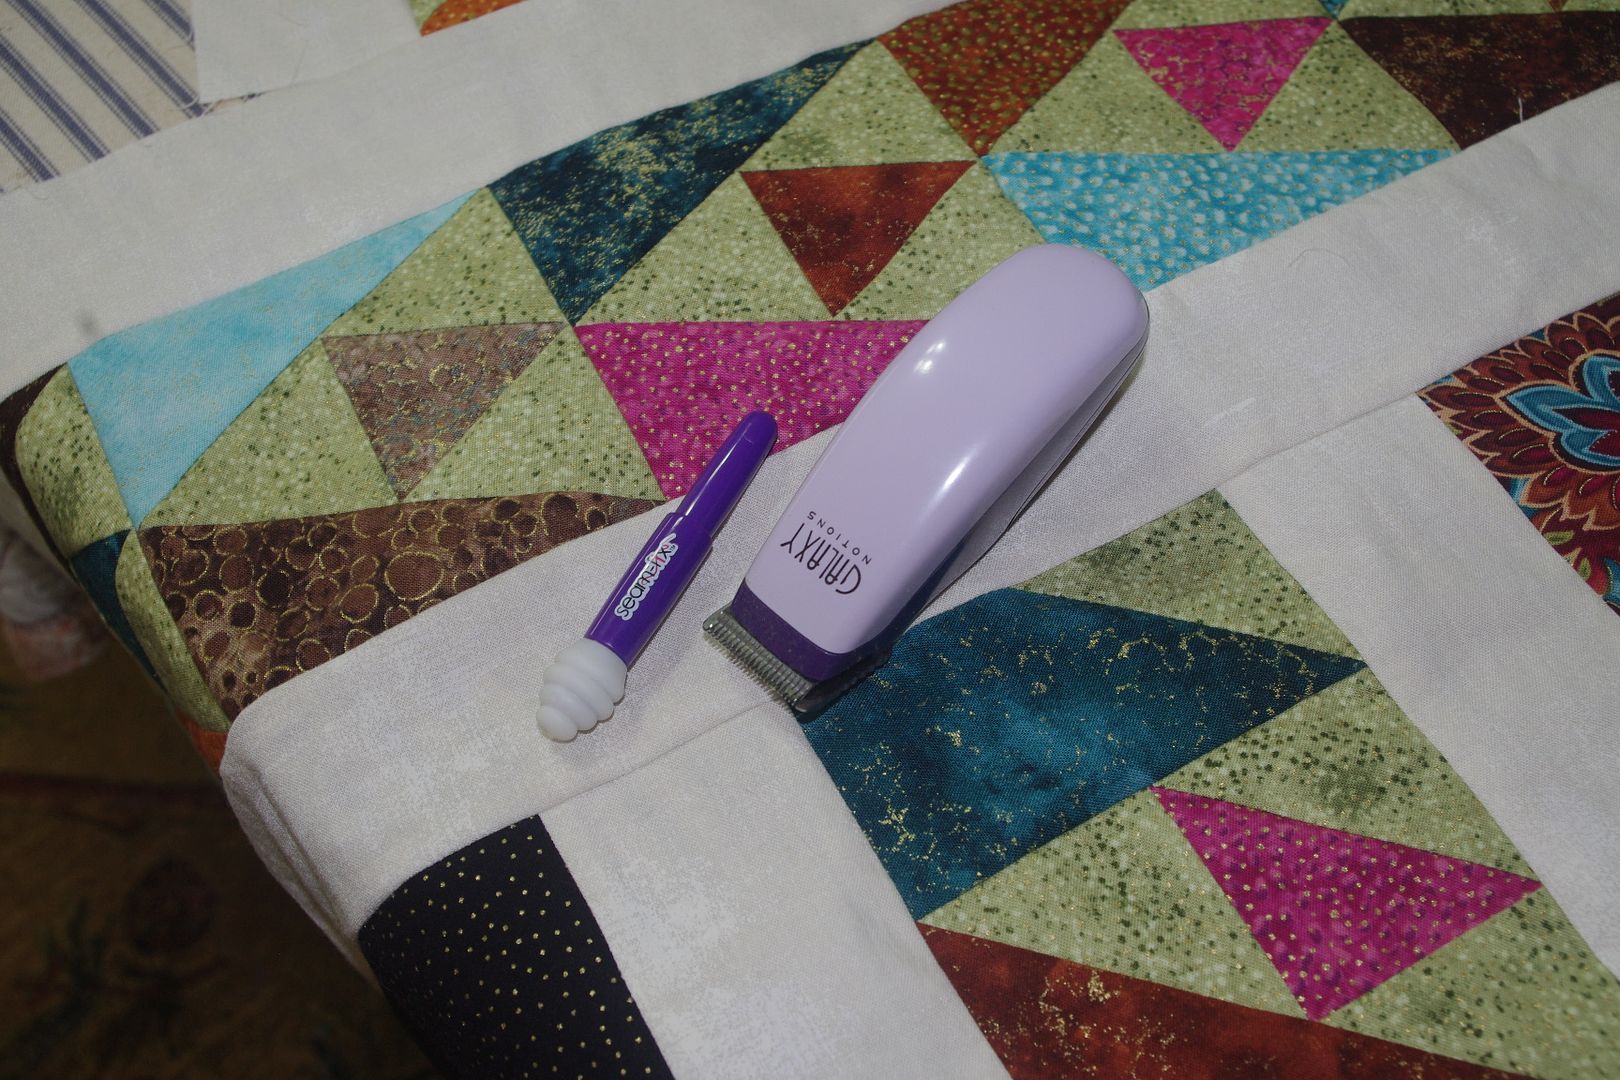
This little tool worked quite well, (did not work for satin stitching though) It cut the ripping time way down. Whenever I have long seams to rip out, I use it. It's not worth the effort for shorter runs.
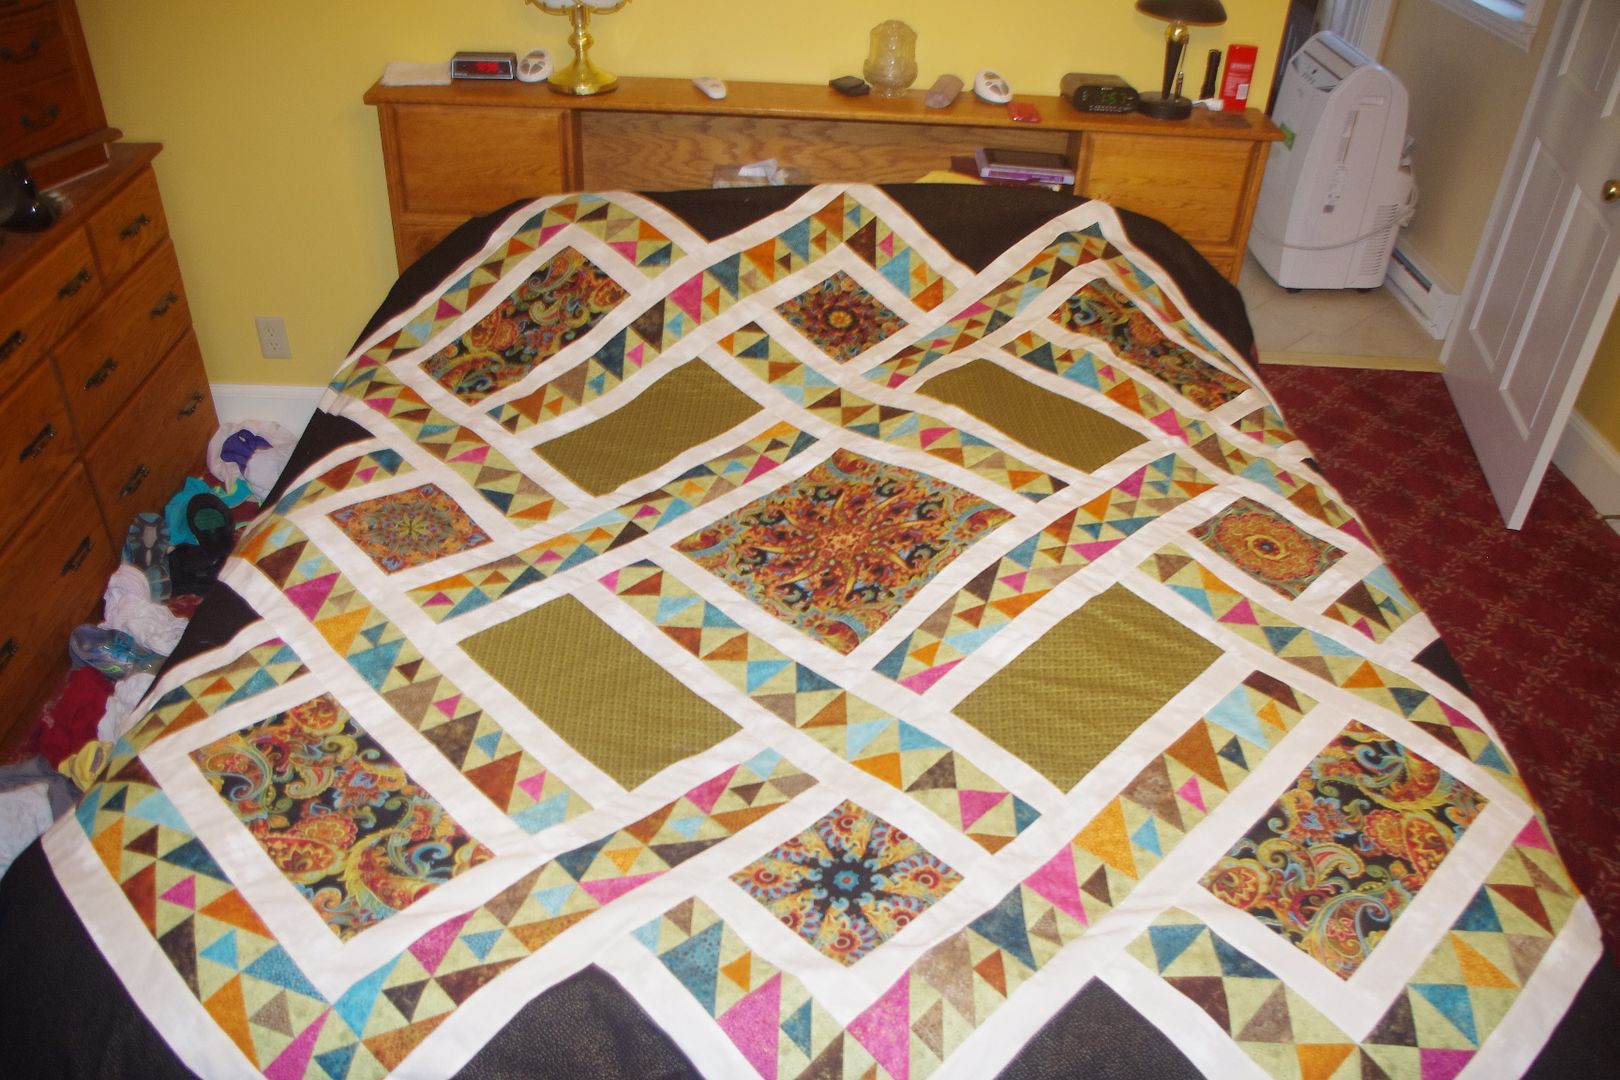
Here is the complete quilt - after a lot of time spent ripping.
One of my first jobs was doing alterations - so I got very comfortable with ripping seams out. My favorite tool was a very sharp, small pocket knife. I learned that method from the other sewers at the shop - who had been doing it for years. It worked like what Peckish describes, put the knife between the layers and hold it taut, and then slide the knife. You could feel if it was hitting fabric instead of thread, so cutting the fabric rarely happened. Worked best when you were taking something in- so any fabric damage would end up in the seam allowance.
For quilts, I think the worst was a mosaic quilt that I did not realize the mosaic strips were specific. I had just sewed them on and then realized the pattern did not flow.
This is a picture I took at the time, see how the pieces switch directions? the are not suppose to do that. I had three of the four going wrong.
This little tool worked quite well, (did not work for satin stitching though) It cut the ripping time way down. Whenever I have long seams to rip out, I use it. It's not worth the effort for shorter runs.
Here is the complete quilt - after a lot of time spent ripping.
One of my first jobs was doing alterations - so I got very comfortable with ripping seams out. My favorite tool was a very sharp, small pocket knife. I learned that method from the other sewers at the shop - who had been doing it for years. It worked like what Peckish describes, put the knife between the layers and hold it taut, and then slide the knife. You could feel if it was hitting fabric instead of thread, so cutting the fabric rarely happened. Worked best when you were taking something in- so any fabric damage would end up in the seam allowance.
Last edited by Macybaby; 02-20-2018 at 08:13 AM.
02-20-2018, 08:21 AM
#14
Super Member
Join Date: Mar 2010
Location: Ridgefield WA
Posts: 7,765
That's why I like doing 6" blocks! I think the Labyrinth Walk gave me the most practice un-quilting! The contrasting fabrics make errors very visible!
One tip is to squeeze a bit of fabric between your fingers to make a little dip it it. That separates the thread to just above the fabric enough to slide the ripper under more easily.
One tip is to squeeze a bit of fabric between your fingers to make a little dip it it. That separates the thread to just above the fabric enough to slide the ripper under more easily.
02-20-2018, 10:30 AM
#15
Power Poster
Join Date: May 2008
Location: MN
Posts: 24,407
Originally Posted by Macybaby
My worst ripping was not a quilt - I sewed about 40 yards of the wrong color of ribbon on a set of vestments - and it was satin stitched both sides. It took me 2 hours per shirt of ripping and there were 12 shirts. Took about half that time to sew the new color on.
For quilts, I think the worst was a mosaic quilt that I did not realize the mosaic strips were specific. I had just sewed them on and then realized the pattern did not flow.
This is a picture I took at the time, see how the pieces switch directions? the are not suppose to do that. I had three of the four going wrong.
This little tool worked quite well, (did not work for satin stitching though) It cut the ripping time way down. Whenever I have long seams to rip out, I use it. It's not worth the effort for shorter runs.
Here is the complete quilt - after a lot of time spent ripping.
One of my first jobs was doing alterations - so I got very comfortable with ripping seams out. My favorite tool was a very sharp, small pocket knife. I learned that method from the other sewers at the shop - who had been doing it for years. It worked like what Peckish describes, put the knife between the layers and hold it taut, and then slide the knife. You could feel if it was hitting fabric instead of thread, so cutting the fabric rarely happened. Worked best when you were taking something in- so any fabric damage would end up in the seam allowance.
02-20-2018, 06:05 PM
#17
Senior Member
Join Date: May 2010
Location: SW, MI
Posts: 827
Originally Posted by Kitsie
That's why I like doing 6" blocks! I think the Labyrinth Walk gave me the most practice un-quilting! The contrasting fabrics make errors very visible!
One tip is to squeeze a bit of fabric between your fingers to make a little dip it it. That separates the thread to just above the fabric enough to slide the ripper under more easily.
One tip is to squeeze a bit of fabric between your fingers to make a little dip it it. That separates the thread to just above the fabric enough to slide the ripper under more easily.
02-20-2018, 08:06 PM
#18
Super Member
Join Date: Aug 2011
Location: kansas
Posts: 6,407
when I first started LA I unfortunately had to rip out all the quilting on a couple of quilts (boo!); but the quilt that practically had me in tears and I would have tossed if it wasn't from my DD's wedding table toppers and for her--was a Storm at Sea.
Like Geri said, I use the ripper with the little red ball inside the seam and rip away when it's a long seam and without lots of cross seaming. I also have one of those nifty little razor gizmos for really long seams--but always wish I had another hand when I use that.
Like Geri said, I use the ripper with the little red ball inside the seam and rip away when it's a long seam and without lots of cross seaming. I also have one of those nifty little razor gizmos for really long seams--but always wish I had another hand when I use that.
02-21-2018, 06:41 AM
#19
Super Member
Join Date: Jul 2010
Location: Jeffersonville, In
Posts: 2,621
Originally Posted by Barb in Louisiana
I bought two of these quilts off Ebay. My goal was to do easy, inexpensive, quilts until I could get my 1/4 inch seam done pat. The instructions were basically to make the blocks like the picture. I've been sewing a long time, so managed to figure out how to sew the different segments of the block to get several done. The I noticed something. One of the problems was that the block was shown as only one orientation, but you had to reverse the block for the other side. It made everything so much more interesting. Then I laid it out. Just knew I had it right. I very soon found out that taking a picture of the layout with my phone helped me find where I had sewed the blocks wrong. Took me 3 or 4 times to figure that out. Doesn't look hard, does it?
https://www.ebay.com/itm/Quilt-Kit-C...4AAOSwMtxXvH7t
In the end, it was a very good learning experience for me. And the value of a good ripper cannot be overstated.
https://www.ebay.com/itm/Quilt-Kit-C...4AAOSwMtxXvH7t
In the end, it was a very good learning experience for me. And the value of a good ripper cannot be overstated.

Thread
Thread Starter
Forum
Replies
Last Post
