
Sashing issue.

 10-01-2014, 10:43 AM
#12
Super Member
Join Date: Jul 2010
Location: Central Willamette Valley, Oregon, USA
Posts: 7,695
The method that worked for me was putting sashing on each block as I went, and keeping them on the design floor until I had them all positioned, then started sewing them together. I think the method might be called "sashing as you go"?
10-01-2014, 10:55 AM
#13
Power Poster
Join Date: Dec 2008
Location: Western Wisconsin
Posts: 12,930
You don't have to use cornerstones to get sashing to line up.
I put the quilt together in rows first, with the short sashing strips in-between the blocks. Sew the long sashing strip to the bottom of the first row. The important step at this point is to turn the row-with-long-sashing-strip to the wrong side. Use a ruler and pencil to extend the seam lines from the row of blocks down through the long sashing strip. When you attach the second row to the long sashing strip, use pins to match up the marks on the sashing strip with the seam lines in the second row. Use the same technique after adding a long sashing strip. This keeps all the blocks lined up.
The pencil marks on the wrong side of the long sashing become "virtual" seamlines. This is a lot faster than adding cornerstones, as there is a lot less cutting and sewing. The only extra step is drawing the pencil marks on the wrong side.
10-01-2014, 02:48 PM
#15
Power Poster
Join Date: Jun 2011
Location: Southern California
Posts: 19,127
GingerK is exactly right. Take the time and make sure the measurements match up.
10-01-2014, 08:25 PM
#16
Junior Member
Thread Starter

Join Date: Jul 2013
Location: Central Kentucky
Posts: 119
You don't have to use cornerstones to get sashing to line up.
I put the quilt together in rows first, with the short sashing strips in-between the blocks. Sew the long sashing strip to the bottom of the first row. The important step at this point is to turn the row-with-long-sashing-strip to the wrong side. Use a ruler and pencil to extend the seam lines from the row of blocks down through the long sashing strip. When you attach the second row to the long sashing strip, use pins to match up the marks on the sashing strip with the seam lines in the second row. Use the same technique after adding a long sashing strip. This keeps all the blocks lined up.
The pencil marks on the wrong side of the long sashing become "virtual" seamlines. This is a lot faster than adding cornerstones, as there is a lot less cutting and sewing. The only extra step is drawing the pencil marks on the wrong side.
I put the quilt together in rows first, with the short sashing strips in-between the blocks. Sew the long sashing strip to the bottom of the first row. The important step at this point is to turn the row-with-long-sashing-strip to the wrong side. Use a ruler and pencil to extend the seam lines from the row of blocks down through the long sashing strip. When you attach the second row to the long sashing strip, use pins to match up the marks on the sashing strip with the seam lines in the second row. Use the same technique after adding a long sashing strip. This keeps all the blocks lined up.
The pencil marks on the wrong side of the long sashing become "virtual" seamlines. This is a lot faster than adding cornerstones, as there is a lot less cutting and sewing. The only extra step is drawing the pencil marks on the wrong side.

 10-02-2014, 06:59 PM
#19
Super Member
Join Date: May 2011
Location: Pacific NW
Posts: 9,444
Count me as another who likes to sash each block individually. Makes it sooooo easy to get everything lined up straight.
On this quilt, I sashed each block with a narrow contrasting color, then a wider black strip. Sew the blocks together, and voil�, instant sashing that lines up perfectly.
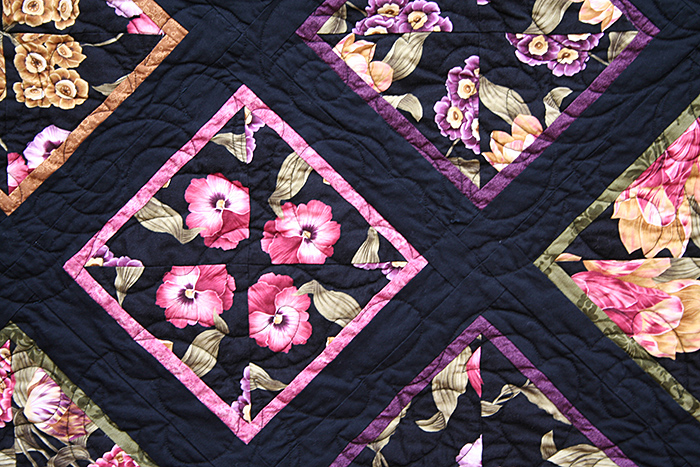
On this quilt, I sashed each block with a narrow contrasting color, then a wider black strip. Sew the blocks together, and voil�, instant sashing that lines up perfectly.
10-02-2014, 09:34 PM
#20
Senior Member
Join Date: Apr 2009
Posts: 609
This is how I do sashing. Susan Claire (Gourmet Quilter) makes it so easy. The sashing can be all one color or 2 color like in the video. Adjust to your size of blocks.
https://www.youtube.com/watch?v=7Sa-HeY4dNg
https://www.youtube.com/watch?v=7Sa-HeY4dNg

Thread
Thread Starter
Forum
Replies
Last Post
