
Here's a tutorial for your UFOs!
 06-19-2015, 01:42 PM
#1
Senior Member
Thread Starter

Join Date: Nov 2013
Location: Calgary, Canada
Posts: 516
Setting Odd Blocks with 2 1/2" Strips

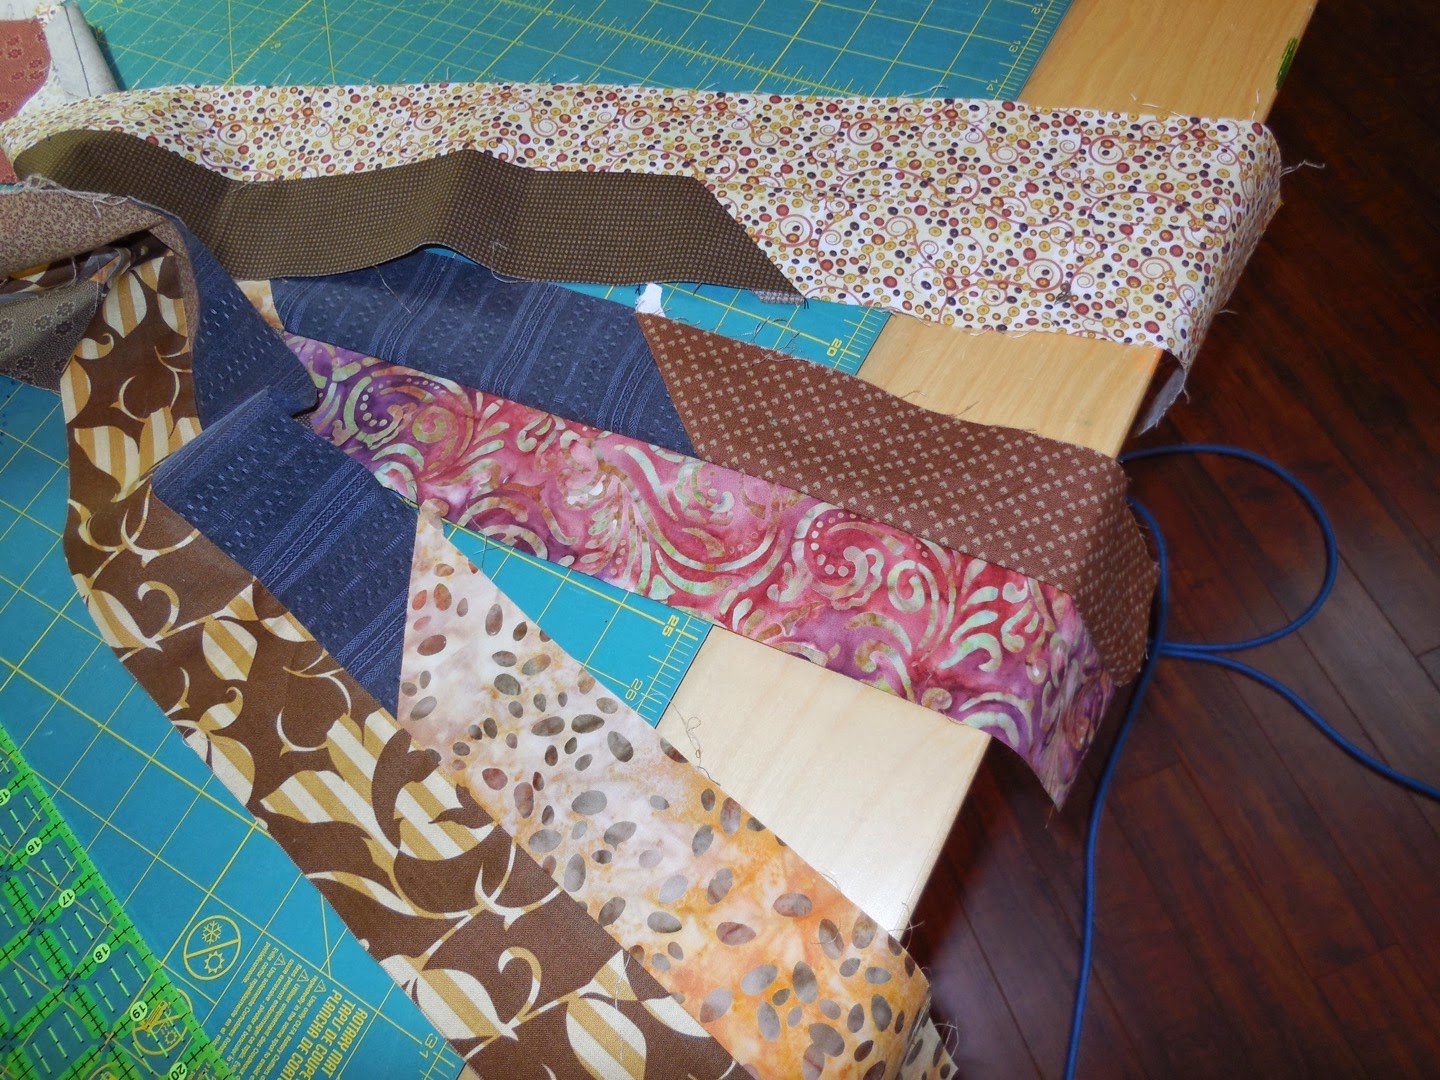 Make your setting background strips by sewing your 2 1/2" strips end to end, then side to side. It took about 40 WOF (width of fabric) strips to have enough for my background. You will need 6 strips side-by-side to make the 12 1/2" setting background pieces. These strips are joined on the bias, but this is not necessary. I chose to do this so the diagonal would repeat throughout my quilt because of the diagonal pattern in my odd blocks.

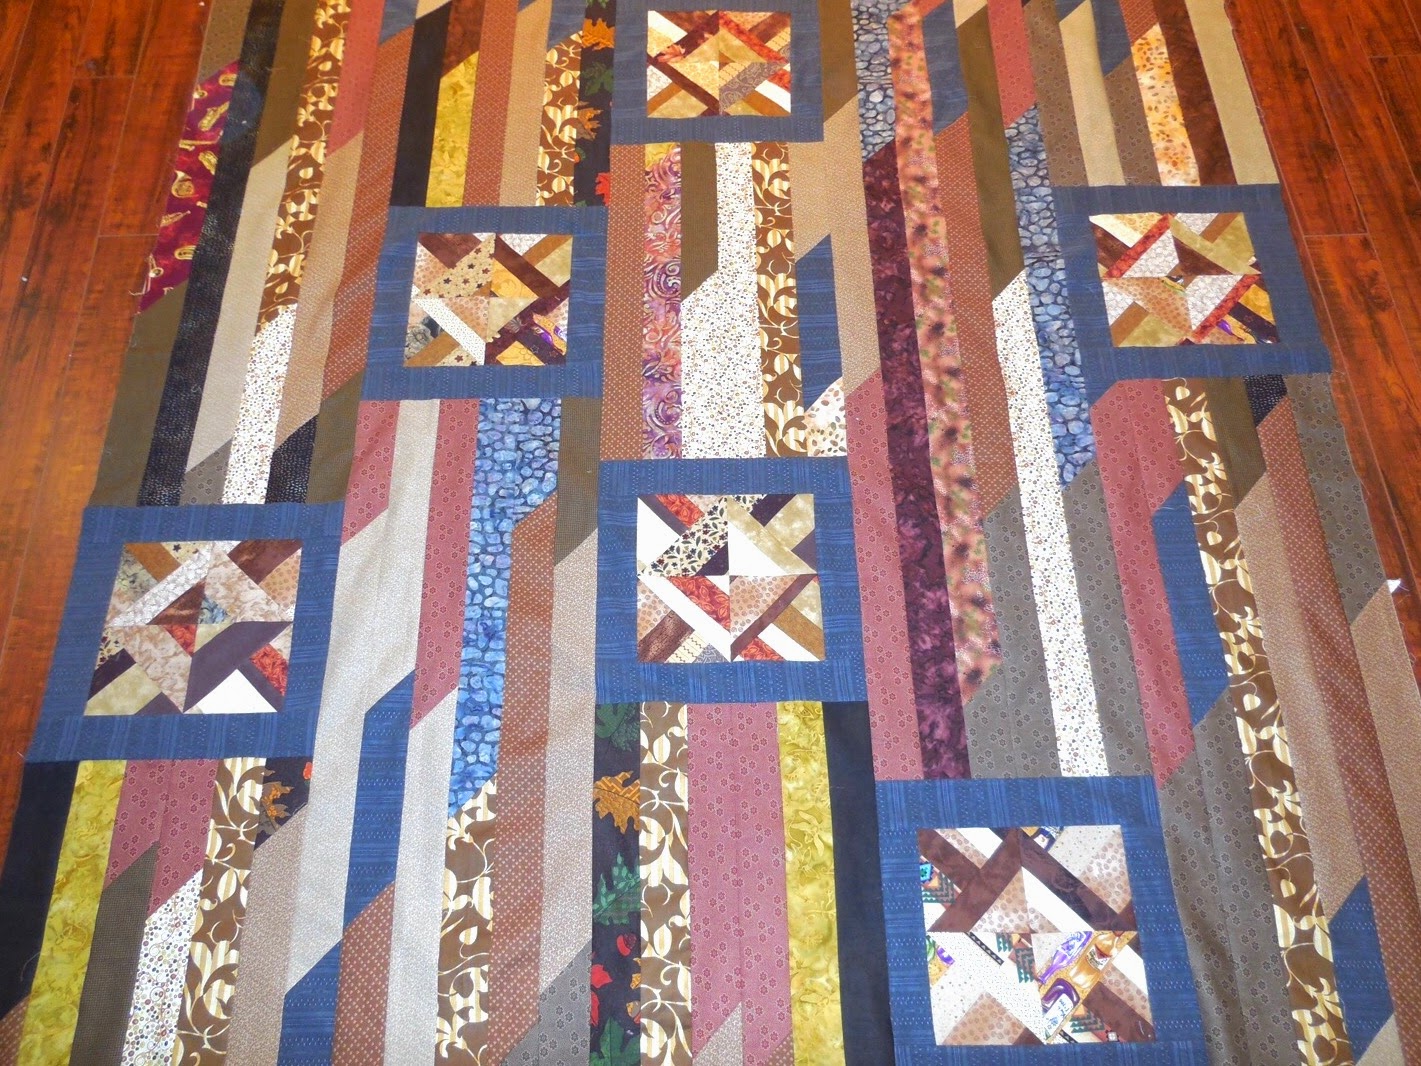
Having some nice odd blocks in my stash that I wanted to use up got me thinking about how I could lay them out in a pleasing, simple way for a charity quilt project.
I also had a huge pile of 2 1/2" strips and they worked beautifully as a setting background for the odd blocks. When I am done working on a new quilt I will often cut the remnants of fabric into these strips for future use. Keeping these in 2 bags, one with warm colors and one with cool colors keeps them ready for my next scrap quilt.
For this quilt I used the warm colors. The gray neutrals worked because of the warm undertones.
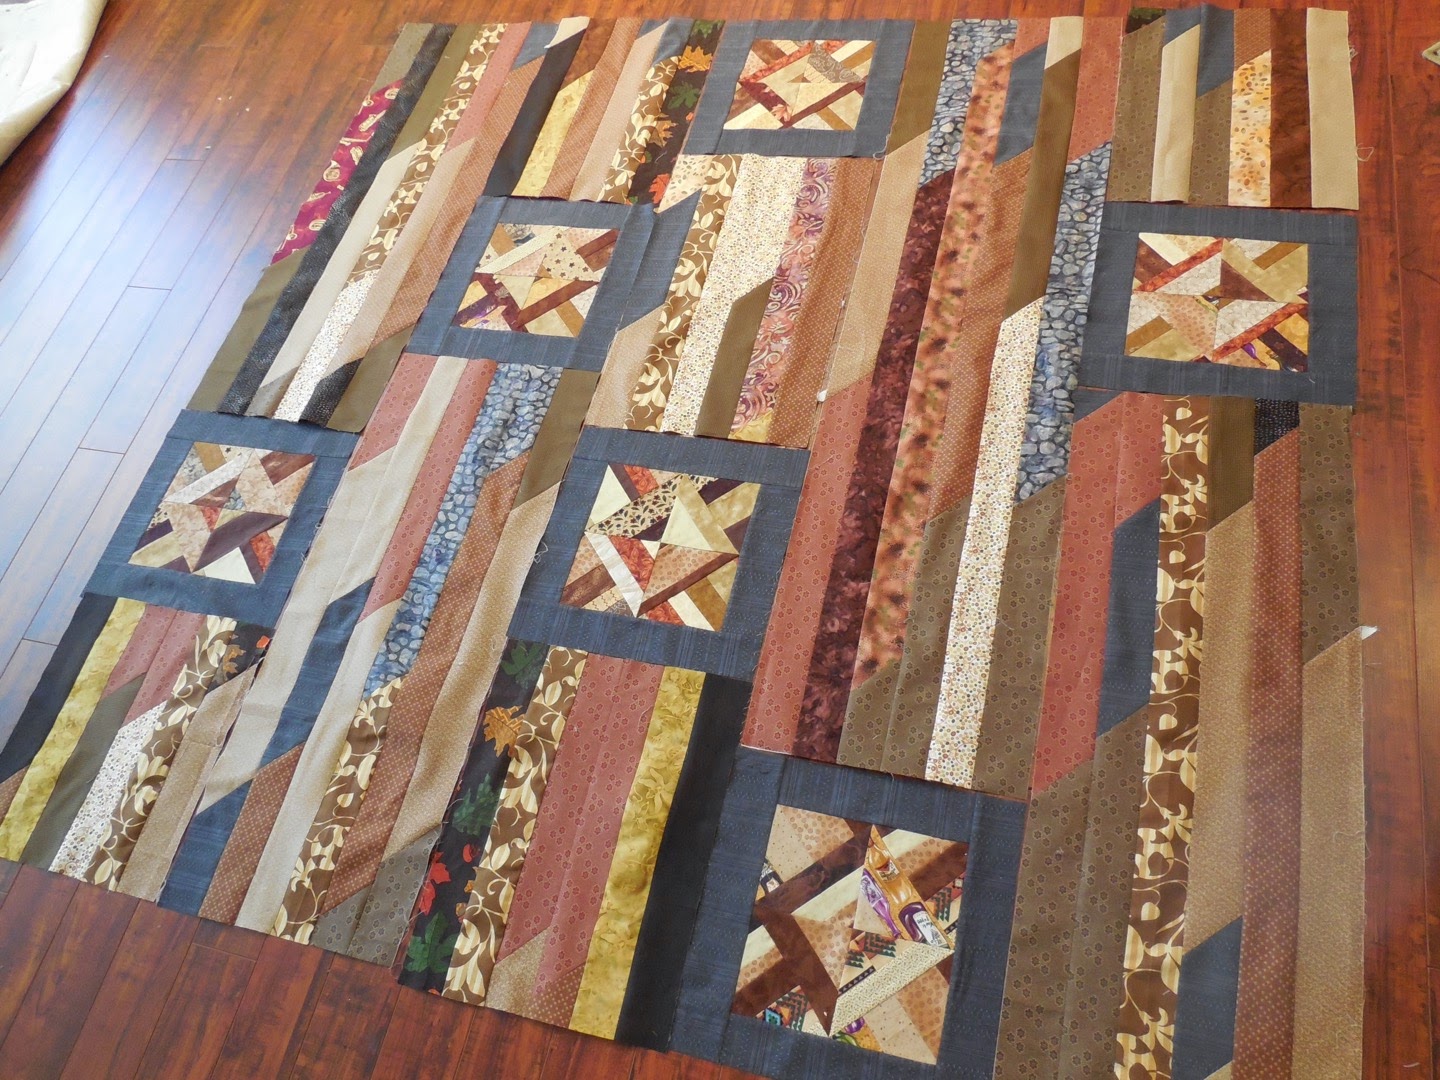
This completed top is approx. 60 x 60".
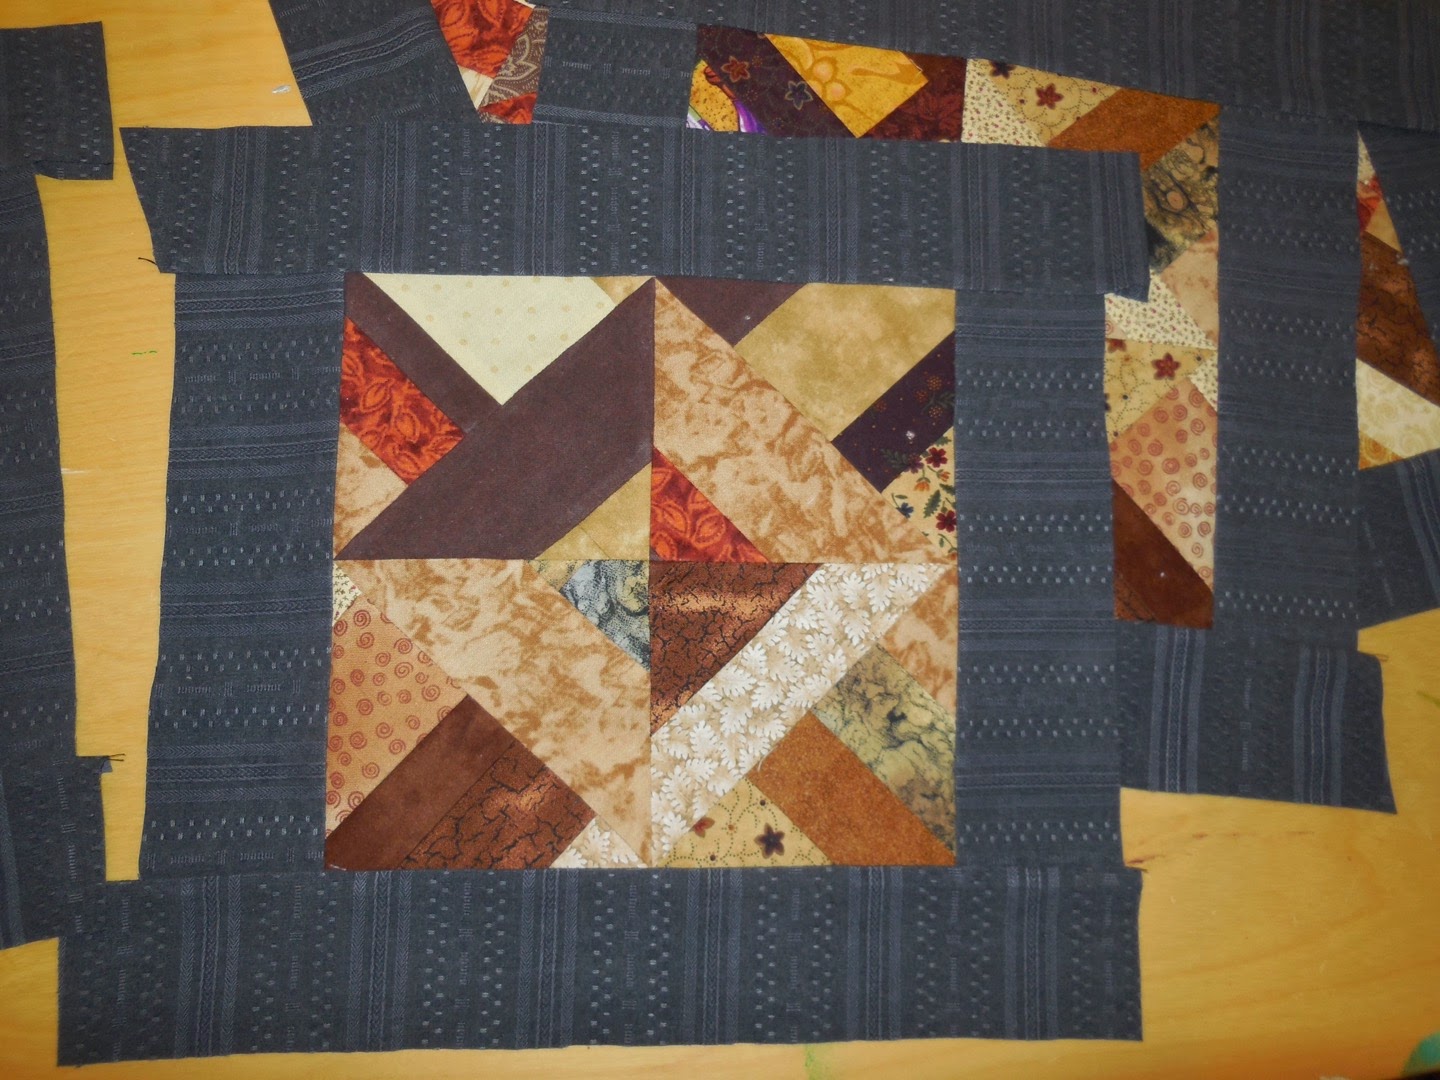
Start by adding a neutral border to your odd block
with enough fabric that you can trim it to 12 1/2"
Note: This lovely gray fabric was one of my husband's shirts that was almost brand new. He didn't like it. Normally I would not recommend used clothing for quilts, but when the fabric is still very new it is a good recycle idea. Make sure it is 100% cotton.
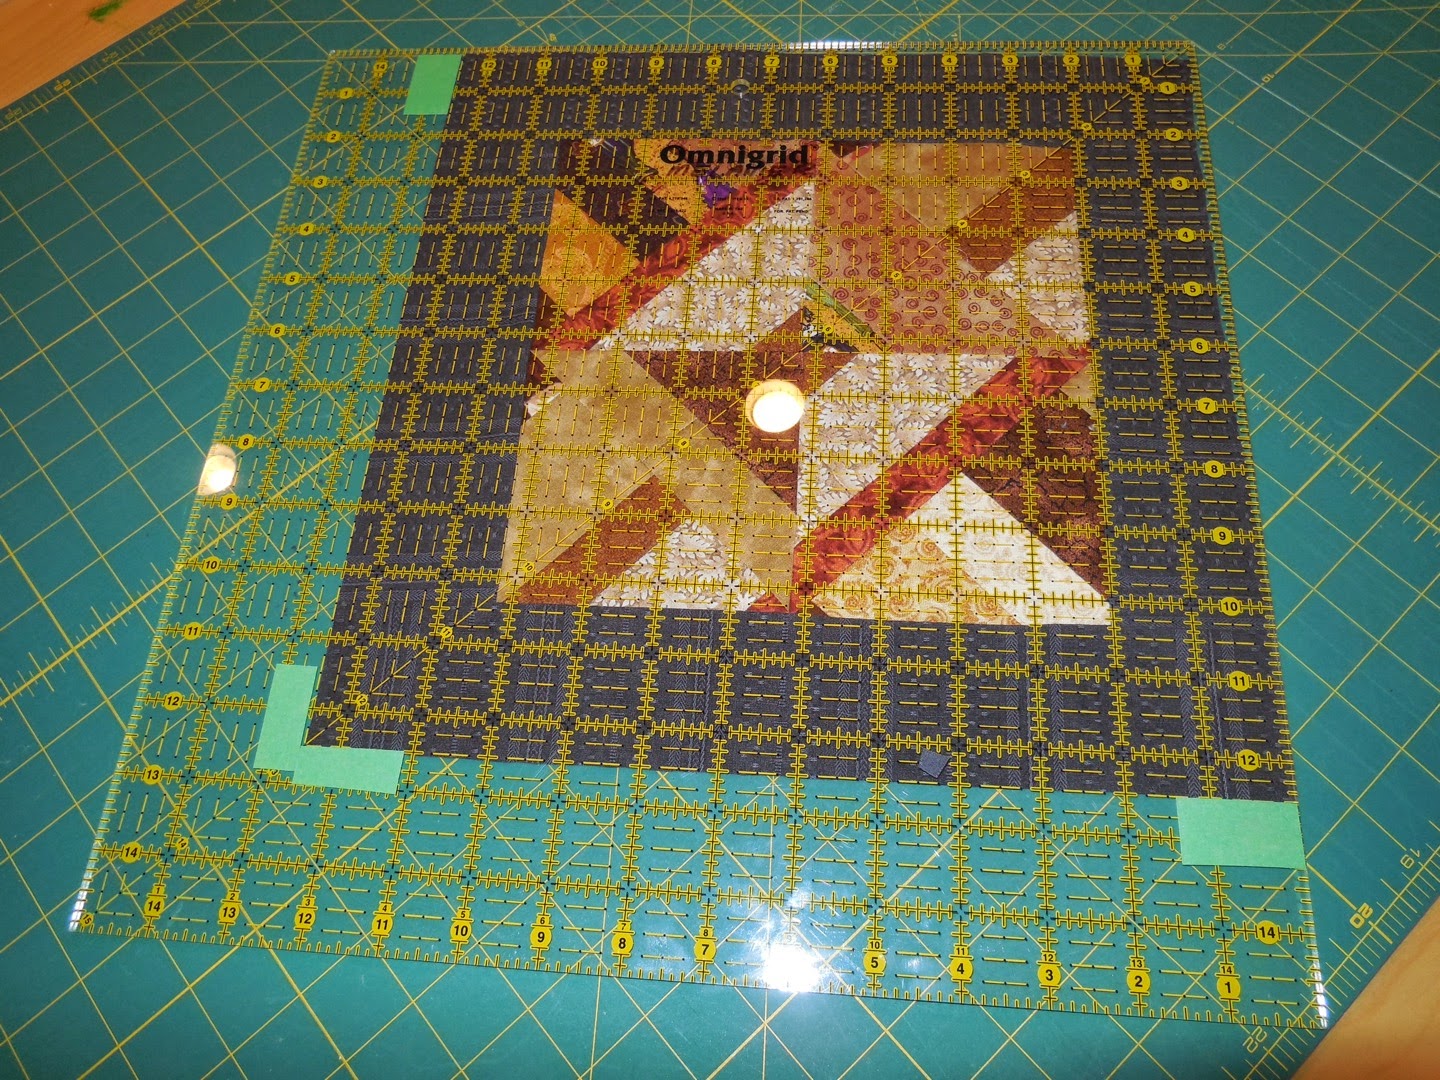
Use small pieces of painters tape to mark off your 12 1/2" size.
Trim your blocks, being sure to centre them in your border.
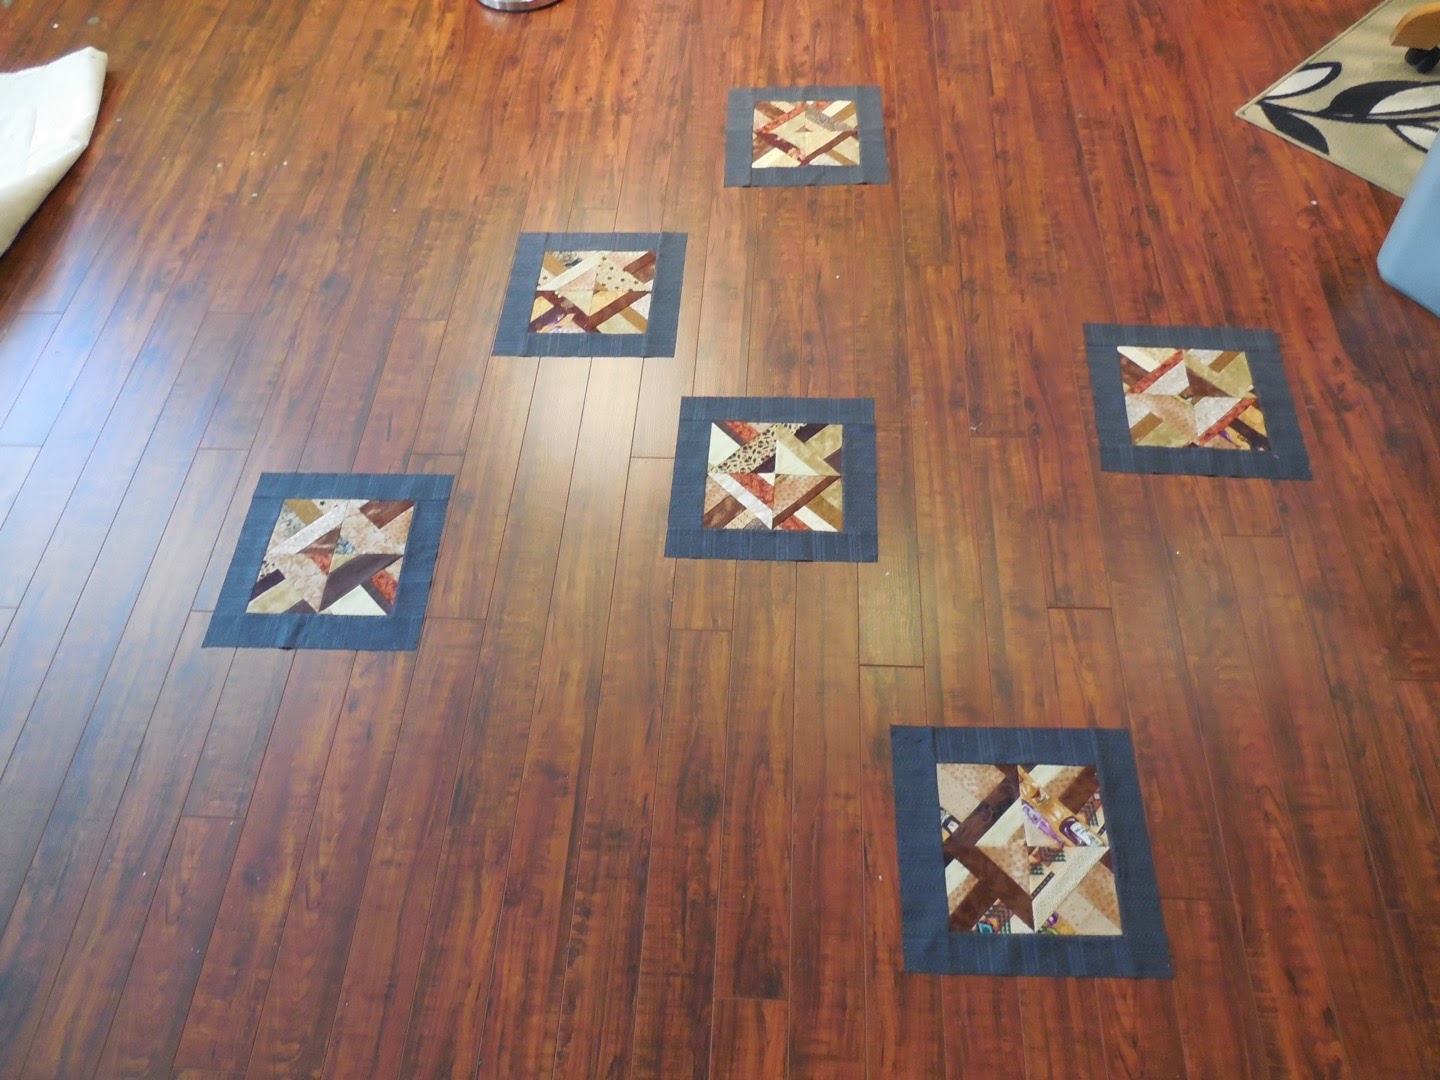
My quilt used 6 blocks, but you can easily use any number that you have.
After you have pairs of strips, divide them into 3 even lengths and
sew them together until 6 strips are joined.
Next, lay out your odd blocks on the floor or a design board in a pleasing pattern, imagining your strips in between. Keep in mind the finished quilt size that you desire when you do this.
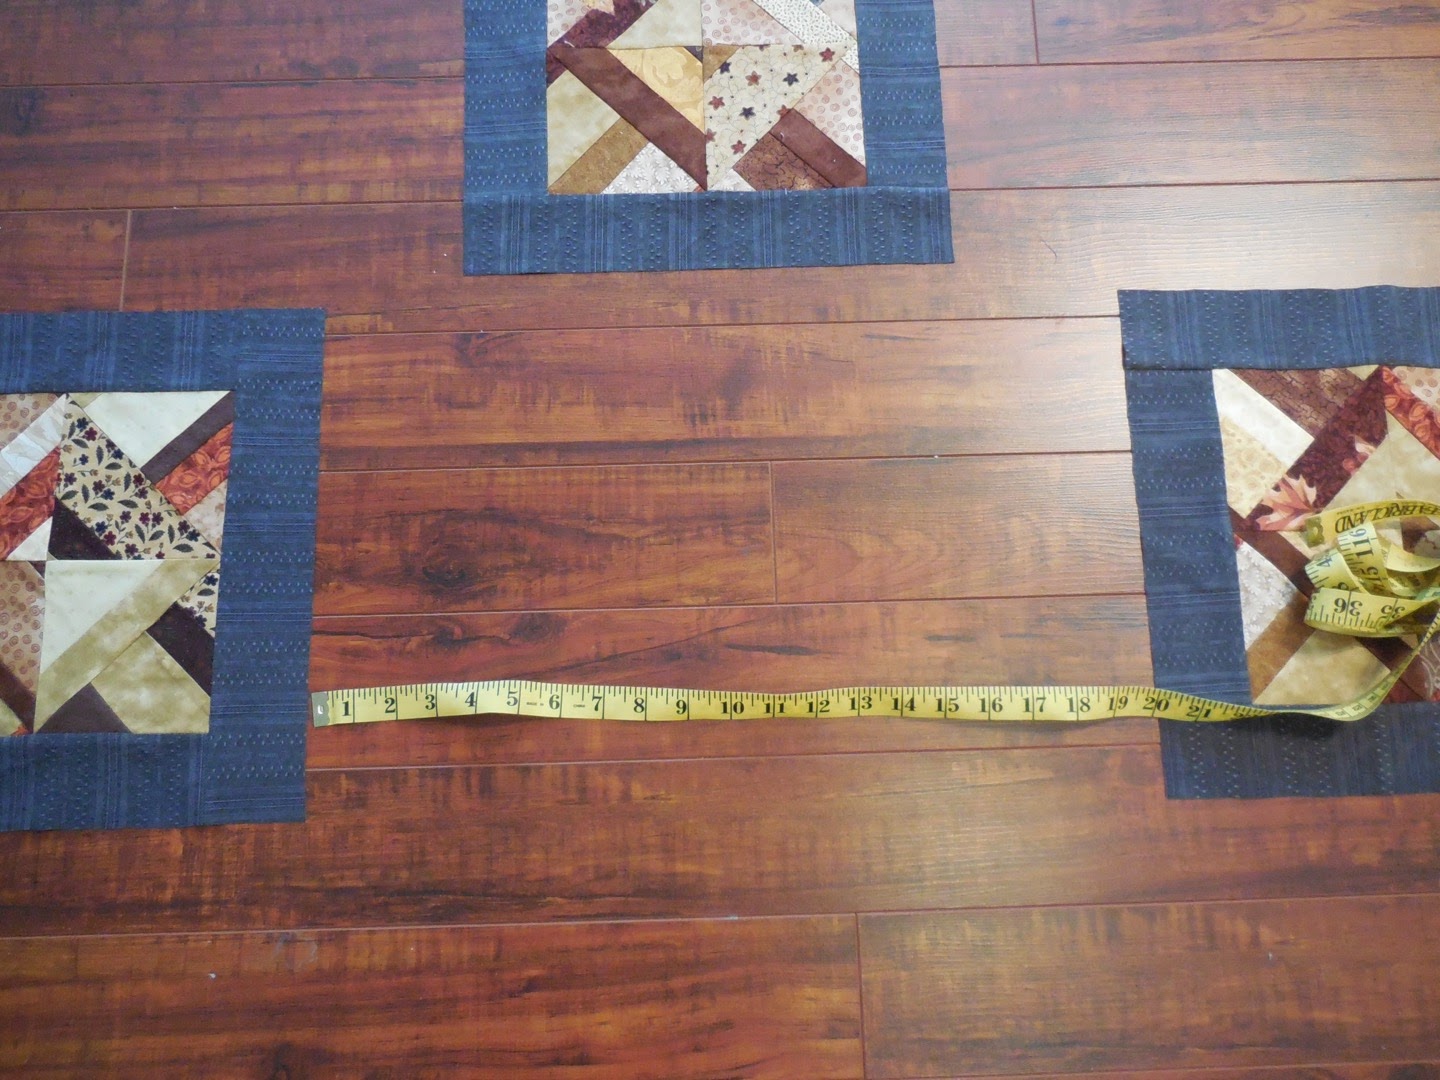
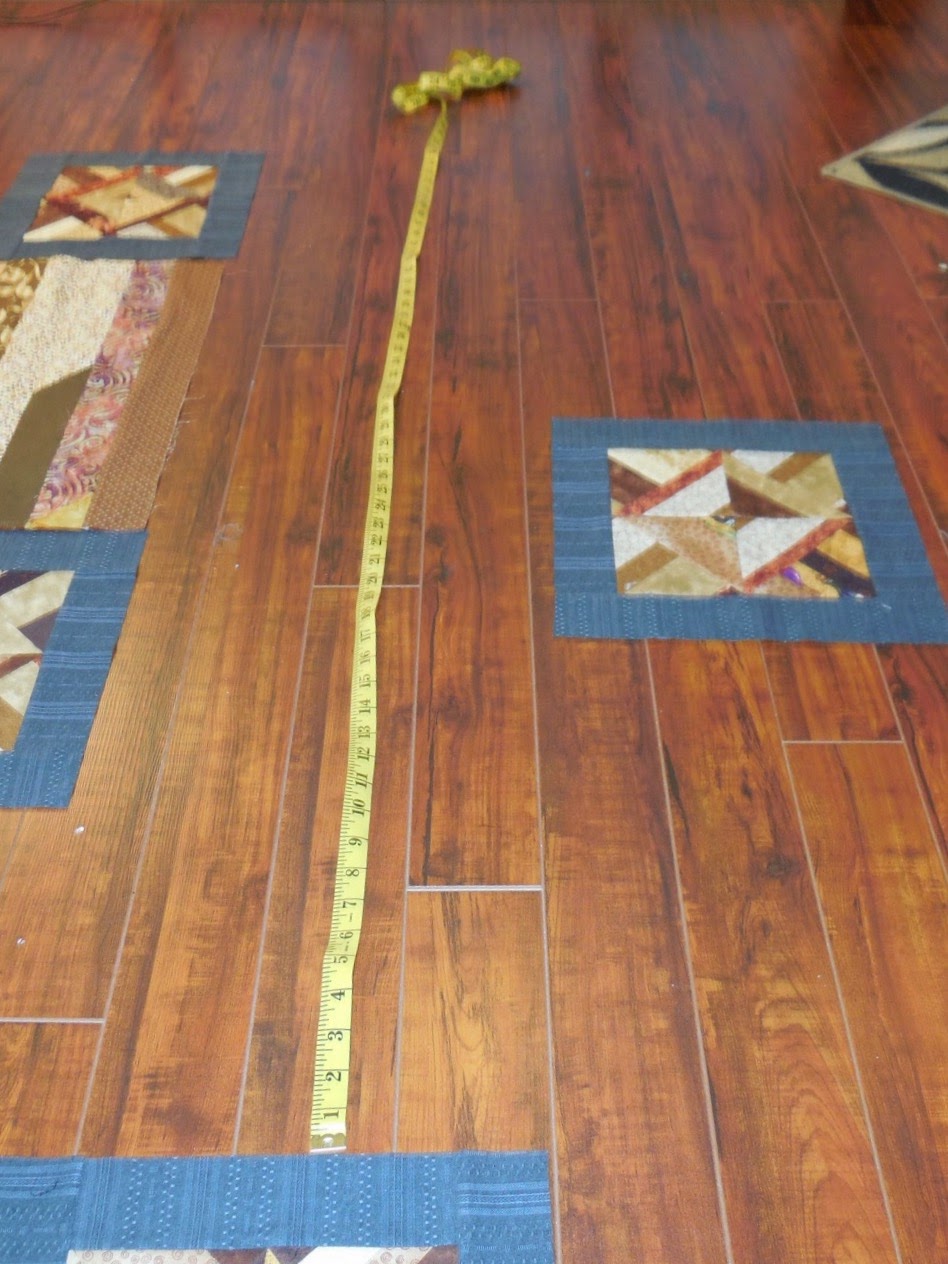
Measure the length in between your blocks.
Cut the 6-strip sets to this desired length,
adding 1/2" for your seam allowance.
Sew the 6-strip sets in between your blocks and
continue with this process until your top is complete.
Last edited by patricej; 06-20-2015 at 02:15 AM.
 06-20-2015, 04:59 AM
#3
Super Member
Join Date: Dec 2011
Location: Horse Country, FL
Posts: 7,341
You are too clever! I mean that in the best way. My scraps have been a puzzle to me, and I've been trying to figure out something to do between blocks and strips. YAY! Problem solved. Thank you for sharing!! 


 06-20-2015, 07:50 AM
#9
Senior Member

Join Date: Oct 2010
Location: Moved from New Orleans to Port Neches, TX June 2014
Posts: 695
I have been on the "scrappy bandwagon" for the last couple of years, thanks to Bonnie Hunter!! Now with your great tutorial, I can use up even more scraps! Thanks for taking the time to put this together and sharing it.
HAPPY QUILTING!
HAPPY QUILTING!


Thread
Thread Starter
Forum
Replies
Last Post
