
QAYG With Wide Sashing-- How I Do It
 10-30-2019, 05:24 AM
#21
Power Poster

Join Date: Jul 2017
Location: Central Ohio
Posts: 15,763
 And thank you for the great tutorial.


 10-30-2019, 05:16 PM
#23
Super Member

Join Date: Jun 2011
Location: *where the sun almost always shines*
Posts: 9,326
Thank you SewBizGirl. Your tutorial makes this method so much more approachable. What a nice way to enjoy a wider sashing strip. Your method would work on something even wider if you wanted.
01-26-2020, 10:57 PM
#25
Senior Member

Join Date: Nov 2010
Location: Valley, Washington
Posts: 487
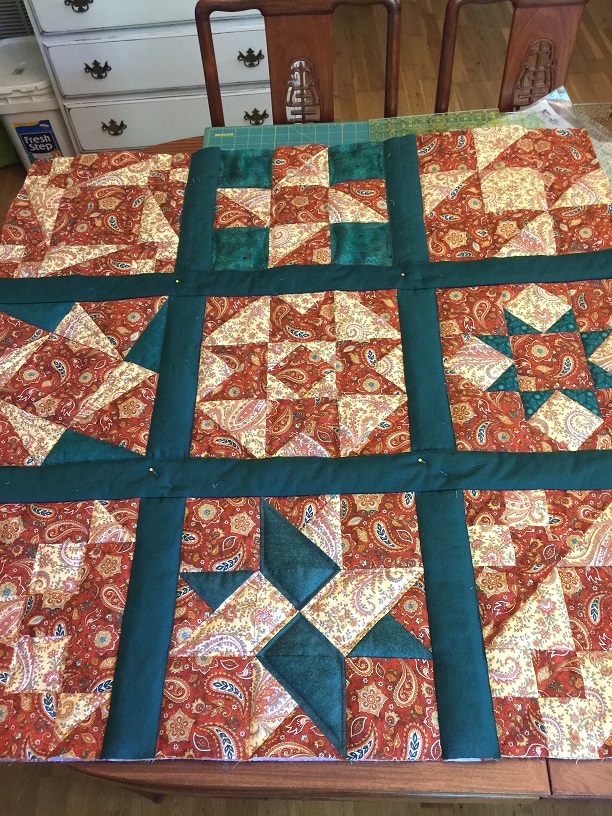
Repeat to join the next row. Then your "center" should be complete, like this:
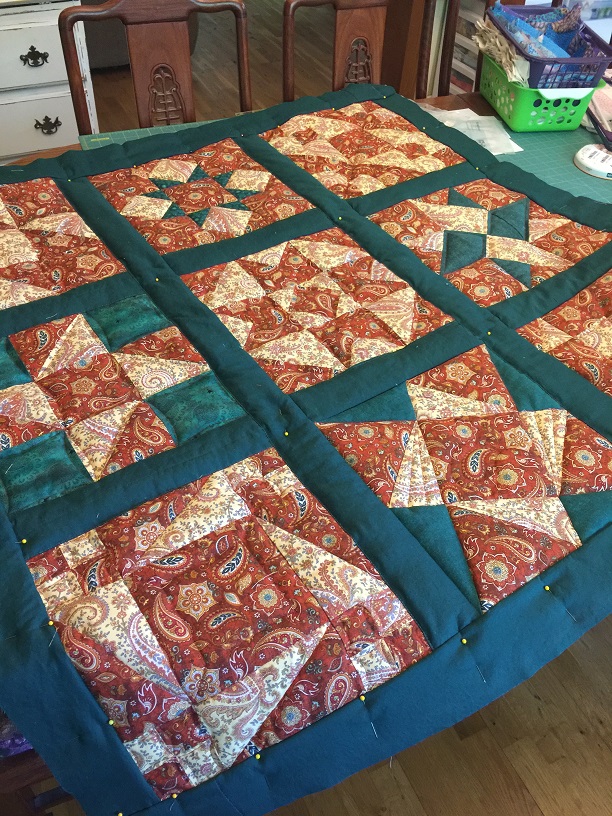
You can bind your quilt at this point if you want to, but I think it looks more balanced if you add the same width border all around. To add the border, I used Marti Michell's "encased seam" technique. It's basically the same as putting on sashings, only you need to sew the batting strip onto the backing piece first. Cut the battings 2.5" and sew them on the backing part of the border, but 1/2" away from the joining seam. Then pin the border front and back to the edge of the quilt and sew with a 1/4" seam. When you press it open, the seam will be smooth with no bump and no gap. I do this on two opposite sides, and then the second two opposite sides. Then you have this, all ready to bind:
And here is the back view:
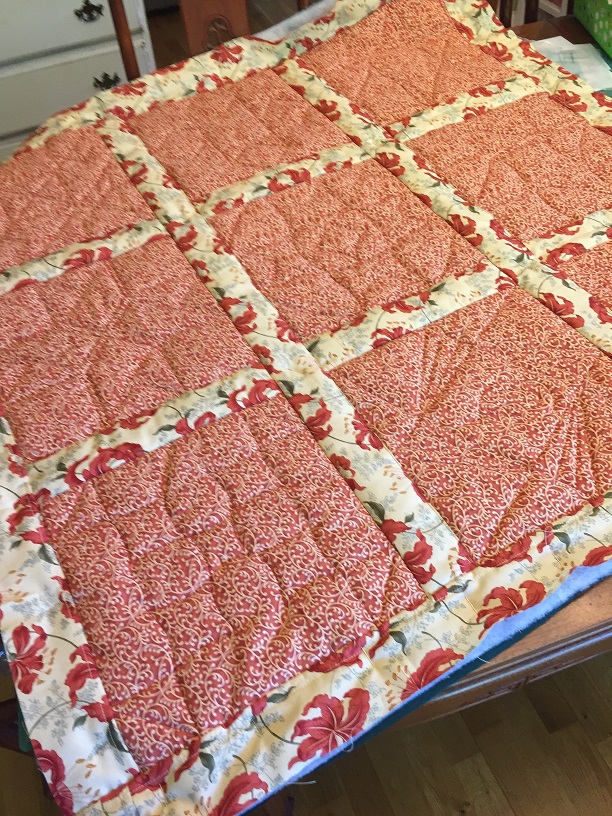
Don't forget to sew on top of the sashings, to hold the batting in place during washings. I like to do curlique lines, but straight lines or any other design is fine too. It doesn't take much.
Here is my quilt after quilting the sashings and border with a simple leaf vine.
[ATTACH=CONFIG]612215[/ATTACH]
You can bind your quilt at this point if you want to, but I think it looks more balanced if you add the same width border all around. To add the border, I used Marti Michell's "encased seam" technique. It's basically the same as putting on sashings, only you need to sew the batting strip onto the backing piece first. Cut the battings 2.5" and sew them on the backing part of the border, but 1/2" away from the joining seam. Then pin the border front and back to the edge of the quilt and sew with a 1/4" seam. When you press it open, the seam will be smooth with no bump and no gap. I do this on two opposite sides, and then the second two opposite sides. Then you have this, all ready to bind:
And here is the back view:
Don't forget to sew on top of the sashings, to hold the batting in place during washings. I like to do curlique lines, but straight lines or any other design is fine too. It doesn't take much.
Here is my quilt after quilting the sashings and border with a simple leaf vine.
[ATTACH=CONFIG]612215[/ATTACH]
05-14-2020, 10:17 AM
#30
Power Poster
Join Date: Feb 2009
Location: Northern Michigan
Posts: 12,861
Great tutorial. Thank you. I�m going to give this a try on a baby quilt I want to make. I had wanted to do QAYG but hadn�t figured out how to put it together. This is perfect for what I had in my mind.

Thread
Thread Starter
Forum
Replies
Last Post
craftybear
Links and Resources
5
09-18-2011 10:25 PM
