
Newest adoptee - Singer 328K
 03-26-2013, 09:14 AM
#1
Super Member
Thread Starter
Join Date: Feb 2012
Posts: 8,091
We got a new ( to us ) Singer 328K last Friday. Came from GW on line. Aluminum body with all steel insides. No plastic junk to give up at the worst moment. It uses flat cams and came with it's #1 ZZ cam and the retaining knob. We have all the flat cams made I believe so we have that end covered. It uses low shank feet and accessories and class 66 bobbins so that makes things easy.
Here is some pics of our new adoptee:
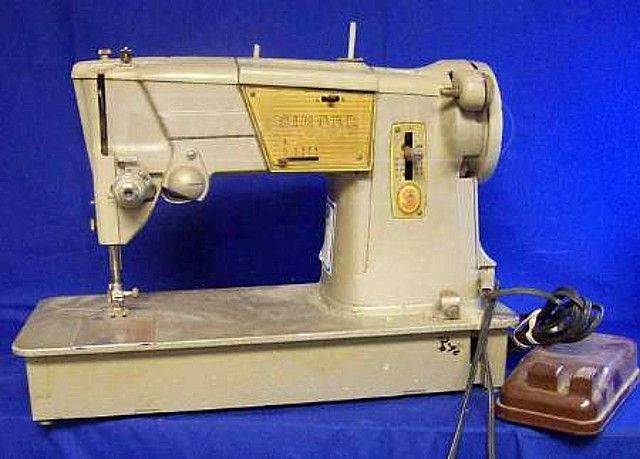
Once I got the machine out of the box I jumped right on cleaning and fixing and forgot to take some "before" pics. So here is the front view from GW. You can see the one broken spool pin on top, the one on the bed is missing and the machine is pretty grimy. But it turned .... very reluctantly though.

Turns out the belt had disintegrated. Parts of it were falling out all over the place and some of it was stuck to the pulleys. This is all that's left of it. I didn't have an exact replacement belt but I had a used one that will work till I can get a replacement.
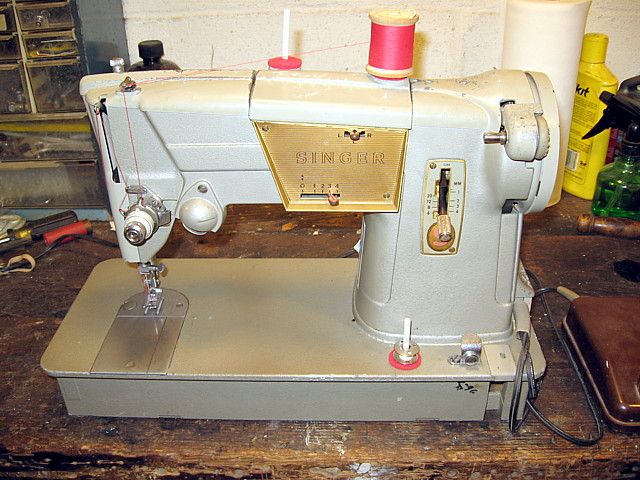
Front end.
Back end.
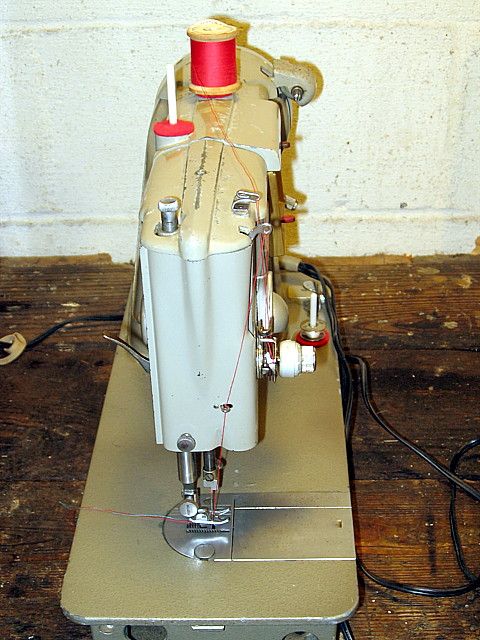
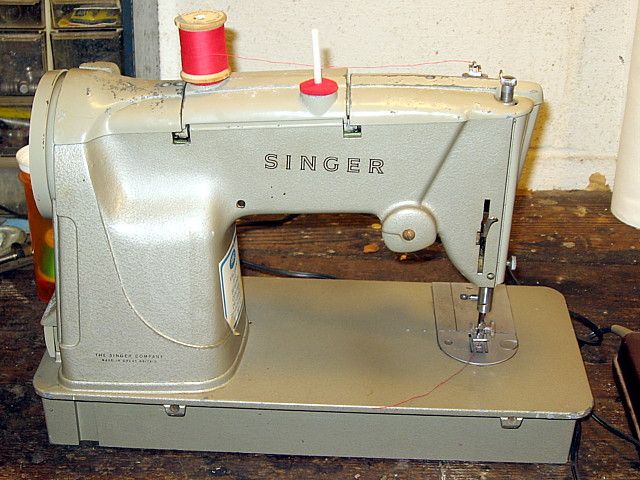
Pointy end.
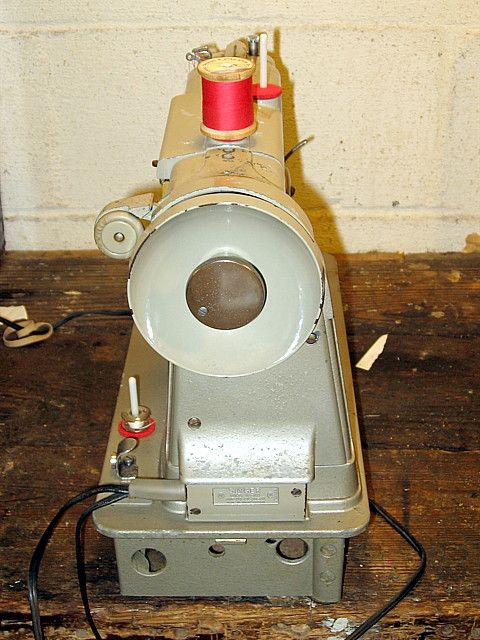
Round end.
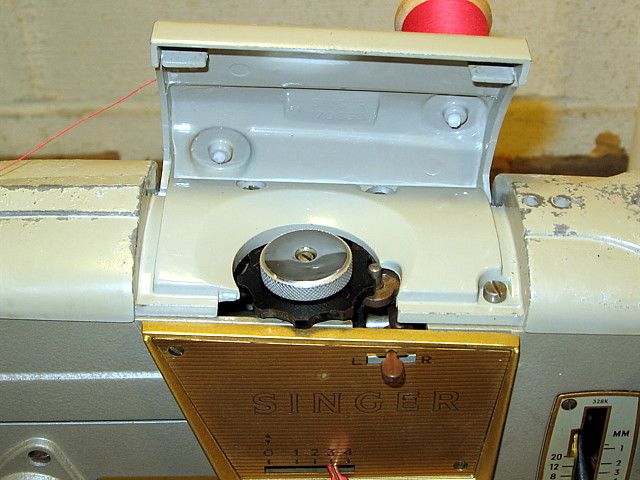
Trap door open to show the cam and retaining knob.

Corrosion on the top.
I had to make the spool pins cos I didn't have any new ones. I used the acetal rod my wife uses in her pet tents.
Worked good. Made mine a quarter inch longer than the originals.
I still need a new motor belt and a set of rubber feet for the bottom and a case. Those I'll get eventually.
You can see the corrosion on the top cover and the motor cover if you look close. I'll be sanding and painting that eventually.
After cleaning the machine sewed very well. She's a bit noisy but she came from FL and from the dirt, grime, nicotine, and corrosion I'd say she spent a long time out in a shed or somewhere exposed to salt air. Cleaning the dirt and grime off was a lot easier than the nicotine. But she's cleaned up and sewing now.
Just have to decide what to make; a whacky bag, a lap quilt?
Joe
Here is some pics of our new adoptee:
Once I got the machine out of the box I jumped right on cleaning and fixing and forgot to take some "before" pics. So here is the front view from GW. You can see the one broken spool pin on top, the one on the bed is missing and the machine is pretty grimy. But it turned .... very reluctantly though.
Turns out the belt had disintegrated. Parts of it were falling out all over the place and some of it was stuck to the pulleys. This is all that's left of it. I didn't have an exact replacement belt but I had a used one that will work till I can get a replacement.
Front end.
Back end.
Pointy end.
Round end.
Trap door open to show the cam and retaining knob.
Corrosion on the top.
I had to make the spool pins cos I didn't have any new ones. I used the acetal rod my wife uses in her pet tents.
Worked good. Made mine a quarter inch longer than the originals.
I still need a new motor belt and a set of rubber feet for the bottom and a case. Those I'll get eventually.
You can see the corrosion on the top cover and the motor cover if you look close. I'll be sanding and painting that eventually.
After cleaning the machine sewed very well. She's a bit noisy but she came from FL and from the dirt, grime, nicotine, and corrosion I'd say she spent a long time out in a shed or somewhere exposed to salt air. Cleaning the dirt and grime off was a lot easier than the nicotine. But she's cleaned up and sewing now.
Just have to decide what to make; a whacky bag, a lap quilt?
Joe
 03-26-2013, 11:43 AM
#2
Super Member
Join Date: Aug 2010
Location: Kentucky - Live in Iowa
Posts: 1,168
Joe, I just want to say how much I value your opinion on all things sewing machines, and your generosity in the giving of your knowledge! I don't know if anyone has ever thanked you, for all you do for all of us.
So here it is: THANK YOU!!!!!!!!!!!!!!!
So here it is: THANK YOU!!!!!!!!!!!!!!!
03-26-2013, 02:55 PM
#3
Banned
Join Date: Oct 2012
Location: San Lorenzo, CA
Posts: 5,361
hey folks, Joe asked me a couple of questions about cleaning up this type of thing, so I though I would share here.
Glad to. First off, I almost NEVER use a paint stripper. I really do not like the fumes. I almost always use a wire-wheel mounted on my 1/2 hp buffer. With that said, when I do use stripper I use "Aircraft remover" (I love the name)
That stuff took the finish off of a 1966 Barracuda to the undercoating in one pass. Watching the paint wrinkle up and literally fall off the sides of the vehicle was amazing... and provided me with a profound respect for what this stuff can do.
One word of caution, Aluminum is not good for the human body, so when you strip or sand be sure to wear protection, especially breathing protection...
Also, when wire wheeling ALWAYS wear goggles or a face shield. I use a shield most of the time because I got tired of having a wire fly out and stick into my face...
I usually use simple Krylon paint for most projects. It is a paint and primer in one product.
I am redoing a Craftsman 109 Lathe right now, and the gear cover you see on the back left is aluminum. It has a huge molding defect in it but since I am not making a show piece, I just painted it. If I wanted it to be smooth, I would have "leaded" it with solder and filed/sanded smooth. (Again Lead is very toxic, so be careful)
The bed with rails in the foreground shows what it looked like when I started.
[ATTACH=CONFIG]404595[/ATTACH]
 03-26-2013, 03:29 PM
#5
Super Member
Thread Starter
Join Date: Feb 2012
Posts: 8,091
Steve,
Thanks for the tips. I dont' have a buffer, but I do have the Aircraft Aluminum stripper. After that I've got some fine sand paper for the rough parts.
I've used Krylon a lot. It's great stuff. I'm hoping I can find a color match for the machine.
All this will be done outside after the weather warms up a bit.
Joe
03-26-2013, 03:49 PM
#6
Power Poster

Join Date: Jul 2010
Location: PA
Posts: 10,703
So, you bought a spool of red thread and the machine was thrown in for free, right! Great machine!
I have never come across any machines in all the garage sales I go to and thrift shops, etc. You people are so lucky!
peace
I have never come across any machines in all the garage sales I go to and thrift shops, etc. You people are so lucky!
peace
03-27-2013, 03:02 AM
#8
Junior Member
Join Date: Nov 2010
Location: Harrisonburg, VA
Posts: 167
The is a second to the above THANK YOU!!
03-28-2013, 05:52 AM
#9
Super Member
Thread Starter
Join Date: Feb 2012
Posts: 8,091
I have noticed something about this machine. There is no light switch. All of the machines I've seen on various sites, and in the owners manual, have a light switch just above the light on the front of the machine. This one doesn't.
I wonder why?
Joe
I wonder why?
Joe
03-28-2013, 07:12 AM
#10
Super Member
Join Date: Dec 2011
Location: Northern CA near Sacramento
Posts: 1,107
Joe,
Cost cutting. Singer was saving money. The 328 was a low end machine in it's day. Low end or not, it beats today's TOL. VBG
Cathy
Cost cutting. Singer was saving money. The 328 was a low end machine in it's day. Low end or not, it beats today's TOL. VBG
Cathy

Thread
Thread Starter
Forum
Replies
Last Post
