
Sun Bonnet Sue applique help
 01-21-2011, 02:39 PM
#11
Super Member
Join Date: Aug 2009
Location: The middle of an IL cornfield
Posts: 7,014
Originally Posted by nativetexan
it's a light weight fusible interfacing. has tiny bumps on the fusible side. you lay the fusible side on the front of the fabric with the drawn pattern on the smooth side. stitch on the drawn lines and snip an area to turn it right side out (if necessary to snip). this turning places the bumpy side of the fusible on the back now and all the raw edges are inside. fuse to your background fabric and stitch in place. i did blanket stitches.
 01-21-2011, 03:13 PM
#12
Super Member

Join Date: Nov 2010
Location: Mars
Posts: 2,549
I did the Quilt in a Day Sues and Sams for an internet swap - I made all the pieces with the lightweight fusible interfacing, turned and fused them, then sewed them all by hand with invisible nylon thread. I'll probably never use that stuff again - I'm using very light grey 50wt Essentials cotton from Connecting Threads and I like it a lot better.
I'm doing more large blocks now - the flowers and centers I've sewn with the fusible interfacing, but the stems and leaves, I'm doing with needleturn applique. I used Elmers Washable School Glue to baste the leaves and stems in place - it washes out when you wash the finished quilt. Not something I have to worry about just yet because I've only got the first block done. :)
You can hardly tell that the interfacing is in there if you use the lightweight stuff. I free-motion sew the fusible to the fabric - much faster than machine-guided sewing and holds perfectly through all the trimming and turning and pressing. :)
 01-21-2011, 03:18 PM
#14
Power Poster
Join Date: Mar 2009
Posts: 15,639
If you use an iron-on interfacing you don't fold the edges under. Instead, it is easiest to transfer the pattern to the paper side of the interfacing, then cut that pattern out a little larger. Press it onto the BACK of the fabric and now cut it on the line. This you press onto the background fabric.
It is important to follow the guidelines for what is ironed first - what is hidden, and you need to pay attention to any pieces that may be mirrored when you trace it.
I use steam-a-seam2 and have not had any problem with it.
My preferred method of securing the seams is to blanket stitch around all the raw edges.
If your applique piece is really big, you can trim the center out of the interfacing and only iron on your outline. That leaves the center piece a little softer and allows for more quilting in the applique.
01-21-2011, 03:24 PM
#15
Super Member

Join Date: Apr 2009
Location: Horseheads, NY 14845
Posts: 4,025
Originally Posted by sharon b
I use Heat and Bond LITE- sewable and then just blanket stitch them down- I don't turn the edges under :wink:
01-22-2011, 03:33 AM
#17
Super Member

Join Date: May 2007
Location: Stacyville Iowa
Posts: 1,608
Originally Posted by QuiltQtrs
I use "used dryer sheets" as my backing, sew on machine around all edges
and then cut a slit in dryer sheet, turn each piece (bonnet, arm, shoe, dress, etc)
and after pressing, you can cut away excess sheet on back. All your edges
are nicely finished, and ready to hand or machine applique onto the background square.
and then cut a slit in dryer sheet, turn each piece (bonnet, arm, shoe, dress, etc)
and after pressing, you can cut away excess sheet on back. All your edges
are nicely finished, and ready to hand or machine applique onto the background square.
01-22-2011, 04:20 AM
#19
Member
Join Date: Jan 2011
Location: South Carolina
Posts: 48
What a great idea - using used dryer sheets for applique! I do a lot of machine applique, mostly of flowers, and like to use a small satin stitch around the edges with matching thread and with colorless thread in the bobbin.
01-22-2011, 04:53 AM
#20
Junior Member

Join Date: Oct 2009
Location: Texas
Posts: 244
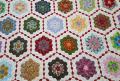
I did this king sized quilt using a 'blind' applique, all by hand, used no interfacing. The long-arm quilter stippled the dark blocks and left the applique blocks soft/puffy... the applique is fine without interfacing and no stiffness, received lots of compliments on this quilt...
Windblown Sue Quilt
[ATTACH=CONFIG]165338[/ATTACH]

Thread
Thread Starter
Forum
Replies
Last Post
