
Help for a newbie (re: stretching)
 02-23-2018, 09:54 AM
#1
Member
Thread Starter

Join Date: Jan 2018
Location: Washington State
Posts: 53
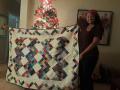
I need to put sashing around this but I've stretched it out in some places. Pic for reference:
[ATTACH=CONFIG]589618[/ATTACH]
I know I've pulled too hard on pieces cut on the bias and I'll definitely be more careful in the future. This is my first quilt top so I'm learning quite a bit. You can see how some of the blocks around the edges are bowing out. My question is, is it too stretched out to add the further sashing? Do I need to redo something? How can I ensure that when I'm adding the sashing, the stretched out pieces aren't distorting how straight the sashing should be? I am having a hard time putting into words what I need to know, but thought I'd try.
Thanks!<button id="tw_schedule_btn" style="padding: 4px 6px; position: absolute; left: 141px; top: 840px; background-image: linear-gradient(rgb(255, 255, 255), rgb(240, 240, 240)); border: 1px solid rgb(204, 204, 204); color: rgb(95, 95, 95); cursor: pointer; font-weight: bold; text-shadow: rgb(255, 255, 255) 0px 1px; white-space: nowrap; border-top-left-radius: 3px; border-top-right-radius: 3px; border-bottom-right-radius: 3px; border-bottom-left-radius: 3px; font-size: 11px; z-index: 8675309; display: none; background-position: initial initial; background-repeat: initial initial;">Schedule</button>
 02-23-2018, 10:33 AM
#2
Super Member
Join Date: Nov 2011
Location: Tn
Posts: 8,805
Very nice work. First I would try steaming the stretched edges. Hold your iron just above the piece for a minute and then lightly press. Do not move the iron as you may stretch it more. If it is not too bad then continue with your sashing. Put the longer piece on the bottom and the feed dogs will help ease the excess in
02-23-2018, 10:40 AM
#3
Super Member
Join Date: Jun 2011
Location: Illinois
Posts: 9,018
Just put those bordering sashes on using the correct original measurements, and if you have "baggy pants" put that on the bottom, as suggested...feed dogs love to eat that! That should keep your stretch under control and blended in...you did a great job.
02-23-2018, 10:47 AM
#4
Power Poster
Join Date: Dec 2010
Location: Michigan
Posts: 11,276
It really doesn't look too bad at all! A wonderful first quilt! When you quilt it that small amount of fullness will be taken up by the batting. I'm assuming that you are going to also add the dark cornerstones in the next round of sashing.
You really don't want to start trimming your blocks because you will cut off all your lovely points. Looks like you know the length of the yellow sashing strips. I would keep that measurement and cut the rest that length. Add the cornerstones. Start with one side & carefully pin your cornerstones to match the sashing seams in the existing portion. Now you may see that some individual blocks are longer than the sashing. You will need to ease them in. Here's a video on easing:
https://www.youtube.com/watch?v=Eh7_zvHcIio
Basically you find the center of your sashing strip, find the center of the block, then pin this point. You've divided both pieces in half. Now work with one half, finding the centers of the block & sashing of that half match & pin. Continue in this manner until there's almost no excess.
Do this on the entire side, working with one block at a time.
When you sew, you want to sew with a 'baggy bottom' which means that you want the piece with the excess fabric to be on the bottom. The feed dogs will help with any additional fullness.
For future projects, try not to pull too much on the bias. Starch your fabric before you cut. Make all your blocks first and measure. You might find that all your blocks are a bit bigger or smaller than your target size (i.e. what the pattern says they should be). You can then cut your sashing strips to match the majority of your blocks. All the sashing strips should be cut the same length. You will then need to ease either the blocks or sashings on the odd block to make them fit.
Sometimes the pattern is such that you can trim too large blocks down to make them all the same size.
02-23-2018, 01:44 PM
#5
Super Member
Join Date: Jul 2013
Location: Tri-Cities, WA
Posts: 1,063
I�ve found that using a polyester batting like Soft and White helps - it puffs up and fills in the little bobbles. Thin cotton batting doesn�t seem to work well with stretched areas. Best of luck! It�s a really pretty quilt!
 02-23-2018, 06:46 PM
#7
Super Member
Join Date: Dec 2017
Location: Southwest Idaho
Posts: 5,999
Beautiful job on your first quilt. Good advice already given.... You could also remove seams, adjust the sashing to remove stretched fabric and resew but I don't see it's bad enough to do that work considering the bordering measuring accuracy would likely fix the issue. In future, press not iron, no steam, and starch sashing before adding may help eliminate this issue.


Thread
Thread Starter
Forum
Replies
Last Post
