
Colorado get-together?
 03-01-2023, 06:21 AM
#341
Super Member

Join Date: Mar 2015
Location: Denver, CO
Posts: 4,305
February brought Colorado quite a variety of weather, from overnight lows of -14F with a daytime high of 7 in Denver to much more pleasant days reaching 60 degrees. I must say, we prefer the latter. Other parts of the state got even colder. But spring is just around the corner.
We have project notes from Dianne, Courtney and Dorothy this month. So let's get started.
Dianne
Dianne tells us about a Vibra machine she has and her Singer 128, along with some ideas for quilting. She writes:
Hi Everyone,
About the middle of the month I set aside the Vibra, which still needs a new bobbin winder tire, and pulled out my Singer 128. This machine is a hand crank model, AB648502 from 1927 according to my records. This is one of the first vintage machines I purchased, way back in 2009. It was chosen for February because it uses standard feet - well, standard for my 15-91 (1952) which is the usual machine I use. Some half-square triangle blocks were the next project in line, and a machine that could use a quarter-inch foot was desirable.
A needlebar page shows the 128 being manufactured from 1916 to 1952 in Elizabethport and the 128K from 1912 to 1962 in Kilbowie. Over 4 million were made, so the model was well represented. One difference between the very similar 127 and 128 models is the shuttle carrier and shuttle. The manufacture of these two very similar models overlapped, with the 127 being produced to 1941 at Elizabethport and the 127K until 1939 at Kilbowie, producing over two and half million of them. That said, Singer made many more Model 66s - 8,906,297! That is a lot of sewing machines. But even that pales to the number of Model 15 and its variants, over 26 million machines.
My machine has the La Vencedora decal set, used from the beginning of production of this model to 1960. Was something else placed on those last few machines produced in Kilbowie, or is this information incorrect? That would be interesting to find out. The decals on my machine are fairly intact, despite the fact she seems to have been well used. The crank turns incredibly easily, and will continue turning for several stitches if you let go while in motion. There are no notable problems with this machine, but it does like smaller, older-style spools of thread rather than the newer and larger crosswound type. The upper thread will sometimes break if using those, but never did using smaller spools. It might be the angle the thread approaches the first guide or inconsistent pull off the spool that causes the breakage. Anyway, that problem was easily solved and the HSTs are almost all stitched into 16 patch blocks of various designs and sizes.
The size difference of the HSTs was due to having on hand a tall stack of scrappy 3 1/2" squares. Wanting to make some 3" finished HSTs, a line was drawn diagonally to stitch along; but not wanting to waste close to half the fabric, another line 1/2" away was drawn and also stitched. Cutting between the stitchings produces two half-square units. The 3" finish ones have been used with very little trimming needed; the smaller cut-off squares needed trimming, but that can easily be done to make 2 1/2"� squares. So, ending up with 8" finish and 12" finish 16 square blocks, I will border the smaller ones up to 12" finish and alternate the two sizes in a quilt. This will separate each block from its neighbors and should make an interesting quilt.
Dianne


Courtney
Courtney tells us a bit about his activities and sewing interests this month, including stumbling upon a buttonholer. He tells us:
Dear All,
My report this month will be short but that is appropriate because February is short. Actually, February weather has seemed to last forever this year. Hopefully, Spring will be here shortly. A week or so ago we had a PCCP (Post-Christmas Christmas Party). A good friend had been in the hospital and recovering from a fall so we had to keep putting a Christmas celebration off several times. I raked in a bunch of loot, all sewing. I got a jelly roll and two charm packs, a couple of fun quilting activity books and a JoAnn gift card! Although, I have not done much concerning sewing machines this month, I have been working on a couple of quilts. After I finished my cowboy sougan (sugan, soogan, or whatever), I started on another quilt, which is about half pieced now.
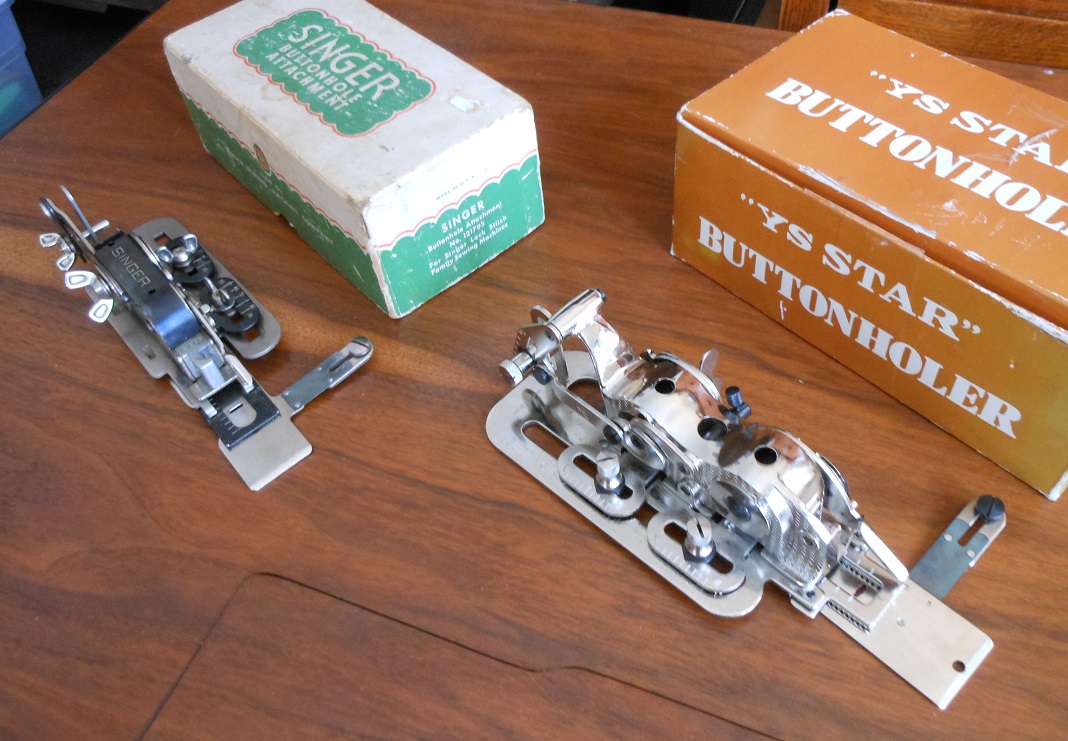
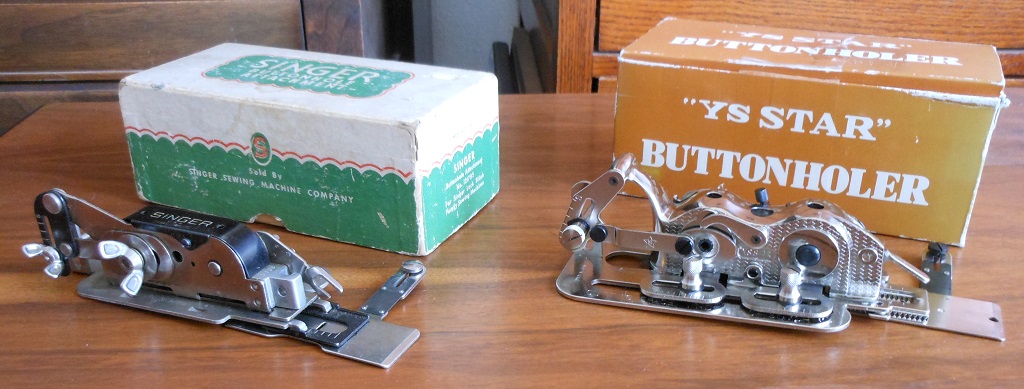
My one sewing machine activity occurred quite by accident. While wandering through my local thrift shop I noticed a "YS Star" YS-4455 industrial buttonholer. I do have a couple of semi-industrial machines that use high shank feet and a couple of older domestic machines that also use a high shank feet. I have not had a chance to try it out yet but everything was in the box and ready to go. This style of buttonholer has been around since the 1890s. In fact, this one looks almost identical to a "Famous" buttonholer from the 1930s. (I have a "Famous" down in the basement but could not find it). I did take a picture of the "YS Star" and a pre-war, pre-cam Singer buttonholer. Both the Star and Singer work nearly identical but the Singer did move things around a bit. During the pandemic one of my daughter's friends was given a Featherweght and so she decided to take up sewing. It included an early Singer buttonholer so I sent her information on its use as well as a couple of YouTube videos on its use. The nice thing about these buttonholers is that unlike the cam type of buttonholers, they can sew custom buttonholes. You can adjust the width of the zig-zag on the sides (bight), the length, and the cutting width (space between the two parallel sides.) It is amazing what they can do with a straight stitch sewing machine. Buttonholers are quite amazing machines themselves(and cute)!
Courtney
to be continued...
We have project notes from Dianne, Courtney and Dorothy this month. So let's get started.
Dianne
Dianne tells us about a Vibra machine she has and her Singer 128, along with some ideas for quilting. She writes:
Hi Everyone,
About the middle of the month I set aside the Vibra, which still needs a new bobbin winder tire, and pulled out my Singer 128. This machine is a hand crank model, AB648502 from 1927 according to my records. This is one of the first vintage machines I purchased, way back in 2009. It was chosen for February because it uses standard feet - well, standard for my 15-91 (1952) which is the usual machine I use. Some half-square triangle blocks were the next project in line, and a machine that could use a quarter-inch foot was desirable.
A needlebar page shows the 128 being manufactured from 1916 to 1952 in Elizabethport and the 128K from 1912 to 1962 in Kilbowie. Over 4 million were made, so the model was well represented. One difference between the very similar 127 and 128 models is the shuttle carrier and shuttle. The manufacture of these two very similar models overlapped, with the 127 being produced to 1941 at Elizabethport and the 127K until 1939 at Kilbowie, producing over two and half million of them. That said, Singer made many more Model 66s - 8,906,297! That is a lot of sewing machines. But even that pales to the number of Model 15 and its variants, over 26 million machines.
My machine has the La Vencedora decal set, used from the beginning of production of this model to 1960. Was something else placed on those last few machines produced in Kilbowie, or is this information incorrect? That would be interesting to find out. The decals on my machine are fairly intact, despite the fact she seems to have been well used. The crank turns incredibly easily, and will continue turning for several stitches if you let go while in motion. There are no notable problems with this machine, but it does like smaller, older-style spools of thread rather than the newer and larger crosswound type. The upper thread will sometimes break if using those, but never did using smaller spools. It might be the angle the thread approaches the first guide or inconsistent pull off the spool that causes the breakage. Anyway, that problem was easily solved and the HSTs are almost all stitched into 16 patch blocks of various designs and sizes.
The size difference of the HSTs was due to having on hand a tall stack of scrappy 3 1/2" squares. Wanting to make some 3" finished HSTs, a line was drawn diagonally to stitch along; but not wanting to waste close to half the fabric, another line 1/2" away was drawn and also stitched. Cutting between the stitchings produces two half-square units. The 3" finish ones have been used with very little trimming needed; the smaller cut-off squares needed trimming, but that can easily be done to make 2 1/2"� squares. So, ending up with 8" finish and 12" finish 16 square blocks, I will border the smaller ones up to 12" finish and alternate the two sizes in a quilt. This will separate each block from its neighbors and should make an interesting quilt.
Dianne


Courtney
Courtney tells us a bit about his activities and sewing interests this month, including stumbling upon a buttonholer. He tells us:
Dear All,
My report this month will be short but that is appropriate because February is short. Actually, February weather has seemed to last forever this year. Hopefully, Spring will be here shortly. A week or so ago we had a PCCP (Post-Christmas Christmas Party). A good friend had been in the hospital and recovering from a fall so we had to keep putting a Christmas celebration off several times. I raked in a bunch of loot, all sewing. I got a jelly roll and two charm packs, a couple of fun quilting activity books and a JoAnn gift card! Although, I have not done much concerning sewing machines this month, I have been working on a couple of quilts. After I finished my cowboy sougan (sugan, soogan, or whatever), I started on another quilt, which is about half pieced now.
My one sewing machine activity occurred quite by accident. While wandering through my local thrift shop I noticed a "YS Star" YS-4455 industrial buttonholer. I do have a couple of semi-industrial machines that use high shank feet and a couple of older domestic machines that also use a high shank feet. I have not had a chance to try it out yet but everything was in the box and ready to go. This style of buttonholer has been around since the 1890s. In fact, this one looks almost identical to a "Famous" buttonholer from the 1930s. (I have a "Famous" down in the basement but could not find it). I did take a picture of the "YS Star" and a pre-war, pre-cam Singer buttonholer. Both the Star and Singer work nearly identical but the Singer did move things around a bit. During the pandemic one of my daughter's friends was given a Featherweght and so she decided to take up sewing. It included an early Singer buttonholer so I sent her information on its use as well as a couple of YouTube videos on its use. The nice thing about these buttonholers is that unlike the cam type of buttonholers, they can sew custom buttonholes. You can adjust the width of the zig-zag on the sides (bight), the length, and the cutting width (space between the two parallel sides.) It is amazing what they can do with a straight stitch sewing machine. Buttonholers are quite amazing machines themselves(and cute)!
Courtney
to be continued...
 03-01-2023, 06:24 AM
#342
Super Member
Join Date: Mar 2015
Location: Denver, CO
Posts: 4,305
Dorothy
Dorothy sent us the following notes of the last month and some associated pictures. She says:
Hello!
Feb passed quickly as any 28 day month.
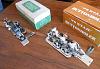
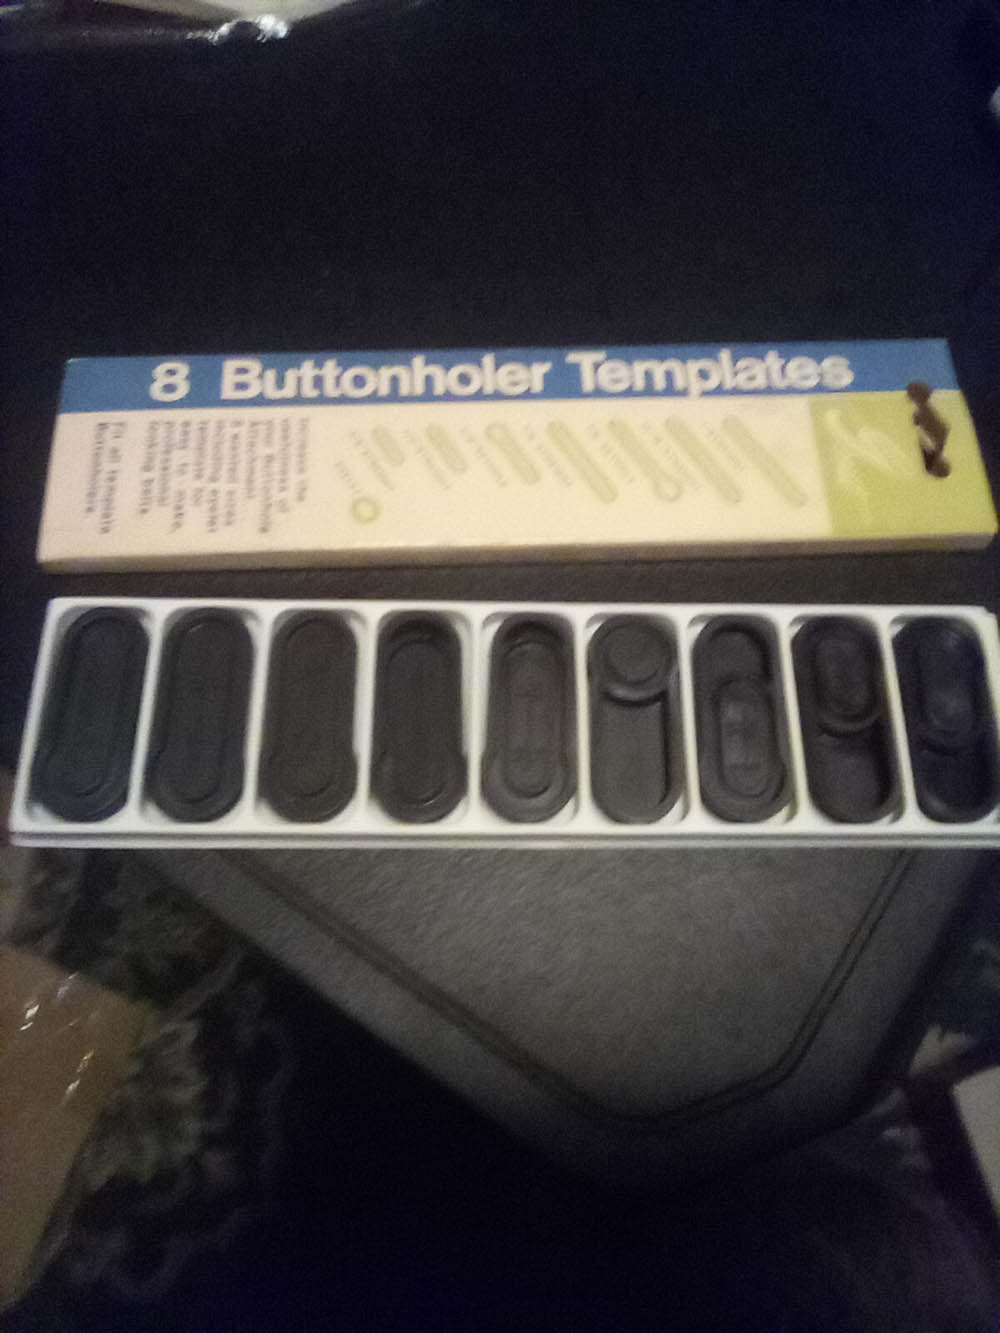
I did find a Griest treasure in an accessory kit consisting of all the plastic cams for the buttonholer! It includes an eyelet templete. Not sure the difference between a cam and template, but the box calls them templates!
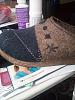
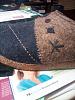
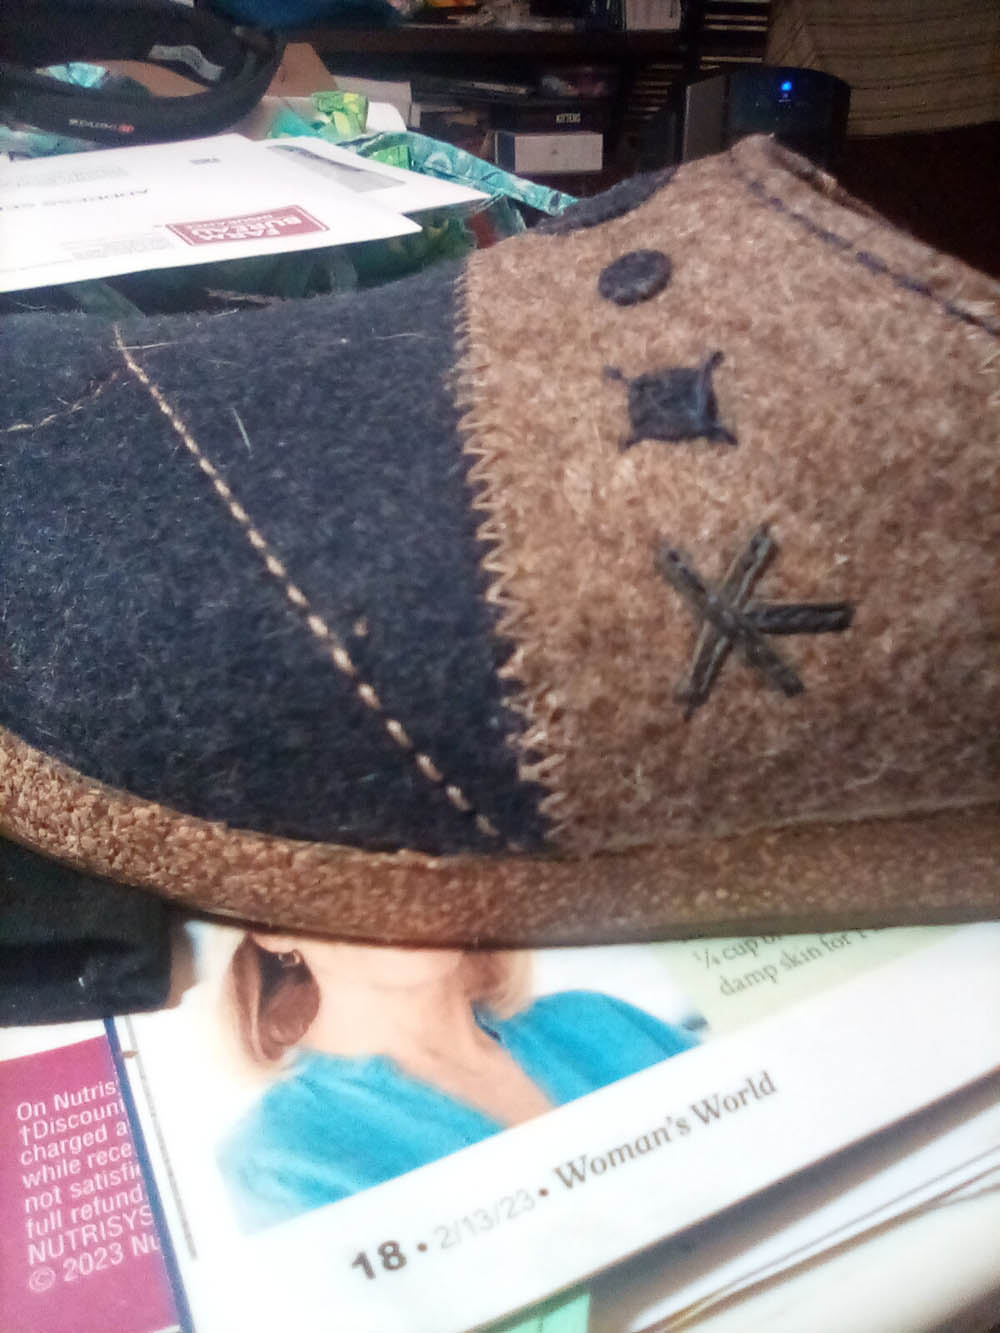
There other activity predates the sewing machine, requiring a repair to a pair of shoes my daughter bought from Poshmark, A used item site. She purchased a pair of Haflinger wool clogs with the stitching letting loose. Roughly 5 hours of needle & pliers "by hand" completed the repair. (I do confess to the feeling it took 7 hours to thread the 3 ply thread into a too small needle which was easy to manipulate inside the shoe.) The repair was rather successful. The photo shows the area across the instep where the stitching let loose and after stitching. Stitching had also let loose around the foot opening which was stitched again and the rear tab was glued and stitched back into place. A small pair of jewellers needle nose pliers were employed. I got a lunch in payment.
It elicited a comment from my daughter that she should learn how to do these repairs herself as her Dad & I will stop doing them at some point.
Looking forward to Saturday!
Dorothy
In Closing
Thanks to Dianne, Courtney and Dorothy for sharing their interests with us this month. We will post here again next month. Until then, thank you for reading.
Dorothy sent us the following notes of the last month and some associated pictures. She says:
Hello!
Feb passed quickly as any 28 day month.
I did find a Griest treasure in an accessory kit consisting of all the plastic cams for the buttonholer! It includes an eyelet templete. Not sure the difference between a cam and template, but the box calls them templates!
There other activity predates the sewing machine, requiring a repair to a pair of shoes my daughter bought from Poshmark, A used item site. She purchased a pair of Haflinger wool clogs with the stitching letting loose. Roughly 5 hours of needle & pliers "by hand" completed the repair. (I do confess to the feeling it took 7 hours to thread the 3 ply thread into a too small needle which was easy to manipulate inside the shoe.) The repair was rather successful. The photo shows the area across the instep where the stitching let loose and after stitching. Stitching had also let loose around the foot opening which was stitched again and the rear tab was glued and stitched back into place. A small pair of jewellers needle nose pliers were employed. I got a lunch in payment.
It elicited a comment from my daughter that she should learn how to do these repairs herself as her Dad & I will stop doing them at some point.
Looking forward to Saturday!
Dorothy

In Closing
Thanks to Dianne, Courtney and Dorothy for sharing their interests with us this month. We will post here again next month. Until then, thank you for reading.
03-29-2023, 06:06 AM
#343
Super Member
Join Date: Mar 2015
Location: Denver, CO
Posts: 4,305
They say, 'In like a lion, out like a lamb.' Colorado has been experiencing warmer temperatures, with winter occasionally spitting out short bursts of light snow and cold weather. Buds are forming, hopefully not too soon. And birds have begun their pretty and distinctive springtime songs. What a variety of weather we are fortunate enough to have here!
This month we have write-ups from Dianne and Courtney. We'll begin with Dianne.
Dianne
Dianne has been featuring a different machine from her nice collection each month. This month she tells us about a machine called a Hexagon. She writes:
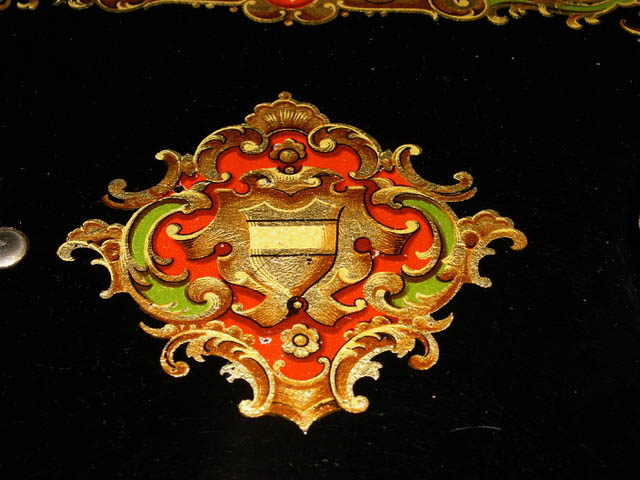
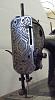
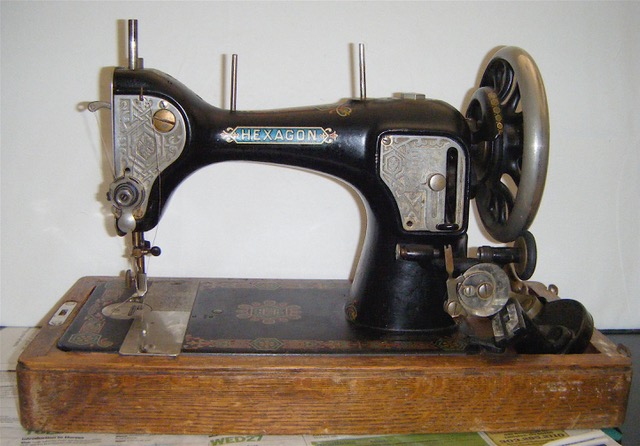
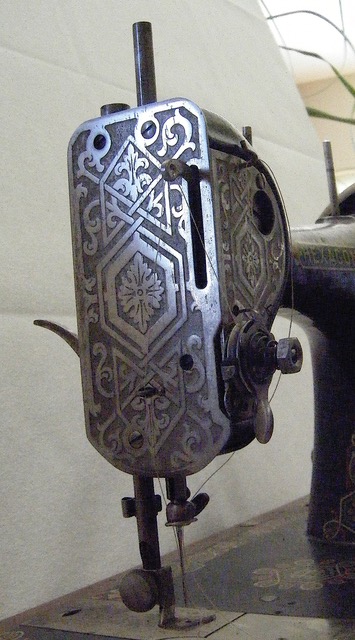
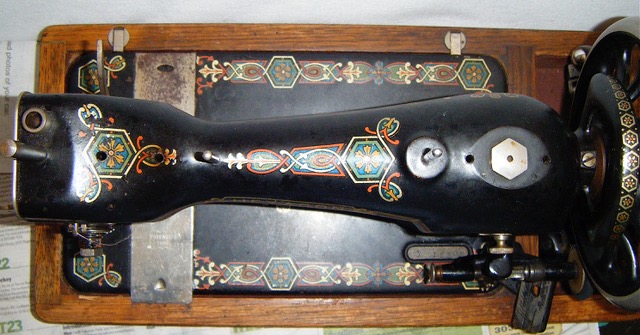
This month's adventure in antique sewing happened using a Hexagon sewing machine. It was made by the Standard Sewing Machine Co. of Cleveland, Ohio in the 1920s. It seems they were sold mostly or exclusively in Europe. Mine has a serial number of X12306 and its decals and overall finish are not anywhere near pristine, but it is quite attractive. The small, disintegrating manual is dated 1919. There was, at least in name, a Hexagon Sewing Machine Company Ltd. (as printed on the manual) but it is accepted that Standard made the machine. Standard was taken over by Frederick Osann (maker of Sewhandy machines) in 1928, and then by Singer in 1934. This machine is also badged Harris #5 and Nelson's #61. The battering ram or tank-like look created by the metal on the sides of the left end of the machine are distinctive. There is a hexagonal metal piece on top, and the stitch length area has an oversized metal covering. Many parts of the sewing machine are interchangeable with the Singer 128.
Shortly after cleaning up and oiling the machine, a problem developed with the stitching. There were occasional loops on the bottom - not the consistent looping caused by tension problems. The shuttle was suspected, and replacing it with the shuttle from a Singer 128 solved the problem immediately. Lucky guess.
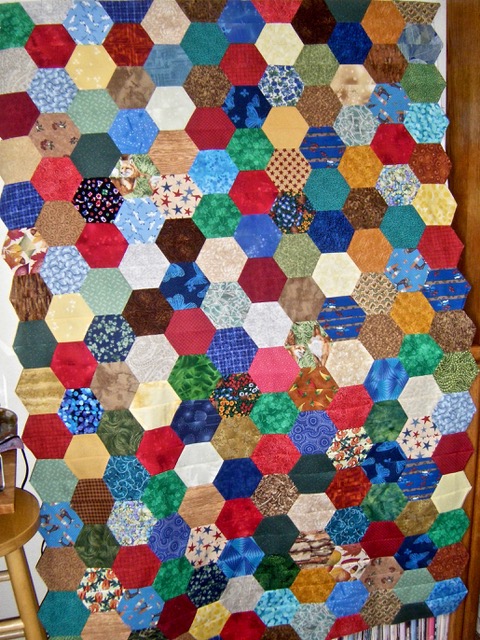
Of course, with a machine badged Hexagon, one must sew hexagons! I settled for simple pieced half hexagons cut from leftover 2-1/2" strips. A template made by Westalee efficiently cut the pieces, having a handle and corners to snip off, making aligning the angled pieces a cinch. It took quite a few pieces to put together this 41 x 62 inch flimsy. The rows were pieced on the Hexagon, but the assembly of the rows was accomplished on a Singer 15-91. Sewing all those rows on a handcrank machine simply wasn't in the stars.

to be continued ...
This month we have write-ups from Dianne and Courtney. We'll begin with Dianne.
Dianne
Dianne has been featuring a different machine from her nice collection each month. This month she tells us about a machine called a Hexagon. She writes:
This month's adventure in antique sewing happened using a Hexagon sewing machine. It was made by the Standard Sewing Machine Co. of Cleveland, Ohio in the 1920s. It seems they were sold mostly or exclusively in Europe. Mine has a serial number of X12306 and its decals and overall finish are not anywhere near pristine, but it is quite attractive. The small, disintegrating manual is dated 1919. There was, at least in name, a Hexagon Sewing Machine Company Ltd. (as printed on the manual) but it is accepted that Standard made the machine. Standard was taken over by Frederick Osann (maker of Sewhandy machines) in 1928, and then by Singer in 1934. This machine is also badged Harris #5 and Nelson's #61. The battering ram or tank-like look created by the metal on the sides of the left end of the machine are distinctive. There is a hexagonal metal piece on top, and the stitch length area has an oversized metal covering. Many parts of the sewing machine are interchangeable with the Singer 128.
Shortly after cleaning up and oiling the machine, a problem developed with the stitching. There were occasional loops on the bottom - not the consistent looping caused by tension problems. The shuttle was suspected, and replacing it with the shuttle from a Singer 128 solved the problem immediately. Lucky guess.
Of course, with a machine badged Hexagon, one must sew hexagons! I settled for simple pieced half hexagons cut from leftover 2-1/2" strips. A template made by Westalee efficiently cut the pieces, having a handle and corners to snip off, making aligning the angled pieces a cinch. It took quite a few pieces to put together this 41 x 62 inch flimsy. The rows were pieced on the Hexagon, but the assembly of the rows was accomplished on a Singer 15-91. Sewing all those rows on a handcrank machine simply wasn't in the stars.
to be continued ...
03-29-2023, 06:33 AM
#344
Super Member
Join Date: Mar 2015
Location: Denver, CO
Posts: 4,305
Courtney
Courtney, who lives in northern Colorado, tells us about the machines that he has worked on over the last month. He sent us the following pictures and notes:
Dear All,
During our Zoom call last month, I mentioned that I had just been given a 1942 Singer 201. It was in the last batch manufactured before the Singer factories switched over war work. I am sure that whoever bought the machine was very happy (and lucky) because sewing machines were hard to come by during World War II. The machine was not in great cosmetic shape and was missing the dust guard up by the spool pin and the machine ran very slowly. The case also had some problems in that it was missing a handle and one of the hinges was missing. I gave her a good lubrication and cut a circle out of card stock to cover the lubrication holes near the spool pin (I also put a large spool pin cover my daughter had crocheted over the area to also keep any dust from getting inside the machine.) When I looked at the control pedal, I found that it was actually for 220V rather than 110V. I replaced it with a 110V control and was really surprised. I think this is the smoothest and most responsive machine I have ever had.
I started thinking about looking at my other Singer 201s. The first machine I ever purchased was a 1948 Singer 201-2. The machine runs and sews very well but there is a quiet knock in the bobbin area. I have searched and searched for the knock and simply cannot find it. I purchased a 1947 Singer 201-3 in Portales, NM a few years ago. I have converted it to a 201-1 hand crank with an original Singer hand crank and spoked wheel. I was surprised to find such a machine in Portales, since nearly all-American machines were 201-2 machines with potted motors. This machine was made in Great Britain and Portales in not a major sewing machine hub. My third machine is a 1937 201-2 that is rather unusual. It has a potted motor, but it appears to have been drilled so the potted motor can be removed, and a 201-3 belt guard and bobbin winder can be attached to turn the machine into a 201-3 (or -1 or -4.) The only difference between 201-1s, 201-3s and 201-4s is whether they are treadle, external motor, or hand crank machines. I have included a picture of my converted 201-2 machine, and you can see it still has the built in light and the wires for the light sticking out at the back of the machine. I have also included a picture of the external motor I now have on the machine. I have always been interested in why the potted motor machine (-2) was almost ubiquitous here in the US and why the other models (-1,-3,-4) were so popular overseas.
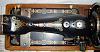
After working on the 201s I got to thinking it would be nice to have one of the aluminum bodied 201s made in England after the war, but Colorado is a very long way from England. Then I remembered that the 201 in the US was basically replaced by the 404 which has an aluminum body. So down to the basement I went and brought up my two 404s. I cleaned and lubricated both machines and they also run very nicely (although I think the 201 is much smoother and quieter.) While working on the 404s I noticed they were not exactly the same. In the picture I have removed the top plate on each machine. The machine with the lowest serial number (AN023722 right) has a different internal casting than the machine with the higher serial number (AN126894 left) even though the serial numbers on both machines are reasonably close. The machine with the higher serial number has a casting which goes all the way from front to back for more support than the other machine. The other major difference is the drip plate. The machine with the lower serial number has a drip plate similar to a Featherweight or 301. It is a metal plate with a felt pad which screws on the bottom of the machine. The machine with a higher serial number has replaced the metal plate with a plastic cover which covers the entire bottom. Both of these differences can be seen in the photo. I don't know but perhaps the difference is how the machine was sold. If it was sold in a cabinet, it might be like the low numbered machine and if it was sold as a portable then perhaps it came similar to the higher numbered machine.
Until next month,
Courtney
In Closing
Thank you to our members Dianne and Courtney for their offerings this month. We will post here again next month. Until then, thank you for reading.
Courtney, who lives in northern Colorado, tells us about the machines that he has worked on over the last month. He sent us the following pictures and notes:
Dear All,
During our Zoom call last month, I mentioned that I had just been given a 1942 Singer 201. It was in the last batch manufactured before the Singer factories switched over war work. I am sure that whoever bought the machine was very happy (and lucky) because sewing machines were hard to come by during World War II. The machine was not in great cosmetic shape and was missing the dust guard up by the spool pin and the machine ran very slowly. The case also had some problems in that it was missing a handle and one of the hinges was missing. I gave her a good lubrication and cut a circle out of card stock to cover the lubrication holes near the spool pin (I also put a large spool pin cover my daughter had crocheted over the area to also keep any dust from getting inside the machine.) When I looked at the control pedal, I found that it was actually for 220V rather than 110V. I replaced it with a 110V control and was really surprised. I think this is the smoothest and most responsive machine I have ever had.
I started thinking about looking at my other Singer 201s. The first machine I ever purchased was a 1948 Singer 201-2. The machine runs and sews very well but there is a quiet knock in the bobbin area. I have searched and searched for the knock and simply cannot find it. I purchased a 1947 Singer 201-3 in Portales, NM a few years ago. I have converted it to a 201-1 hand crank with an original Singer hand crank and spoked wheel. I was surprised to find such a machine in Portales, since nearly all-American machines were 201-2 machines with potted motors. This machine was made in Great Britain and Portales in not a major sewing machine hub. My third machine is a 1937 201-2 that is rather unusual. It has a potted motor, but it appears to have been drilled so the potted motor can be removed, and a 201-3 belt guard and bobbin winder can be attached to turn the machine into a 201-3 (or -1 or -4.) The only difference between 201-1s, 201-3s and 201-4s is whether they are treadle, external motor, or hand crank machines. I have included a picture of my converted 201-2 machine, and you can see it still has the built in light and the wires for the light sticking out at the back of the machine. I have also included a picture of the external motor I now have on the machine. I have always been interested in why the potted motor machine (-2) was almost ubiquitous here in the US and why the other models (-1,-3,-4) were so popular overseas.
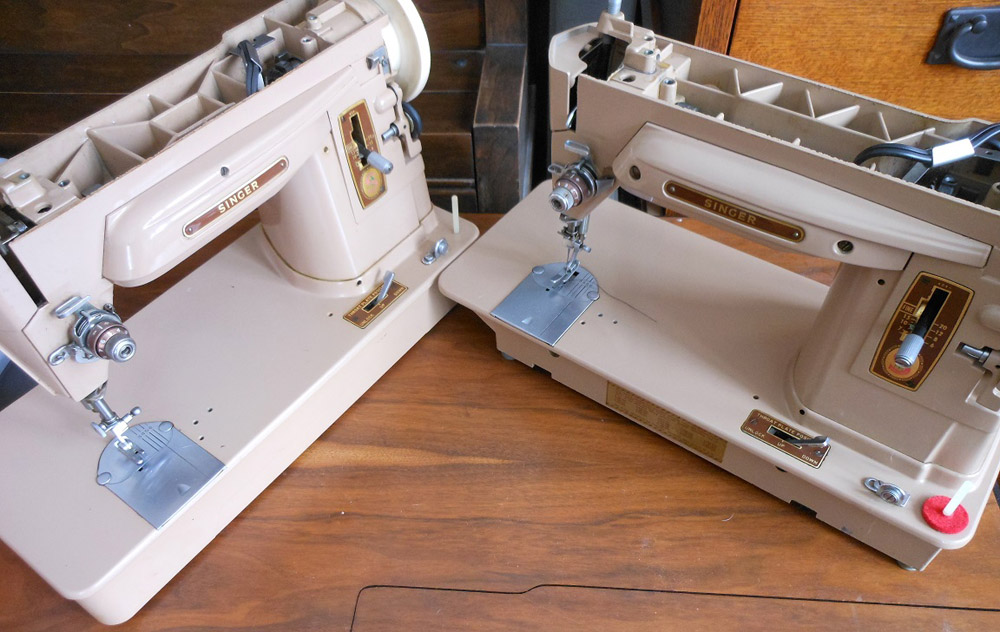
After working on the 201s I got to thinking it would be nice to have one of the aluminum bodied 201s made in England after the war, but Colorado is a very long way from England. Then I remembered that the 201 in the US was basically replaced by the 404 which has an aluminum body. So down to the basement I went and brought up my two 404s. I cleaned and lubricated both machines and they also run very nicely (although I think the 201 is much smoother and quieter.) While working on the 404s I noticed they were not exactly the same. In the picture I have removed the top plate on each machine. The machine with the lowest serial number (AN023722 right) has a different internal casting than the machine with the higher serial number (AN126894 left) even though the serial numbers on both machines are reasonably close. The machine with the higher serial number has a casting which goes all the way from front to back for more support than the other machine. The other major difference is the drip plate. The machine with the lower serial number has a drip plate similar to a Featherweight or 301. It is a metal plate with a felt pad which screws on the bottom of the machine. The machine with a higher serial number has replaced the metal plate with a plastic cover which covers the entire bottom. Both of these differences can be seen in the photo. I don't know but perhaps the difference is how the machine was sold. If it was sold in a cabinet, it might be like the low numbered machine and if it was sold as a portable then perhaps it came similar to the higher numbered machine.
Until next month,
Courtney


In Closing
Thank you to our members Dianne and Courtney for their offerings this month. We will post here again next month. Until then, thank you for reading.
05-03-2023, 07:37 AM
#345
Super Member
Join Date: Mar 2015
Location: Denver, CO
Posts: 4,305
Spring has fully arrived in Colorado. In Denver, overnights are 30s and 40s, with daytimes in the 60s and 70s. Very pleasant with everything blooming. Age brings a little more appreciation for springtime with each passing year.
We have show-and-tell to offer from our members this month, so let's get started. We'll begin with Thanh.
Thanh
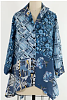
Thanh made a shirt for an interesting upcoming class which he shows us, as well as some of his machine interests. He writes:
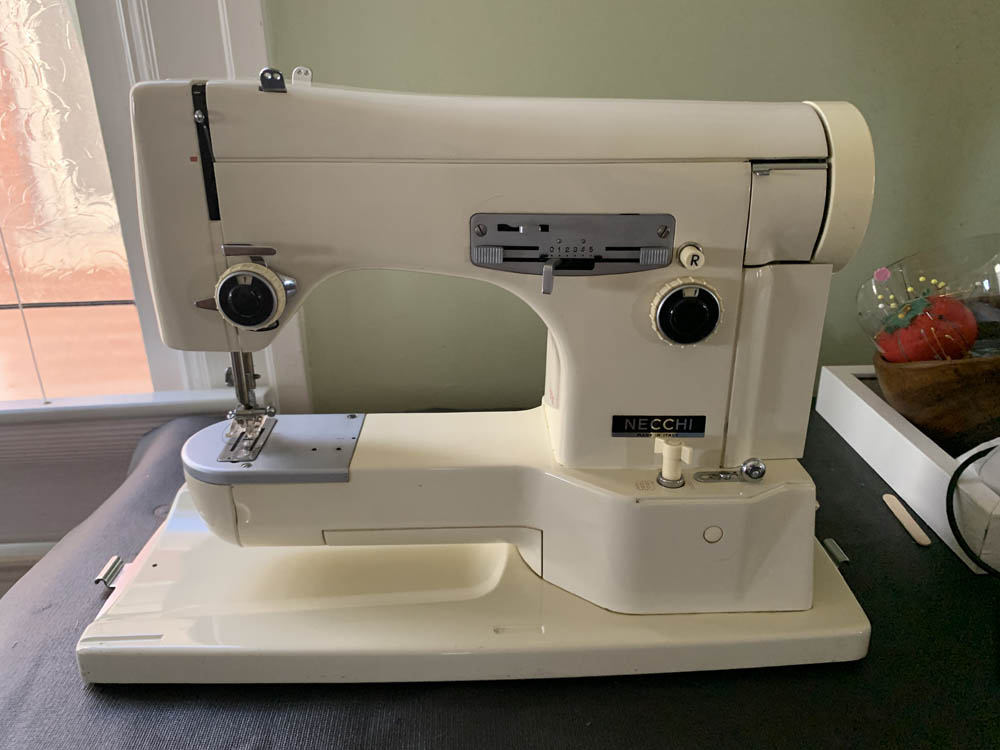
I haven't made a SM purchase in awhile which is a good thing because I just don't have the space. However, I'm a sucker for Necchi's especially inexpensive ones and bought a Necchi 523 at an online estate sale. The case handle is broken but other than that, it only needed some light cleaning and oiling. I typically use a BU Mira as my go to machine and will see how this one compares.
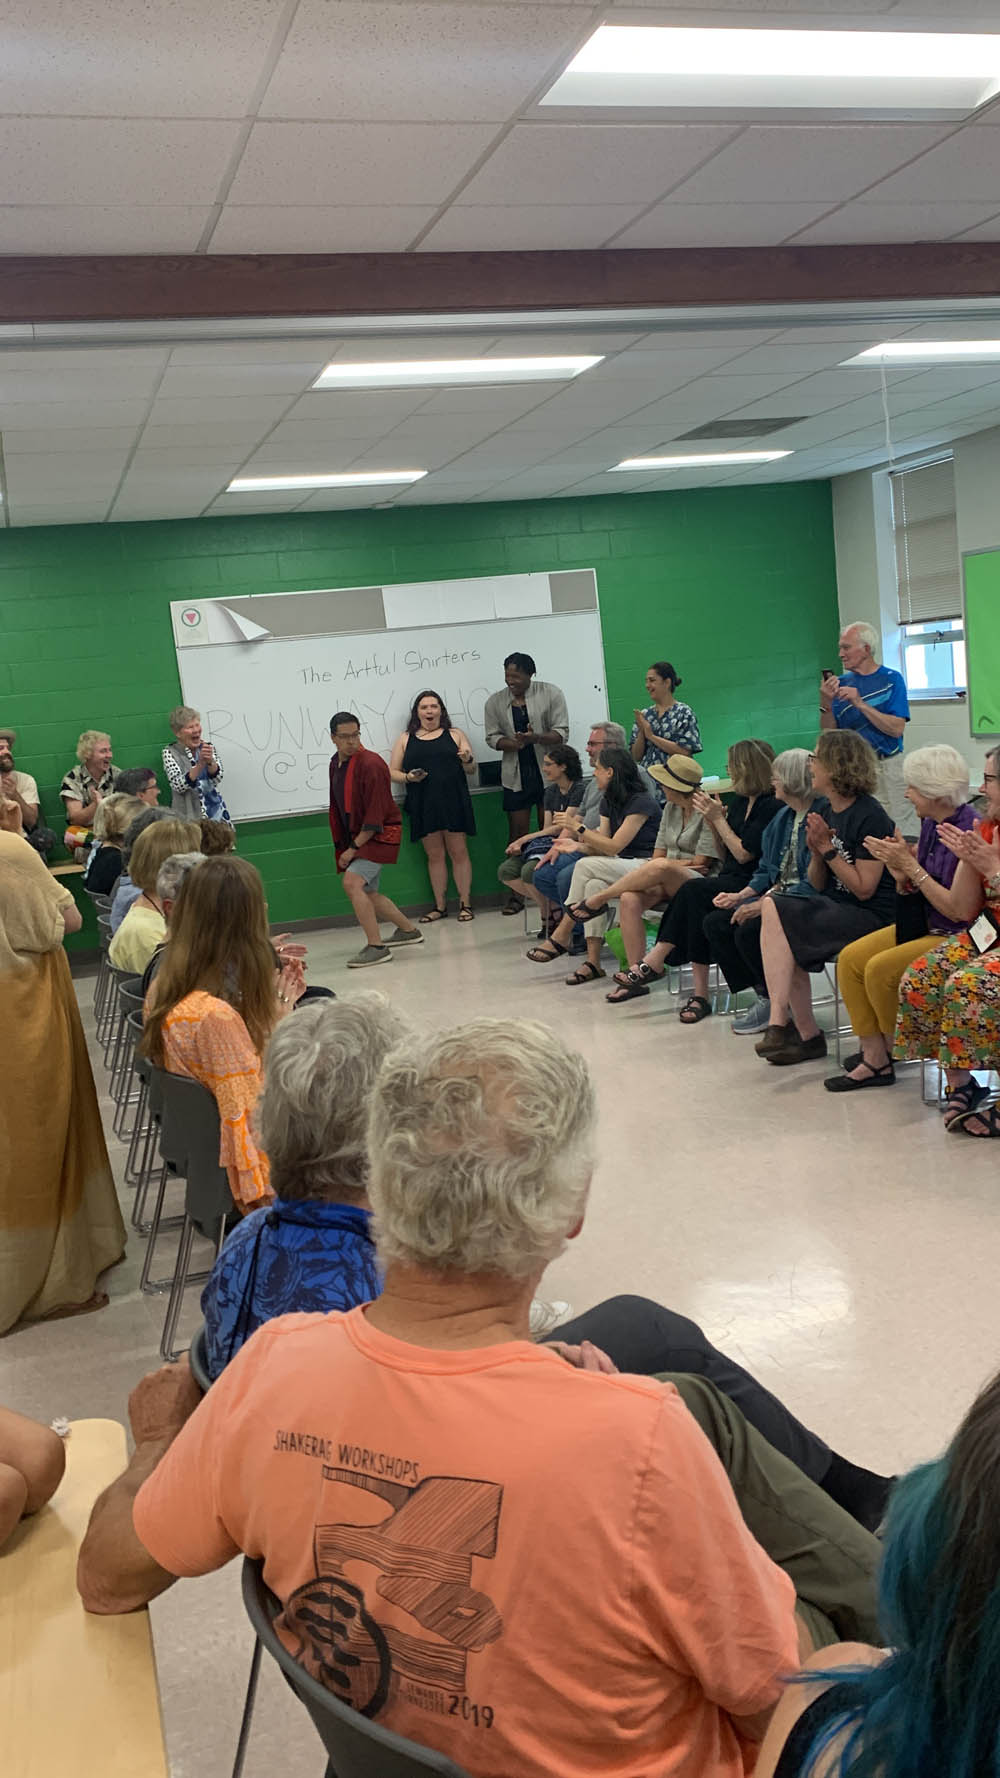
Other than the one purchase, Lara and I are preparing for an art workshop coming up in Sewanee TN. Shakerag Workshops are held each June consisting of two week-long sessions with about 10 workshops each session. Different artists across many media such as ceramics, photography, textile, dying, collage, woodworking come to teach and lecture about their art. It's hosted at a high school, we stay on campus all week long and swim in the reservoir after class. It's like summer camp for adults. We're taking a class taught by Katherine Tilton called the Artful Shirt and I included a photo from the Shakerag website to give you a sense of the class.
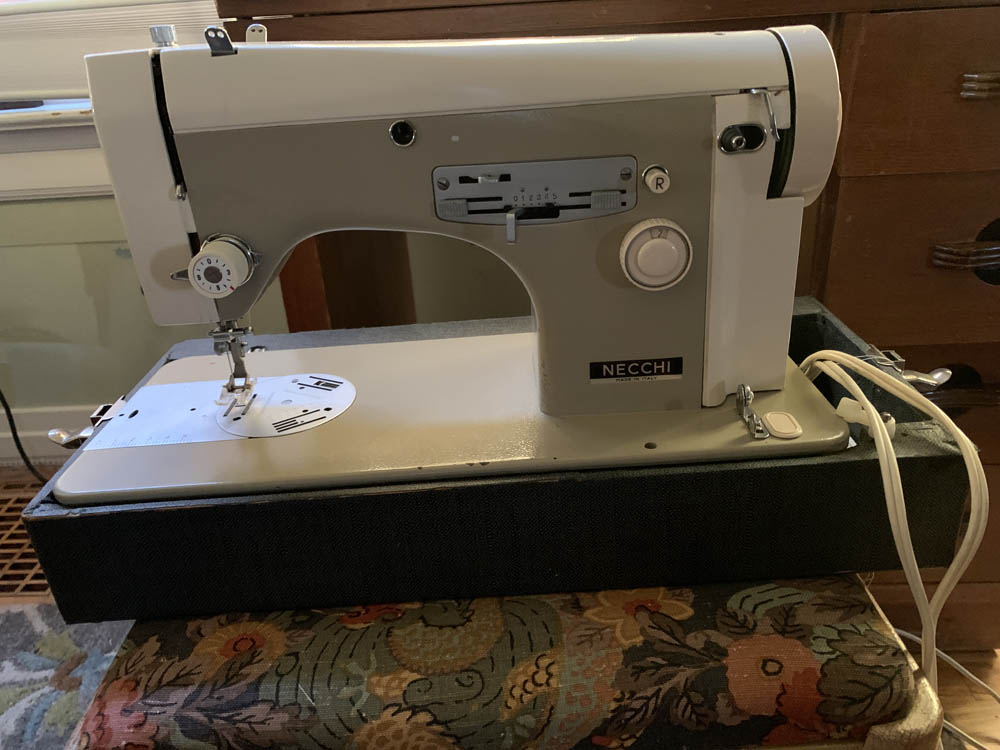
In preparation for the class, I practiced making a Japanese Happi as one of my ideas for a shirt, thinking about fabrics and colors/patterns, and most importantly deciding which machine to take to class. After purchasing the Necchi 523, I remembered a Necchi 522 Lycia that I bought about a year ago. This is my second Lycia (did I mention I'm a sucker for Necchi's?). However, I never got around to fixing the stitch length worm gear which is notorious for cracking in these models. On my first Lycia, I removed the worm gear to epoxy it and remembered how tricky that was to put back together even with instructions from a Necchi Facebook group member. For this one, I decided to epoxy the gear in place and it turned out to be much easier and faster. I'm happy with the results and decided the Lycia will come with me to Shakerag: it sews well, has a free arm and extension table, and isn't that heavy with the cover. I also have a high-shank button holer I can bring along. That's it for now. I'll be sure to take pictures at the workshop and report out in July.
Dorothy
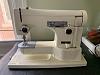
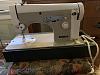
Dorothy has had more time for what she likes to do since retiring a while back. She continues to be an asset to our group, with the experience of sewing professionally for many years. She writes:
Hello!
Months pass very quickly.
I attended a "How to make a Woman's Victorian blouse from a Mens shirt" class. Rather fun and interesting. The Lady leading the class came up with this method and is very kind to share her knowledge. Unfortunately, during stitching a sleeve together, the belt broke (internal motor so I HOPE that is the issue) on my Kenmore 1060. The 1060 is light weight enough to carry to events. Sigh.
Friday, I go to a function dedicated to sewing with Featherweights. It will be my first adventure with this group. Introduced by a woman who has purchased the hand crank for featherweight machines. I hope to take photos. I do not know if she has a machine set up with a hand crank on it.
Dorothy
... to be continued
We have show-and-tell to offer from our members this month, so let's get started. We'll begin with Thanh.
Thanh
Thanh made a shirt for an interesting upcoming class which he shows us, as well as some of his machine interests. He writes:
I haven't made a SM purchase in awhile which is a good thing because I just don't have the space. However, I'm a sucker for Necchi's especially inexpensive ones and bought a Necchi 523 at an online estate sale. The case handle is broken but other than that, it only needed some light cleaning and oiling. I typically use a BU Mira as my go to machine and will see how this one compares.
Other than the one purchase, Lara and I are preparing for an art workshop coming up in Sewanee TN. Shakerag Workshops are held each June consisting of two week-long sessions with about 10 workshops each session. Different artists across many media such as ceramics, photography, textile, dying, collage, woodworking come to teach and lecture about their art. It's hosted at a high school, we stay on campus all week long and swim in the reservoir after class. It's like summer camp for adults. We're taking a class taught by Katherine Tilton called the Artful Shirt and I included a photo from the Shakerag website to give you a sense of the class.
In preparation for the class, I practiced making a Japanese Happi as one of my ideas for a shirt, thinking about fabrics and colors/patterns, and most importantly deciding which machine to take to class. After purchasing the Necchi 523, I remembered a Necchi 522 Lycia that I bought about a year ago. This is my second Lycia (did I mention I'm a sucker for Necchi's?). However, I never got around to fixing the stitch length worm gear which is notorious for cracking in these models. On my first Lycia, I removed the worm gear to epoxy it and remembered how tricky that was to put back together even with instructions from a Necchi Facebook group member. For this one, I decided to epoxy the gear in place and it turned out to be much easier and faster. I'm happy with the results and decided the Lycia will come with me to Shakerag: it sews well, has a free arm and extension table, and isn't that heavy with the cover. I also have a high-shank button holer I can bring along. That's it for now. I'll be sure to take pictures at the workshop and report out in July.

Dorothy
Dorothy has had more time for what she likes to do since retiring a while back. She continues to be an asset to our group, with the experience of sewing professionally for many years. She writes:
Hello!
Months pass very quickly.
I attended a "How to make a Woman's Victorian blouse from a Mens shirt" class. Rather fun and interesting. The Lady leading the class came up with this method and is very kind to share her knowledge. Unfortunately, during stitching a sleeve together, the belt broke (internal motor so I HOPE that is the issue) on my Kenmore 1060. The 1060 is light weight enough to carry to events. Sigh.
Friday, I go to a function dedicated to sewing with Featherweights. It will be my first adventure with this group. Introduced by a woman who has purchased the hand crank for featherweight machines. I hope to take photos. I do not know if she has a machine set up with a hand crank on it.
Dorothy
... to be continued
05-03-2023, 07:44 AM
#346
Super Member
Join Date: Mar 2015
Location: Denver, CO
Posts: 4,305
Courtney
Courtney has been busy, as he tells us in his report this month.
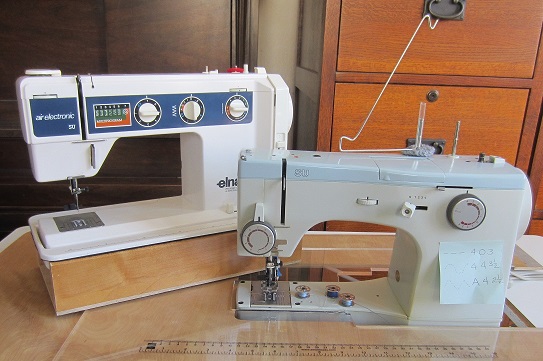
This month has mostly been a trip back into time to the 1970s for me. I finished piecing and basting my "States of Matter" quilt and thought I would do the quilting a bit different than usual. For the solid portion and the border, I thought I would use straight line quilting. For the liquid portion, I thought I would use a serpentine stitch and for the gas portion a multi-step zigzag. Since I usually use just a straight stitch machine, I did not foresee the problems I would have. Most zigzag machines do not have a serpentine and a multi-step zigzag, They only have one or the other. While perusing the web I saw an Elna which had both. In 1978, Connie bought an Elna Air Electronic SP which she now keeps for backup in a far corner of the closet. I pulled it out and yes indeed it did have all three stitches. However, Connie and I have been married a very long time and to make it longer I thought I better not use it on one of my projects. But then I remembered I have an Elna Air SU made about 1979 or 1980. When I checked, the SU only had the serpentine stitch, but the SU will make a wide variety of stitches by inserting cams. I have a few of the Elna cams and did find a multi-step zigzag. I started in cleaning up the SU and even made a special base that would fit the cutout for my sewing machine table. Things came to a screeching halt when I found I could not set the bottom tension. The machine had been sitting too long and the screw was too firmly tightened. Then I remembered I also have an Elna Star SU which takes the same cams. I pulled it out, checked that it was making a good stitch, and then cleaned it up. It did a great job. I had forgotten how smooth and easy the Elnas are to work with. What a joy to sew on
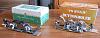
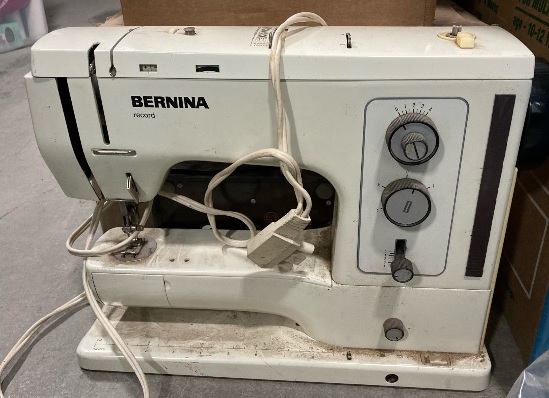
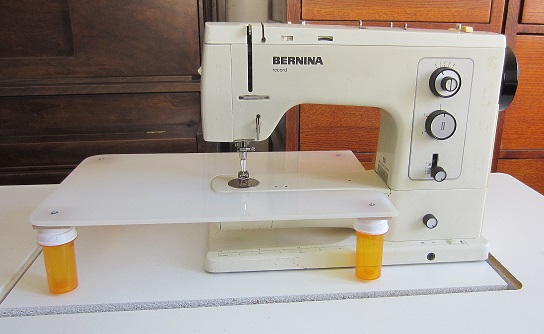
Just as I finished quilting my quilt, some friends in New Mexico said that they were cleaning out a storage shed and came across an old dirty machine. The sent me a picture and asked if I wanted it free of charge. I of course said yes. Connie and Cordelia, our daughter, were just leaving on a road trip down to New Mexico (Cordelia called it the pig tour because of the frequent stops for junk food.) They picked it up and brought it back to Colorado. It was a dirty old Bernina 830 record from about 1972. It was just the machine and foot control, no case or feet. Our friends had wiped off much of the dirt and I cleaned off some more. The inside of the machine was quite clean and even though the machine was quite stiff, with a bit of lubrication, the machine was soon running and sounding like a Bernina. The 1970s was about the time companies started to use plastic on their machines. On the back of the Bernina is a decorative bit of plastic which also holds the spool pins. The internal mechanism which allows the spool pins to move up and down was broken. I have an old Bernina 831 which is missing a motor, so I switched back panels so that I had a machine on which everything worked. I dug up an old Bernina fiberboard case and some Bernina 530 feet. The only important thing I did not have was the sewing platform it originally came with. I went to the shop and found so old plastic and cut a small table that slips around the machine. The legs are made from old pill bottles which were just the right size. They make for legs that easily clip on and off. I think I is looking rather nice now.
This last week was history fest at Centennial village here in Greeley. Twice a year in the Spring and Fall, fourth graders come and learn how things used to be. They get to see a blacksmith forge a nail. The kids get to taste beans from a real chuck wagon and have a lesson in a one room schoolhouse. I take a number of my antique sewing machines and talk about how we used to get clothes before Walmart. I pass around squares and have the kids sign their names. I then make a quilt with the squares. The theme for the quilt this week was dinosaurs. A triceratops skull (named Pops) found in Weld county has just been returned from the Denver Museum where it was studied and refurbished. Pops just went back on display at the county administration building a couple of weeks ago. The quilts usually have themes from a 100 to 150 years ago but this time we are going back millions of years ago! During the week we have about 2500 fourth graders. I think the kids enjoy themselves, I know I have a great time.
Until next month,
Courtney


Dianne
Dianne didn't have anything to present this month, but sent along the following note:
Hi,
Crazy & busy month, so I have nothing to report about. I should be home on the 6th. Maybe.
Dianne
In Closing
We enjoy posting the work of our varied members as their generous contributions allow. We want to thank them for their effort. And thank you for reading.
Courtney has been busy, as he tells us in his report this month.
This month has mostly been a trip back into time to the 1970s for me. I finished piecing and basting my "States of Matter" quilt and thought I would do the quilting a bit different than usual. For the solid portion and the border, I thought I would use straight line quilting. For the liquid portion, I thought I would use a serpentine stitch and for the gas portion a multi-step zigzag. Since I usually use just a straight stitch machine, I did not foresee the problems I would have. Most zigzag machines do not have a serpentine and a multi-step zigzag, They only have one or the other. While perusing the web I saw an Elna which had both. In 1978, Connie bought an Elna Air Electronic SP which she now keeps for backup in a far corner of the closet. I pulled it out and yes indeed it did have all three stitches. However, Connie and I have been married a very long time and to make it longer I thought I better not use it on one of my projects. But then I remembered I have an Elna Air SU made about 1979 or 1980. When I checked, the SU only had the serpentine stitch, but the SU will make a wide variety of stitches by inserting cams. I have a few of the Elna cams and did find a multi-step zigzag. I started in cleaning up the SU and even made a special base that would fit the cutout for my sewing machine table. Things came to a screeching halt when I found I could not set the bottom tension. The machine had been sitting too long and the screw was too firmly tightened. Then I remembered I also have an Elna Star SU which takes the same cams. I pulled it out, checked that it was making a good stitch, and then cleaned it up. It did a great job. I had forgotten how smooth and easy the Elnas are to work with. What a joy to sew on
Just as I finished quilting my quilt, some friends in New Mexico said that they were cleaning out a storage shed and came across an old dirty machine. The sent me a picture and asked if I wanted it free of charge. I of course said yes. Connie and Cordelia, our daughter, were just leaving on a road trip down to New Mexico (Cordelia called it the pig tour because of the frequent stops for junk food.) They picked it up and brought it back to Colorado. It was a dirty old Bernina 830 record from about 1972. It was just the machine and foot control, no case or feet. Our friends had wiped off much of the dirt and I cleaned off some more. The inside of the machine was quite clean and even though the machine was quite stiff, with a bit of lubrication, the machine was soon running and sounding like a Bernina. The 1970s was about the time companies started to use plastic on their machines. On the back of the Bernina is a decorative bit of plastic which also holds the spool pins. The internal mechanism which allows the spool pins to move up and down was broken. I have an old Bernina 831 which is missing a motor, so I switched back panels so that I had a machine on which everything worked. I dug up an old Bernina fiberboard case and some Bernina 530 feet. The only important thing I did not have was the sewing platform it originally came with. I went to the shop and found so old plastic and cut a small table that slips around the machine. The legs are made from old pill bottles which were just the right size. They make for legs that easily clip on and off. I think I is looking rather nice now.
This last week was history fest at Centennial village here in Greeley. Twice a year in the Spring and Fall, fourth graders come and learn how things used to be. They get to see a blacksmith forge a nail. The kids get to taste beans from a real chuck wagon and have a lesson in a one room schoolhouse. I take a number of my antique sewing machines and talk about how we used to get clothes before Walmart. I pass around squares and have the kids sign their names. I then make a quilt with the squares. The theme for the quilt this week was dinosaurs. A triceratops skull (named Pops) found in Weld county has just been returned from the Denver Museum where it was studied and refurbished. Pops just went back on display at the county administration building a couple of weeks ago. The quilts usually have themes from a 100 to 150 years ago but this time we are going back millions of years ago! During the week we have about 2500 fourth graders. I think the kids enjoy themselves, I know I have a great time.
Until next month,
Courtney
Dianne
Dianne didn't have anything to present this month, but sent along the following note:
Hi,
Crazy & busy month, so I have nothing to report about. I should be home on the 6th. Maybe.
Dianne
In Closing
We enjoy posting the work of our varied members as their generous contributions allow. We want to thank them for their effort. And thank you for reading.
05-31-2023, 06:35 AM
#347
Super Member
Join Date: Mar 2015
Location: Denver, CO
Posts: 4,305
Colorado has seen a very temperate beginning of summer, with 80s being reached only a time or two. Earlier in the month we got four or five inches of rain lasting for several days. That is more than the normal average for the entire month of May. Needless to say it made everything very green. We were fortunate to have lilacs this year, at their best about the 8th of May, avoiding the common Colorado late freeze that can sometimes catch them by surprise.
This month we have reports from James and Courtney. We'll begin with James.
James
James has made a recent acquisition, taking some pictures of it that he shares with us:
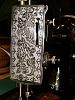
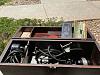
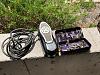
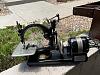
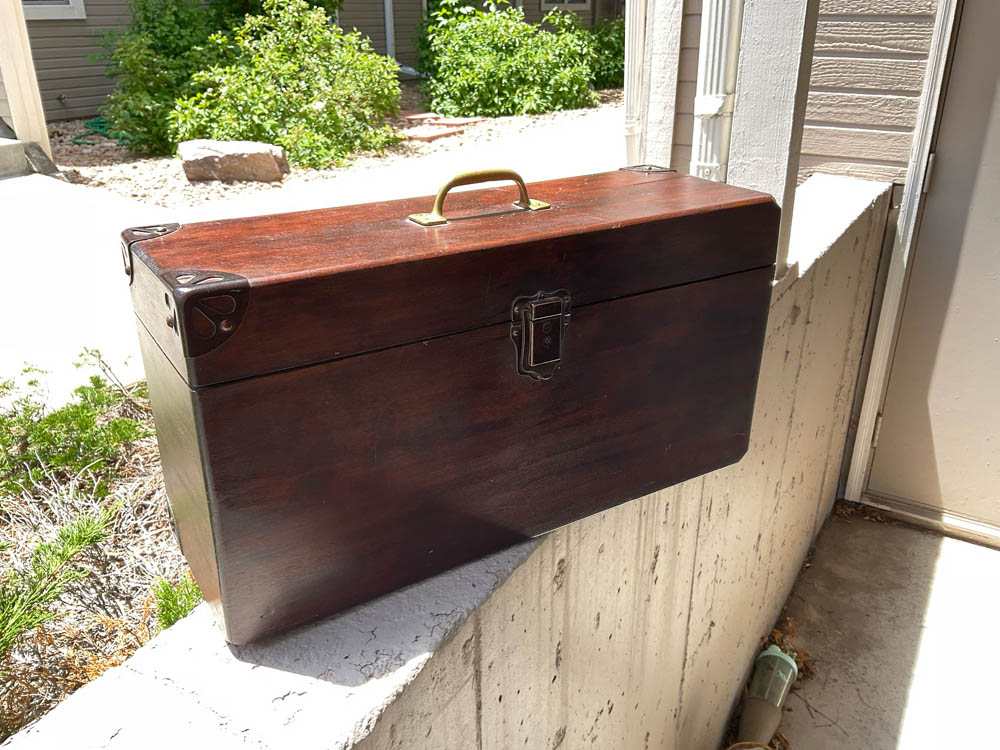
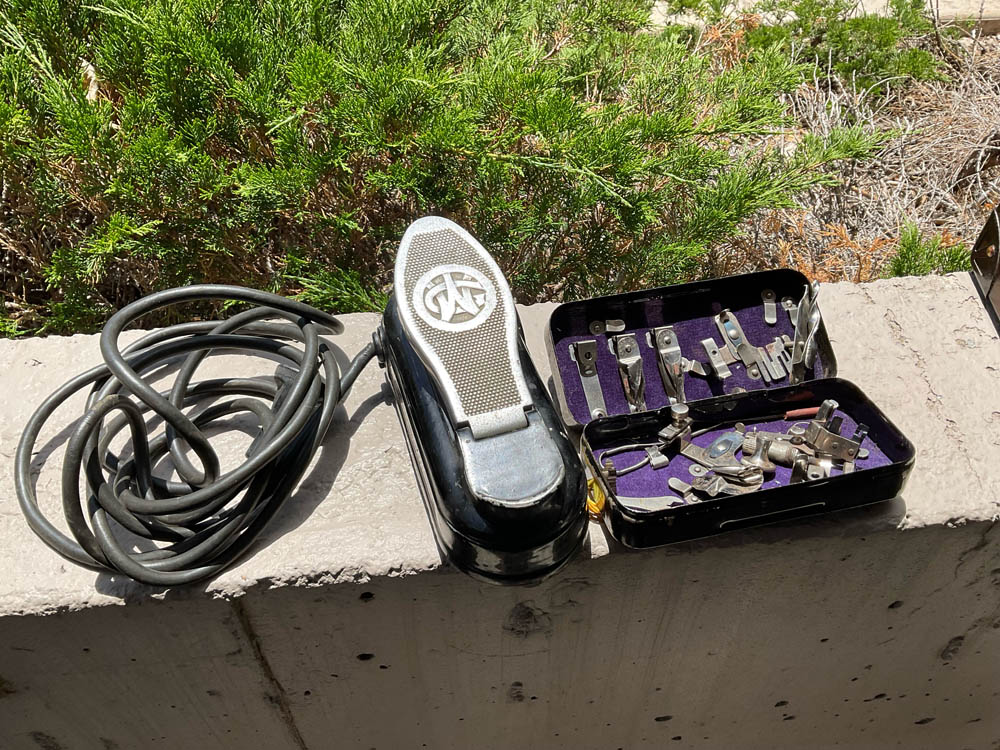
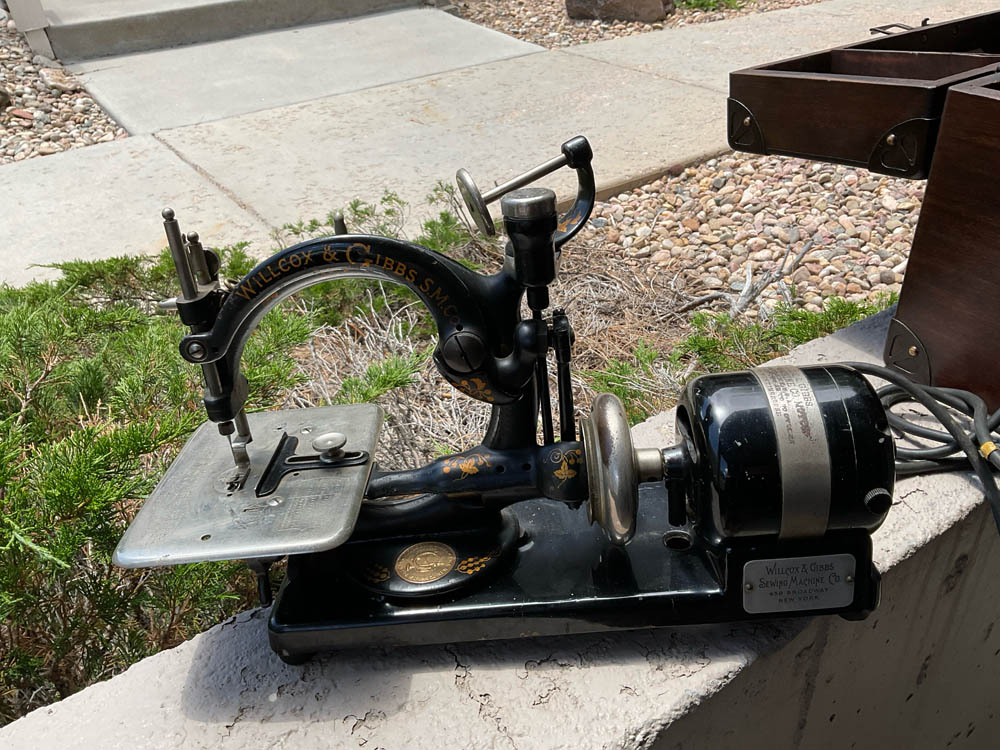
After a bit of a sewing machine hiatus, I could not resist getting this motorized Willcox and Gibbs chainstitch. The outside of the case looks really nice with several missing copper/brass corner braces. I may try getting modern brass corner braces of the correct size and use a Dremel to cut out enough material to match the original corner braces and age them.
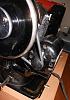
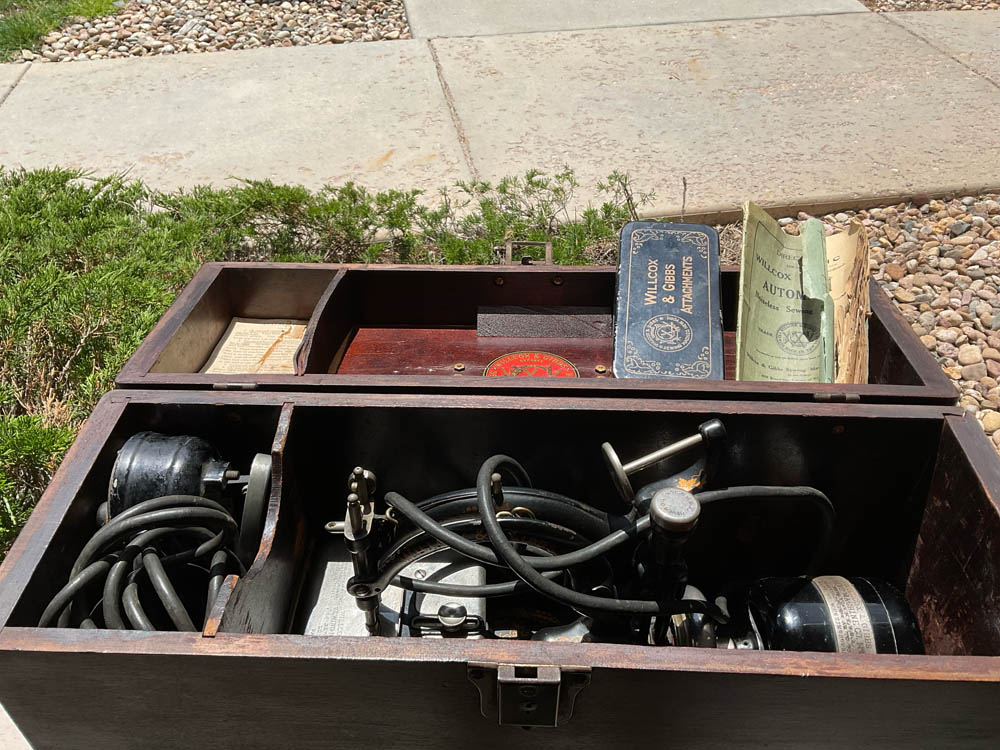
As you can see it still retains most of the original pasted instruction sheet on the underside of the lid. It also came with the original instruction manual that is in pretty bad shape but it has all the pages. A black Willcox and Gibbs attachment tin manufactured by Greist was included. I do not think it is complete but contains quite a few attachments including a handmade needle threader made to hook the thread while threading the machine. There is apparently an extra grease lube screw with a spring included.
The machine itself dates from 1907 according to the serial numbers published and dated in the spreadsheet. The decals are in good shape with some pitting of the japanning here and there. The hand wheel moves smoothly and the needle and feed move just fine. Despite the wiring being in decent shape, the motor does not run when plugged directly into the outlet. The pedal is in good shape but I am not sure if it works since I can not test it against that motor. I plan to test it on my stand-alone Hamilton Beach motor.
James

Courtney
Courtney did a little traveling over the last month. He tells us of his interesting experiences and finds. He writes:
A couple of weeks ago Connie and I went on a short road trip vacation. We took US Highway 36 across Kansas and ended up in Hamilton, MO. Highway 36 was great. No traffic, especially no big trucks, and a really good and smooth road. Next time we go East we will probably take 36 again and stay away from I-70 or I-80. Why Hamilton Missouri, you might ask. Well Hamilton is the home of the Missouri Star Quilt Company of YouTube fame.
Hamilton has become a quilters mecca. Missouri Star appears to have taken over nearly half the downtown area. One whole block, both at street level and up on second floor, are quilt shops. They also have most of the shops in the block across the street and a block down. Instead of everything all together they have a bunch of different shops, a Batik shop, a florals shop, a shop with licensed fabrics, and several others. It's great just to walk around and see all the different fabrics. For the guys not interested in fabric they have a lounge with easy chairs and TVs. Connie spent most of her time in the lounge explaining that she's not the quilter, her husband is. We spent the first night of our trip in Seneca, KS and drove the 2 hours on the Hamilton the next day. Our first day there was just looking around but the second day we had to get out the wallet and spend some money. After going through Hamilton one last time, we started home and spent the night in Marysville, KS where we visited the Pony Express stating and stables. Great Fun!
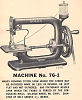
Besides the quilt shops in Hamilton there is also a quilt museum in an old high school. They have a fine display of modern and antique quilts. In the museum they also have a nice collection of antique and vintage sewing machines. They are still working on the sewing machine displays but they have a wonderful collection of toy sewing machines. A whole room dedicated just to toy machines. While going through the room with all the toys I spotted and unusual machine. It was a bit bigger than a Singer model 20 Sewhandy but not much. I am sure that is why it was in the toy room. It was a Singer model 76-1. I had never seen or heard of one before. That night in our motel, I looked online for info about the 76. The next day, besides spending money in the quilt shops, we went back to the museum, and they let me closely look it over. I could not see a "stationary" needle but could see a number of very small gears that could gather the cloth as the handle was cranked. At least I have something to think about and look into. I still can't quite figure out how it worked.
We spent the first night of our trip in Seneca, KS and drove the 2 hours on the Hamilton the next day. Our first day there was just looking around but the second day we had to get out the wallet and spend some money and visit the museum a second time. After going through Hamilton one last time, we started home and spent the night in Marysville, KS where we visited the original Pony Express station and stables still there. Then back to Greeley and pick up the dog. Great Fun all the way!
Sorry, I can't be with you on the Zoom call this month. Sew Downtown, our local quilt shop, has been so nice to me over the years. so that when they asked me to do a program on mathematics in quilting, I could not say no. It has inspired me to work on a quilt that I will show off next month.
Have a great June.
Courtney
In Closing
We want to offer thanks to our members who give us pictures and notes about their work to post here. And to our readers, thank you for reading.
This month we have reports from James and Courtney. We'll begin with James.
James
James has made a recent acquisition, taking some pictures of it that he shares with us:
After a bit of a sewing machine hiatus, I could not resist getting this motorized Willcox and Gibbs chainstitch. The outside of the case looks really nice with several missing copper/brass corner braces. I may try getting modern brass corner braces of the correct size and use a Dremel to cut out enough material to match the original corner braces and age them.
As you can see it still retains most of the original pasted instruction sheet on the underside of the lid. It also came with the original instruction manual that is in pretty bad shape but it has all the pages. A black Willcox and Gibbs attachment tin manufactured by Greist was included. I do not think it is complete but contains quite a few attachments including a handmade needle threader made to hook the thread while threading the machine. There is apparently an extra grease lube screw with a spring included.
The machine itself dates from 1907 according to the serial numbers published and dated in the spreadsheet. The decals are in good shape with some pitting of the japanning here and there. The hand wheel moves smoothly and the needle and feed move just fine. Despite the wiring being in decent shape, the motor does not run when plugged directly into the outlet. The pedal is in good shape but I am not sure if it works since I can not test it against that motor. I plan to test it on my stand-alone Hamilton Beach motor.
James
Courtney
Courtney did a little traveling over the last month. He tells us of his interesting experiences and finds. He writes:
A couple of weeks ago Connie and I went on a short road trip vacation. We took US Highway 36 across Kansas and ended up in Hamilton, MO. Highway 36 was great. No traffic, especially no big trucks, and a really good and smooth road. Next time we go East we will probably take 36 again and stay away from I-70 or I-80. Why Hamilton Missouri, you might ask. Well Hamilton is the home of the Missouri Star Quilt Company of YouTube fame.
Hamilton has become a quilters mecca. Missouri Star appears to have taken over nearly half the downtown area. One whole block, both at street level and up on second floor, are quilt shops. They also have most of the shops in the block across the street and a block down. Instead of everything all together they have a bunch of different shops, a Batik shop, a florals shop, a shop with licensed fabrics, and several others. It's great just to walk around and see all the different fabrics. For the guys not interested in fabric they have a lounge with easy chairs and TVs. Connie spent most of her time in the lounge explaining that she's not the quilter, her husband is. We spent the first night of our trip in Seneca, KS and drove the 2 hours on the Hamilton the next day. Our first day there was just looking around but the second day we had to get out the wallet and spend some money. After going through Hamilton one last time, we started home and spent the night in Marysville, KS where we visited the Pony Express stating and stables. Great Fun!
Besides the quilt shops in Hamilton there is also a quilt museum in an old high school. They have a fine display of modern and antique quilts. In the museum they also have a nice collection of antique and vintage sewing machines. They are still working on the sewing machine displays but they have a wonderful collection of toy sewing machines. A whole room dedicated just to toy machines. While going through the room with all the toys I spotted and unusual machine. It was a bit bigger than a Singer model 20 Sewhandy but not much. I am sure that is why it was in the toy room. It was a Singer model 76-1. I had never seen or heard of one before. That night in our motel, I looked online for info about the 76. The next day, besides spending money in the quilt shops, we went back to the museum, and they let me closely look it over. I could not see a "stationary" needle but could see a number of very small gears that could gather the cloth as the handle was cranked. At least I have something to think about and look into. I still can't quite figure out how it worked.
We spent the first night of our trip in Seneca, KS and drove the 2 hours on the Hamilton the next day. Our first day there was just looking around but the second day we had to get out the wallet and spend some money and visit the museum a second time. After going through Hamilton one last time, we started home and spent the night in Marysville, KS where we visited the original Pony Express station and stables still there. Then back to Greeley and pick up the dog. Great Fun all the way!
Sorry, I can't be with you on the Zoom call this month. Sew Downtown, our local quilt shop, has been so nice to me over the years. so that when they asked me to do a program on mathematics in quilting, I could not say no. It has inspired me to work on a quilt that I will show off next month.
Have a great June.
Courtney

In Closing
We want to offer thanks to our members who give us pictures and notes about their work to post here. And to our readers, thank you for reading.
06-28-2023, 06:58 AM
#348
Super Member
Join Date: Mar 2015
Location: Denver, CO
Posts: 4,305
The month of June has brought Colorado an unusually wet season, breaking the previous record for moisture set in the 1880s. Denver hit the first official 90 degree high temperature on June 27. These factors have given us lush lawns and gardens.
We have a little more abbreviated presentation this month, with several of our members doing 4th of July and mid-summer activities. We did however receive notes from Courtney, Dorothy and Thanh. We'll start with Courtney.
Courtney
Courtney, one of our members who lives in northern Colorado, sent a few notes about his activities:
Dear All,
Sewing machines have been a bit slow around here this month. I did acquire an EverSewn Celine for $46 that I have been playing with off and on. It is a modern computer-based machine. Since it has all the bells and whistles and I generally work on vintage and antique machines, I thought it would give me some experience with modern machines. I do have the home manual and the repair manual for the machine. Boy, do I like the ruggedness of the older machines.
One of the highlights of the month was getting to see and talk to Dorothy in person! There was a big shop hop here in northern Colorado, so I met her at the local quilting store, and we walked over and had lunch nearby. Lunch was OK but the conversation was the GREAT! I didn't participate in the shop hop because I have been working hard trying to finish some other quilts. I think I will have some to show on Saturday.
An old teacher friend ran across some of the Pathe movie shorts and sent me links:
From about 1934: https://www.youtube.com/watch?v=z8iRmYlpKHE
From about 1960: https://www.youtube.com/watch?v=paX-gwtSTIM
Unfortunately, Pathe was more into entertainment than accuracy. The following are much better:
The History Guy: https://www.youtube.com/watch?v=3144SpUGbng
The Secret Life of Sewing Machines: https://www.youtube.com/watch?v=8lwI4TSKM3Y
Oh, I almost forgot. I have been asked to do a Featherweight Maintenance class on July 29, at the Quilters Corner in Erie, CO. I think the last time I taught the class was 8 or 9 years ago, so I am pretty excited.
Courtney
Dorothy
Dorothy, our member having the most experience with commercial sewing, also sent notes about what she's been doing:
Hello!
These months sure fly by fast!
I participated in the NoCo Shop Hop, for 5 of the participating 11 shops. All the shops I visited have Wonderful fabrics and are unique. I have to admit driving has lost some thrill and I stopped. I will order the other blocks after the first of July.
A Good part of one day was meeting Courtney in Greeley! Talked sewing machines over lunch. Great time!
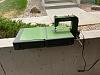
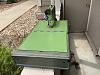
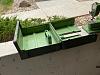
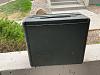
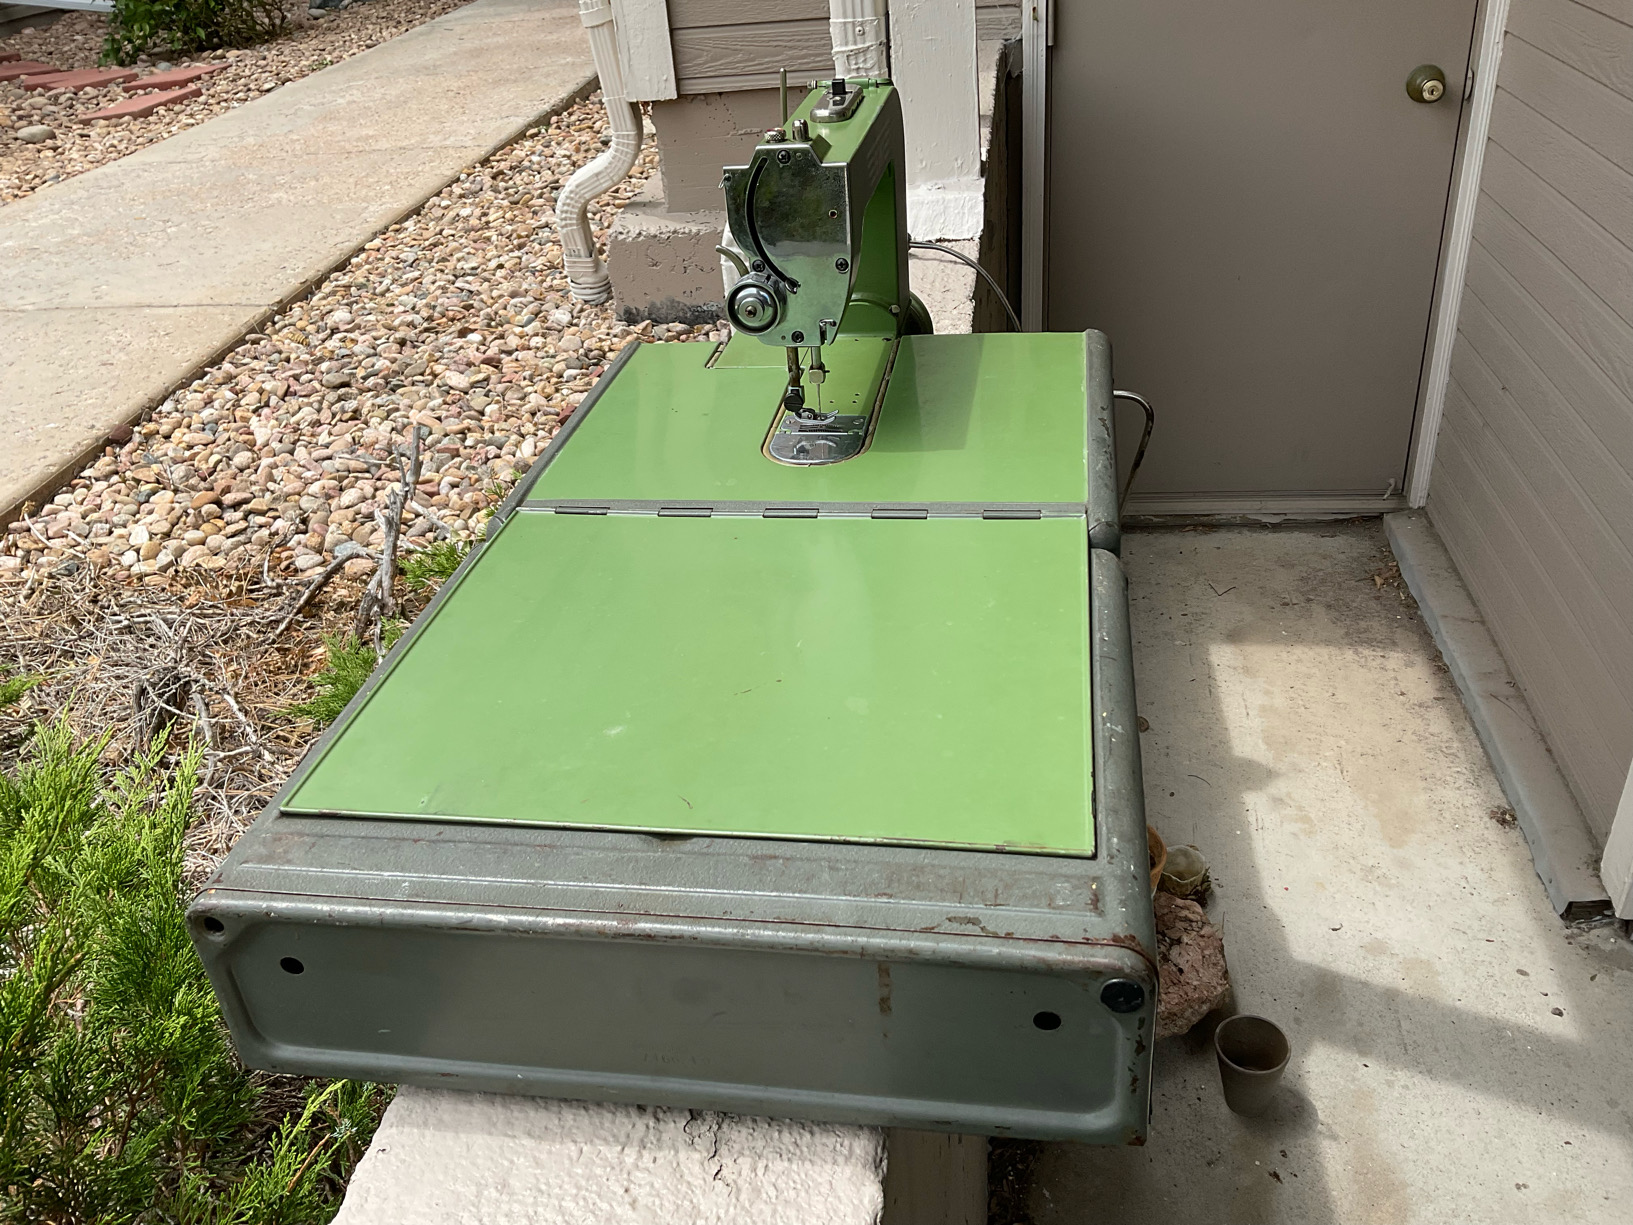
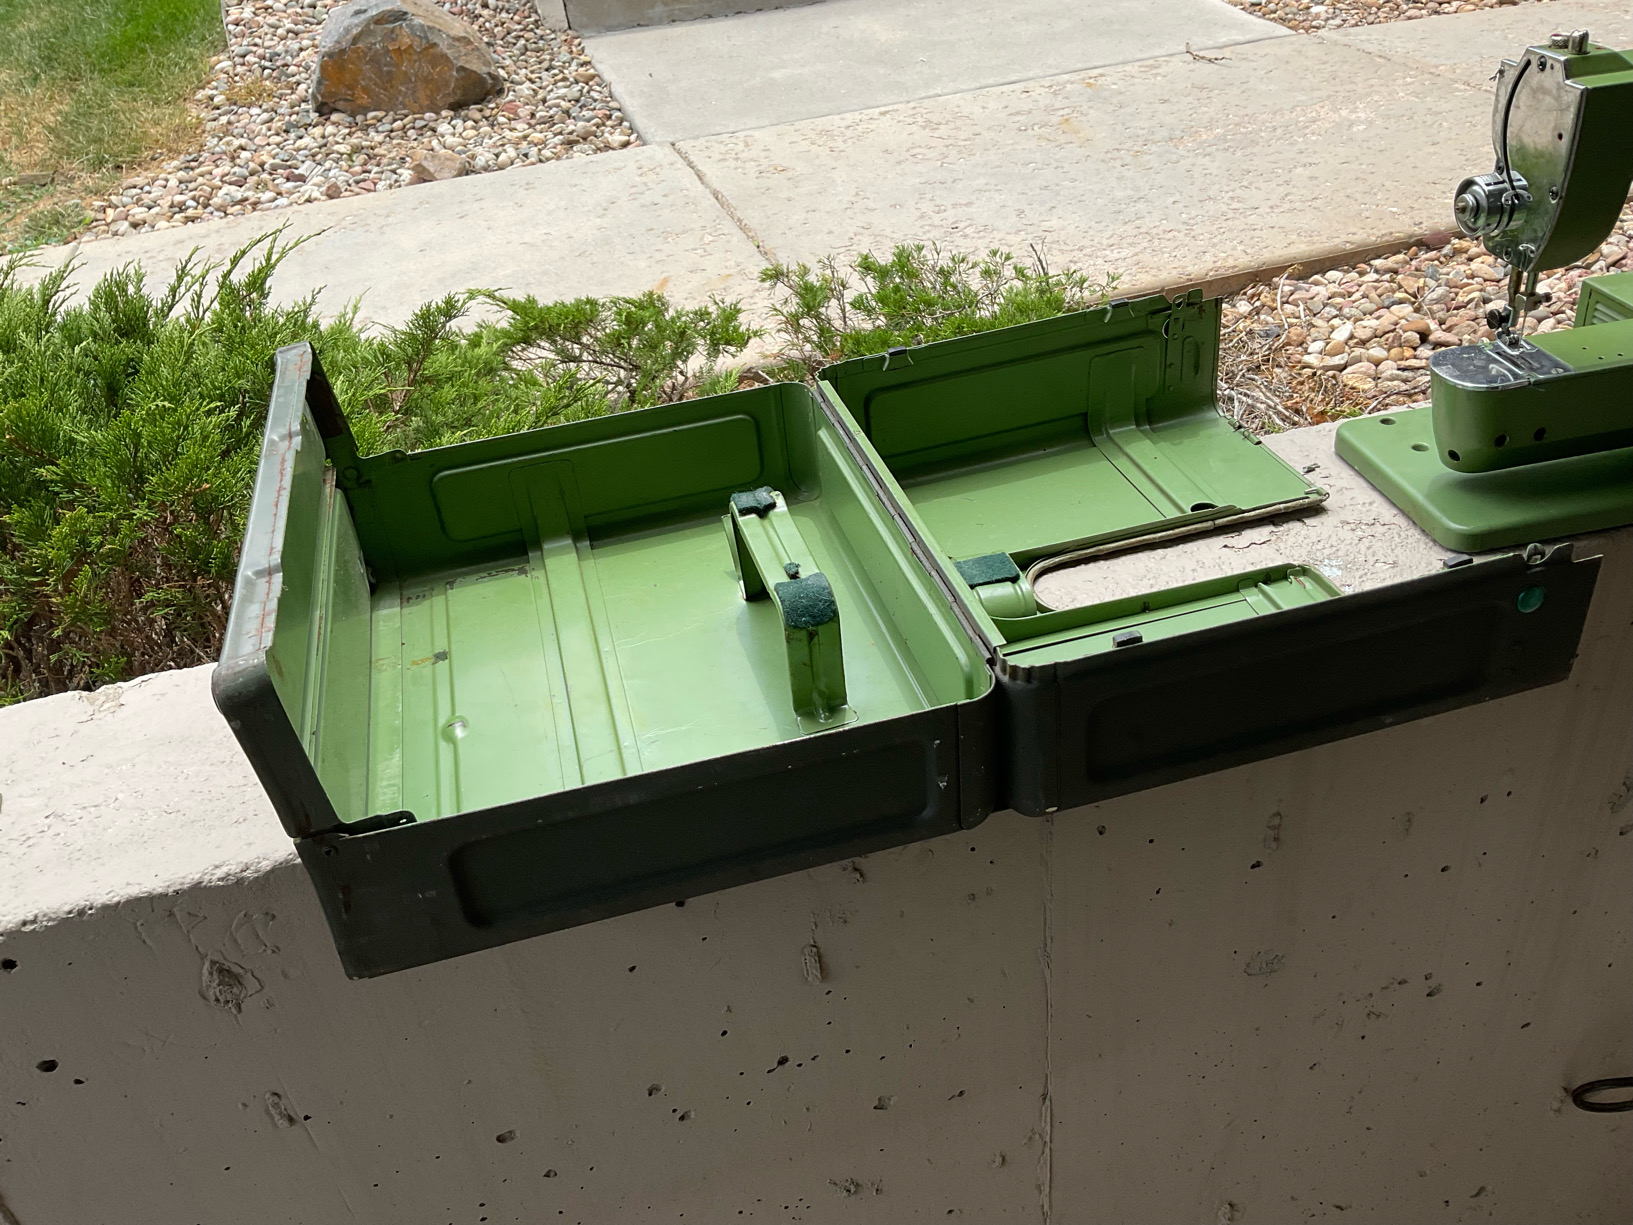
Not much for my own collecting, but I am living vicariously through a friend who is setting up a 15-90 into a treadle cabinet. There is also one of the Chinese shoe patching machines getting close to final set up.for use sewing emblem. patches onto shirts. The Patcher is interesting in its absolute simplicity, no finishing touches other than the green color. It is advised that YOU do fine sanding to smooth out the bobbin area and surrounding areas for smooth sewing! I wonder about the first sewing machines and how much hand finishing was done at the factory to produce functional machines the lady could use!
Looking forward to Saturday!
Dorothy
Thanh
Thanh has been busy with some interesting workshops, which he tells us about.
Greetings,
I hope everyone's summer is off to a good start.
I had been looking forward to Shakerag workshops since I registered at the beginning of the year and boy, it didn't disappoint. What a wonderful week! It's so inspiring to be among talented instructors, participants and staff members who all come together to create a community for one week up in the mountains of Tennessee. It's my happy place.
I took the Artful Shirt class with Katherine Tilton who is such a fun teacher with a great sense of humor. She spent the week showing us her approach to designing her own shirts, how to combine patterns/fabrics, and some construction techniques. What I really liked about her approach is that she allowed each student to build on their own creative direction. At the end of the week, each of us created 1-3 pieces that really reflected our own sense of style.
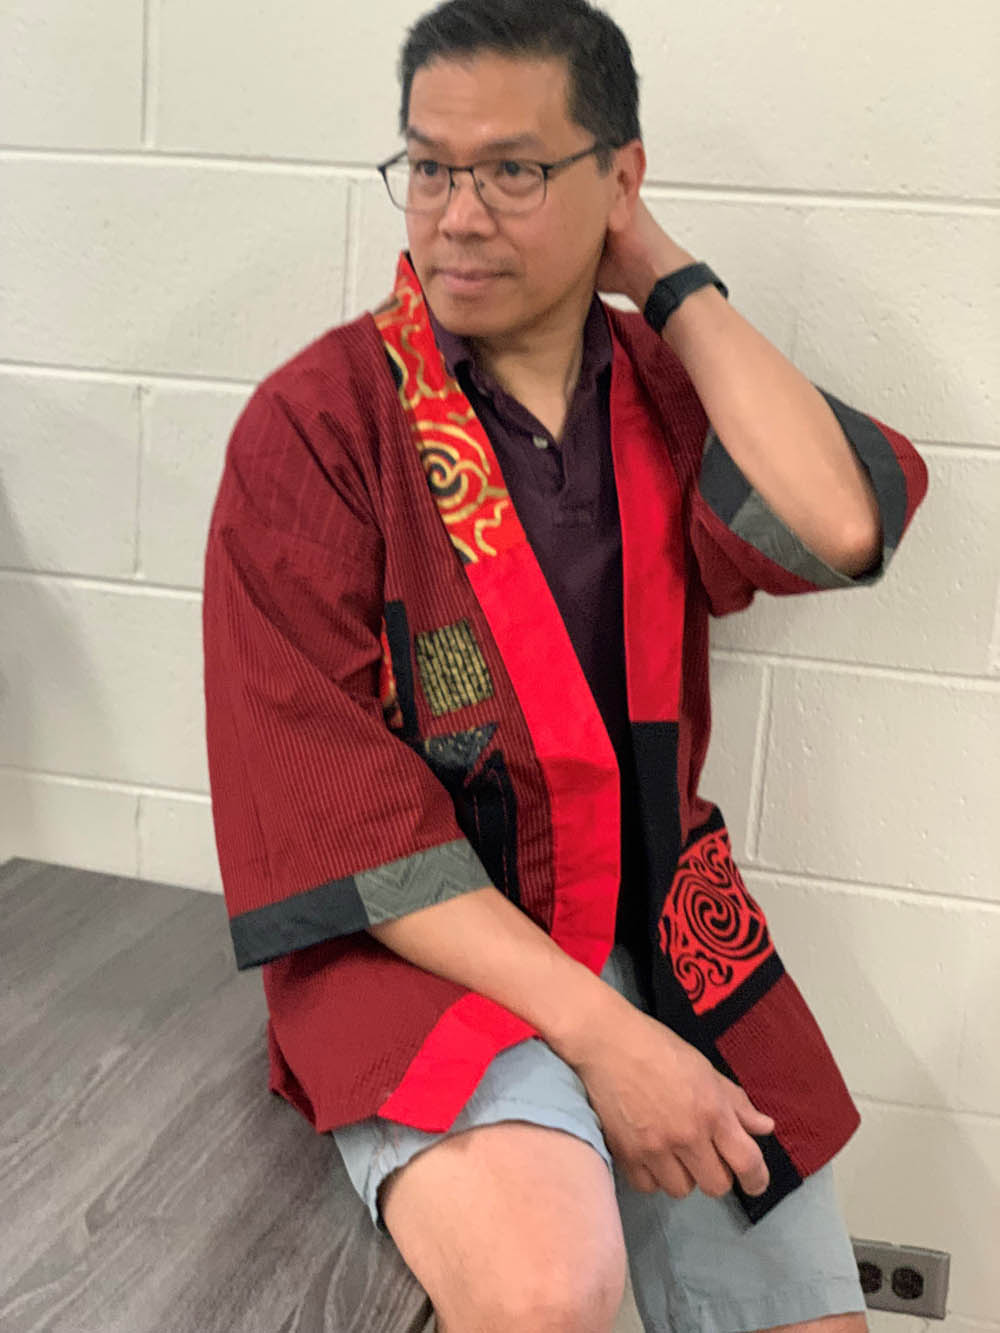
I spent most of the week making a Japanese happi. I chose the happi because the pattern contains simple, mostly rectangular shapes which gave me a blank canvas to use. I came with some ideas and vision of what I might do, but my final piece was very different from what I had imagined. I altered the pattern for fit and used a hand-woven Japanese cotton for the body and sleeve, adding different fabrics for the collar and sleeve bands. I also appliqued and hand stitched some shapes onto one side of the front panel.
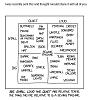
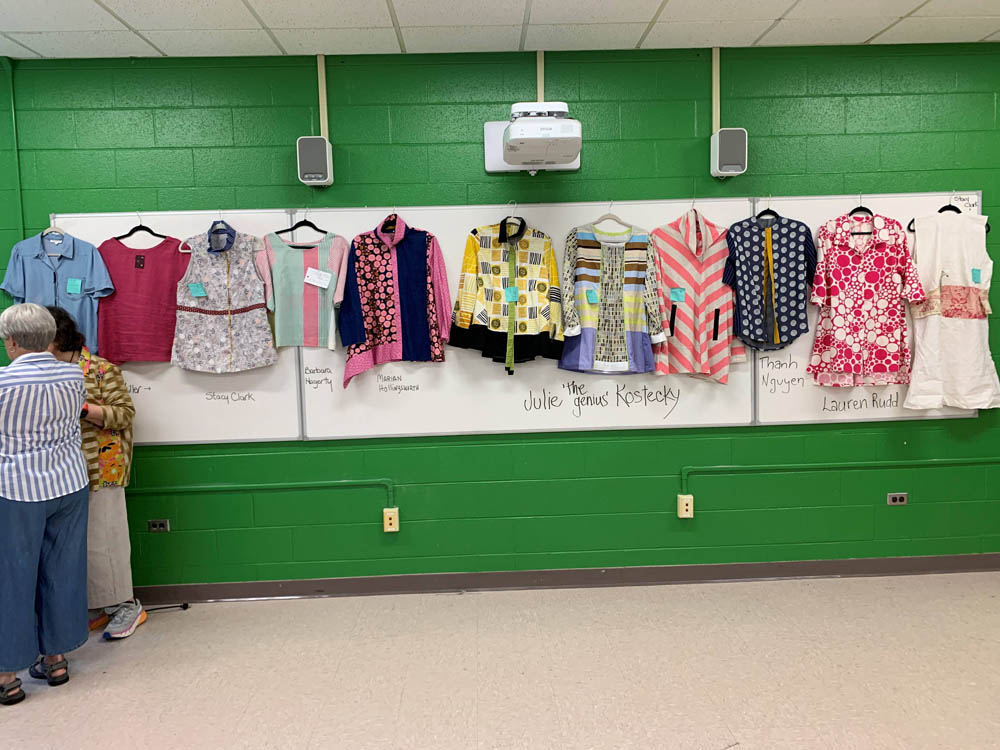
I created a short-sleeve, button down shirt for my second piece. I had sewn this pattern before, but this time I explored cutting up the pattern to combine different fabrics. I attached a picture which shows some of the class' work on the white board. My shirt is blue with large white dots and a gold placket. As you can see, I didn't get a chance to finish the shirt during class but did add the collar over the weekend.
For those who are curious, I sewed on the Necchi Lycia which was a joy to use. Lara, who took the class with me, used her Featherweight. She does a lot of piecing on it and takes that machine to her sewing group each week. It's become her favorite machine. I know because she's told me that "You can never have too many Featherweights".
While the workshop is done for this year, you make many connections with wonderful people. On our way back to Colorado, we stopped in Paducah Kentucky to visit a classmate. We only had a chance to stay a couple of hours before continuing our drive home. We had lunch and visited the charming downtown but we plan to visit the National Quilt museum the next time we're passing through.
One of this year's Shakerag instructors, Ana Maria Hernando is based in CO. She has a new project called Making a Mountain starting on July 14 at the Dairy Arts Center in Boulder. Participants can sign up in advance to help sew the piece together and she's asked Lara if she could borrow a couple of our sewing machines for people to use at the project. https://thedairy.org/making-a-mountain/
Looking ahead, the 2024 Shakerag Workshop lineup looks to be even more interesting for fiber arts:
Paula Kovarik | @yelowbrickstudio - Art Quilts (BTW, Paula has two pieces currently on display at the 39th Annual New Legacies: Contemporary Art Quilts exhibit up in Fort Collins)
Adrianna Aguirre | @threadtheorydesigns - Menswear Sewing
Arounna Khounnoraj | @bookhou - Stitching/Printing Embroidery
and for all the knitters out there, Shakerag holds a 3 or 4 day knitting camp to kick off the summer sessions. Next year's knitting weekend showcases "Knitting Getaway" with Ann and Kay of Modern Daily Knitting
That's all from Shakerag. I may report on the Dairy Arts exhibit next month if I get a chance to participate.
Thanh


In Closing
We appreciate not only the contributions of our members, but to the regular readership we have as well. Thanks to everyone.
Have a safe and enjoyable 4th of July.
We have a little more abbreviated presentation this month, with several of our members doing 4th of July and mid-summer activities. We did however receive notes from Courtney, Dorothy and Thanh. We'll start with Courtney.
Courtney
Courtney, one of our members who lives in northern Colorado, sent a few notes about his activities:
Dear All,
Sewing machines have been a bit slow around here this month. I did acquire an EverSewn Celine for $46 that I have been playing with off and on. It is a modern computer-based machine. Since it has all the bells and whistles and I generally work on vintage and antique machines, I thought it would give me some experience with modern machines. I do have the home manual and the repair manual for the machine. Boy, do I like the ruggedness of the older machines.
One of the highlights of the month was getting to see and talk to Dorothy in person! There was a big shop hop here in northern Colorado, so I met her at the local quilting store, and we walked over and had lunch nearby. Lunch was OK but the conversation was the GREAT! I didn't participate in the shop hop because I have been working hard trying to finish some other quilts. I think I will have some to show on Saturday.
An old teacher friend ran across some of the Pathe movie shorts and sent me links:
From about 1934: https://www.youtube.com/watch?v=z8iRmYlpKHE
From about 1960: https://www.youtube.com/watch?v=paX-gwtSTIM
Unfortunately, Pathe was more into entertainment than accuracy. The following are much better:
The History Guy: https://www.youtube.com/watch?v=3144SpUGbng
The Secret Life of Sewing Machines: https://www.youtube.com/watch?v=8lwI4TSKM3Y
Oh, I almost forgot. I have been asked to do a Featherweight Maintenance class on July 29, at the Quilters Corner in Erie, CO. I think the last time I taught the class was 8 or 9 years ago, so I am pretty excited.
Courtney
Dorothy
Dorothy, our member having the most experience with commercial sewing, also sent notes about what she's been doing:
Hello!
These months sure fly by fast!
I participated in the NoCo Shop Hop, for 5 of the participating 11 shops. All the shops I visited have Wonderful fabrics and are unique. I have to admit driving has lost some thrill and I stopped. I will order the other blocks after the first of July.
A Good part of one day was meeting Courtney in Greeley! Talked sewing machines over lunch. Great time!
Not much for my own collecting, but I am living vicariously through a friend who is setting up a 15-90 into a treadle cabinet. There is also one of the Chinese shoe patching machines getting close to final set up.for use sewing emblem. patches onto shirts. The Patcher is interesting in its absolute simplicity, no finishing touches other than the green color. It is advised that YOU do fine sanding to smooth out the bobbin area and surrounding areas for smooth sewing! I wonder about the first sewing machines and how much hand finishing was done at the factory to produce functional machines the lady could use!
Looking forward to Saturday!
Dorothy
Thanh
Thanh has been busy with some interesting workshops, which he tells us about.
Greetings,
I hope everyone's summer is off to a good start.
I had been looking forward to Shakerag workshops since I registered at the beginning of the year and boy, it didn't disappoint. What a wonderful week! It's so inspiring to be among talented instructors, participants and staff members who all come together to create a community for one week up in the mountains of Tennessee. It's my happy place.
I took the Artful Shirt class with Katherine Tilton who is such a fun teacher with a great sense of humor. She spent the week showing us her approach to designing her own shirts, how to combine patterns/fabrics, and some construction techniques. What I really liked about her approach is that she allowed each student to build on their own creative direction. At the end of the week, each of us created 1-3 pieces that really reflected our own sense of style.
I spent most of the week making a Japanese happi. I chose the happi because the pattern contains simple, mostly rectangular shapes which gave me a blank canvas to use. I came with some ideas and vision of what I might do, but my final piece was very different from what I had imagined. I altered the pattern for fit and used a hand-woven Japanese cotton for the body and sleeve, adding different fabrics for the collar and sleeve bands. I also appliqued and hand stitched some shapes onto one side of the front panel.
I created a short-sleeve, button down shirt for my second piece. I had sewn this pattern before, but this time I explored cutting up the pattern to combine different fabrics. I attached a picture which shows some of the class' work on the white board. My shirt is blue with large white dots and a gold placket. As you can see, I didn't get a chance to finish the shirt during class but did add the collar over the weekend.
For those who are curious, I sewed on the Necchi Lycia which was a joy to use. Lara, who took the class with me, used her Featherweight. She does a lot of piecing on it and takes that machine to her sewing group each week. It's become her favorite machine. I know because she's told me that "You can never have too many Featherweights".
While the workshop is done for this year, you make many connections with wonderful people. On our way back to Colorado, we stopped in Paducah Kentucky to visit a classmate. We only had a chance to stay a couple of hours before continuing our drive home. We had lunch and visited the charming downtown but we plan to visit the National Quilt museum the next time we're passing through.
One of this year's Shakerag instructors, Ana Maria Hernando is based in CO. She has a new project called Making a Mountain starting on July 14 at the Dairy Arts Center in Boulder. Participants can sign up in advance to help sew the piece together and she's asked Lara if she could borrow a couple of our sewing machines for people to use at the project. https://thedairy.org/making-a-mountain/
Looking ahead, the 2024 Shakerag Workshop lineup looks to be even more interesting for fiber arts:
Paula Kovarik | @yelowbrickstudio - Art Quilts (BTW, Paula has two pieces currently on display at the 39th Annual New Legacies: Contemporary Art Quilts exhibit up in Fort Collins)
Adrianna Aguirre | @threadtheorydesigns - Menswear Sewing
Arounna Khounnoraj | @bookhou - Stitching/Printing Embroidery
and for all the knitters out there, Shakerag holds a 3 or 4 day knitting camp to kick off the summer sessions. Next year's knitting weekend showcases "Knitting Getaway" with Ann and Kay of Modern Daily Knitting
That's all from Shakerag. I may report on the Dairy Arts exhibit next month if I get a chance to participate.
Thanh
In Closing
We appreciate not only the contributions of our members, but to the regular readership we have as well. Thanks to everyone.
Have a safe and enjoyable 4th of July.
08-02-2023, 07:39 AM
#349
Super Member
Join Date: Mar 2015
Location: Denver, CO
Posts: 4,305
Late summer in Colorado has seen the disappearance of our unusually wet start to summer and has given way to the typically hot weather that one would expect, perhaps even unusually warm this year.
For our August posting, we have notes and pictures from several of our members. We'll start with James.
James
James tells us about a recent acquisition that he made:
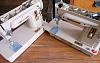
After a bit of time without any new acquisitions, I noticed a nicely priced Elna Grasshopper with a case on eBay at a buy it now price. It did not come with any accessories but I had purchased another caseless Elna Grasshopper that included an original tray with many accessories several years ago. The only real issue with the recent purchase is that the light housing is broken. I have not tested to see if the bulb socket still works since it did not come with a bulb. Even if it does not work, I have six of the original Jansco LED lights from IKEA that will be perfect. (The lights were for a macrophotography shooting project hence the number of lamps!) The little gaskets that help hold the sewing machine to the case are a bit crumbled in spots because of age. I am thinking I can use backer rod to reinforce the crumbling gaskets.
This machine dates from May 1952 and runs more smoothly than my prior Grasshopper. I will be placing the accessory tray with feet and the speed reducer gear with the case so it will be mostly complete except for the oil cans which I do not have. In any case I now have an example of a case that I can try to duplicate with some other material for the caseless Elna.
James

... to be continued
For our August posting, we have notes and pictures from several of our members. We'll start with James.
James
James tells us about a recent acquisition that he made:
After a bit of time without any new acquisitions, I noticed a nicely priced Elna Grasshopper with a case on eBay at a buy it now price. It did not come with any accessories but I had purchased another caseless Elna Grasshopper that included an original tray with many accessories several years ago. The only real issue with the recent purchase is that the light housing is broken. I have not tested to see if the bulb socket still works since it did not come with a bulb. Even if it does not work, I have six of the original Jansco LED lights from IKEA that will be perfect. (The lights were for a macrophotography shooting project hence the number of lamps!) The little gaskets that help hold the sewing machine to the case are a bit crumbled in spots because of age. I am thinking I can use backer rod to reinforce the crumbling gaskets.
This machine dates from May 1952 and runs more smoothly than my prior Grasshopper. I will be placing the accessory tray with feet and the speed reducer gear with the case so it will be mostly complete except for the oil cans which I do not have. In any case I now have an example of a case that I can try to duplicate with some other material for the caseless Elna.
James

... to be continued
08-02-2023, 07:47 AM
#350
Super Member
Join Date: Mar 2015
Location: Denver, CO
Posts: 4,305
Courtney
Courtney tells us about an interesting machine that he got, as well as a workshop for Featherweights he is putting on in northern Colorado:
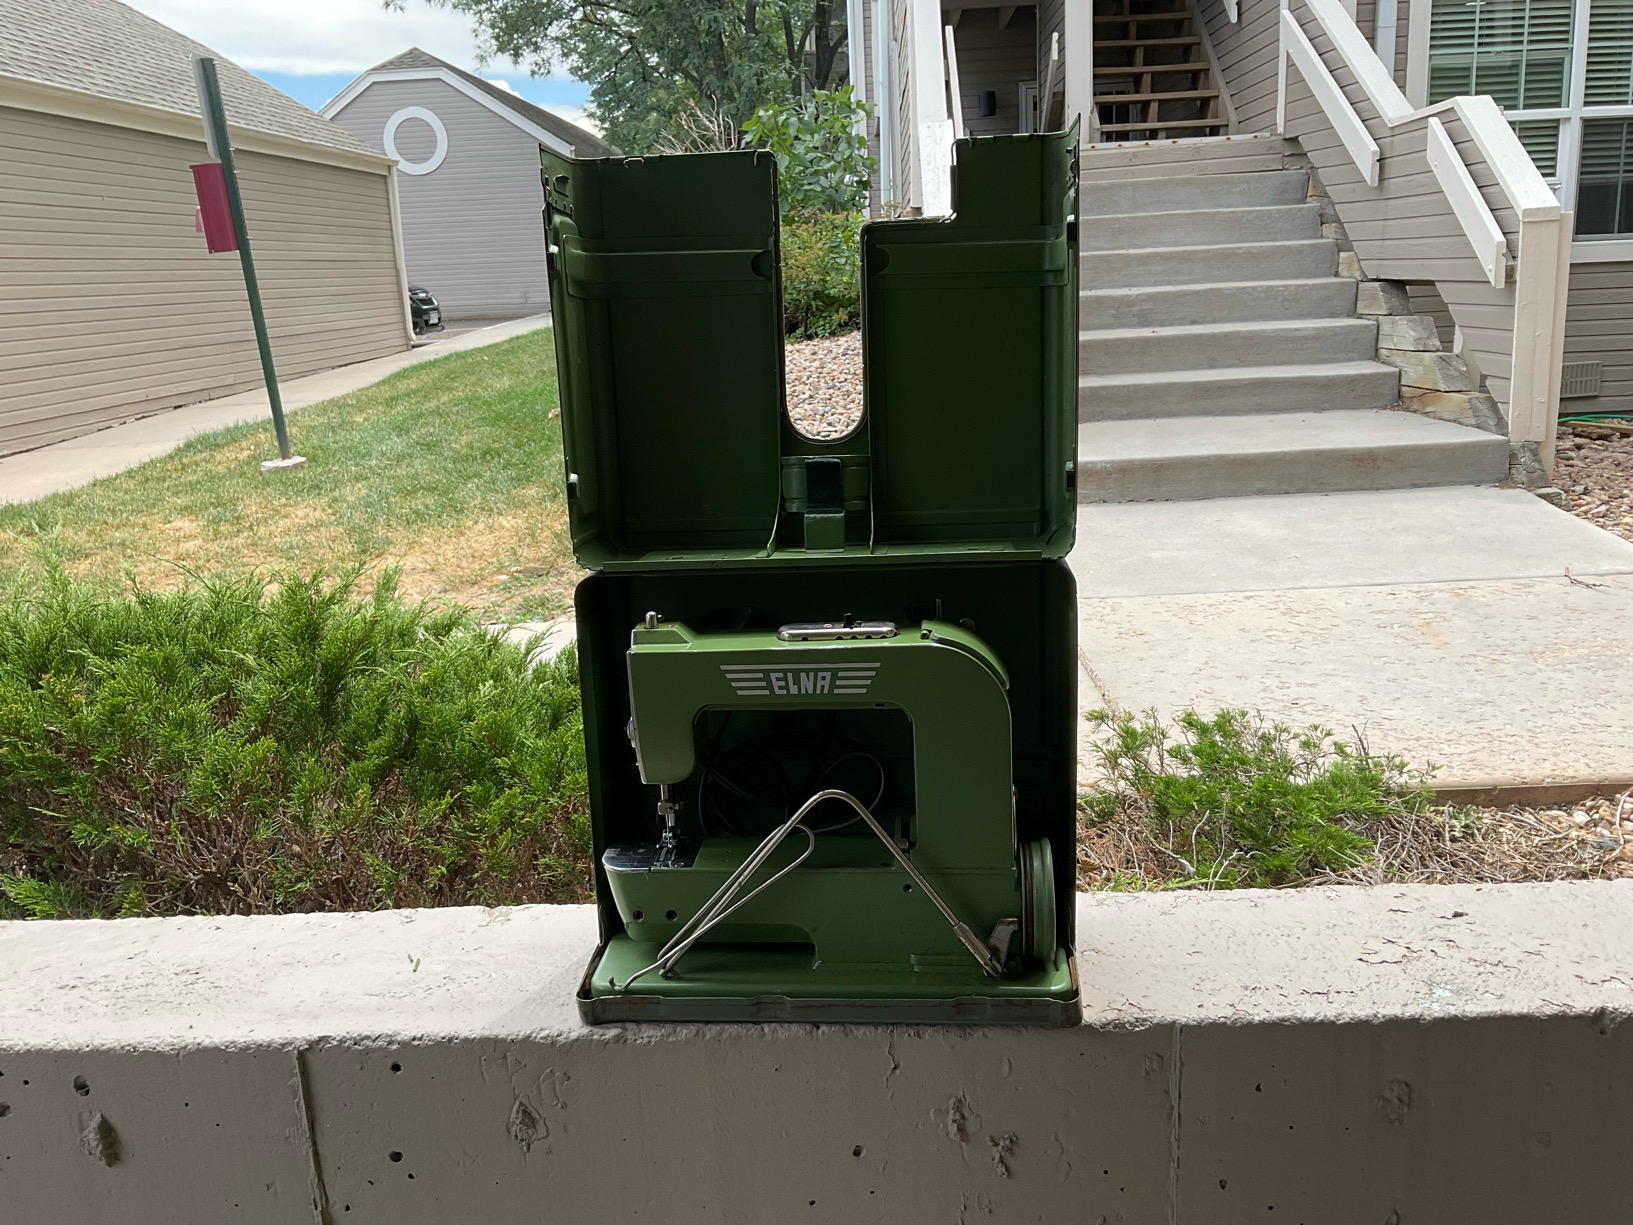
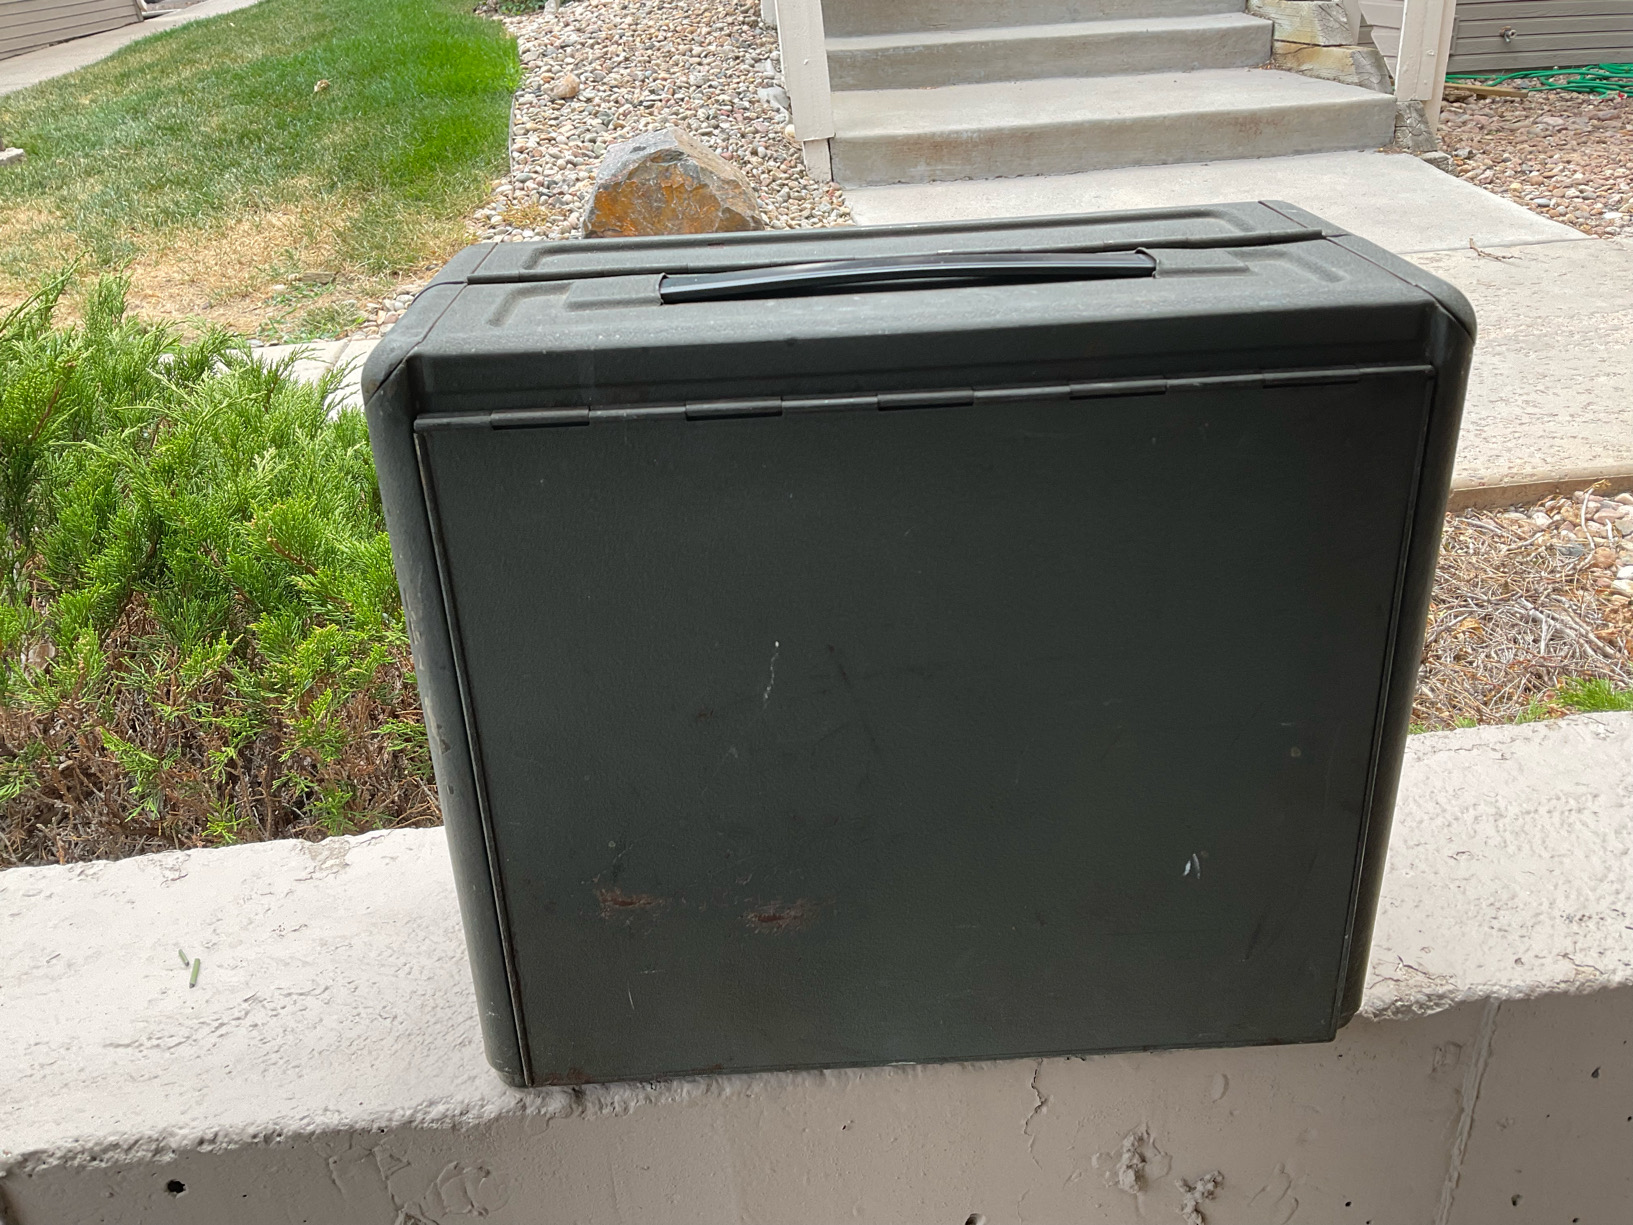
This month has been busy in a number of areas. I obtained a new (for me) machine. It is an Elna Elnita ZZ. It is from about 1980. It is much like an Elna Lotus but does not have the fold out (?)petals. I did have to give it a good oiling as it ran nicely but did not zigzag. A bit of time spent on lubricating the zigzag area got it back to sewing nicely. It also needed a bit of tension adjustment both upper and lower. It only sews a straight stitch and a zigzag but is smooth and a very nifty machine. The Elnita did not have a cover so when I was at a garage sale a couple of weeks ago I picked up some very pretty pillow covers (2 for a dollar) and made a couple of attractive dust covers, one for the Elnita and one for my Lotus. (see picture). At only 11 pounds it still has a reasonable harp space of 6.25 inches so it would be the ideal machine to take to Thanh's summer camp!
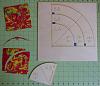
Our downtown library has just reopened in a new building. It is very large and nice. It also has maker spaces where you can weave, sew, do woodworking, and use a 3D printer and a Laser cutter. I spent some time working on my Drunkards Path template. Fortunately an ex-student of mine was working at the library to help me get my design from CAD to Adobe Illustrator so the Laser would take it. It will cut a number of materials. I chose wood because it was easy and available, although I may return and have some cut out of plastic. I originally designed the 4" template to cut 5" charm squares with a minimum of waste. From a 42 piece charm pack I can get 42 drunkards path squares which are 4.5 inches pieced or 4 inches finished. The picture shows some 5" charm squares and one cut from my templates. It also shows the amount of waste after the cutting.(see picture) Of course the templates can be used with fabric squares larger that 5 inches as long as you want a 4 inch radius. While I was at it I also designed 6 inch radius templates and 8 inch radius templates and had them all laser cut at the same time.
Finally, I have been spending a lot of time trying to get ready for the Featherweight Maintenance class (now two classes) at A Quilter's Corner in Erie. On Saturday the 29th I had a full class of 10. Attendees lived from Ft. Collins to Erie with a majority from the Longmont area. The Class was supposed to run from 10 to 12:30 but we went about a half hour over (I tend to talk too much.) I had taught a couple of similar classes about 7 or 8 years ago before the pandemic. The machines everyone brought to this class seemed to be in much better condition. The gears were not packed with some strange red grease, all of the screws were reasonably easy undo, none of the belts needed replacing, and the electrical cords were not dried and scary. It was a great group and lots of fun. My biggest concern was motor lubricant. I am not convinced that the white Singer lubricant now available is good for the motor. My informal poll of you guys came back evenly distributed between Sew Retro grease from the Featherweight Shop and Nova Montgomery's motor lubricant. I ordered both but the Sew Retro grease has not arrived yet so we used Nova's motor lubricant. I don't know if one is that much better than the other but I am sure either is much better than the white stuff from Singer. I plan on doing a couple of experiments myself. All in all, I think things went well and I am looking forward to the next class in a couple of weeks on the 13th.
Have a great month,
Courtney

Thanh
Thanh sent us the following note about his activities over the last month:
A short report this month.
In the middle of July, we went to the Dairy Arts Center in Boulder to participate in Anna Maria's art exhibit. During our session there were four of us plus the artist sewing long strands of ruffle onto nylon straps. After one of us finished a strand, we all cheered as the sewist threw the strand into the pile in the middle. The final exhibit is the mountain of sewn material piled up in the gallery over the two week sessions plus a timelapse video of all the participants is available on the Dairy Arts website. You can see me on the Elna Grasshopper and my wife on her Featherweight. Overall, it was a fun experience to meet new people and to help with the exhibit.
Other than that, I did pick up a Bernette Funlock 09DCC coverstitch machine to start experimenting with knits and other stretchy fabrics.
Oh, and I started reading The Road to Roswell. Maybe a book review will be in next month's report.
Dorothy
Dorothy says she has been away from sewing recently. In her words:
Hello!
I have looked at my sewing machine. Other than that? Nothing.
Tuesday starts the International Bra Sewing Bee and I am in a sew along with fit emphasis. Should be able to see a variety of fits and corrections!
Have a Great August!
Dorothy
In Closing
It is always a pleasure to post the activities of our multi-talented members. We want to thank the people who read what we post, as well.
Courtney tells us about an interesting machine that he got, as well as a workshop for Featherweights he is putting on in northern Colorado:
This month has been busy in a number of areas. I obtained a new (for me) machine. It is an Elna Elnita ZZ. It is from about 1980. It is much like an Elna Lotus but does not have the fold out (?)petals. I did have to give it a good oiling as it ran nicely but did not zigzag. A bit of time spent on lubricating the zigzag area got it back to sewing nicely. It also needed a bit of tension adjustment both upper and lower. It only sews a straight stitch and a zigzag but is smooth and a very nifty machine. The Elnita did not have a cover so when I was at a garage sale a couple of weeks ago I picked up some very pretty pillow covers (2 for a dollar) and made a couple of attractive dust covers, one for the Elnita and one for my Lotus. (see picture). At only 11 pounds it still has a reasonable harp space of 6.25 inches so it would be the ideal machine to take to Thanh's summer camp!
Our downtown library has just reopened in a new building. It is very large and nice. It also has maker spaces where you can weave, sew, do woodworking, and use a 3D printer and a Laser cutter. I spent some time working on my Drunkards Path template. Fortunately an ex-student of mine was working at the library to help me get my design from CAD to Adobe Illustrator so the Laser would take it. It will cut a number of materials. I chose wood because it was easy and available, although I may return and have some cut out of plastic. I originally designed the 4" template to cut 5" charm squares with a minimum of waste. From a 42 piece charm pack I can get 42 drunkards path squares which are 4.5 inches pieced or 4 inches finished. The picture shows some 5" charm squares and one cut from my templates. It also shows the amount of waste after the cutting.(see picture) Of course the templates can be used with fabric squares larger that 5 inches as long as you want a 4 inch radius. While I was at it I also designed 6 inch radius templates and 8 inch radius templates and had them all laser cut at the same time.
Finally, I have been spending a lot of time trying to get ready for the Featherweight Maintenance class (now two classes) at A Quilter's Corner in Erie. On Saturday the 29th I had a full class of 10. Attendees lived from Ft. Collins to Erie with a majority from the Longmont area. The Class was supposed to run from 10 to 12:30 but we went about a half hour over (I tend to talk too much.) I had taught a couple of similar classes about 7 or 8 years ago before the pandemic. The machines everyone brought to this class seemed to be in much better condition. The gears were not packed with some strange red grease, all of the screws were reasonably easy undo, none of the belts needed replacing, and the electrical cords were not dried and scary. It was a great group and lots of fun. My biggest concern was motor lubricant. I am not convinced that the white Singer lubricant now available is good for the motor. My informal poll of you guys came back evenly distributed between Sew Retro grease from the Featherweight Shop and Nova Montgomery's motor lubricant. I ordered both but the Sew Retro grease has not arrived yet so we used Nova's motor lubricant. I don't know if one is that much better than the other but I am sure either is much better than the white stuff from Singer. I plan on doing a couple of experiments myself. All in all, I think things went well and I am looking forward to the next class in a couple of weeks on the 13th.
Have a great month,
Courtney

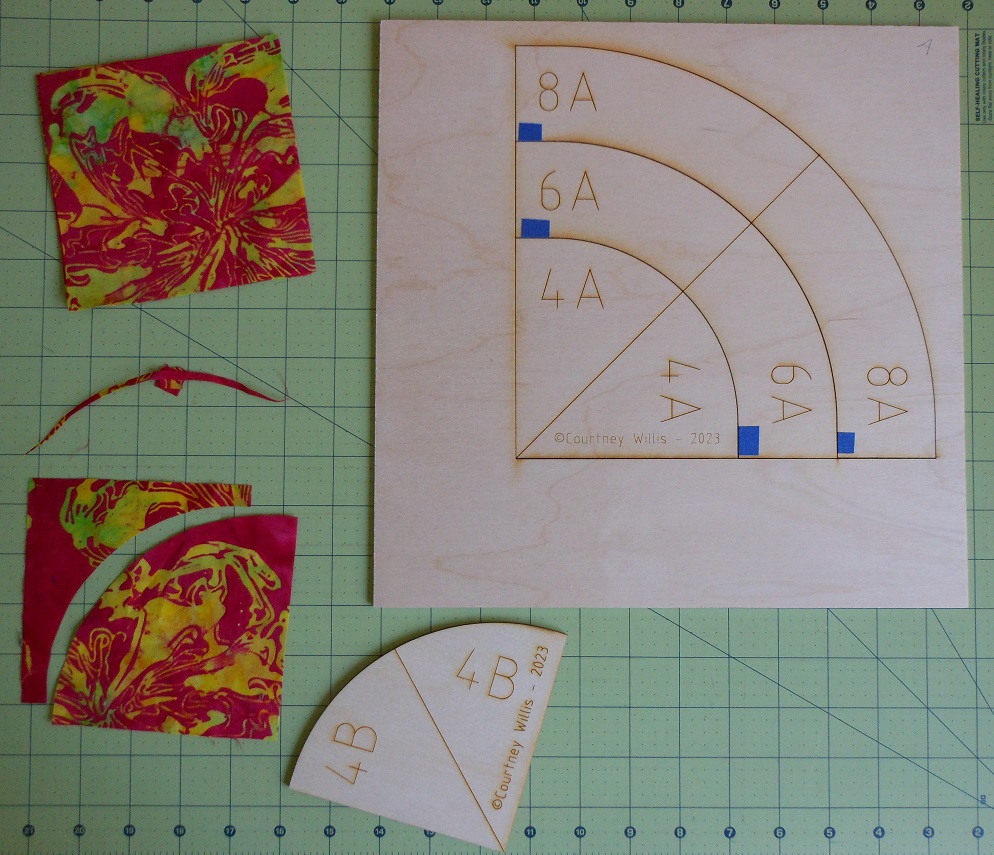
Thanh
Thanh sent us the following note about his activities over the last month:
A short report this month.
In the middle of July, we went to the Dairy Arts Center in Boulder to participate in Anna Maria's art exhibit. During our session there were four of us plus the artist sewing long strands of ruffle onto nylon straps. After one of us finished a strand, we all cheered as the sewist threw the strand into the pile in the middle. The final exhibit is the mountain of sewn material piled up in the gallery over the two week sessions plus a timelapse video of all the participants is available on the Dairy Arts website. You can see me on the Elna Grasshopper and my wife on her Featherweight. Overall, it was a fun experience to meet new people and to help with the exhibit.
Other than that, I did pick up a Bernette Funlock 09DCC coverstitch machine to start experimenting with knits and other stretchy fabrics.
Oh, and I started reading The Road to Roswell. Maybe a book review will be in next month's report.
Dorothy
Dorothy says she has been away from sewing recently. In her words:
Hello!
I have looked at my sewing machine. Other than that? Nothing.
Tuesday starts the International Bra Sewing Bee and I am in a sew along with fit emphasis. Should be able to see a variety of fits and corrections!
Have a Great August!
Dorothy
In Closing
It is always a pleasure to post the activities of our multi-talented members. We want to thank the people who read what we post, as well.

Thread
Thread Starter
Forum
Replies
Last Post
sewcrazygirl
General Chit-Chat (non-quilting talk)
10
04-21-2011 08:51 PM
