
2015--50 Fabulous Paper-Pieced Stars BOW
 04-13-2015, 05:19 PM
#131
Super Member

Join Date: Jul 2013
Location: South Dakota
Posts: 8,151
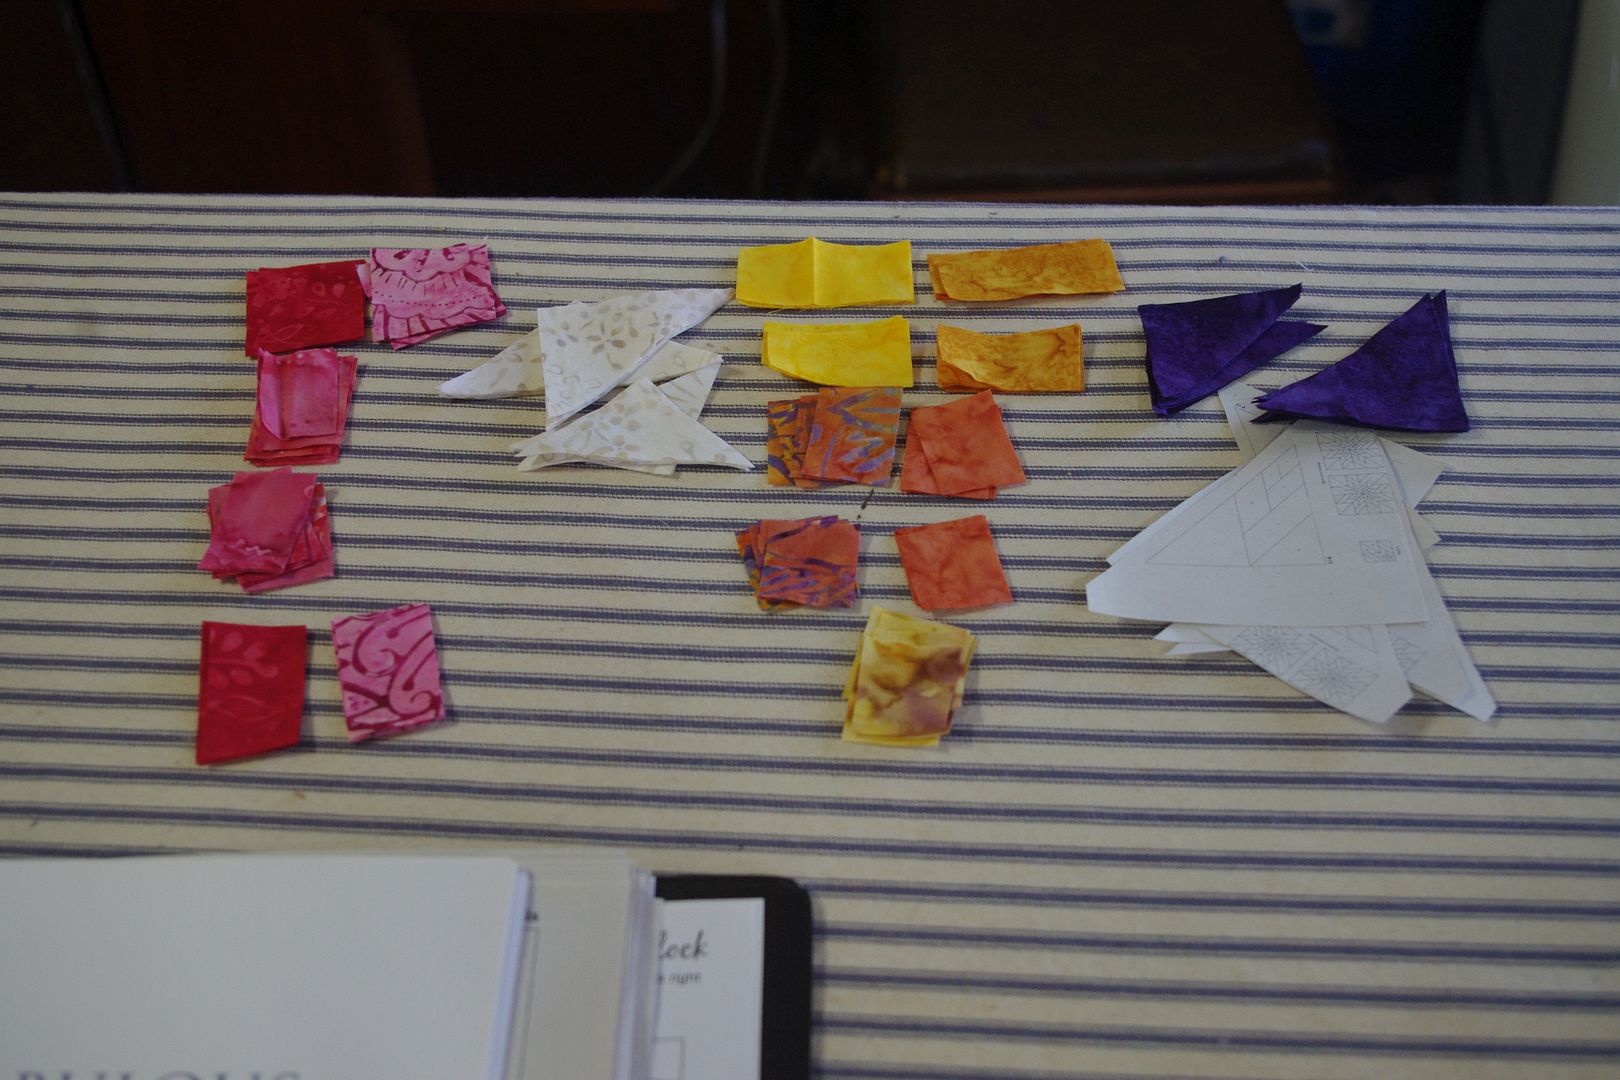
DH and I went on a mini-vacation over the weekend. Visited some friends and spent a few hours (and $$$) at Missouri Star Quilt Company. Took today off work to rest up - and sewed up a few more 4" blocks.
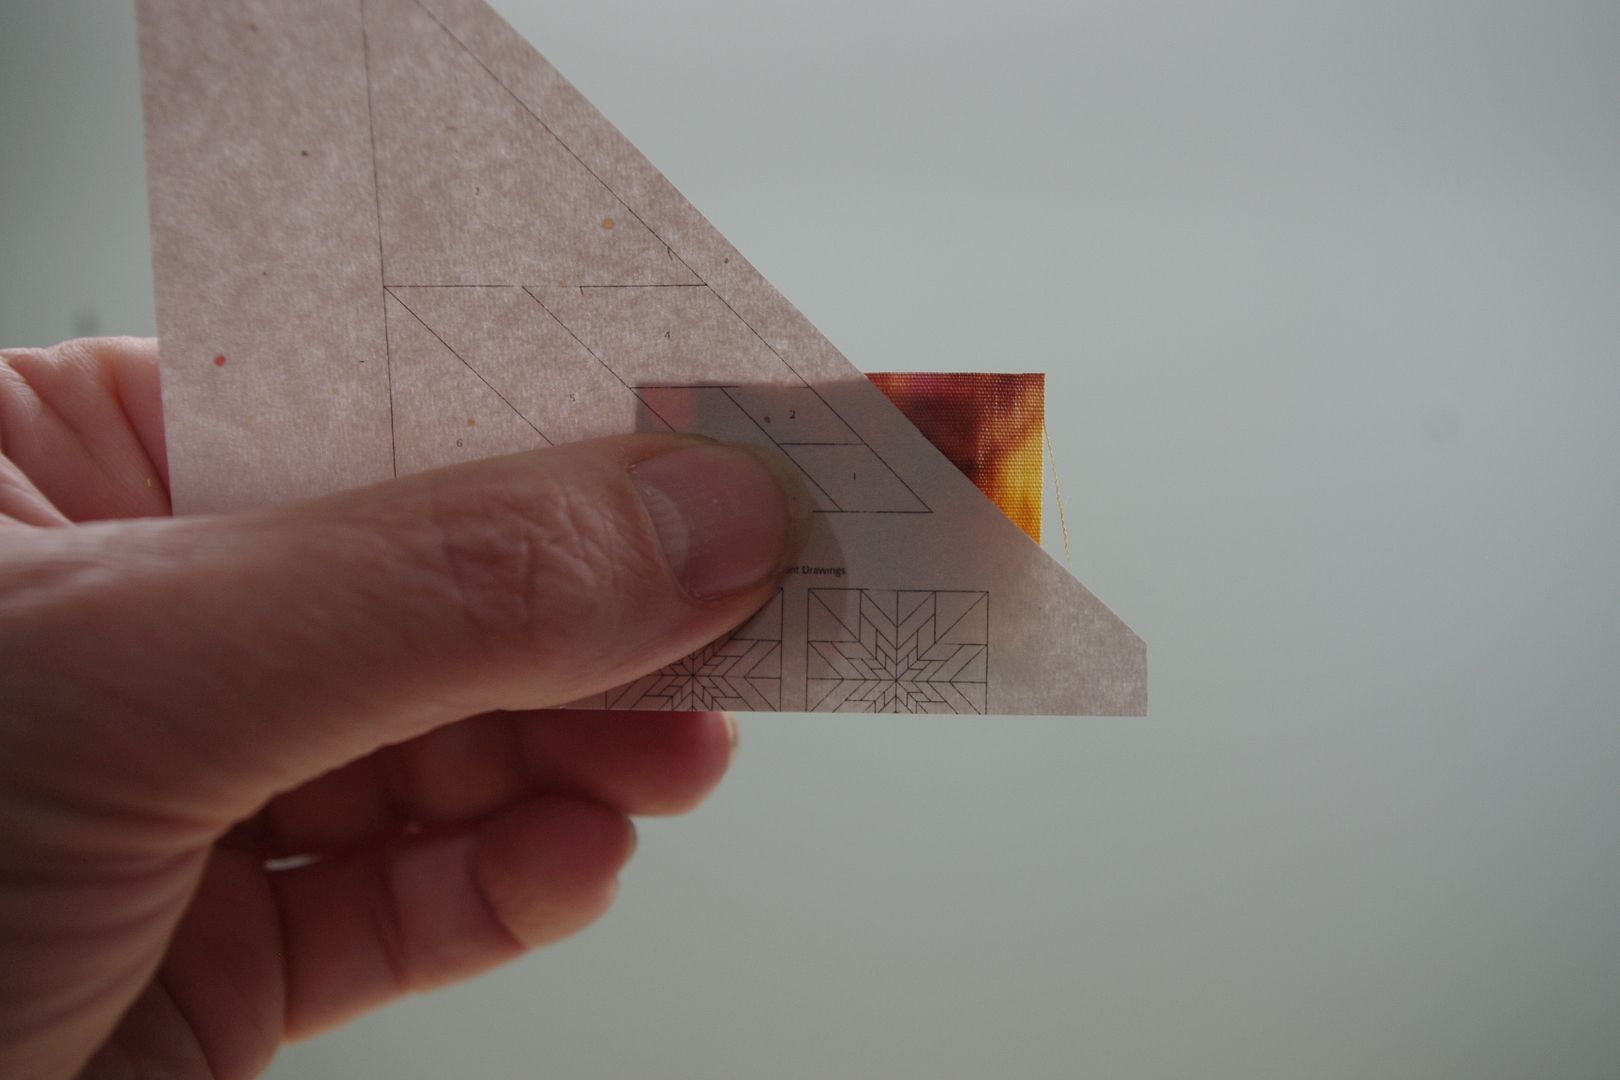
I'm using the same paper I use for the big blocks - just copied at 33%
When I figure the fabric sizes, I measure using the seam line between the piece and the one before, and then figure a rectangle, making sure to add the 1/4" seam allowance - always going up to the next 1/4" total measurement. With these little pieces, I find it's easier to have a bit extra so I can be a bit sloppier with lining them up.
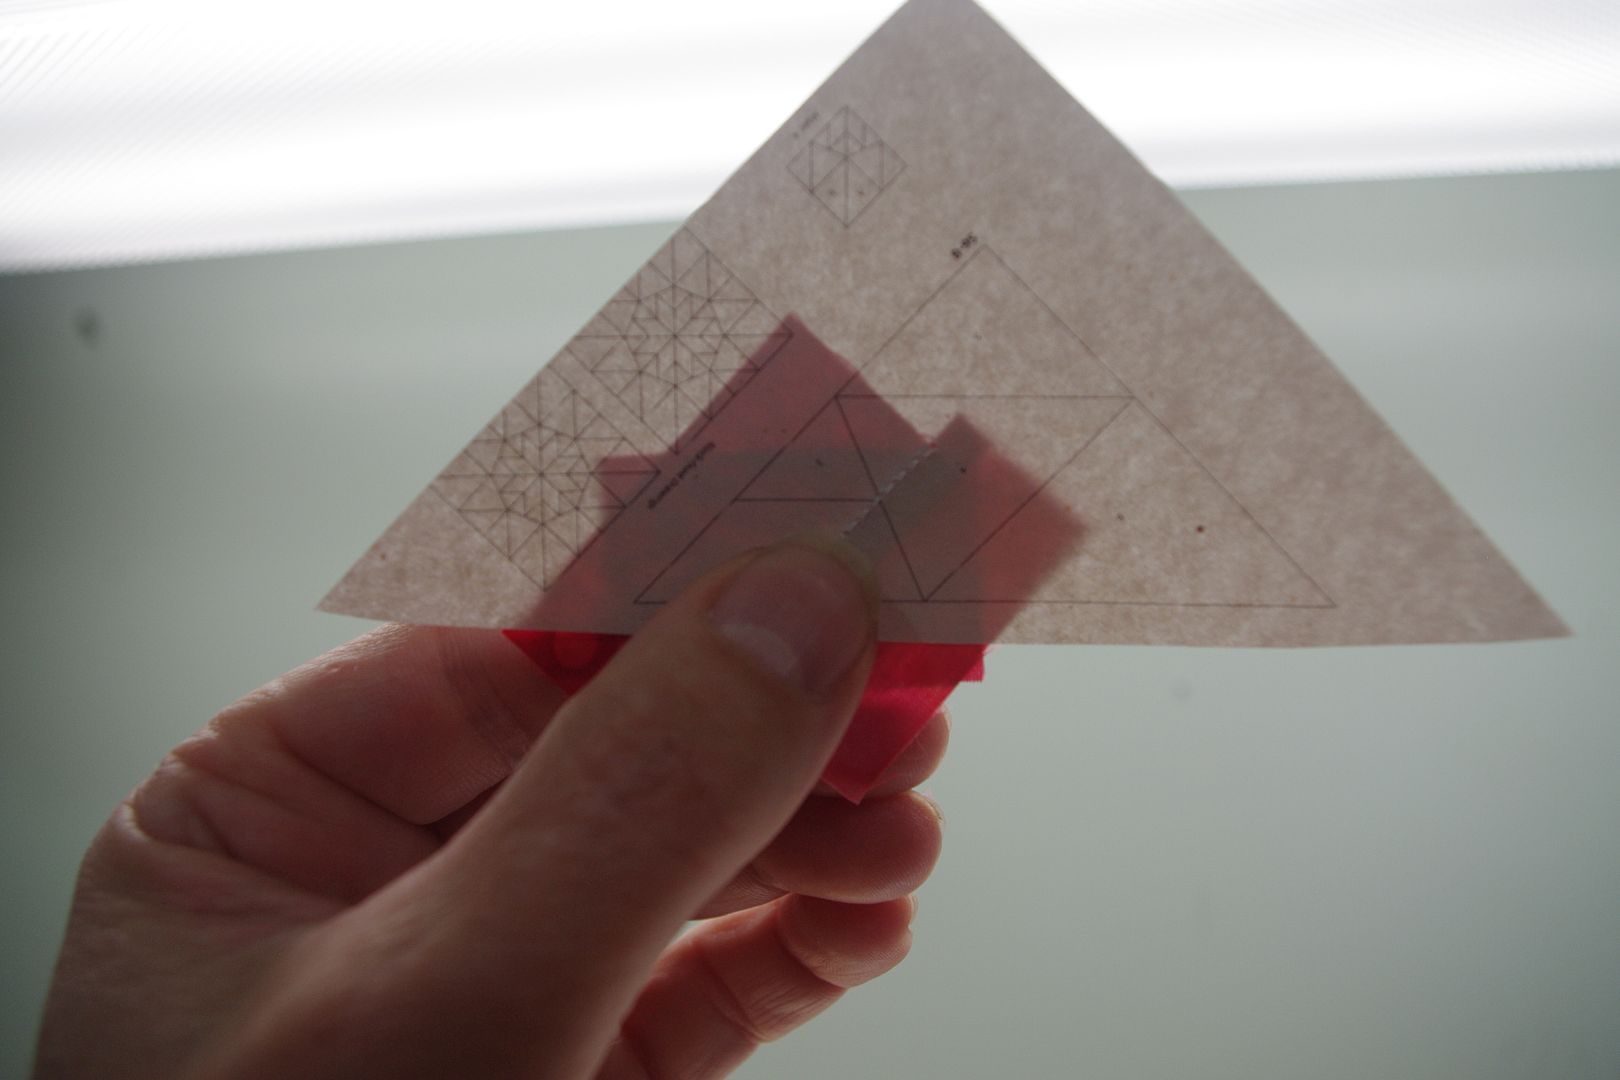
I line up 1 and 2 pieces, holding the paper up to my sewing light so I can see where things are, then put them down and sew.
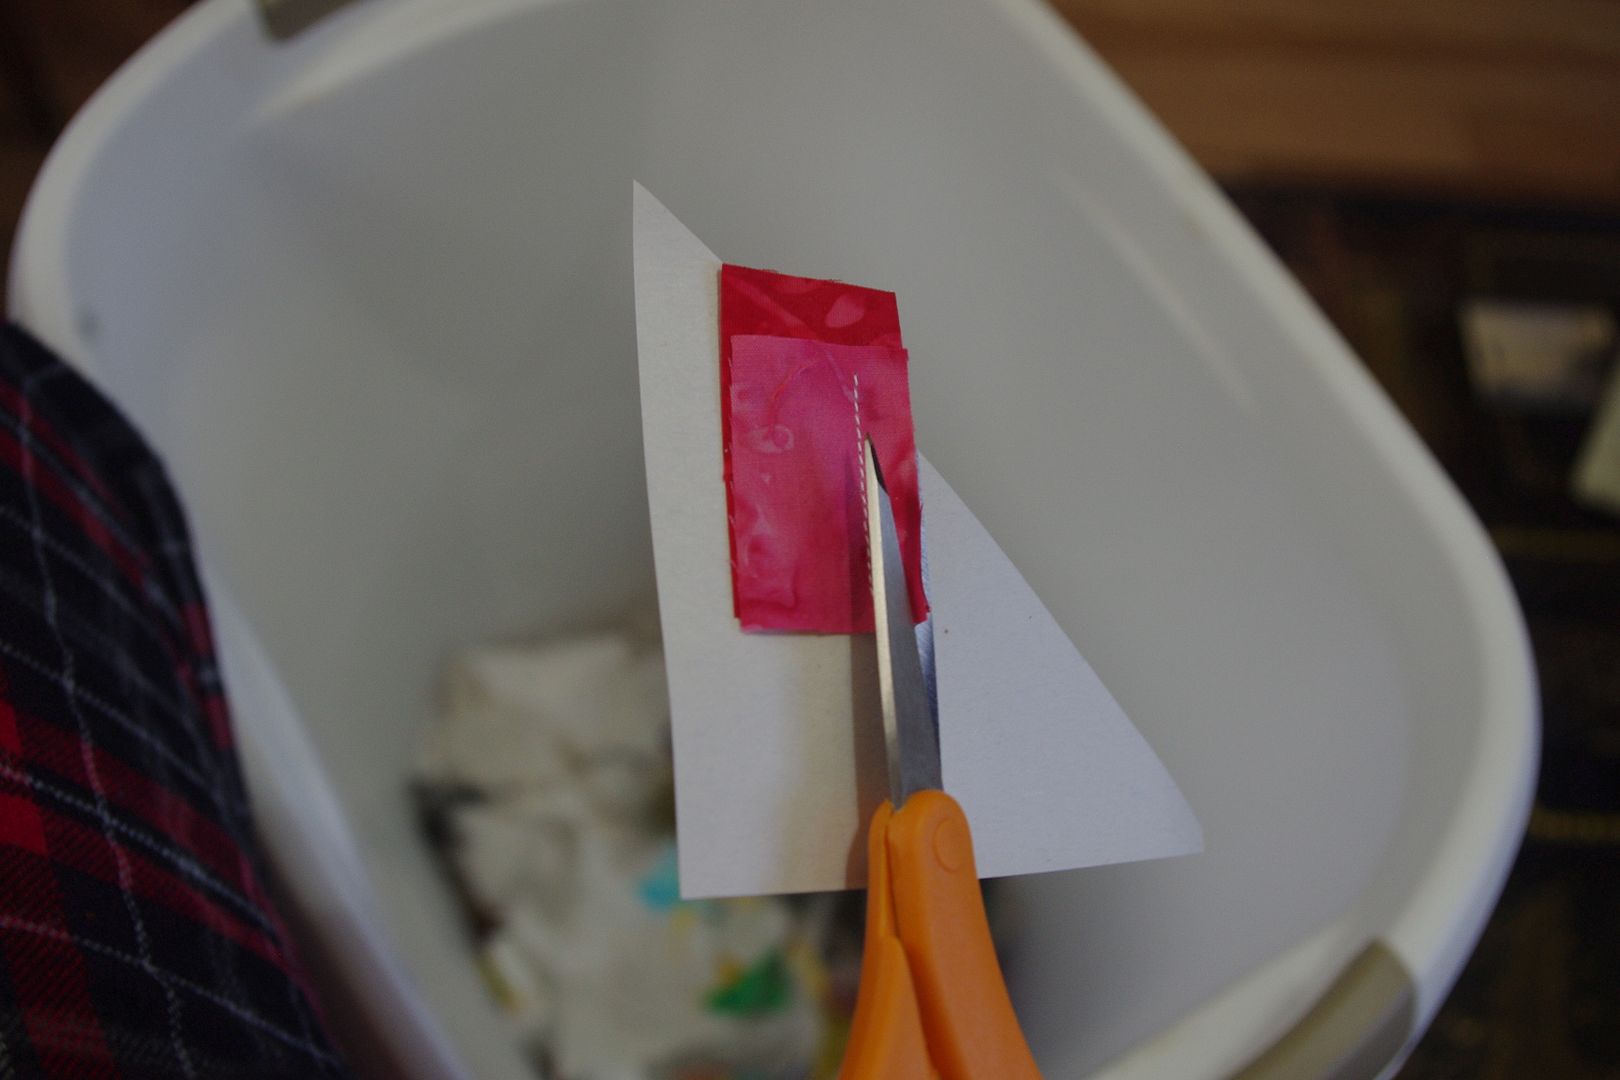
I trim each seam with scissors as I sew, I don't use the ruler or rotary cutter on these small ones, and go for a 3/16" or so seam allowance.
This shows lining up piece 3 over pieces 1&2,

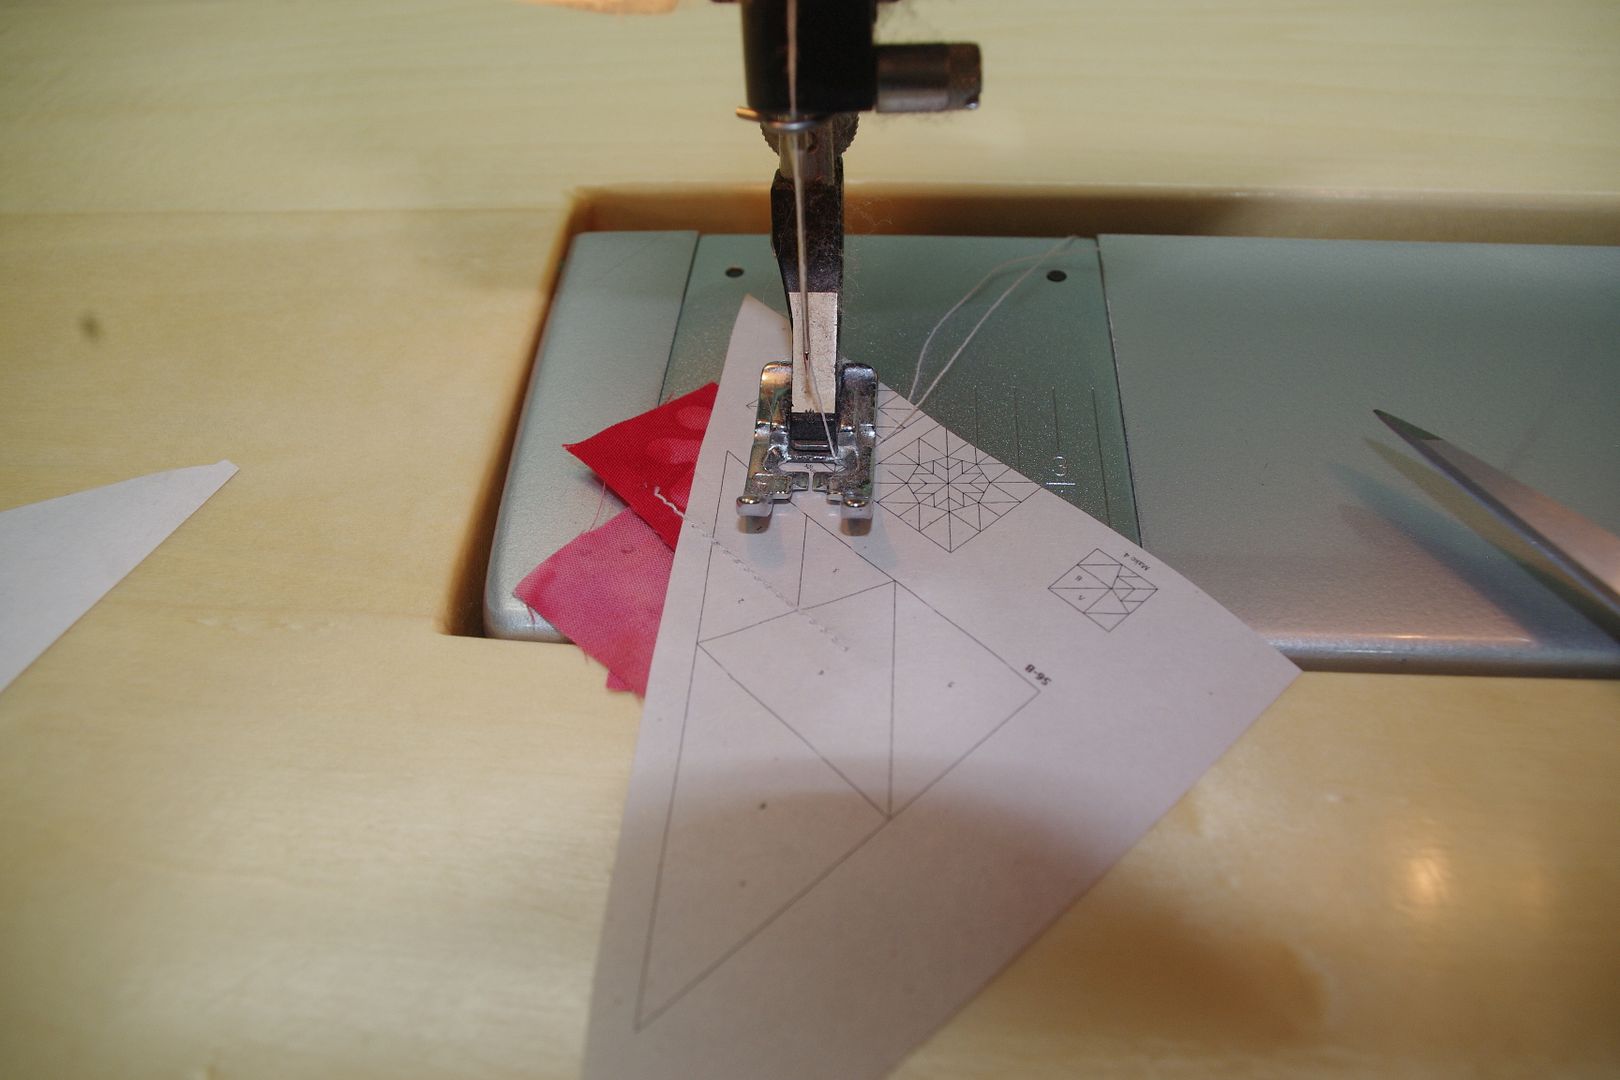
And then cut and press - and go on to the next one.
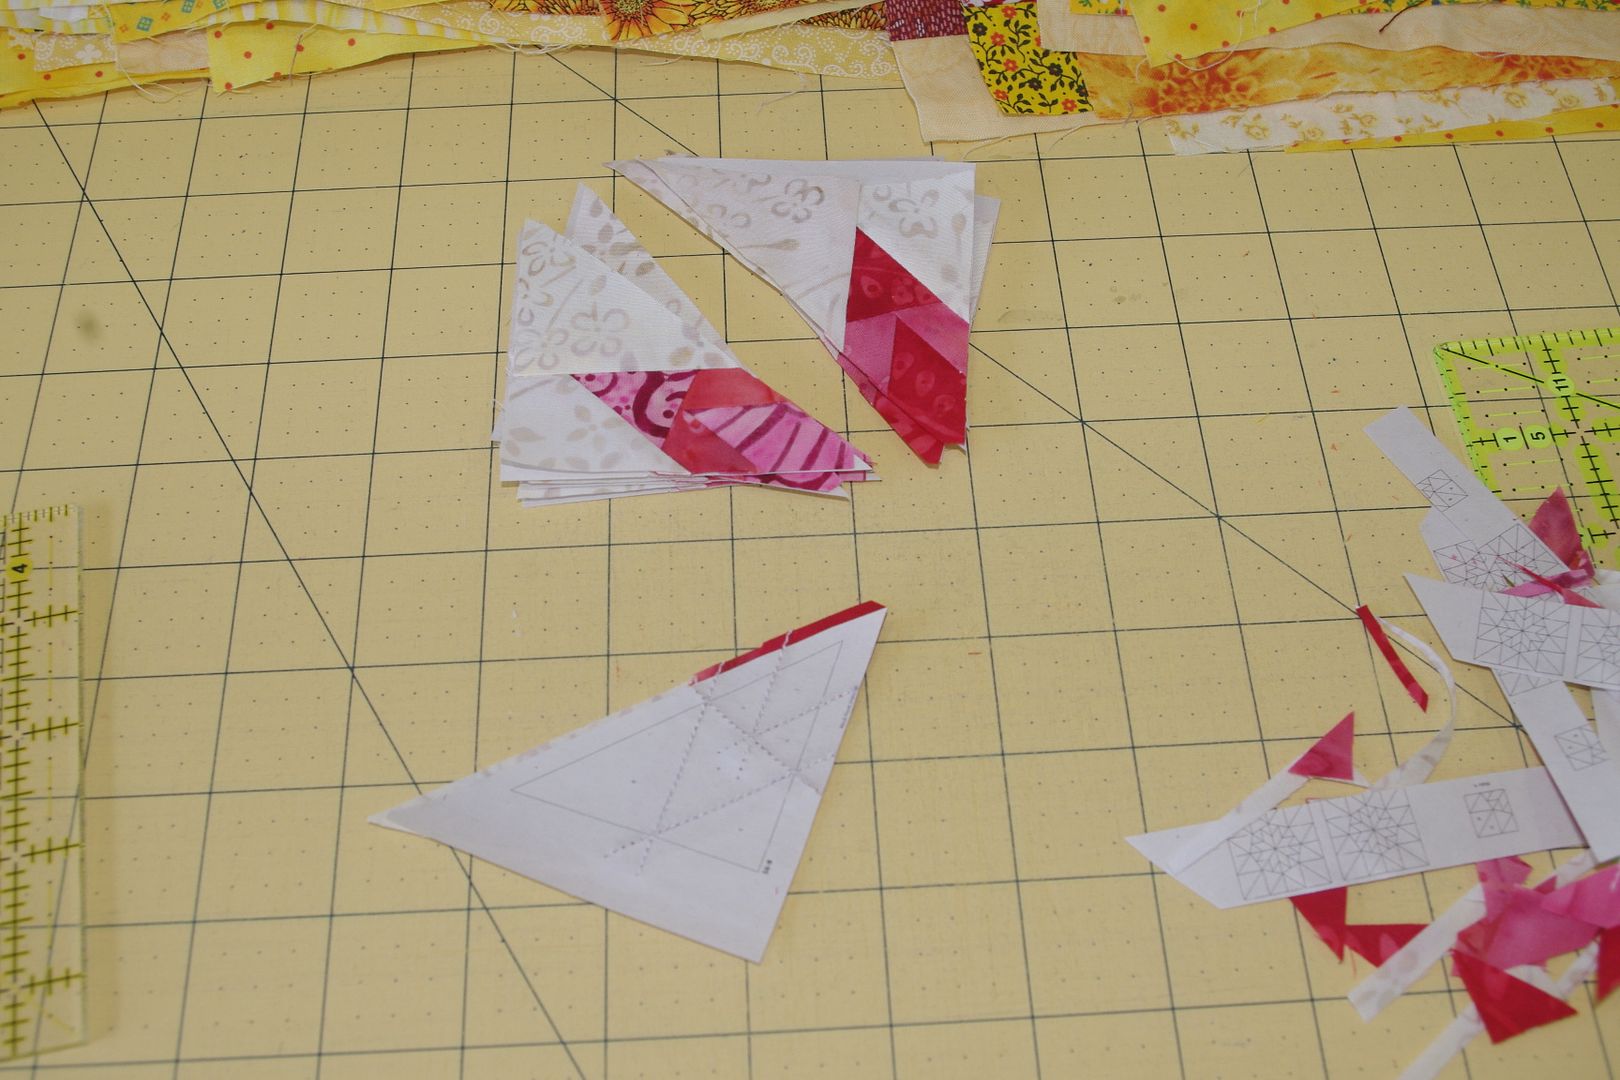
When done, I cut the side seams at 1/4". I removed all the paper at this point when I did the first one, so this time I pulled the paper from one section but left it on the opposing side, though I ended up removing all the paper because it was moving around on me. I try to be careful removing the paper so I don't stretch the fabric - not at all like how I do it on the big stars after they are all sewn.
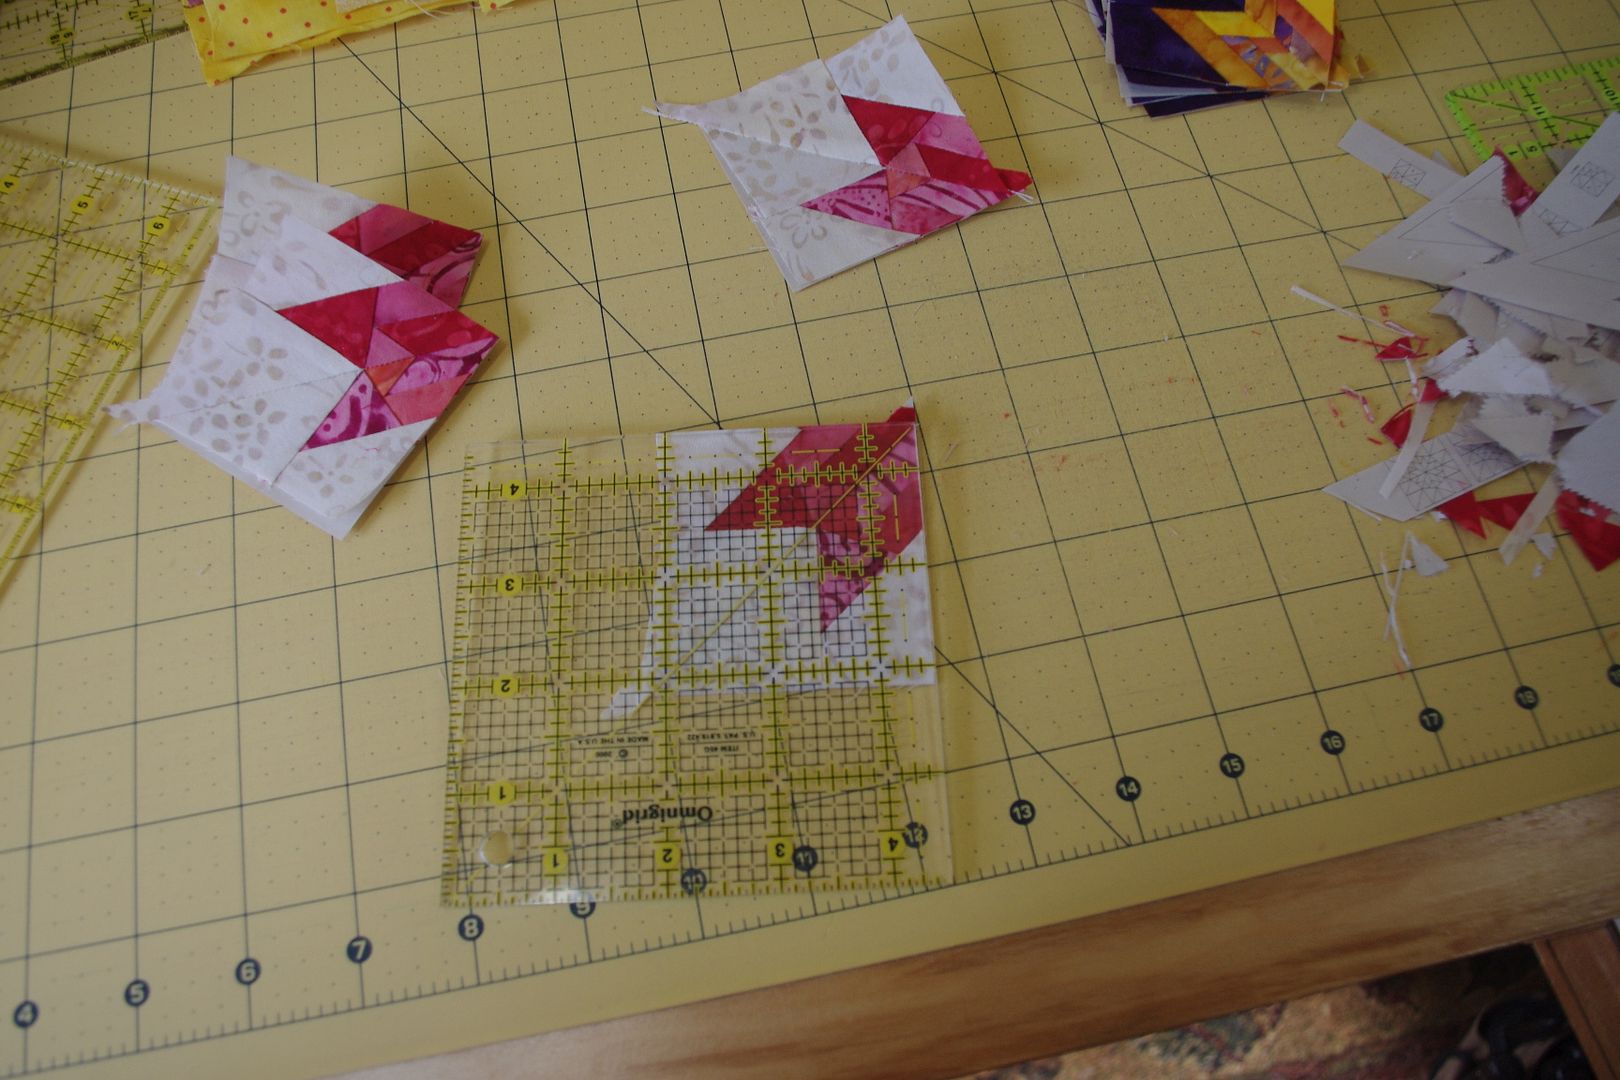
after I sewed the diagonal seam, I checked for square and trimmed if needed.
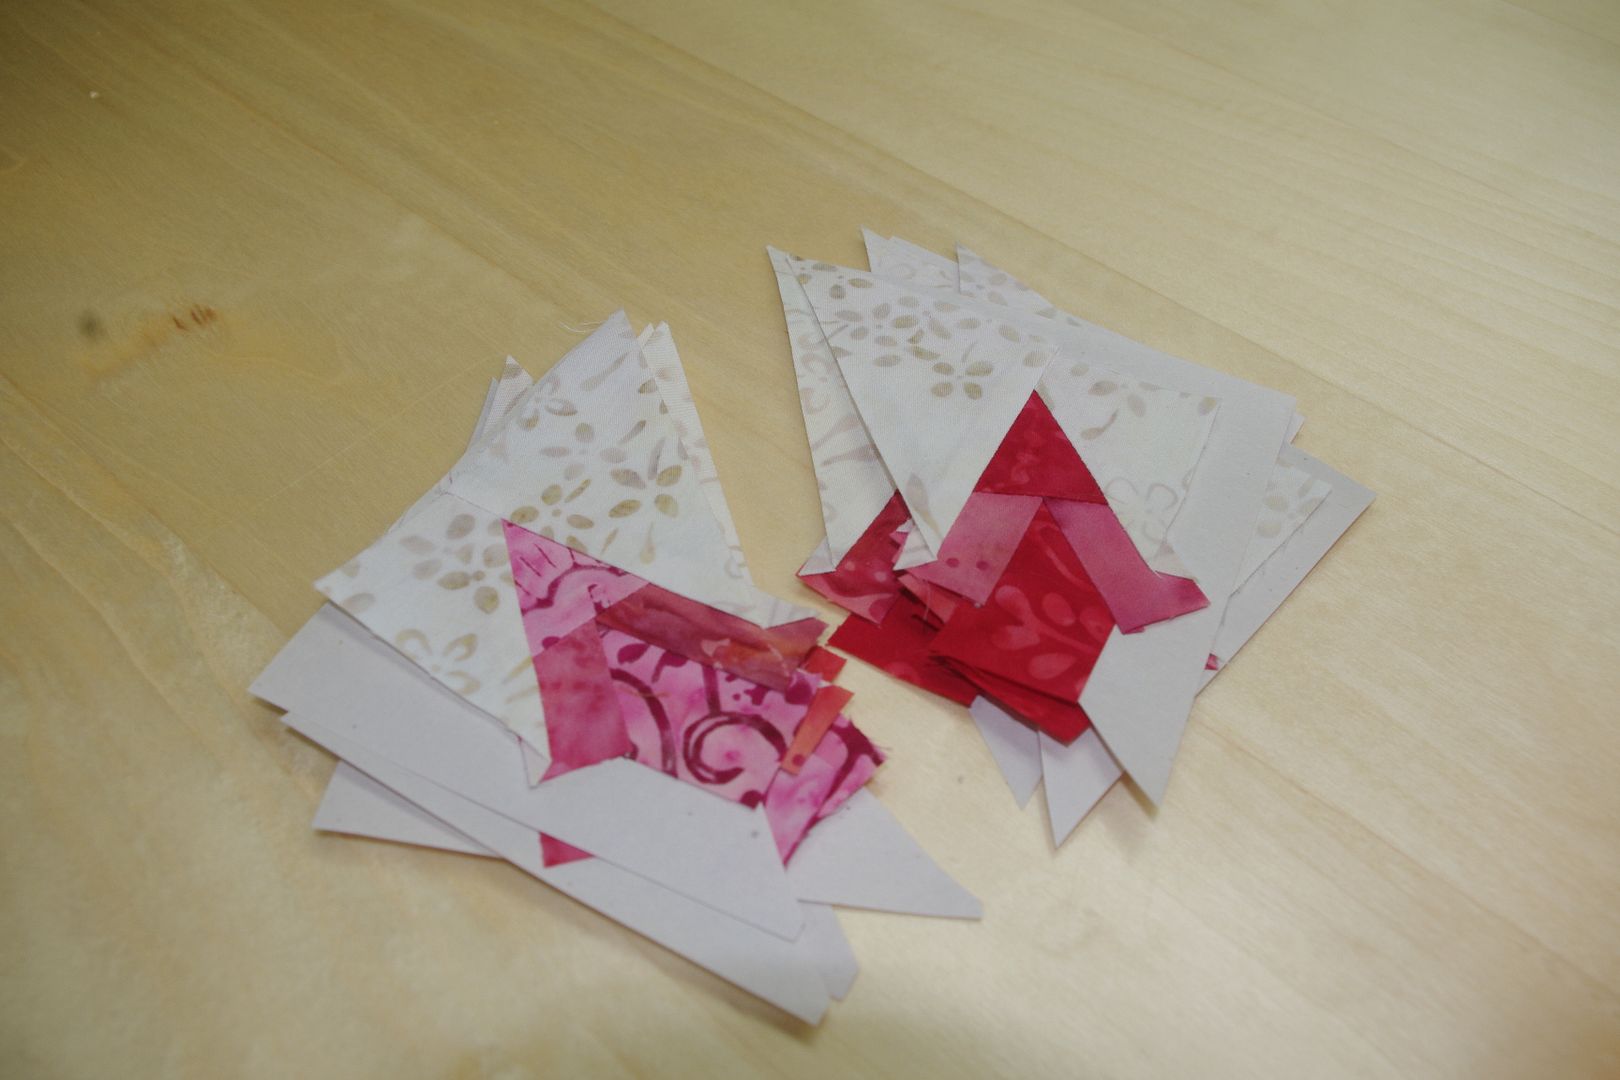
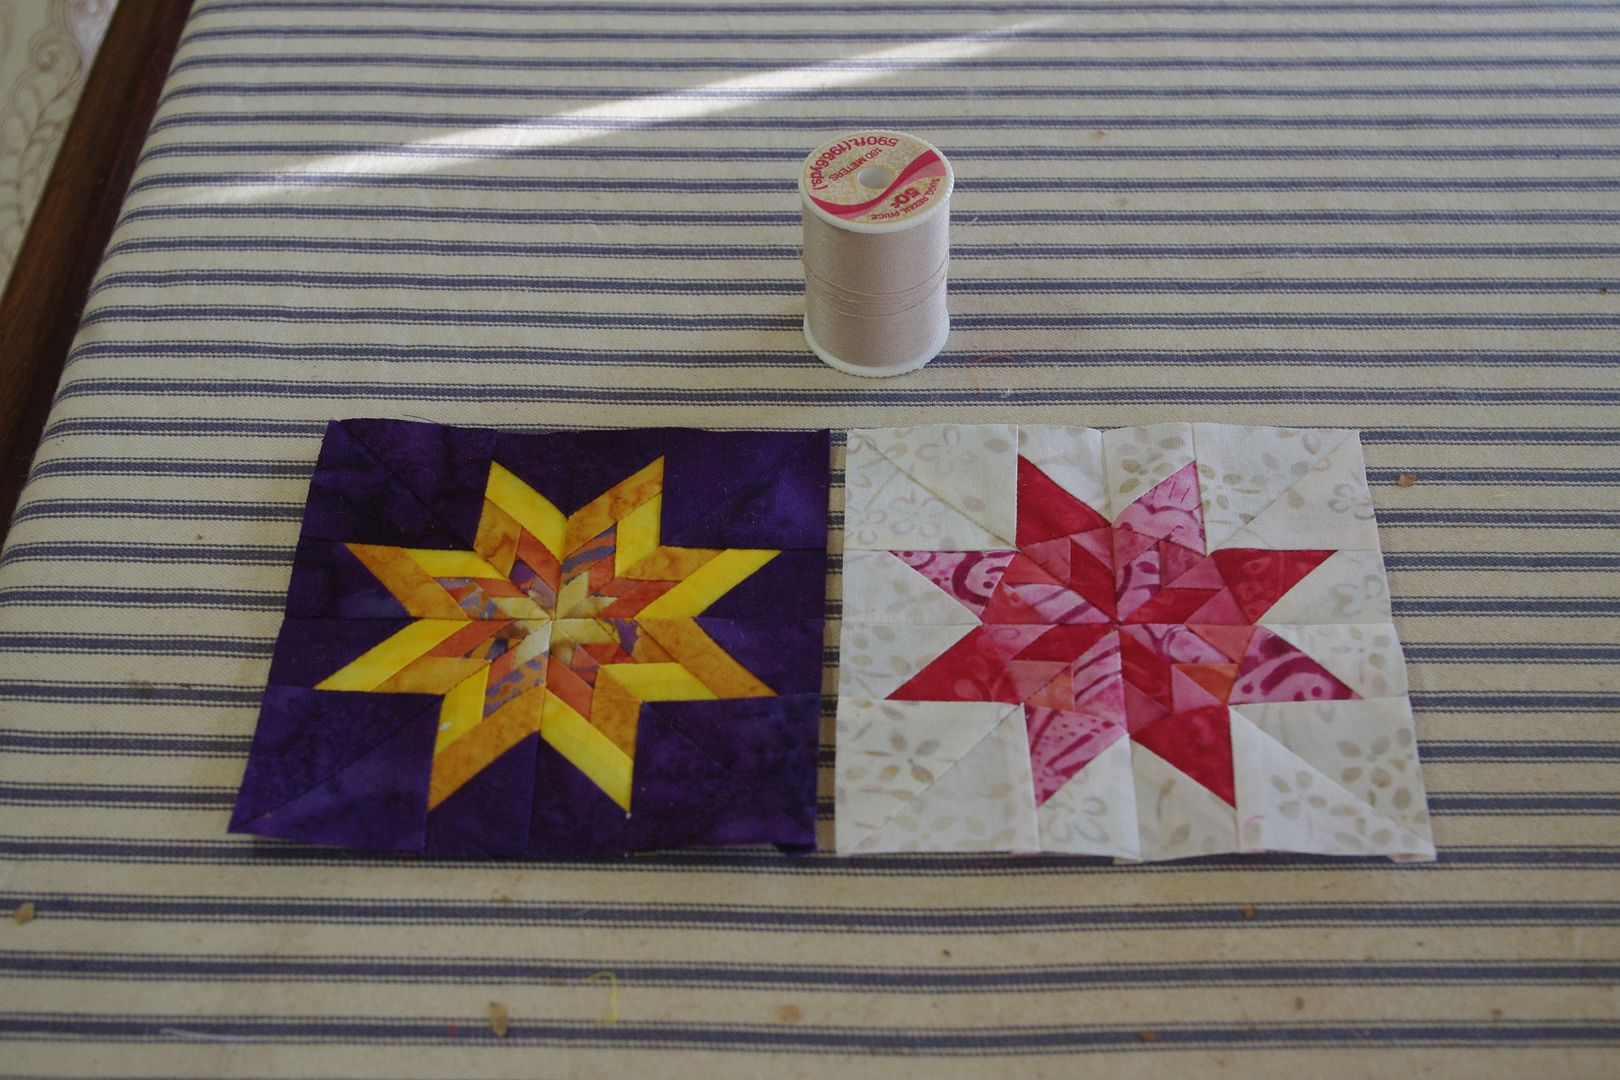
Here are the two completed stars.
I'm using the same paper I use for the big blocks - just copied at 33%
When I figure the fabric sizes, I measure using the seam line between the piece and the one before, and then figure a rectangle, making sure to add the 1/4" seam allowance - always going up to the next 1/4" total measurement. With these little pieces, I find it's easier to have a bit extra so I can be a bit sloppier with lining them up.
I line up 1 and 2 pieces, holding the paper up to my sewing light so I can see where things are, then put them down and sew.
I trim each seam with scissors as I sew, I don't use the ruler or rotary cutter on these small ones, and go for a 3/16" or so seam allowance.
This shows lining up piece 3 over pieces 1&2,
And then cut and press - and go on to the next one.
When done, I cut the side seams at 1/4". I removed all the paper at this point when I did the first one, so this time I pulled the paper from one section but left it on the opposing side, though I ended up removing all the paper because it was moving around on me. I try to be careful removing the paper so I don't stretch the fabric - not at all like how I do it on the big stars after they are all sewn.
after I sewed the diagonal seam, I checked for square and trimmed if needed.
Here are the two completed stars.

 04-14-2015, 01:24 PM
#133
Super Member
Join Date: Jan 2011
Location: Nawth o' Boston
Posts: 1,879
Cathy thanks for the tutorial. Your mini-blocks are lovely. Have you decided to expand your color range now?
I am glad you found this is doable without going to add-an-eighth as I have trouble with the 1/8" with multiple layers of fabric. This is inspirational! Now if I can only stop using as my excuse the fact that I already printed up 4 of each of the 50 blocks at 12" and therefore wasted a lot of paper, I'll be ready to try to shrink a couple.
I am glad you found this is doable without going to add-an-eighth as I have trouble with the 1/8" with multiple layers of fabric. This is inspirational! Now if I can only stop using as my excuse the fact that I already printed up 4 of each of the 50 blocks at 12" and therefore wasted a lot of paper, I'll be ready to try to shrink a couple.
04-14-2015, 03:22 PM
#134
Super Member
Join Date: Jul 2013
Location: South Dakota
Posts: 8,151
I have the peices for all 50 cut out for the 12" size. I will probably use the little ones for something else, not include them in the same quilt as the big ones.
I'm seriously thinking of doing some of the first group in 6" and 9". 50 12" blocks is a lot of area - though I was thinking of putting them in a row to hang all along the top of the wall.
While the 4" is kind of fun, I'm only doing the blocks with less pieces, I don't know how it would turn out with those that have over 100 pieces in them.
04-15-2015, 04:52 AM
#135
Super Member
Join Date: Jan 2011
Location: Nawth o' Boston
Posts: 1,879
Wow, Macybaby you are very organized. If your 'machine shed' had the stars all around in one row it would be similar to a fancy Victorian wallpaper treatment where there is an 8-12" complementary border print or stripe right at the cornice. I think that would look really cool and because of how you did the stars so color-coordinated it would tie the room together.
I am getting nervous about the finished product - although I used all leftover batiks and I am repeating fabrics occasionally from block to block, it's a LOT of random color in one quilt, not in my comfort zone. I wish that I had done them in 6". Maybe I will call it done when I am at 25-30 blocks. I think that is more than enough real estate.
I am getting nervous about the finished product - although I used all leftover batiks and I am repeating fabrics occasionally from block to block, it's a LOT of random color in one quilt, not in my comfort zone. I wish that I had done them in 6". Maybe I will call it done when I am at 25-30 blocks. I think that is more than enough real estate.
04-15-2015, 06:40 AM
#136
Super Member
Join Date: Jul 2013
Location: South Dakota
Posts: 8,151
hehe - I'm not really very organized, so I have to be careful when working on something or I'll loose it in the mess! I am so looking forward to getting the building done and moving most of the sewing machines out and then getting the sewing room less cramped and more organized. I keep buying more, and then have less and less room in the house. With this last trip, came home with three cabinets and 6 more machines . . .
I'm working on a full size block right now, and then I"m going to try for a 3" one. A few things I learned, use fabric that is more one color. A few of the batiks I used had several colors in them (like yellow/purple, or red/orange) and the pieces are so small that it looks like different fabrics, and messed up the pattern. I also need to use fabrics that are not as close in color. With such small pieces, a rose and a red and a dark pink all look the same. With the larger pictures it looks like shading, with the tiny ones, it all looks the same.
I try not to cut any pieces under about 1" square, even if the visible area is much smaller. They are just too hard for me to hold in place and line up with smaller. It does mean that the scrap ratio is much higher. I think if I were to do 9- 4" blocks instead of one 12" block, it would take twice the amount of fabric.
04-15-2015, 01:51 PM
#137
Super Member
Join Date: Mar 2009
Location: western Pa
Posts: 4,569
SueSew, thanks for your kind comments on my wallhanging. I'm posting it here as you suggested altho I don't know if I'm much inspiration. I did all 50 blocks but I'm using the blocks in small increments instead of one large humunguous quilt. I keep checking on you all (yinz in Pittsburghese) and your blocks are great![ATTACH=CONFIG]517012[/ATTACH]
 04-16-2015, 04:09 AM
#139
Super Member

Join Date: Oct 2007
Location: Ashdown, AR
Posts: 9,238
This is such a pretty quilt! I've never paper pieced before. Guess I'd better try to find this book!
04-18-2015, 05:10 AM
#140
Super Member
Join Date: Jul 2013
Location: South Dakota
Posts: 8,151
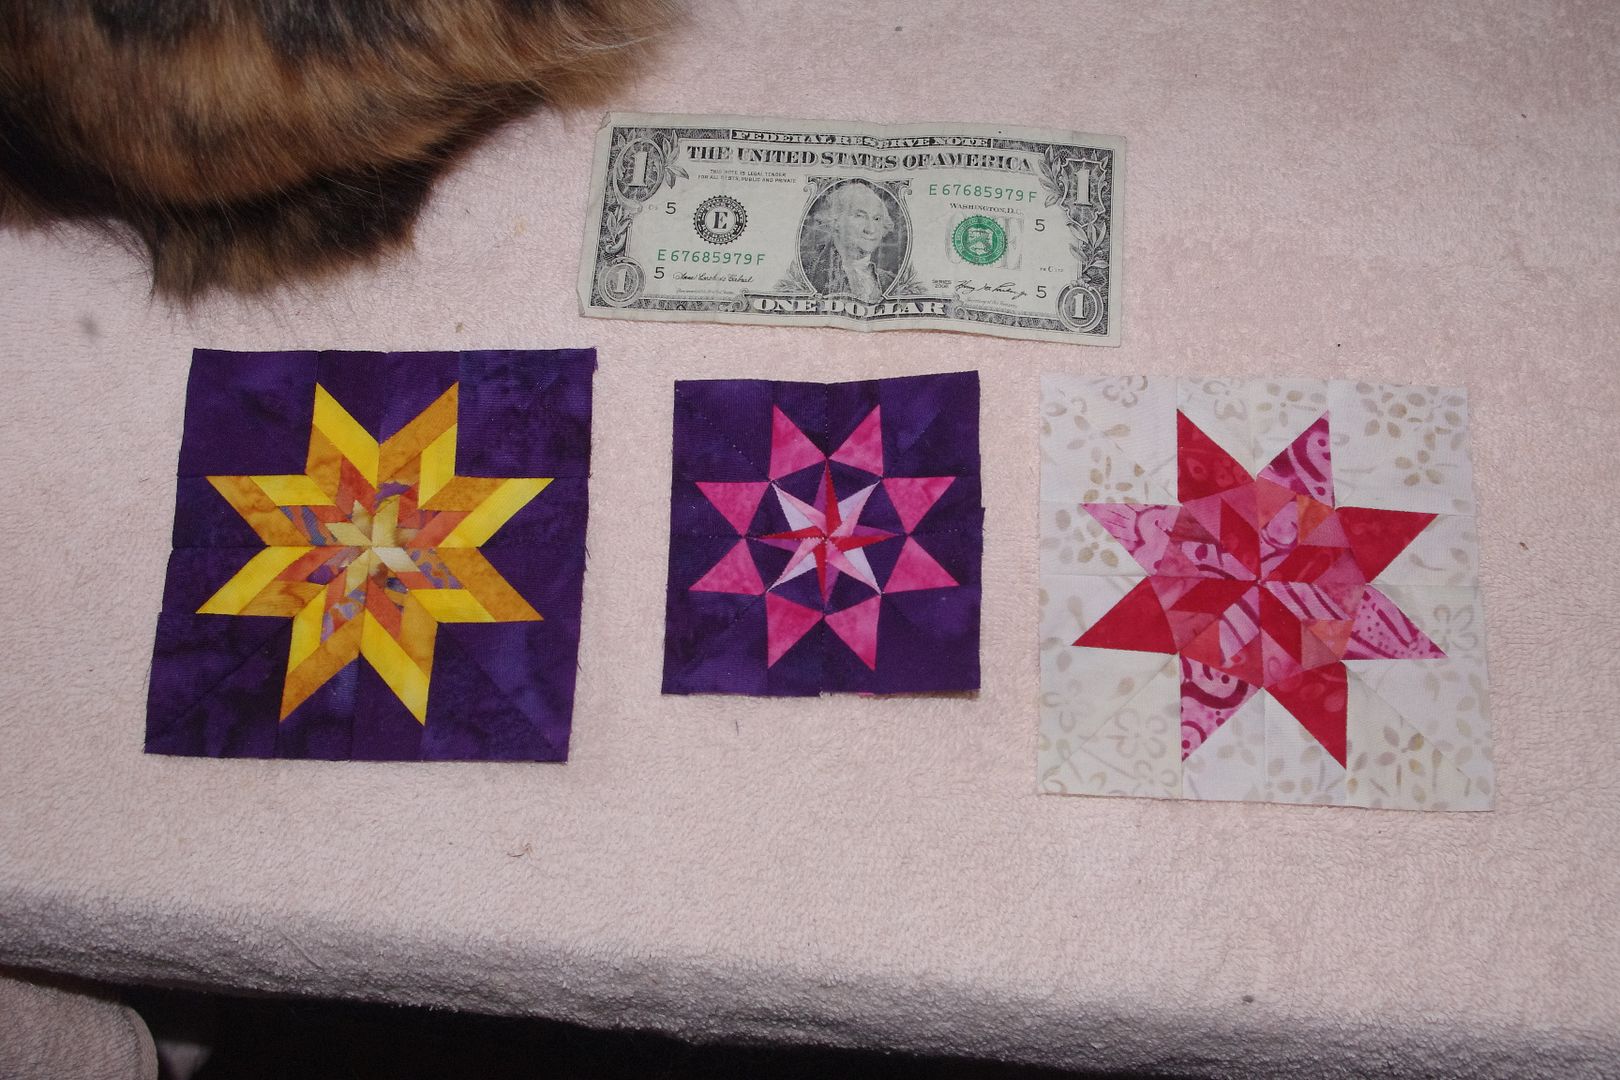
went one size smaller and did a 3" block. This one was a lot harder than the 4", and I resorted to hand tacking the points so they would match. I also graded the seams as I was sewing.
I don't know if I'm brave enough to try a 2" size. I think if I modified it by leaving the center point blank, sewing the eighths together and then doing a simple square enter (sort of like the pieces that have the outer corner a different color). Getting 8 tiny points to like up is a challenge. And with this block - it's 8 points on each side too!
Looking at the 4" blocks, the yellow is 4 points on the sides, and the red is 6 points on the side. hmmm - no wonder this one was so much harder LOL!!
Last edited by Macybaby; 04-18-2015 at 05:14 AM.

Thread
Thread Starter
Forum
Replies
Last Post
carriem
Blocks of the Month and Week
1209
03-15-2016 06:38 AM
Mariposa
Member Swaps and Round/Row Robins
120
08-13-2015 07:48 AM
KrazySewer
Offline Events, Announcements, Discussions
0
05-25-2015 08:23 AM
